weight LINCOLN NAVIGATOR 2012 Navigation Manual
[x] Cancel search | Manufacturer: LINCOLN, Model Year: 2012, Model line: NAVIGATOR, Model: LINCOLN NAVIGATOR 2012Pages: 381, PDF Size: 2.53 MB
Page 93 of 381
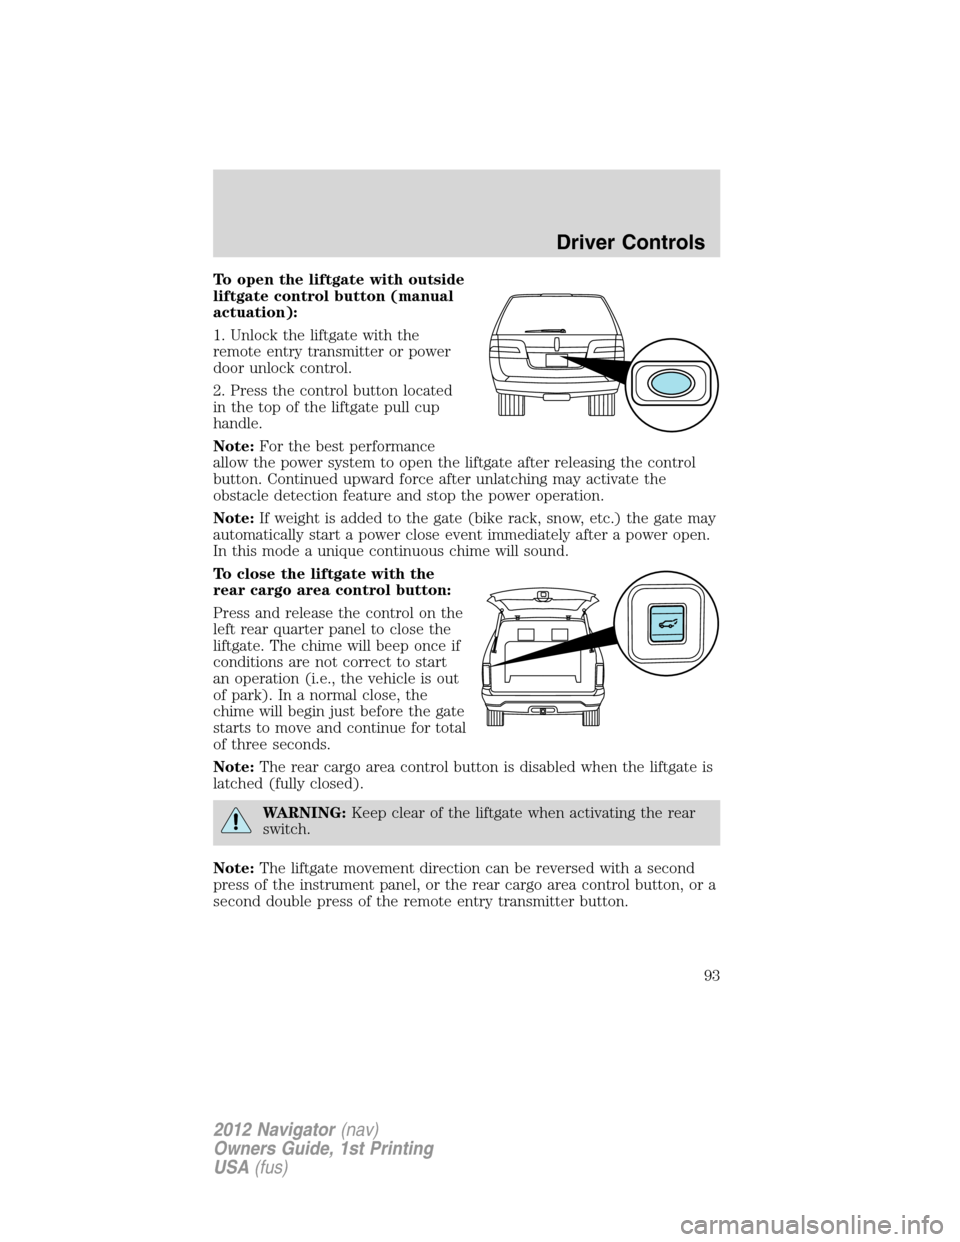
To open the liftgate with outside
liftgate control button (manual
actuation):
1. Unlock the liftgate with the
remote entry transmitter or power
door unlock control.
2. Press the control button located
in the top of the liftgate pull cup
handle.
Note:For the best performance
allow the power system to open the liftgate after releasing the control
button. Continued upward force after unlatching may activate the
obstacle detection feature and stop the power operation.
Note:If weight is added to the gate (bike rack, snow, etc.) the gate may
automatically start a power close event immediately after a power open.
In this mode a unique continuous chime will sound.
To close the liftgate with the
rear cargo area control button:
Press and release the control on the
left rear quarter panel to close the
liftgate. The chime will beep once if
conditions are not correct to start
an operation (i.e., the vehicle is out
of park). In a normal close, the
chime will begin just before the gate
starts to move and continue for total
of three seconds.
Note:The rear cargo area control button is disabled when the liftgate is
latched (fully closed).
WARNING:Keep clear of the liftgate when activating the rear
switch.
Note:The liftgate movement direction can be reversed with a second
press of the instrument panel, or the rear cargo area control button, or a
second double press of the remote entry transmitter button.
Driver Controls
93
2012 Navigator(nav)
Owners Guide, 1st Printing
USA(fus)
Page 166 of 381
SAFETY RESTRAINTS FOR CHILDREN
See the following sections for directions on how to properly use safety
restraints for children. Also seeAirbag supplemental restraint system
(SRS)in this chapter for special instructions about using airbags.
Important child restraint precautions
WARNING:Always make sure your child is secured properly in
a device that is appropriate for their height, age and weight.
Child safety restraints must be purchased separately from the vehicle.
Failure to follow these instructions and guidelines may result in an
increased risk of serious injury or death to your child.
WARNING:All children are shaped differently. The
Recommendations for Safety Restraints are based on probable
child height, age and weight thresholds from NHTSA and other safety
organizations or are the minimum requirements of law. Ford
recommends checking with a NHTSA Certified Child Passenger Safety
Technician (CPST) and consult your pediatrician to make sure your
child seat is appropriate for your child, and is compatible with and
properly installed in the vehicle. To locate a child seat fitting station
and CPST contact the NHTSA toll free at 1-888-327-4236 or on the
internet at http://www.nhtsa.dot.gov. In Canada, check with your local
St. John Ambulance office for referral to a CPST or for further
information, contact your provincial ministry of transportation, your
local St. John Ambulance office at http://www.sfa.ca, or Transport
Canada at 1–800–333–0371 (http://www.tc.gc.ca). Failure to properly
restrain children in safety seats made especially for their height, age,
and weight may result in an increased risk of serious injury or death to
your child.
Seating and Safety Restraints
166
2012 Navigator(nav)
Owners Guide, 1st Printing
USA(fus)
Page 167 of 381
Recommendations for Safety Restraints for Children
Child size, height, weight, or ageRecommended
restraint type
Infants
or
toddlersChildren weighing 40 lb (18 kg) or less
(generally age four or younger)Use a child safety seat
(sometimes called an
infant carrier,
convertible seat, or
toddler seat).
Small
childrenChildren who have outgrown or no
longer properly fit in a child safety seat
(generally children who are less than
4 feet 9 inches (1.45 meters) tall, are
greater than age four (4) and less than
age twelve (12), and between 40 lb
(18 kg) and 80 lb (36 kg) and upward to
100 lb (45 kg) if recommended by your
child restraint manufacturer)Use a belt-positioning
booster seat.
Larger
childrenChildren who have outgrown or no
longer properly fit in a belt-positioning
booster seat (generally children who are
at least 4 feet 9 inches (1.45 meters) tall
or greater than 80 lb (36 kg) or 100 lb
(45 kg) if recommended by child
restraint manufacturer)Use a vehicle safety
belt having the lap
belt snug and low
across the hips,
shoulder belt centered
across the shoulder
and chest, and
seatback upright.
•You are required by law to properly use safety seats for infants and
toddlers in the U.S. and Canada.
•Many states and provinces require that small children use approved
booster seats until they reach age eight, a height of 4 ft 9 in.
(1.45 meters) tall, or 80 lb (36 kg). Check your local and state or
provincial laws for specific requirements regarding the safety of
children in your vehicle.
•When possible, always properly restrain children twelve (12) years of
age and under in a rear seating position of your vehicle. Accident
statistics suggest that children are safer when properly restrained in
the rear seating positions than in a front seating position.
Seating and Safety Restraints
167
2012 Navigator(nav)
Owners Guide, 1st Printing
USA(fus)
Page 168 of 381
Recommendations for attaching child safety restraints for children
Restraint
TypeChild
WeightUse any attachment method as indicated
below by “X”
LATCH
(lower
anchors
and
top
tether
anchor)LATCH
(lower
anchors
only)Safety
belt
and
top
tether
anchorSafety
belt and
LATCH
(lower
anchors
and top
tether
anchor)Safety
belt
only
Rear
facing
child seatUp to
48 lb
(21 kg)XX
Forward
facing
child seatUp to
48 lb
(21 kg)XXX
Forward
facing
child seatOver
48 lb
(21 kg)XX
WARNING:Airbags can kill or injure a child in a child seat.
NEVER place a rear-facing child seat in front of an active airbag.
If you must use a forward-facing child seat in the front seat, move the
vehicle seat all the way back. When possible, all children age 12 and
under should be properly restrained in a rear seating position. If all
children cannot be seated and restrained properly in a rear seating
position, properly restrain the largest child in the front seat.
WARNING:Always carefully follow the instructions and
warnings provided by the manufacturer of any child restraint to
determine if the restraint device is appropriate for your child’s size,
height, weight, or age. Follow the child restraint manufacturer’s
instructions and warnings provided for installation and use in
conjunction with the instructions and warnings provided by the vehicle
manufacturer. A safety seat that is improperly installed or utilized, is
inappropriate for your child’s height, age, or weight or does not
properly fit the child may increase the risk of serious injury or death.
Seating and Safety Restraints
168
2012 Navigator(nav)
Owners Guide, 1st Printing
USA(fus)
Page 169 of 381
WARNING:Never let a passenger hold a child on his or her lap
while the vehicle is moving. The passenger cannot protect the
child from injury in a collision, which may result in serious injury or
death.
WARNING:Never use pillows, books, or towels to boost a child.
They can slide around and increase the likelihood of injury or
death in a collision.
WARNING:Always restrain an unoccupied child seat or booster
seat. These objects may become projectiles in a collision or
sudden stop, which may increase the risk of serious injury.
WARNING:Never place, or allow a child to place, the shoulder
belt under a child’s arm or behind the back because it reduces
the protection for the upper part of the body and may increase the risk
of injury or death in a collision.
WARNING:Do not leave children, unreliable adults, or pets
unattended in your vehicle.
Transporting children
Always make sure your child is secured properly in a device that is
appropriate for their age, height and weight. All children are shaped
differently. The child height, age and weight thresholds provided are
recommendations or the minimum requirements of law. The National
Highway Traffic Safety Administration (NHTSA) provides education and
training to ensure that all children ages 0 to 16 are properly restrained in
the correct restraint system. Ford recommends checking with a NHTSA
Certified Child Passenger Safety Technician (CPST) and your
pediatrician to make sure your seat is appropriate for your child and
properly installed in the vehicle. To locate a child seat fitting station and
CPST contact the NHTSA toll free at1-888-327-4236or on the internet
at http://www.nhtsa.dot.gov. In Canada, check with your local St. John
Ambulance office for referral to a CPST or for further information,
contact your provincial ministry of transportation, your local St. John
Ambulance office at http://www.sfa.ca, or Transport Canada at
1–800–333–0371 (http://www.tc.gc.ca).
Seating and Safety Restraints
169
2012 Navigator(nav)
Owners Guide, 1st Printing
USA(fus)
Page 170 of 381
Follow all the safety restraint and airbag precautions that apply to adult
passengers in your vehicle.
If the child is the proper height, age, and weight (as specified by your
child safety seat or booster manufacturer), fits the restraint and can be
restrained properly, then restrain the child in the child safety seat or
with the belt-positioning booster. Remember that child seats and
belt-positioning boosters vary and may be designed to fit children of
different heights, ages and weights. Children who are too large for child
safety seats or belt-positioning boosters (as specified by your child safety
seat manufacturer) should always properly wear safety belts.
SAFETY SEATS FOR CHILDREN
Infant and/or toddler seats
Use a safety seat that is recommended for the size and weight of the
child.
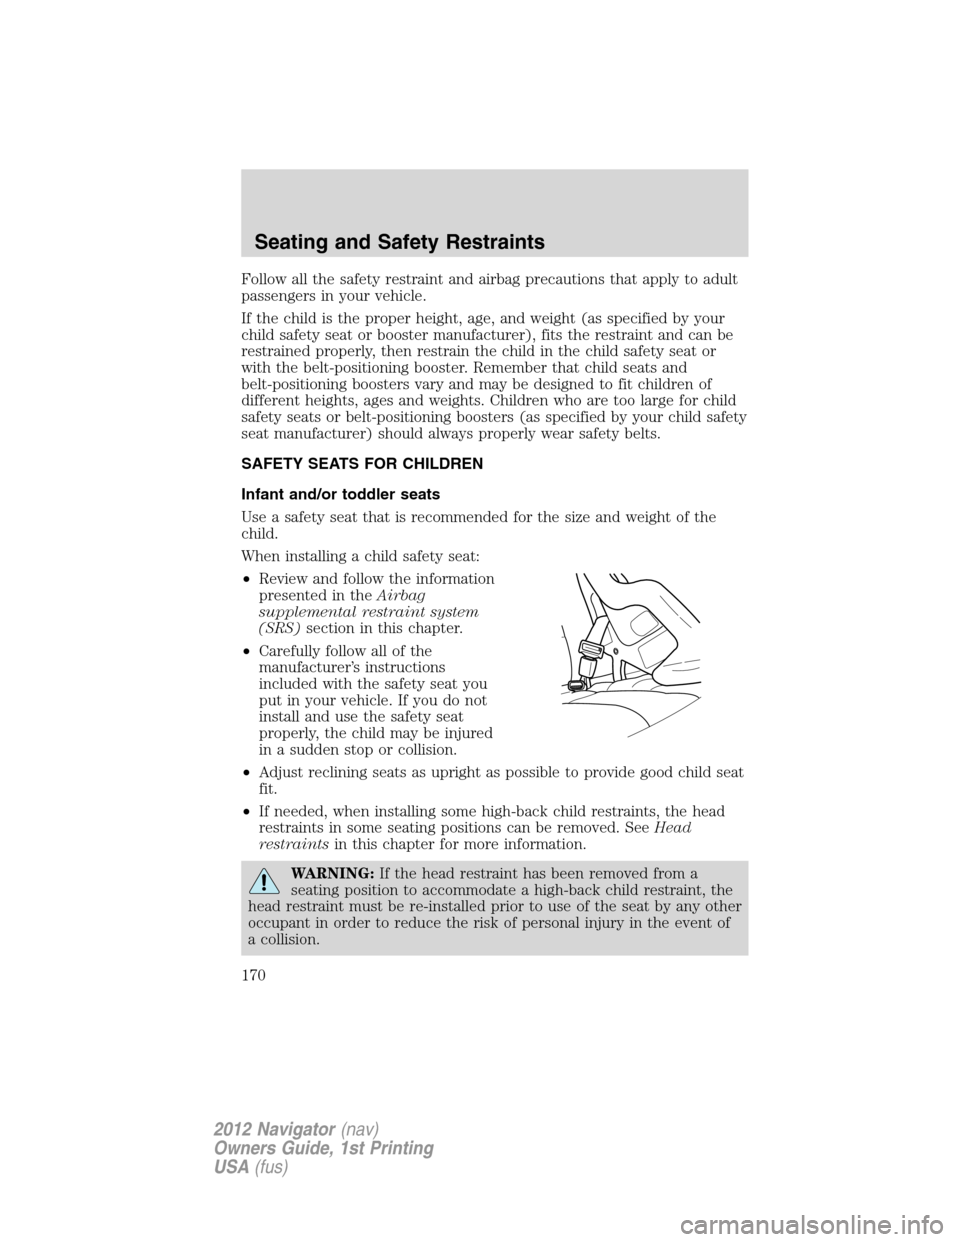
When installing a child safety seat:
•Review and follow the information
presented in theAirbag
supplemental restraint system
(SRS)section in this chapter.
•Carefully follow all of the
manufacturer’s instructions
included with the safety seat you
put in your vehicle. If you do not
install and use the safety seat
properly, the child may be injured
in a sudden stop or collision.
•Adjust reclining seats as upright as possible to provide good child seat
fit.
•If needed, when installing some high-back child restraints, the head
restraints in some seating positions can be removed. SeeHead
restraintsin this chapter for more information.
WARNING:If the head restraint has been removed from a
seating position to accommodate a high-back child restraint, the
head restraint must be re-installed prior to use of the seat by any other
occupant in order to reduce the risk of personal injury in the event of
a collision.
Seating and Safety Restraints
170
2012 Navigator(nav)
Owners Guide, 1st Printing
USA(fus)
Page 173 of 381
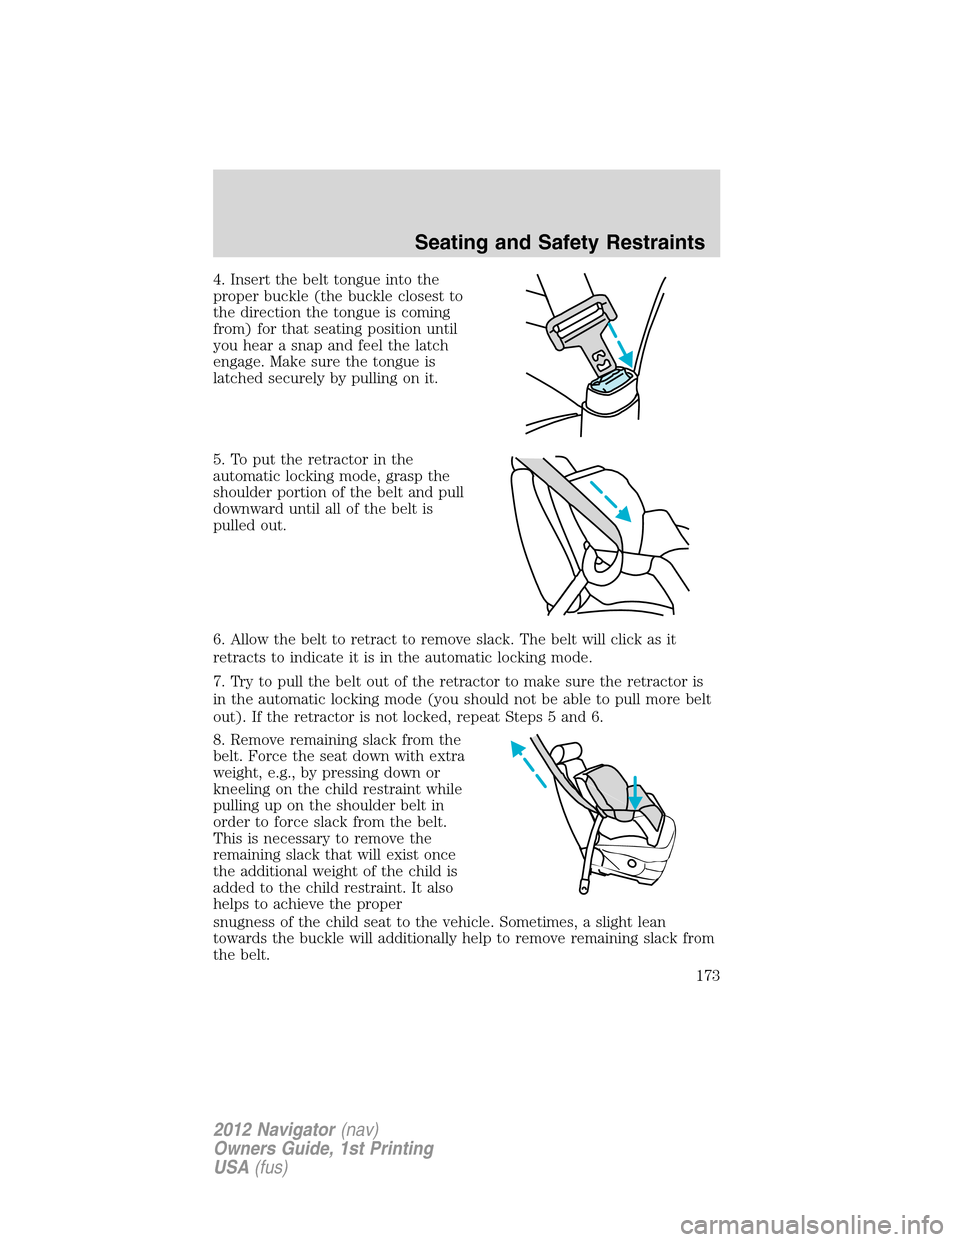
4. Insert the belt tongue into the
proper buckle (the buckle closest to
the direction the tongue is coming
from) for that seating position until
you hear a snap and feel the latch
engage. Make sure the tongue is
latched securely by pulling on it.
5. To put the retractor in the
automatic locking mode, grasp the
shoulder portion of the belt and pull
downward until all of the belt is
pulled out.
6. Allow the belt to retract to remove slack. The belt will click as it
retracts to indicate it is in the automatic locking mode.
7. Try to pull the belt out of the retractor to make sure the retractor is
in the automatic locking mode (you should not be able to pull more belt
out). If the retractor is not locked, repeat Steps 5 and 6.
8. Remove remaining slack from the
belt. Force the seat down with extra
weight, e.g., by pressing down or
kneeling on the child restraint while
pulling up on the shoulder belt in
order to force slack from the belt.
This is necessary to remove the
remaining slack that will exist once
the additional weight of the child is
added to the child restraint. It also
helps to achieve the proper
snugness of the child seat to the vehicle. Sometimes, a slight lean
towards the buckle will additionally help to remove remaining slack from
the belt.
Seating and Safety Restraints
173
2012 Navigator(nav)
Owners Guide, 1st Printing
USA(fus)
Page 180 of 381

3. Clip the tether strap through the
anchor loop as shown.
If the tether strap is clipped
incorrectly, the child safety seat may
not be retained properly in the
event of a collision.
4. Tighten the child safety seat
tether strap according to the
manufacturer’s instructions.
If the safety seat is not anchored
properly, the risk of a child being
injured in a collision greatly
increases.
If your child restraint system is equipped with a tether strap, and the
child restraint manufacturer recommends its use, Ford also recommends
its use.
Child booster seats
The belt-positioning booster (booster seat) is used to improve the fit of
the vehicle safety belt. Children outgrow a typical child seat (e.g.,
convertible or toddler seat) when they weigh about 40 lb (18 kg) and are
around four (4) years of age. Consult your child safety seat owner guide
for the weight, height, and age limits specific to your child safety seat.
Keep your child in the child safety seat if it properly fits the child,
remains appropriate for their weight, height and age AND if properly
secured to the vehicle.
Although the lap/shoulder belt will provide some protection, children
who have outgrown a typical child seat are still too small for lap/shoulder
belts to fit properly, and wearing an improperly fitted vehicle safety belt
could increase the risk of serious injury in a crash. To improve the fit of
both the lap and shoulder belt on children who have outgrown child
safety seats, Ford Motor Company recommends use of a belt-positioning
booster.
Seating and Safety Restraints
180
2012 Navigator(nav)
Owners Guide, 1st Printing
USA(fus)
Page 189 of 381
Temperature A B C
The temperature grades are A (the highest), B and C, representing the
tire’s resistance to the generation of heat and its ability to dissipate heat
when tested under controlled conditions on a specified indoor laboratory
test wheel. Sustained high temperature can cause the material of the tire
to degenerate and reduce tire life, and excessive temperature can lead to
sudden tire failure. The grade C corresponds to a level of performance
which all passenger car tires must meet under the Federal Motor Vehicle
Safety Standard No. 139. Grades B and A represent higher levels of
performance on the laboratory test wheel than the minimum required by
law.
WARNING:The temperature grade for this tire is established
for a tire that is properly inflated and not overloaded. Excessive
speed, underinflation, or excessive loading, either separately or in
combination, can cause heat buildup and possible tire failure.
TIRES
Tires are designed to give many thousands of miles of service, but they
must be maintained in order to get the maximum benefit from them.
Glossary of tire terminology
•Tire label:A label showing the OE (Original Equipment) tire sizes,
recommended inflation pressure and the maximum weight the vehicle
can carry.
•Tire Identification Number (TIN):A number on the sidewall of
each tire providing information about the tire brand and
manufacturing plant, tire size and date of manufacture. Also referred
to as DOT code.
•Inflation pressure:A measure of the amount of air in a tire.
•Standard load:A class of P-metric or Metric tires designed to carry a
maximum load at 35 psi [37 psi (2.5 bar) for Metric tires]. Increasing
the inflation pressure beyond this pressure will not increase the tire’s
load carrying capability.
•Extra load:A class of P-metric or Metric tires designed to carry a
heavier maximum load at 41 psi [43 psi (2.9 bar) for Metric tires].
Increasing the inflation pressure beyond this pressure will not increase
the tire’s load carrying capability.
•kPa:Kilopascal, a metric unit of air pressure.
Tires, Wheels and Loading
189
2012 Navigator(nav)
Owners Guide, 1st Printing
USA(fus)
Page 198 of 381
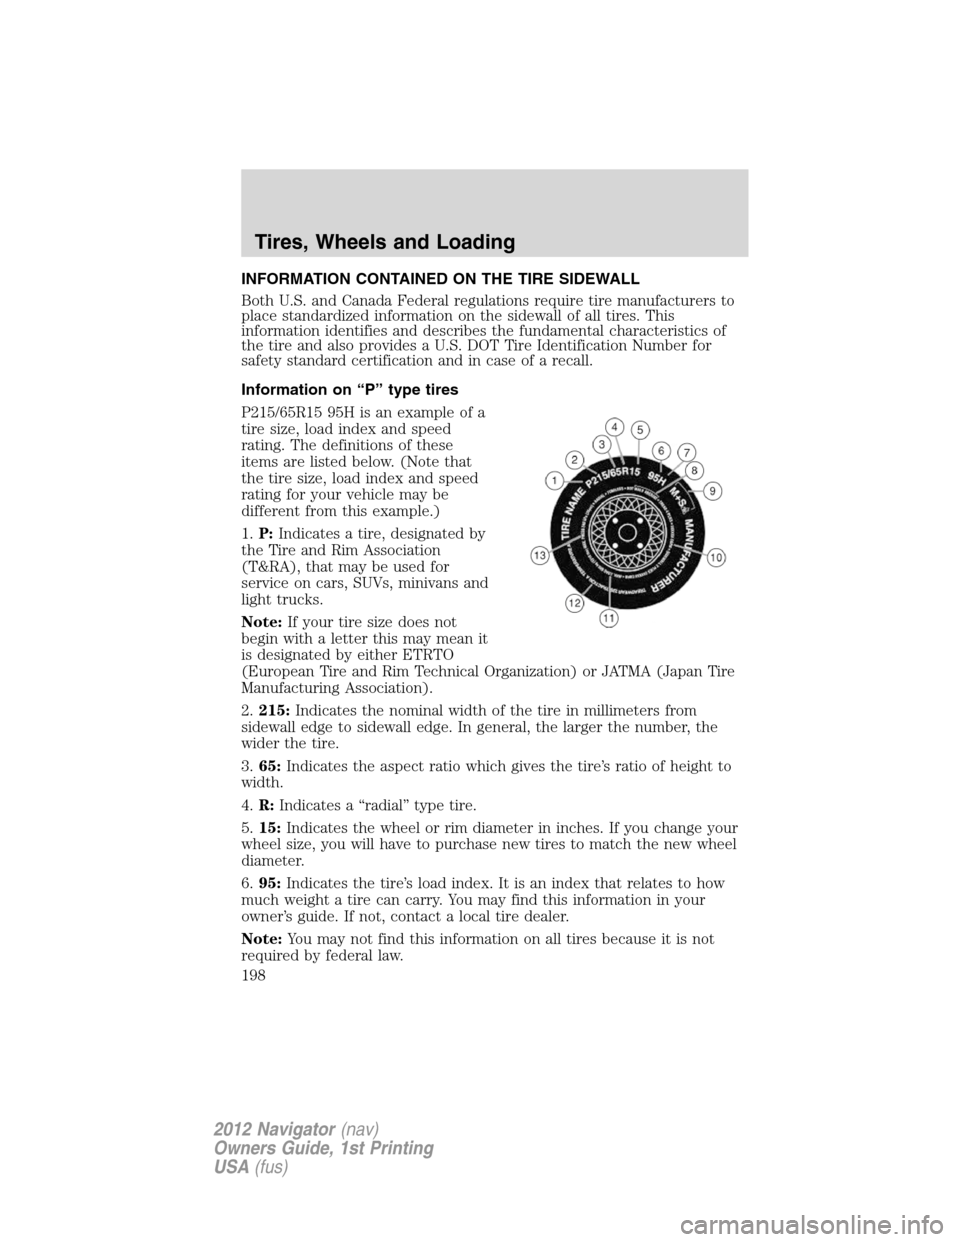
INFORMATION CONTAINED ON THE TIRE SIDEWALL
Both U.S. and Canada Federal regulations require tire manufacturers to
place standardized information on the sidewall of all tires. This
information identifies and describes the fundamental characteristics of
the tire and also provides a U.S. DOT Tire Identification Number for
safety standard certification and in case of a recall.
Information on “P” type tires
P215/65R15 95H is an example of a
tire size, load index and speed
rating. The definitions of these
items are listed below. (Note that
the tire size, load index and speed
rating for your vehicle may be
different from this example.)
1.P:Indicates a tire, designated by
the Tire and Rim Association
(T&RA), that may be used for
service on cars, SUVs, minivans and
light trucks.
Note:If your tire size does not
begin with a letter this may mean it
is designated by either ETRTO
(European Tire and Rim Technical Organization) or JATMA (Japan Tire
Manufacturing Association).
2.215:Indicates the nominal width of the tire in millimeters from
sidewall edge to sidewall edge. In general, the larger the number, the
wider the tire.
3.65:Indicates the aspect ratio which gives the tire’s ratio of height to
width.
4.R:Indicates a “radial” type tire.
5.15:Indicates the wheel or rim diameter in inches. If you change your
wheel size, you will have to purchase new tires to match the new wheel
diameter.
6.95:Indicates the tire’s load index. It is an index that relates to how
much weight a tire can carry. You may find this information in your
owner’s guide. If not, contact a local tire dealer.
Note:You may not find this information on all tires because it is not
required by federal law.
Tires, Wheels and Loading
198
2012 Navigator(nav)
Owners Guide, 1st Printing
USA(fus)