engine LINCOLN NAVIGATOR 2015 Workshop Manual
[x] Cancel search | Manufacturer: LINCOLN, Model Year: 2015, Model line: NAVIGATOR, Model: LINCOLN NAVIGATOR 2015Pages: 475, PDF Size: 5.13 MB
Page 211 of 475

System Errors
If either system senses a problem with the left or right sensor, the
BLIS® indicator in the information display will illuminate and remain on.
Also,BLIND SPOT SYSTEM FAULT orCROSS TRAFFIC SYSTEM
FAULT message will appear. When problems that may cause the left or
right indicator not to illuminate, only the information display message
faults appear.
Switching the Systems Off and On
One or both systems can be switched off temporarily by using the
information display control; refer to the Information Displaychapter.
When you switch off the Blind Spot Information System, you will not
receive alerts and the information display will display a system off
message. The yellow alert indicator in the outside mirror will also flash
twice. The system switches back on whenever you switch the ignition on.
You can also have one or both systems switched off permanently at an
authorized dealer. Once switched off, the system can only be switched
back on at an authorized dealer.
STEERING
Electric Power Steering
WARNING: The electric power steering system has diagnostic
checks that continuously monitor the system to ensure proper
operation. When a system error is detected a steering message will
appear in the information display.
WARNING: The electric power steering system has diagnostic
checks that continuously monitor the system to ensure proper
operation of the electronic system. When an electronic error is
detected, a message will be displayed in the information display. If this
happens, stop the vehicle in a safe place, and turn off the engine. After
at least 10 seconds, reset the system by restarting the engine, and
watch the information display for a steering message. If a steering
message returns, or returns while driving, take the vehicle to your
dealer to have it checked.
210 Driving Aids
2015 Navigator(nav)
Owners Guide gf, 2nd Printing, December 2014
USA (fus)
Page 218 of 475
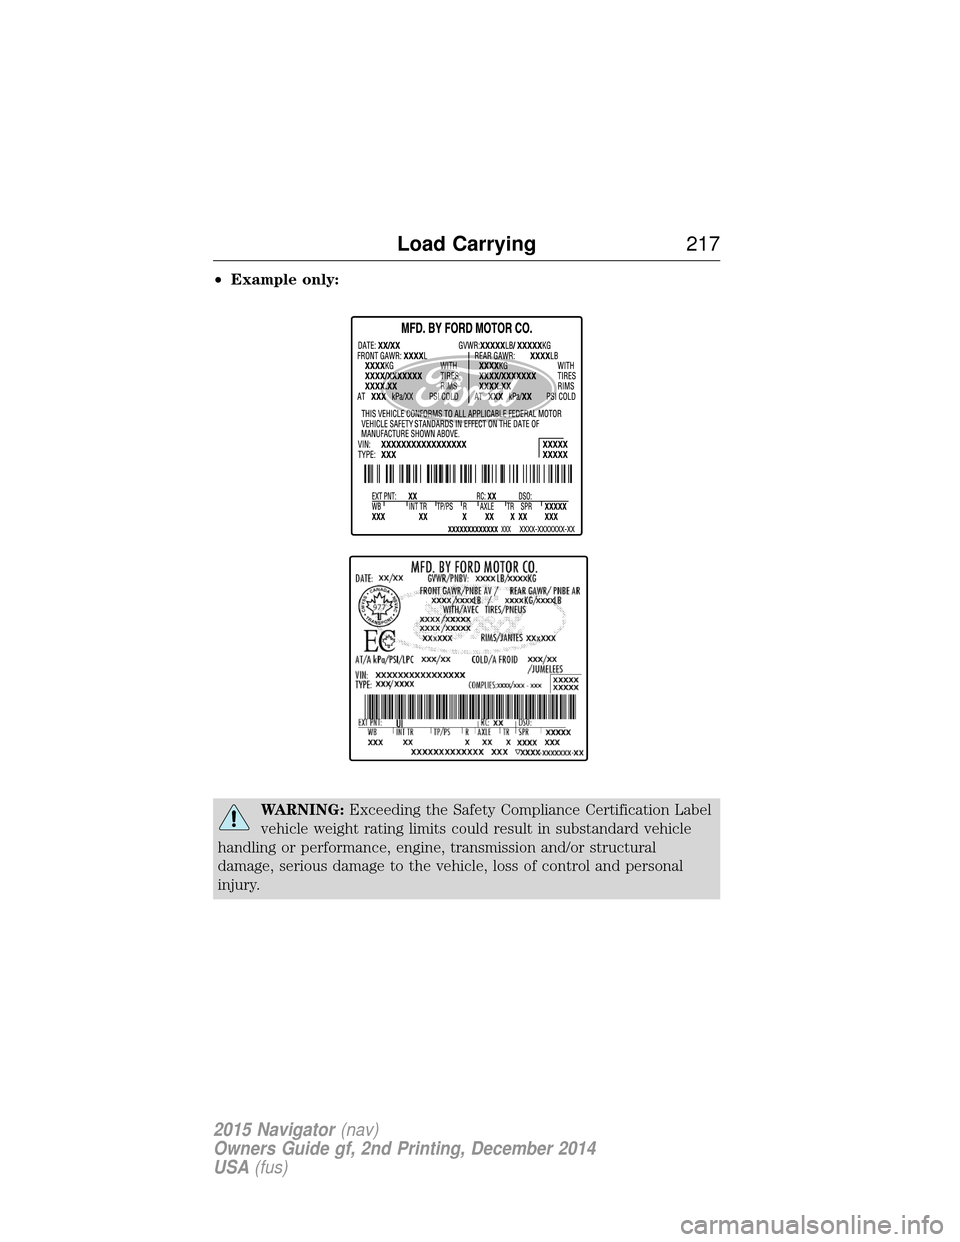
•Example only:
WARNING: Exceeding the Safety Compliance Certification Label
vehicle weight rating limits could result in substandard vehicle
handling or performance, engine, transmission and/or structural
damage, serious damage to the vehicle, loss of control and personal
injury.
Load Carrying 217
2015 Navigator(nav)
Owners Guide gf, 2nd Printing, December 2014
USA (fus)
Page 225 of 475
TOWING A TRAILER
WARNING:Do not exceed the GVWR or the GAWR specified on
the certification label.
WARNING: Towing trailers beyond the maximum recommended
gross trailer weight exceeds the limit of your vehicle and could
result in engine damage, transmission damage, structural damage, loss
of vehicle control, vehicle rollover and personal injury.
Note: For information on electrical items such as fuses or relays, see the
Fuses chapter.
The load capacity of your vehicle is designated by weight not volume.
You may not necessarily be able to use all available space when loading
your vehicle or trailer.
Towing a trailer places extra load on the engine, transmission, axle,
brakes, tires, and suspension. Inspect these components before, during
and after towing.
Load Placement
To help minimize how trailer movement affects your vehicle when
driving:
• Load the heaviest items closest to the trailer floor.
• Load the heaviest items centered between the left and right side
trailer tires.
• Load the heaviest items above the trailer axles or just slightly forward
toward the trailer tongue. Do not allow the final trailer tongue weight
to go above or below 10–15% of the loaded trailer weight.
• Select a tow bar with the correct rise or drop. When both the loaded
vehicle and trailer are connected, the trailer frame should be level, or
slightly angled down toward your vehicle, when viewed from the side.
When driving with a trailer or payload, a slight takeoff vibration or
shudder may be present due to the increased payload weight. You can
find more information about proper trailer loading and setting your
vehicle up for towing under Load limitin theLoad Carrying chapter.
You can also find information in the RV and Trailer Towing Guide
available at your authorized dealer.
224 Towing
2015 Navigator(nav)
Owners Guide gf, 2nd Printing, December 2014
USA (fus)
Page 226 of 475
TRAILER SWAY CONTROL
WARNING:Turning off trailer sway control increases the risk of
loss of vehicle control, serious injury or death. Ford does not
recommend disabling this feature except in situations where speed
reduction may be detrimental (such as hill climbing), the driver has
significant trailer towing experience, and can control trailer sway and
maintain safe operation.
Note: This feature does not prevent trailer sway, but reduces it once it
begins.
Note: This feature cannot stop all trailers from swaying.
Note: In some cases, if vehicle speed is too high, the system may turn
on multiple times, gradually reducing vehicle speed.
This feature applies your vehicle brakes at individual wheels and, if
necessary, reduces engine power. If the trailer begins to sway, the
stability control light flashes and the message TRAILER SWAY
REDUCE SPEED appears in the information display. The first thing to
do is slow your vehicle down, then pull safely to the side of the road and
check for proper tongue load and trailer load distribution. See the Load
Carrying chapter for specific loading information.
RECOMMENDED TOWING WEIGHTS
Note: Do not exceed the trailer weight for your vehicle configuration
listed in the chart below.
Note: Make sure to take into consideration trailer frontal area. Do not
exceed:
• 36.5 feet
2(3.39 meters2) trailer frontal area for vehicles equipped
with the standard towing package.
• 60.0 feet
2(5.57 meters2) trailer frontal area for vehicles equipped
with the optional Heavy Duty package.
Note: Exceeding this limitation may significantly reduce the
performance of your towing vehicle. Selecting a trailer with a low
aerodynamic drag and rounded front design helps optimize performance
and fuel economy.
Note: For high altitude operation, reduce the gross combined weight by
2% per 1000 feet (300 meters) starting at the 1000 foot (300 meter)
elevation point.
Towing 225
2015 Navigator(nav)
Owners Guide gf, 2nd Printing, December 2014
USA (fus)
Page 230 of 475
The standard integrated hitch has two ratings depending on mode of
operation:
•Weight-carrying mode requires a draw bar and hitch ball. The draw
bar supports all the vertical tongue load of the trailer.
• Weight-distributing mode requires an aftermarket weight-distributing
system, which includes draw bar, hitch ball, spring bars and snap-up
brackets. This system distributes the vertical tongue load of the trailer
between the truck and the trailer.
Mode Maximum trailer
weight Maximum tongue
weight
Weight-carrying 6300 lb (2857 kg) 630 lb (285 kg)
Weight-distributing 9000 lb (4082 kg) 900 lb (408 kg)
Note: These are hitch ratings only. Actual vehicle ratings are dependent
on engine, transmission and axle combinations.
Weight-distributing Hitch – Vehicles without Automatic Leveling
Suspension
WARNING: Do not adjust a weight-distributing hitch to any
position where the rear bumper of the vehicle is higher than it
was before attaching the trailer. Doing so will defeat the function of the
weight-distributing hitch, which may cause unpredictable handling, and
could result in serious personal injury.
When hooking-up a trailer using a weight-distributing hitch, always use
the following procedure:
1. Park your vehicle, without the trailer, on a level surface.
2. Measure the height of the top of your vehicle’s front wheel opening on the fender. This is H1.
3. Attach the trailer to your vehicle without the weight-distributing bars connected.
4. Measure the height of the top of your vehicle’s front wheel opening on the fender a second time. This is H2.
5. Install and adjust the tension in the weight distributing bars so that the height of the front fender is approximately halfway between H1
and H2.
6. Check that the trailer is level or slightly nose down toward your vehicle. If not, adjust the ball height accordingly and repeat
Steps 2–6.
Once the trailer is level or slightly nose down toward the vehicle:
• Lock the bar tension adjuster in place.
Towing 229
2015 Navigator(nav)
Owners Guide gf, 2nd Printing, December 2014
USA (fus)
Page 233 of 475
Trailer Lamps
WARNING:Never connect any trailer lamp wiring to the
vehicle’s tail lamp wiring; this may damage the electrical system
resulting in a fire. Contact an authorized dealer as soon as possible for
assistance in proper trailer tow wiring installation. Additional electrical
equipment may be required.
Trailer lamps are required on most towed vehicles. Make sure all running
lights, brake lights, turn signals and hazard lights are working.
Before Towing a Trailer
Practice turning, stopping and backing up to get the feel of your
vehicle-trailer combination before starting on a trip. When turning, make
wider turns so the trailer wheels clear curbs and other obstacles.
When Towing a Trailer
• Do not drive faster than 70 mph (113 km/h) during the first 500 miles
(800 kilometers).
• Do not make full-throttle starts.
• Check your hitch, electrical connections and trailer wheel lug nuts
thoroughly after you have traveled 50 miles (80 kilometers).
• When stopped in congested or heavy traffic during hot weather, place
the gearshift in position Pto aid engine and transmission cooling and
to help air conditioning performance.
• Turn off the speed control with heavy loads or in hilly terrain. The
speed control may turn off automatically when you are towing on
long, steep grades.
• Shift to a lower gear when driving down a long or steep hill. Do not
apply the brakes continuously, as they may overheat and become less
effective.
• If your transmission is equipped with a Grade Assist or Tow/Haul
feature, use this feature when towing. This provides engine braking
and helps eliminate excessive transmission shifting for optimum fuel
economy and transmission cooling.
• If your vehicle is equipped with AdvanceTrac™ with RSC, this system
may turn on during typical cornering maneuvers with a heavily loaded
trailer. This is normal. Turning the corner at a slower speed while
towing may reduce this tendency.
232 Towing
2015 Navigator(nav)
Owners Guide gf, 2nd Printing, December 2014
USA (fus)
Page 238 of 475
BREAKING-IN
You need to break in new tires for approximately 300 miles
(480 kilometers). During this time, your vehicle may exhibit some unique
driving characteristics. Avoid driving too fast during the first 1000 miles
(1600 kilometers). Vary your speed frequently and change up through
the gears early. Do not labor the engine. Do not tow during the first
1000 miles (1600 kilometers).
ECONOMICAL DRIVING
Fuel economy is affected by several things, such as how you drive, the
conditions you drive under and how you maintain your vehicle.
There are some things to keep in mind that may improve your fuel
economy:
•Accelerate and slow down in a smooth, moderate fashion.
• Drive at steady speeds without stopping.
• Anticipate stops; slowing down may eliminate the need to stop.
• Combine errands and minimize stop-and-go driving.
• Close the windows for high-speed driving.
• Drive at reasonable speeds (traveling at 55 mph [88 km/h] uses 15%
less fuel than traveling at 65 mph [105 km/h]).
• Keep the tires properly inflated and use only the recommended size.
• Use the recommended engine oil.
• Perform all regularly scheduled maintenance.
There are also some things you may not want to do because they may
reduce your fuel economy:
• Sudden or hard accelerations.
• Rev the engine before turning it off.
• Idle for periods longer than one minute.
• Warm up your vehicle on cold mornings.
• Use the air conditioner or front defroster.
• Use the speed control in hilly terrain.
• Rest your foot on the brake pedal while driving.
• Drive a heavily loaded vehicle or tow a trailer.
• Carry unnecessary weight (approximately 1 mpg [0.4 km/L] is lost for
every 400 pounds [180 kilograms] of weight carried).
Driving Hints 237
2015 Navigator(nav)
Owners Guide gf, 2nd Printing, December 2014
USA (fus)
Page 239 of 475
•Add particular accessories to your vehicle (e.g.; bug deflectors,
rollbars or light bars, running boards, ski racks).
• Drive with the wheels out of alignment.
DRIVING THROUGH WATER
WARNING: Do not drive through flowing or deep water as you
may lose control of your vehicle.
Note: Driving through standing water can cause vehicle damage.
Note: Engine damage can occur if water enters the air filter.
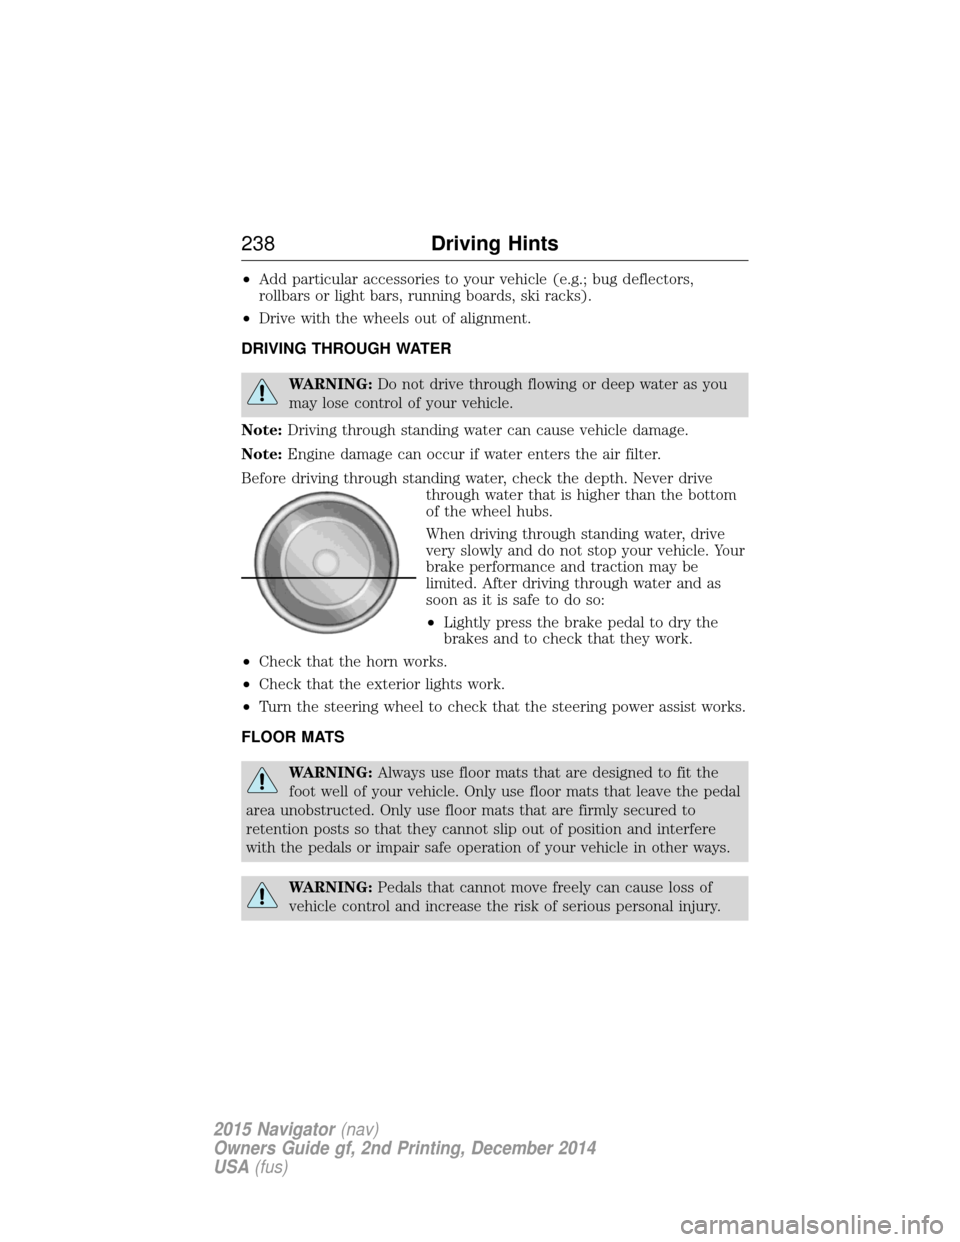
Before driving through standing water, check the depth. Never drive through water that is higher than the bottom
of the wheel hubs.
When driving through standing water, drive
very slowly and do not stop your vehicle. Your
brake performance and traction may be
limited. After driving through water and as
soon as it is safe to do so:
•Lightly press the brake pedal to dry the
brakes and to check that they work.
• Check that the horn works.
• Check that the exterior lights work.
• Turn the steering wheel to check that the steering power assist works.
FLOOR MATS
WARNING: Always use floor mats that are designed to fit the
foot well of your vehicle. Only use floor mats that leave the pedal
area unobstructed. Only use floor mats that are firmly secured to
retention posts so that they cannot slip out of position and interfere
with the pedals or impair safe operation of your vehicle in other ways.
WARNING: Pedals that cannot move freely can cause loss of
vehicle control and increase the risk of serious personal injury.
238 Driving Hints
2015 Navigator(nav)
Owners Guide gf, 2nd Printing, December 2014
USA (fus)
Page 244 of 475
HAZARD WARNING FLASHERSThe hazard flasher control is located on the instrument panel
by the radio. Use it when your vehicle is disabled and is
creating a safety hazard for other motorists.
•
Press the flasher control and all front and rear direction signals will flash.
• Press the flasher control again to turn them off.
Note:
With extended use, the flashers may run down your 12–volt battery.
FUEL SHUTOFF
WARNING: Failure to inspect and, if necessary, repair fuel leaks
after a collision may increase the risk of fire and serious injury.
Ford Motor Company recommends that the fuel system be inspected by
an authorized dealer after any collision.
In the event of a moderate to severe collision, this vehicle includes a fuel
pump shut-off feature that stops the flow of fuel to the engine. Not every
impact will cause a shut off.
Should your vehicle shut off after a collision, you may restart your
vehicle by doing the following:
1. Switch off the ignition.
2. Switch on the ignition.
3. Repeat Steps 1 and 2 to re-enable the fuel pump.
For vehicles equipped with a push button start system:
1. Press the START/STOP button to switch off the ignition.
2. Press the brake pedal and press the START/STOP button to start the
vehicle.
3. Remove your foot from the brake pedal and press the START/STOP
button to switch off the ignition.
4. You can either attempt to start the engine by pressing the brake pedal
and the START/STOP button, or switch on the ignition only by pressing
the START/STOP button without pressing the brake pedal. Both ways
re-enable the fuel system.
Note: When you try to restart your vehicle after a fuel shutoff, the
vehicle makes sure that various systems are safe to restart. Once your
vehicle determines that the systems are safe, then the vehicle will allow
you to restart.
Note: In the event that your vehicle does not restart after your third
attempt, contact an authorized dealer.
Roadside Emergencies 243
2015 Navigator(nav)
Owners Guide gf, 2nd Printing, December 2014
USA (fus)
Page 245 of 475
JUMP-STARTING THE VEHICLE
WARNING:The gases around the battery can explode if exposed
to flames, sparks, or lit cigarettes. An explosion could result in
injury or vehicle damage.
WARNING: Batteries contain sulfuric acid which can burn skin,
eyes and clothing, if contacted.
Do not attempt to push-start your automatic transmission vehicle.
Automatic transmissions do not have push-start capability. Attempting to
push-start a vehicle with an automatic transmission may cause
transmission damage.
When the battery is disconnected or a new battery is installed, the
automatic transmission must relearn its shift strategy. As a result, the
transmission may exhibit a combination of firm and soft shifts. This
operation is considered normal and will not affect function or durability
of the transmission. Over time, the adaptive learning process will fully
update transmission operation.
Preparing Your Vehicle
Note: Use only a 12–volt supply to start your vehicle.
Note: Do not disconnect the battery of the disabled vehicle as this could
damage the vehicle’s electrical system.
1. Park the booster vehicle close to the hood of the disabled vehicle
making sure the two vehicles do not touch. Set the parking brake on
both vehicles and stay clear of the engine cooling fan and other moving
parts.
2. Check all battery terminals. Remove the positive terminal cover (if
equipped) and any excessive corrosion before you attach the battery
cables. Ensure that vent caps are tight and level.
3. Turn the heater fan on in both vehicles to protect from any electrical
surges. Turn all other accessories off.
244 Roadside Emergencies
2015 Navigator (nav)
Owners Guide gf, 2nd Printing, December 2014
USA (fus)