check engine LINCOLN NAVIGATOR 2016 User Guide
[x] Cancel search | Manufacturer: LINCOLN, Model Year: 2016, Model line: NAVIGATOR, Model: LINCOLN NAVIGATOR 2016Pages: 419, PDF Size: 3.59 MB
Page 163 of 419

4. Apply the parking brake.
Guarding Against Exhaust Fumes
WARNING
If you smell exhaust fumes inside your
vehicle, have your vehicle checked by
your authorized dealer immediately. Do not
drive your vehicle if you smell exhaust fumes.
Carbon monoxide is present in exhaust
fumes. Take precautions to avoid its
dangerous effects. Important Ventilating Information
If you stop your vehicle and then leave the
engine idling for long periods, we
recommend that you do one of the following:
•
Open the windows at least 1 in (3 cm).
• Set your climate control to outside air. ENGINE BLOCK HEATER
(If Equipped) WARNINGS
Failure to follow engine block heater
instructions could result in property
damage or serious personal injury. Do not use your heater with
ungrounded electrical systems or
two-pronged adapters. There is a risk of
electrical shock. Do not fully close the hood, or allow it
to drop under its own weight when
using the engine block heater. This could
damage the power cable and may cause an
electrical short resulting in fire, injury and
property damage. Note:
The heater is most effective when
outdoor temperatures are below 0°F (-18°C).
The heater acts as a starting aid by warming
the engine coolant. This allows the climate
control system to respond quickly. The
equipment includes a heater element
(installed in the engine block) and a wire
harness. You can connect the system to a
grounded 120-volt AC electrical source. We recommend that you do the following for
a safe and correct operation:
•
Use a 16-gauge outdoor extension cord
that is product certified by Underwriter’ s
Laboratory (UL) or Canadian Standards
Association (CSA). This extension cord
must be suitable for use outdoors, in cold
temperatures, and be clearly marked
Suitable for Use with Outdoor
Appliances. Do not use an indoor
extension cord outdoors. This could
result in an electric shock or become a
fire hazard.
• Use as short an extension cord as
possible.
• Do not use multiple extension cords.
• Make sure that when in operation, the
extension cord plug and heater cord plug
connections are free and clear of water.
This could cause an electric shock or fire.
• Make sure your vehicle is parked in a
clean area, clear of combustibles.
• Make sure the heater, heater cord and
extension cord are firmly connected.
160
Navigator (TB5) Canada/United States of America, enUSA, First Printing Starting and Stopping the Engine
Page 164 of 419
•
Check for heat anywhere in the electrical
hookup once the system has been
operating for approximately 30 minutes.
• Make sure the system is unplugged and
properly stowed before starting and
driving your vehicle. Make sure the
protective cover seals the prongs of the
block heater cord plug when not in use.
• Make sure the heater system is checked
for proper operation before winter.
Using the Engine Block Heater
Make sure the receptacle terminals are clean
and dry prior to use. Clean them with a dry
cloth if necessary.
The heater uses 0.4 to 1.0 kilowatt-hours of
energy per hour of use. The system does not
have a thermostat. It achieves maximum
temperature after approximately three hours
of operation. Using the heater longer than
three hours does not improve system
performance and unnecessarily uses
electricity.
161
Navigator (TB5) Canada/United States of America, enUSA, First Printing Starting and Stopping the Engine
Page 173 of 419
You can correct these temporary
malfunctions by filling the fuel tank with good
quality fuel, properly closing the fuel fill inlet
or letting the electrical system dry out. After
three driving cycles without these or any
other temporary malfunctions present, the
service engine soon indicator should stay off
the next time you start the engine. A driving
cycle consists of a cold engine startup
followed by mixed city/highway driving. No
additional vehicle service is required.
If the service engine soon indicator remains
on, have your vehicle serviced at the first
available opportunity. Although some
malfunctions detected by the OBD-II may not
have symptoms that are apparent, continued
driving with the service engine soon indicator
on can result in increased emissions, lower
fuel economy, reduced engine and
transmission smoothness, and lead to more
costly repairs.
Readiness for Inspection/Maintenance
(I/M) Testing
Some state/provincial and local governments
may have Inspection/Maintenance (I/M)
programs to inspect the emission control
equipment on your vehicle. Failure to pass
this inspection could prevent you from
getting a vehicle registration. If the service engine soon indicator
is on or the bulb does not work,
you may need to have the vehicle
serviced. See On-Board Diagnostics (OBD-II).
Your vehicle may not pass the I/M test if the
service engine soon indicator is on or not
working properly (bulb is burned out), or if
the OBD-II system has determined that some
of the emission control systems have not
been properly checked. In this case, your
vehicle is not ready for I/M testing.
If the vehicle ’s engine or transmission has
just been serviced, or the battery has
recently run down or been replaced, the
OBD-II system may indicate that the vehicle
is not ready for I/M testing. To determine if
the vehicle is ready for I/M testing, turn the ignition key to the on position for 15 seconds
without cranking the engine. If the service
engine soon indicator blinks eight times, it
means that the vehicle is not ready for I/M
testing; if the service engine soon indicator
stays on solid, it means that the vehicle is
ready for I/M testing.
The OBD-II system monitors the emission
control system during normal driving. A
complete check may take several days. If the
vehicle is not ready for I/M testing, you may
need to perform the following driving cycle
consisting of mixed city and highway driving:
Drive on an expressway or highway for a
steady 15 minutes, followed by 20 minutes
of stop-and-go driving with at least four
30-second idle periods.
Allow the vehicle to sit for at least eight hours
without starting the engine. Then, start the
engine and complete the above driving
cycle. The engine must warm up to its normal
operating temperature. Once started, do not
turn off the engine until the above driving
cycle is complete. If the vehicle is still not
ready for I/M testing, you will have to repeat
the above driving cycle.
170
Navigator (TB5) Canada/United States of America, enUSA, First Printing Fuel and Refueling
Page 187 of 419
GENERAL INFORMATION
Note:
Occasional brake noise is normal. If a
metal-to-metal, continuous grinding or
continuous squeal sound is present, the
brake linings may be worn-out and an
authorized dealer should check them. If the
vehicle has continuous vibration or shudder
in the steering wheel while braking, an
authorized dealer should check your vehicle.
Note: Brake dust may accumulate on the
wheels, even under normal driving
conditions. Some dust is inevitable as the
brakes wear and does not contribute to
brake noise. See Cleaning the Alloy Wheels
(page 292). See
Warning Lamps and
Indicators (page 101).
Wet brakes result in reduced braking
efficiency. Gently press the brake pedal a
few times when driving from a car wash or
standing water to dry the brakes. Brake Over Accelerator
In the event the accelerator pedal becomes
stuck or entrapped, apply steady and firm
pressure to the brake pedal to slow the
vehicle and reduce engine power. If you
experience this condition, apply the brakes
and bring your vehicle to a safe stop. Switch
the engine off, move the transmission to park
(P) and apply the parking brake. Inspect the
accelerator pedal and the area around it for
any items or debris that may be obstructing
its movement. If none are found and the
condition persists, have your vehicle towed
to the nearest authorized dealer.
Emergency Brake Assist
Emergency brake assist detects when you
brake heavily by measuring the rate at which
you press the brake pedal. It provides
maximum braking efficiency as long as you
press the pedal. Emergency brake assist can
reduce stopping distances in critical
situations.Anti-lock Brake System
This system helps you maintain steering
control during emergency stops by keeping
the brakes from locking. This lamp momentarily illuminates
when you switch the ignition on. If
the light does not illuminate during
start up, remains on or flashes, the anti-lock
braking system may be disabled. Have the
system checked by an authorized dealer. If
the anti-lock brake system is disabled,
normal braking is still effective. If the brake warning lamp
illuminates with the parking brake
released, have your brake system
serviced immediately.
HINTS ON DRIVING WITH ANTI-
LOCK BRAKES
Note: When the system is operating, the
brake pedal will pulse and may travel further.
Maintain pressure on the brake pedal. You
may also hear a noise from the system. This
is normal.
184
Navigator (TB5) Canada/United States of America, enUSA, First Printing BrakesE138644 E138644
Page 213 of 419
•
Active noise control utilizes your vehicle
electronics to enhance the acoustic
experience.
• Electronic stability control and traction
control maintain your vehicle control in
adverse conditions or high performance
driving.
• Electronic throttle control enhances the
powertrain response to your inputs.
Using Lincoln Drive Control
You can configure which of the Drive Control
modes are active when your vehicle is in
drive (D) or in Sport (S). The configuration
remains active until modified from the main
menu on the information display. These systems have a range of modes which
you can choose from in order to customize
your ideal driving experience:
•
Comfort – Provides a more relaxed
driving experience, maximizing comfort.
Your steering effort decreases and the
suspension movement is more fluid.
Comfort mode is ideal when you desire
enhanced traveling comfort.
• Normal – Delivers a balanced
combination of comfortable, controlled
ride and confident handling. This mode
provides an engaging drive experience
and a direct connection to the road
without sacrificing any of the composure
demanded from a luxury vehicle.
• Sport – Provides a sportier driving
experience. The suspension stiffens, with
an emphasis on handling and control.
The engine responds more directly to
your inputs and takes on a more powerful
tone. Sport mode is ideal for use during
more spirited driving. You can change your vehicle
’s Drive
Control settings from the main menu on
the information display: Settings
Drive Control
Vehicle
Note: Not all settings may be available.
Note: Lincoln Drive Control has diagnostic
checks that continuously monitor the system
to ensure proper operation. Certain types of
system errors will gray out the mode
selections within the information display,
preventing you from changing states when
the gear position is changed. Other types of
errors will produce a temporary message
that states Drive Control Malfunction. If either
condition persists for multiple key cycles,
have your vehicle checked by an authorized
dealer.
210
Navigator (TB5) Canada/United States of America, enUSA, First Printing Driving Aids
Page 226 of 419
RV & Trailer Towing Guide Online
http://www.fleet.ford.com/towing-guides/
Website
TRAILER SWAY CONTROL WARNING
Turning off trailer sway control
increases the risk of loss of vehicle
control, serious injury or death. Ford does
not recommend disabling this feature except
in situations where speed reduction may be
detrimental (such as hill climbing), the driver
has significant trailer towing experience, and
can control trailer sway and maintain safe
operation. Note:
This feature does not prevent trailer
sway, but reduces it once it begins.
Note: This feature cannot stop all trailers
from swaying. Note:
In some cases, if vehicle speed is too
high, the system may activate multiple times,
gradually reducing vehicle speed.
This feature applies your vehicle brakes at
individual wheels and, if necessary, reduces
engine power. If the trailer begins to sway,
the stability control light flashes and the
message TRAILER SWAY REDUCE SPEED
appears in the information display. The first
thing to do is slow your vehicle down, then
pull safely to the side of the road and check
for proper tongue load and trailer load
distribution.
See Load Carrying (page 212).
RECOMMENDED TOWING
WEIGHTS
Note: Do not exceed the trailer weight for
your vehicle configuration listed in the chart
below. Note:
Make sure to take into consideration
trailer frontal area. Do not exceed 36.5 feet²
(3.39 meters²) if your vehicle is equipped
with the standard towing package, or 60
feet² (5.57 meters²) if your vehicle is
equipped with the optional heavy duty
package.
Note: Exceeding this limitation may
significantly reduce the performance of your
towing vehicle. Selecting a trailer with a low
aerodynamic drag and rounded front design
helps optimize performance and fuel
economy.
Note: For high altitude operation, reduce the
gross combined weight by 2% per 1000 feet
(300 meters) starting at the 1000 foot (300
meter) elevation point.
223
Navigator (TB5) Canada/United States of America, enUSA, First Printing Towing
Page 234 of 419
Before Towing a Trailer
Practice turning, stopping and backing up to
get the feel of your vehicle-trailer
combination before starting on a trip. When
turning, make wider turns so the trailer
wheels clear curbs and other obstacles.
When Towing a Trailer
•
Do not drive faster than 70 mph (113
km/h) during the first 500 miles (800
kilometers).
• Do not make full-throttle starts.
• Check your hitch, electrical connections
and trailer wheel lug nuts thoroughly after
you have traveled 50 miles (80
kilometers).
• When stopped in congested or heavy
traffic during hot weather, place the
gearshift in position P to aid engine and
transmission cooling and to help A/C
performance.
• Turn off the speed control with heavy
loads or in hilly terrain. The speed control
may turn off automatically when you are
towing on long, steep grades. •
Shift to a lower gear when driving down
a long or steep hill. Do not apply the
brakes continuously, as they may
overheat and become less effective.
• If your transmission is equipped with a
Grade Assist or Tow/Haul feature, use
this feature when towing. This provides
engine braking and helps eliminate
excessive transmission shifting for
optimum fuel economy and transmission
cooling.
• If your vehicle is equipped with
AdvanceTrac with RSC, this system may
turn on during typical cornering
maneuvers with a heavily loaded trailer.
This is normal. Turning the corner at a
slower speed while towing may reduce
this tendency.
• If your vehicle is equipped with
Continuous Controlled Damping
Suspension (CCD Suspension), you can
select NORMAL or SPORT drive control
modes for better experience while towing
a trailer. See Information Displays (page
105
). •
If you are towing a trailer frequently in
hot weather, hilly conditions, at the gross
combined weight rating (or any
combination of these factors), consider
refilling your rear axle with synthetic gear
lubricant (if the axle is not already filled
with it).
See Capacities and
Specifications (page 328).
• Allow more distance for stopping with a
trailer attached. Anticipate stops and
brake gradually.
• Avoid parking on a grade. However, if
you must park on a grade:
1. Turn the steering wheel to point your vehicle tires away from traffic flow.
2. Set your vehicle parking brake.
3. Place the automatic transmission in position
P.
4. Place wheel chocks in front and back of the trailer wheels. (Chocks not included
with vehicle.)
231
Navigator (TB5) Canada/United States of America, enUSA, First Printing Towing
Page 238 of 419
BREAKING-IN
You need to break in new tires for
approximately 300 miles (480 kilometers).
During this time, your vehicle may exhibit
some unusual driving characteristics.
Avoid driving too fast during the first 1000
miles (1600 kilometers). Vary your speed
frequently and change up through the gears
early. Do not labor the engine.
Do not tow during the first 1000 miles (1600
kilometers).
REDUCED ENGINE PERFORMANCE
WARNING
Continued operation will increase the
engine temperature and cause the
engine to shut down completely. If the engine coolant temperature gauge
needle moves to the upper limit position, the
engine is overheating. See Gauges (page
99). You must only drive your vehicle for a short
distance if the engine overheats. The
distance you can travel depends on ambient
temperature, vehicle load and terrain. The
engine will continue to operate with limited
power for a short time.
If the engine temperature continues to rise,
the fuel supply to the engine will reduce. The
air conditioning will switch off and the engine
cooling fan will operate continually.
1. Reduce your speed gradually and stop
your vehicle as soon as it is safe to do
so.
2. Switch the engine off immediately to prevent severe engine damage.
3. Wait for the engine to cool down.
4. Check the coolant level.
See Engine
Coolant Check (page 269).
5. Have your vehicle checked by an authorized dealer as soon as possible. ECONOMICAL DRIVING
Fuel economy is affected by several things
such as how you drive, the conditions you
drive under and how you maintain your
vehicle.
There are some things to keep in mind that
may improve your fuel economy:
•
Accelerate and slow down in a smooth,
moderate fashion.
• Drive at steady speeds.
• Anticipate stops; slowing down may
eliminate the need to stop.
• Combine errands and minimize
stop-and-go driving(When running
errands, go to the furthest destination
first and then work your way back home).
• Close the windows for high-speed
driving.
• Drive at reasonable speeds.
• Keep the tires properly inflated and use
only the recommended size.
• Use the recommended engine oil.
• Perform all regularly scheduled
maintenance.
235
Navigator (TB5) Canada/United States of America, enUSA, First Printing Driving Hints
Page 239 of 419
There are also some things you may want to
avoid doing because they reduce your fuel
economy:
•
Avoid sudden or hard accelerations.
• Avoid revving the engine before turning
off the car.
• Avoid long idle periods.
• Do not warm up your vehicle on cold
mornings.
• Reduce the use of air conditioning and
heat.
• Avoid using speed control in hilly terrain.
• Do not rest your foot on the brake pedal
while driving.
• Avoid carrying unnecessary weight.
• Avoid adding particular accessories to
your vehicle (e.g. bug deflectors,
rollbars/light bars, running boards, ski
racks).
• Avoid driving with the wheels out of
alignment. DRIVING THROUGH WATER WARNING
Do not drive through flowing or deep
water as you may lose control of your
vehicle. Note:
Driving through standing water can
cause vehicle damage.
Note: Engine damage can occur if water
enters the air filter.
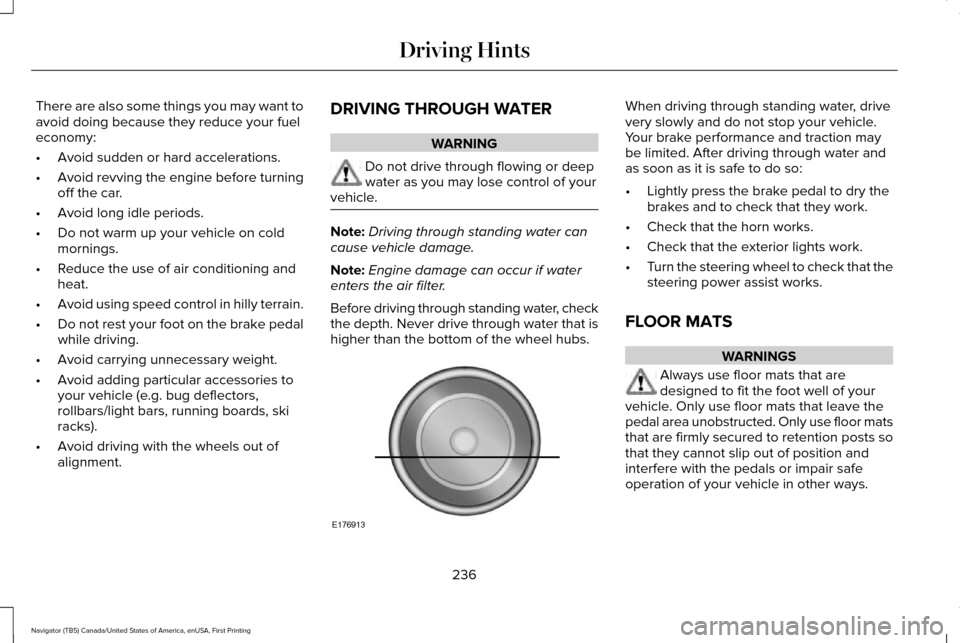
Before driving through standing water, check
the depth. Never drive through water that is
higher than the bottom of the wheel hubs. When driving through standing water, drive
very slowly and do not stop your vehicle.
Your brake performance and traction may
be limited. After driving through water and
as soon as it is safe to do so:
•
Lightly press the brake pedal to dry the
brakes and to check that they work.
• Check that the horn works.
• Check that the exterior lights work.
• Turn the steering wheel to check that the
steering power assist works.
FLOOR MATS WARNINGS
Always use floor mats that are
designed to fit the foot well of your
vehicle. Only use floor mats that leave the
pedal area unobstructed. Only use floor mats
that are firmly secured to retention posts so
that they cannot slip out of position and
interfere with the pedals or impair safe
operation of your vehicle in other ways.
236
Navigator (TB5) Canada/United States of America, enUSA, First Printing Driving HintsE176913
Page 267 of 419
GENERAL INFORMATION
Have your vehicle serviced regularly to help
maintain its roadworthiness and resale value.
There is a large network of authorized
dealers that are there to help you with their
professional servicing expertise. We believe
that their specially trained technicians are
best qualified to service your vehicle properly
and expertly. They are supported by a wide
range of highly specialized tools developed
specifically for servicing your vehicle.
If your vehicle requires professional service,
an authorized dealer can provide the
necessary parts and service. Check your
warranty information to find out which parts
and services are covered.
Use only recommended fuels, lubricants,
fluids and service parts conforming to
specifications. Motorcraft® parts are
designed and built to provide the best
performance in your vehicle.
Precautions
•
Do not work on a hot engine.
• Make sure that nothing gets caught in
moving parts.
• Do not work on a vehicle with the engine
running in an enclosed space, unless you
are sure you have enough ventilation.
• Keep all open flames and other burning
material (such as cigarettes) away from
the battery and all fuel related parts.
Working with the Engine Off
1. Set the parking brake and shift to park (P).
2. Switch off the engine.
3. Block the wheels.
Working with the Engine On WARNING
To reduce the risk of vehicle damage
and/or personal burn injuries, do not
start your engine with the air cleaner
removed and do not remove it while the
engine is running. 1. Set the parking brake and shift to park
(P).
2. Block the wheels.
OPENING AND CLOSING THE
HOOD
1. Inside the vehicle, pull the hood release handle located under the left-hand side
of the instrument panel.
264
Navigator (TB5) Canada/United States of America, enUSA, First Printing Maintenance