manual transmission LINCOLN NAVIGATOR 2019 Owners Manual
[x] Cancel search | Manufacturer: LINCOLN, Model Year: 2019, Model line: NAVIGATOR, Model: LINCOLN NAVIGATOR 2019Pages: 645, PDF Size: 5.02 MB
Page 16 of 645
Collision Repairs
We hope that you never experience acollision, but accidents do happen. GenuineFord replacement collision parts meet ourstringent requirements for fit, finish, structuralintegrity, corrosion protection and dentresistance. During vehicle development wevalidate that these parts deliver the intendedlevel of protection as a whole system. Agreat way to know for sure you are gettingthis level of protection is to use genuine Fordreplacement collision parts.
Warranty on Replacement Parts
Genuine Ford and Motorcraft replacementparts are the only replacement parts thatbenefit from a Lincoln Warranty. Damagecaused to your vehicle as a result of thefailure of non-Ford parts may not be coveredby the Lincoln Warranty. For additionalinformation, refer to the terms and conditionsof the Lincoln Warranty.
SPECIAL NOTICES
New Vehicle Limited Warranty
For a detailed description of what is coveredand what is not covered by your vehicle’sNew Vehicle Limited Warranty, see theWarranty Manual that is provided to youalong with your Owner’s Manual.
Special Instructions
For your added safety, your vehicle is fittedwith sophisticated electronic controls.
WARNING: You risk death or seriousinjury to yourself and others if you do notfollow the instruction highlighted by thewarning symbol. Failure to follow thespecific warnings and instructions couldresult in personal injury.
WARNING: NEVER use a rearwardfacing child restraint on a seat protectedby an ACTIVE AIRBAG in front of it, DEATHor SERIOUS INJURY to the CHILD canoccur.
On Board Diagnostics Data LinkConnector
WARNING: Do not connect wirelessplug-in devices to the data link connector.Unauthorized third parties could gainaccess to vehicle data and impair theperformance of safety related systems.Only allow repair facilities that follow ourservice and repair instructions to connecttheir equipment to the data link connector.
Your vehicle has an OBD Data LinkConnector (DLC) that is used in conjunctionwith a diagnostic scan tool for vehiclediagnostics, repairs and reprogrammingservices. Installing an aftermarket device thatuses the DLC during normal driving forpurposes such as remote insurance companymonitoring, transmission of vehicle data toother devices or entities, or altering theperformance of the vehicle, may cause
13
Navigator (TB9) Canada/United States of America, enUSA, Edition date: 201808, First-Printing
Introduction
Page 78 of 645
Locking and Unlocking the Doors withthe Key Blade
A key cylinder is located under the driverside door handle. You can use your keyblade to manually lock and unlock the driverside door. See Remote Control (page 62).
Smart Unlocks for Intelligent AccessKeys
This helps to prevent you from locking yourkey inside the passenger compartment orrear cargo area.
When you electronically lock your vehiclewith any door open, the transmission is inpark (P) and the ignition is off, the systemsearches for an intelligent access key insideyour vehicle after you close the last door. Ifthe system finds a key, all the doorsimmediately unlock and the horn soundstwice, indicating that a key is inside.
You can override the smart unlock featureand intentionally lock the intelligent accesskey inside your vehicle.
To do this, lock your vehicle after you haveclosed all the doors by:
•Using the keyless entry keypad.
•Pressing the lock button on anotherintelligent access key.
When you open one of the front doors andlock your vehicle using the power door lockcontrol, all doors will lock then unlock if:
•The ignition is on.
•The ignition is off and the transmissionis not in park (P).
Autolock (If Equipped)
Autolock locks all the doors when:
•All doors are closed.
•The ignition is on.
•You shift into any gear putting yourvehicle in motion.
•Your vehicle reaches a speed greaterthan 12 mph (20 km/h).
Autolock repeats when:
•You open then close any door while theignition is on and your vehicle speed is9 mph (15 km/h) or lower.
•Your vehicle reaches a speed greaterthan 12 mph (20 km/h).
Autounlock
Autounlock unlocks all the doors when:
•The ignition is on, all the doors areclosed, and your vehicle has beenmoving at a speed greater than 12 mph(20 km/h).
•Your vehicle comes to a stop and youswitch the ignition off, or to the accessoryposition.
•You open the driver door within 10minutes of switching the ignition off or toaccessory.
Note:The doors do not autounlock if youelectronically lock your vehicle after youswitch the ignition off and before you openthe driver door.
75
Navigator (TB9) Canada/United States of America, enUSA, Edition date: 201808, First-Printing
Doors and Locks
Page 83 of 645
Note: Objects too close to your vehicle, forexample a wall, garage door or anothervehicle may come into contact with themoving liftgate. Make sure the area behindyour vehicle is free from obstruction and thatthere is enough room for you to operate theliftgate. This could damage the liftgate andits components.
Note:Be careful when opening or closingthe liftgate in a garage or other enclosedarea to avoid damaging the liftgate.
Note: Do not leave the liftgate open whendriving. This could damage the liftgate andits components.
From the Instrument Panel
With the transmission in park (P),press the button on the instrumentpanel.
Remote Control
Press the button twice within a fewseconds.
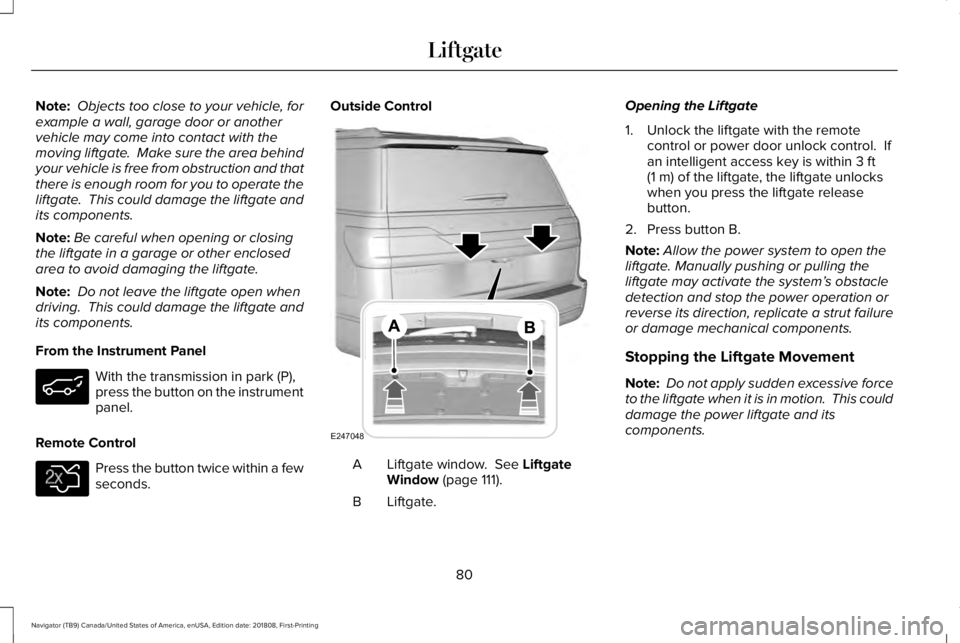
Outside Control
Liftgate window. See LiftgateWindow (page 111).A
Liftgate.B
Opening the Liftgate
1. Unlock the liftgate with the remotecontrol or power door unlock control. Ifan intelligent access key is within 3 ft(1 m) of the liftgate, the liftgate unlockswhen you press the liftgate releasebutton.
2. Press button B.
Note:Allow the power system to open theliftgate. Manually pushing or pulling theliftgate may activate the system’s obstacledetection and stop the power operation orreverse its direction, replicate a strut failureor damage mechanical components.
Stopping the Liftgate Movement
Note: Do not apply sudden excessive forceto the liftgate when it is in motion. This coulddamage the power liftgate and itscomponents.
80
Navigator (TB9) Canada/United States of America, enUSA, Edition date: 201808, First-Printing
Liftgate E138630 E247048
Page 102 of 645
Windshield Wiper Activated Headlamps
When you switch the autolamps on, theheadlamps turn on within 10 seconds ofswitching the wipers on. They turn offapproximately 60 seconds after you switchthe windshield wipers off.
The headlamps do not turn on with thewipers:
•During a single wipe.
•When using the windshield washers.
•If the wipers are in intermittent mode.
Note:If you switch the autolamps and theautowipers on, the headlamps turn on whenthe windshield wipers continuously operate.
INSTRUMENT LIGHTING DIMMER
Note:If you disconnect and connect thebattery, or fully discharge and charge thebattery, the illuminated components switchto the maximum setting.
HEADLAMP EXIT DELAY
After you switch the ignition off, you canswitch the headlamps on by pulling thedirection indicator lever toward you. You willhear a short tone. The headlamps will switchoff automatically after three minutes with anydoor open or 30 seconds after the last doorhas been closed. You can cancel this featureby pulling the direction indicator toward youagain or switching the ignition on.
DAYTIME RUNNING LAMPS
WARNING: The daytime runninglamps system does not activate the rearlamps and may not provide adequatelighting during low visibility drivingconditions. Make sure you switch theheadlamps on, as appropriate, during alllow visibility conditions. Failure to do somay result in a crash.
Type One - Conventional (Non-Configurable)
The daytime running lamps turn on when:
1. Switching the ignition on.
2. The transmission is not in park (P) forvehicles with automatic transmissions, orreleasing the parking brake for vehicleswith manual transmissions.
3. The lighting control is in the off, parkinglamp or autolamps positions.
4. The headlamps are off.
99
Navigator (TB9) Canada/United States of America, enUSA, Edition date: 201808, First-Printing
LightingE254204
Page 103 of 645
Type Two - Configurable
Switch the daytime running lamps on or offusing the information display. SeeInformation Displays (page 120).
The daytime running lamps turn on when:
1. The lamps are on in the informationdisplay.
2. Switching the ignition on.
3. The transmission is not in park (P) forvehicles with automatic transmissions, orreleasing the parking brake for vehicleswith manual transmissions.
4. The lighting control is in the autolampsposition.
5. The headlamps are off.
The other lighting control switch positionsdo not turn on the daytime running lamps.
If the daytime running lamps are off in theinformation display, the lamps stay off in allswitch positions.
AUTOMATIC HIGH BEAM
CONTROL (IF EQUIPPED)
WARNING: The system does notrelieve you of your responsibility to drivewith due care and attention. You may needto override the system if it does not turnthe high beams on or off.
The system turns on high beams if it is darkenough and no other traffic is present. If itdetects an approaching vehicle’s headlampsor tail lamps, or street lighting ahead, thesystem turns off high beams before they candistract other road users. Low beams remainon.
Note:The system may not operate properlyif the sensor is blocked. Keep the windshieldfree from obstruction or damage.
Note:The system may not operate properlyin cold or inclement conditions. You canswitch on the high beams by overriding thesystem.
Note:If the system detects a blockage, forexample bird droppings, bug splatter, snowor ice, the system goes into low beam modeuntil you clear the blockage. A message mayappear in the information display if thecamera is blocked.
Note:Using much larger tires or equippingvehicle accessories such as snowplows canmodify your vehicle's ride height anddegrade automatic high beam controlperformance.
A camera sensor, centrally mounted behindthe windshield of your vehicle, continuouslymonitors conditions to turn the high beamson and off.
Once the system is active, the high beamsturn on if:
•The ambient light level is low enough.
•There is no traffic in front of your vehicle.
•The vehicle speed is greater thanapproximately 32 mph (51 km/h).
100
Navigator (TB9) Canada/United States of America, enUSA, Edition date: 201808, First-Printing
Lighting
Page 149 of 645
ActionMessage
A trailer tire pressure sensor is malfunctioning. If the warning stays on or continuesto come on, contact an authorized dealer as soon as possible.Trailer Tire Pressure Sensor Fault
The trailer tire pressure monitoring system is malfunctioning. If the warning stayson or continues to come on, contact an authorized dealer.Trailer Tire Pressure Monitor Fault
The system cannot detect the trailer tire pressure monitoring system.Trailer Tire Pressure Monitor Capability Not Detected
The trailer tire pressure monitoring system is not setup. See General Information(page 120).Trailer Tire Pressure Indication Not Setup See Manual
Transmission
ActionMessage
You switched the engine off and shift select lever is in any position other than park (P).Shift to Park
Transmission is too cold. Wait for it to warm up before you drive.Transmission Warming Up Please Wait
Displays when the brake pedal needs to be depressed.Press Brake Pedal
The transmission is overheating and needs to cool. Stop in a safe place as soon as it’s possible.Transmission Over Temperature StopSafely
See an authorized dealer.Transmission Service Required
The transmission is overheating and needs to cool. Stop in a safe place as soon as it’s possible.Transmission Too Hot Press Brake
146
Navigator (TB9) Canada/United States of America, enUSA, Edition date: 201808, First-Printing
Information Displays
Page 150 of 645
ActionMessage
The transmission has limited functionality. See an authorized dealer.Transmission Limited Function See Manual
A reminder to shift into park. In addition, this message is typical after reconnecting or rechargingthe battery until you cycle the ignition to the on mode. See Changing the 12V Battery (page371).
Transmission Not in Park
Displays when there is a system fault and the park brake needs to be depressed before exitingthe vehicle. See your authorized dealer.SHIFT SYS FAULT Confirm Park BrakeApply Before Exiting the Vehicle
See your authorized dealer.SHIFT SYS FAULT Service Required
Displays when there is a system fault while the vehicle is shifting to park. See your authorizeddealer.SHIFT SYS FAULT Vehicle is Shifting toPark
Displays when there is a system fault while the vehicle is shifting to reverse. See your authorizeddealer.SHIFT SYS FAULT Reverse UnavailableService Required
See an authorized dealer.SHIFT SYS FAULT Drive Unavailable SelectS for Drive Service Required
See your authorized dealer.SHIFT SYS FAULT Neutral UnavailableService Required
Displays when an invalid gear has been selected.Invalid Gear Selection
147
Navigator (TB9) Canada/United States of America, enUSA, Edition date: 201808, First-Printing
Information Displays
Page 201 of 645
Disabling Auto-Start-Stop
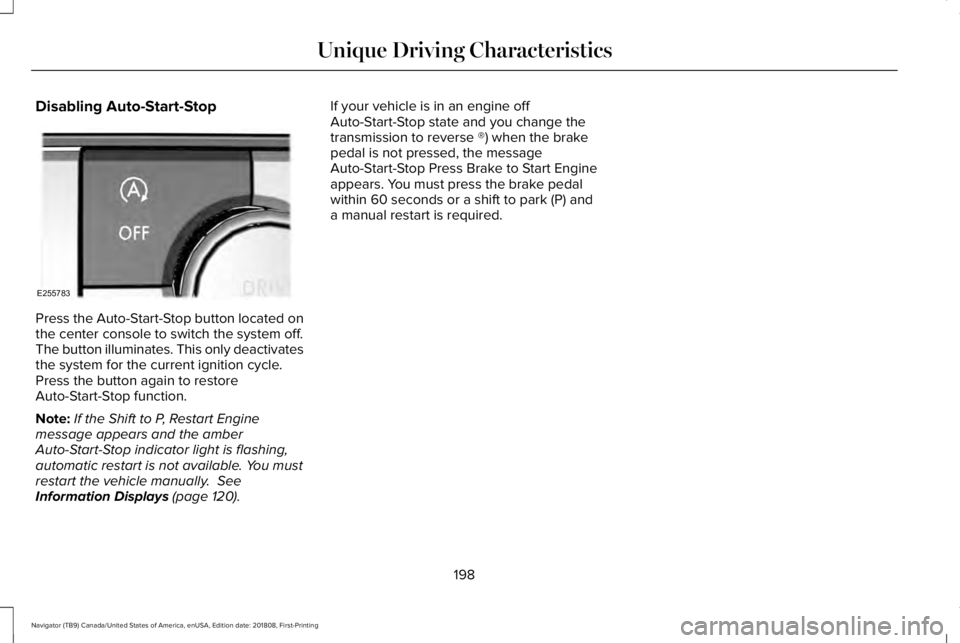
Press the Auto-Start-Stop button located onthe center console to switch the system off.The button illuminates. This only deactivatesthe system for the current ignition cycle.Press the button again to restoreAuto-Start-Stop function.
Note:If the Shift to P, Restart Enginemessage appears and the amberAuto-Start-Stop indicator light is flashing,automatic restart is not available. You mustrestart the vehicle manually. SeeInformation Displays (page 120).
If your vehicle is in an engine offAuto-Start-Stop state and you change thetransmission to reverse ®) when the brakepedal is not pressed, the messageAuto-Start-Stop Press Brake to Start Engineappears. You must press the brake pedalwithin 60 seconds or a shift to park (P) anda manual restart is required.
198
Navigator (TB9) Canada/United States of America, enUSA, Edition date: 201808, First-Printing
Unique Driving CharacteristicsE255783
Page 213 of 645
AUTOMATIC TRANSMISSION
WARNING: Always fully apply theparking brake and make sure you shift intopark (P). Failure to follow this instructioncould result in personal injury or death.
WARNING: Do not use tow/haulwhen the road surface is slippery. Failureto follow this instruction could result in theloss of control of your vehicle.
WARNING: When your vehicle isstationary, keep the brake pedal fullypressed when shifting gears. Failure tofollow this instruction could result inpersonal injury, death or property damage.
Note:You may not be able to shift out ofpark (P) unless the intelligent access key isinside your vehicle.
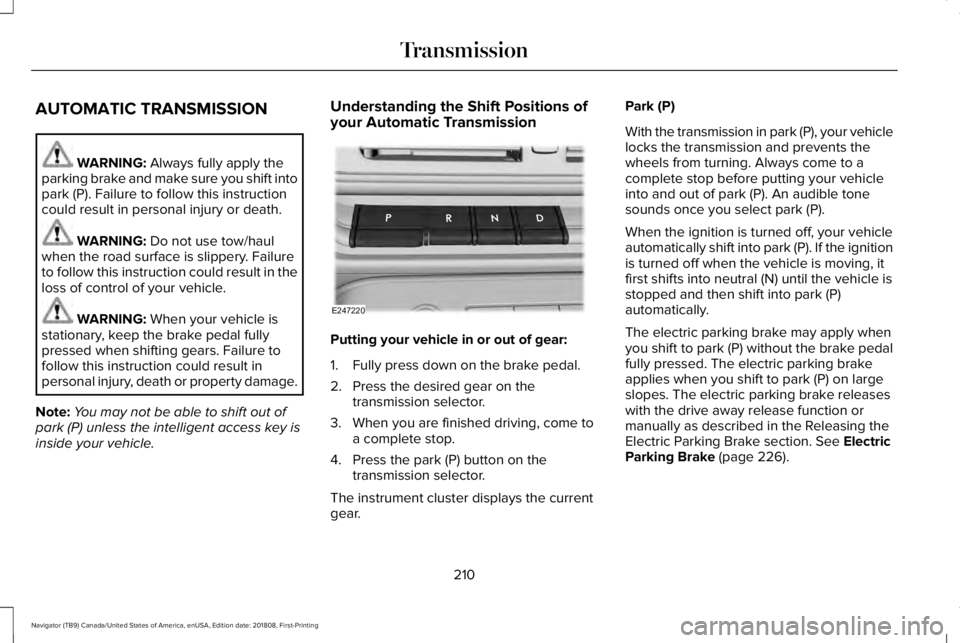
Understanding the Shift Positions ofyour Automatic Transmission
Putting your vehicle in or out of gear:
1. Fully press down on the brake pedal.
2. Press the desired gear on thetransmission selector.
3. When you are finished driving, come toa complete stop.
4. Press the park (P) button on thetransmission selector.
The instrument cluster displays the currentgear.
Park (P)
With the transmission in park (P), your vehiclelocks the transmission and prevents thewheels from turning. Always come to acomplete stop before putting your vehicleinto and out of park (P). An audible tonesounds once you select park (P).
When the ignition is turned off, your vehicleautomatically shift into park (P). If the ignitionis turned off when the vehicle is moving, itfirst shifts into neutral (N) until the vehicle isstopped and then shift into park (P)automatically.
The electric parking brake may apply whenyou shift to park (P) without the brake pedalfully pressed. The electric parking brakeapplies when you shift to park (P) on largeslopes. The electric parking brake releaseswith the drive away release function ormanually as described in the Releasing theElectric Parking Brake section. See ElectricParking Brake (page 226).
210
Navigator (TB9) Canada/United States of America, enUSA, Edition date: 201808, First-Printing
TransmissionE247220
Page 216 of 645
SelectShift™ Automatic Transmission
Your vehicle is equipped with a SelectShiftAutomatic transmission. The SelectShiftAutomatic transmission gives you the abilityto change gears up or down, without aclutch, as desired.
In order to prevent the engine from runningat too low of an RPM, which may cause it tostall, SelectShift still automatically makessome downshifts if it has determined thatyou have not downshifted in time. AlthoughSelectShift makes some downshifts for you,it still allows you to downshift at any time aslong as the SelectShift determines thatdamage to the engine does not occur fromover-revving.
Note:Engine damage may occur if youmaintain excessive engine revving withoutshifting.
SelectShift does not automatically upshift,even if the engine is approaching the RPMlimit. It must be shifted manually by pressingthe + paddle.
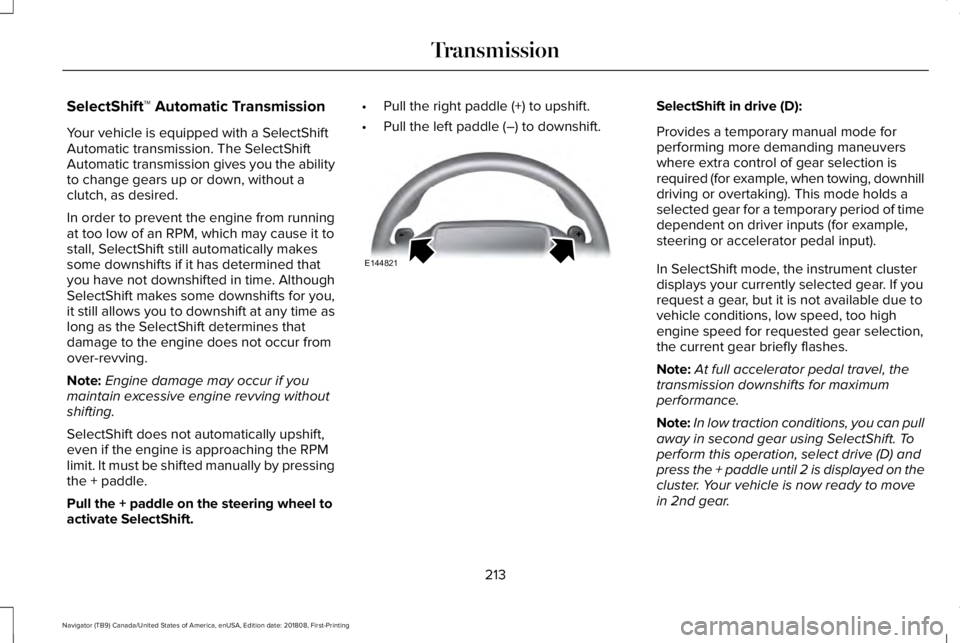
Pull the + paddle on the steering wheel toactivate SelectShift.
•Pull the right paddle (+) to upshift.
•Pull the left paddle (–) to downshift.
SelectShift in drive (D):
Provides a temporary manual mode forperforming more demanding maneuverswhere extra control of gear selection isrequired (for example, when towing, downhilldriving or overtaking). This mode holds aselected gear for a temporary period of timedependent on driver inputs (for example,steering or accelerator pedal input).
In SelectShift mode, the instrument clusterdisplays your currently selected gear. If yourequest a gear, but it is not available due tovehicle conditions, low speed, too highengine speed for requested gear selection,the current gear briefly flashes.
Note:At full accelerator pedal travel, thetransmission downshifts for maximumperformance.
Note:In low traction conditions, you can pullaway in second gear using SelectShift. Toperform this operation, select drive (D) andpress the + paddle until 2 is displayed on thecluster. Your vehicle is now ready to movein 2nd gear.
213
Navigator (TB9) Canada/United States of America, enUSA, Edition date: 201808, First-Printing
TransmissionE144821