ignition LINCOLN NAVIGATOR 2019 Owners Manual
[x] Cancel search | Manufacturer: LINCOLN, Model Year: 2019, Model line: NAVIGATOR, Model: LINCOLN NAVIGATOR 2019Pages: 645, PDF Size: 5.02 MB
Page 48 of 645
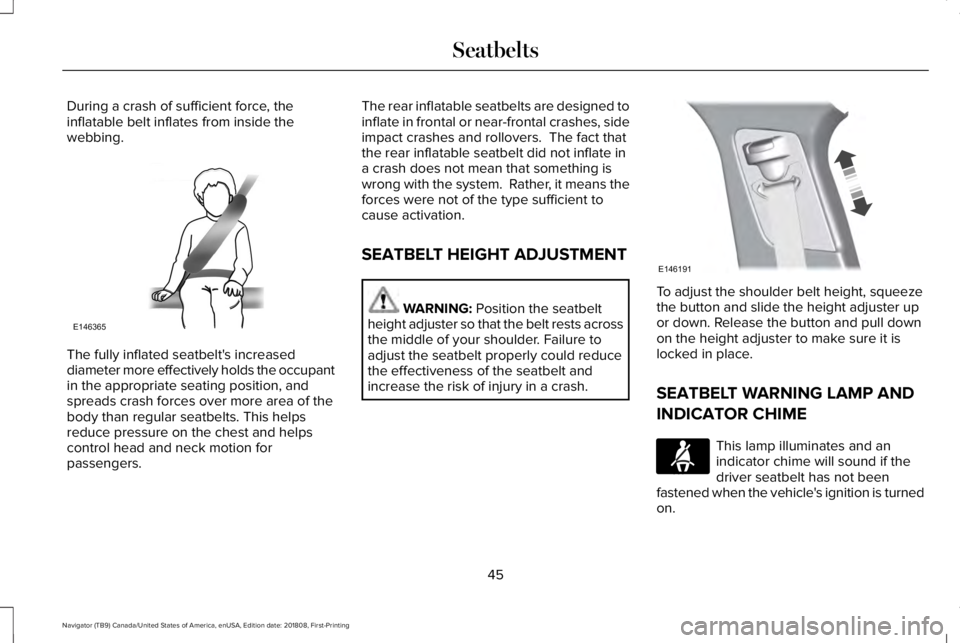
During a crash of sufficient force, theinflatable belt inflates from inside thewebbing.
The fully inflated seatbelt's increaseddiameter more effectively holds the occupantin the appropriate seating position, andspreads crash forces over more area of thebody than regular seatbelts. This helpsreduce pressure on the chest and helpscontrol head and neck motion forpassengers.
The rear inflatable seatbelts are designed toinflate in frontal or near-frontal crashes, sideimpact crashes and rollovers. The fact thatthe rear inflatable seatbelt did not inflate ina crash does not mean that something iswrong with the system. Rather, it means theforces were not of the type sufficient tocause activation.
SEATBELT HEIGHT ADJUSTMENT
WARNING: Position the seatbeltheight adjuster so that the belt rests acrossthe middle of your shoulder. Failure toadjust the seatbelt properly could reducethe effectiveness of the seatbelt andincrease the risk of injury in a crash.
To adjust the shoulder belt height, squeezethe button and slide the height adjuster upor down. Release the button and pull downon the height adjuster to make sure it islocked in place.
SEATBELT WARNING LAMP AND
INDICATOR CHIME
This lamp illuminates and anindicator chime will sound if thedriver seatbelt has not beenfastened when the vehicle's ignition is turnedon.
45
Navigator (TB9) Canada/United States of America, enUSA, Edition date: 201808, First-Printing
SeatbeltsE146365 E146191 E71880
Page 49 of 645
Conditions of operation
ThenIf
The seatbelt warning lamp illuminates and the indicator chime soundsfor a few seconds.The driver seatbelt is not buckled before the ignition switch is turnedto the on position...
The seatbelt warning lamp and indicator chime turn off.The driver seatbelt is buckled while the warning lamp is illuminatedand the indicator chime is sounding...
The seatbelt warning lamp and indicator chime remain off.The driver seatbelt is buckled before the ignition switch is turned tothe on position...
SEATBELT REMINDER
WARNING: The system will onlyprovide protection when you use theseatbelt correctly.
This system monitors all seating positionsand provides audio and graphic feedback.
This lamp illuminates and awarning tone sounds if you do notfasten your seatbelt when youswitch the ignition on. The lamp and toneswitch off when you fasten your seatbelt orabout one minute has elapsed.
When the initial warning expires for thedriver, more warnings are provided for thedriver and front outermost passenger. Thislamp illuminates and a warning tone soundsif you or your front passenger do not fastenthe seatbelt buckle and the vehicle speedexceeds 6 mph (9.7 km/h). To deactivate thewarning, see Deactivating and Activating theBelt-Minder Feature.
Note:To avoid inadvertent warnings, do notplace large objects on the seat.
This lamp illuminates when youswitch the ignition on, identifyingthe number of seating positionswith fastened buckles. It illuminates againwhen a seating position changes fromunfastened to fastened.
46
Navigator (TB9) Canada/United States of America, enUSA, Edition date: 201808, First-Printing
SeatbeltsE71880 E206718
Page 51 of 645
Make sure that:
•You set the parking brake.
•The transmission is in park (P).
•The ignition is off.
•You close all vehicle doors.
•You unbuckle the driver and frontpassenger seatbelts.
1. Switch the ignition on. Do not start theengine.
2.Wait until the seatbelt warning lamp turnsoff (about one minute). After Step 2, waitan additional five seconds beforeproceeding with Step 3. Once you startStep 3, you must complete the procedurewithin 60 seconds.
3.For the seating position you are switchingoff, buckle then unbuckle the seatbeltthree times at a moderate speed, endingin the unbuckled state. After Step 3, theseatbelt warning lamp turns on.
4. When the seatbelt warning lamp is on,buckle then unbuckle the seatbelt. AfterStep 4, the seatbelt warning lamp flashesfor confirmation.
•This switches the feature off if it iscurrently on.
•This switches the feature on if it iscurrently off.
CHILD RESTRAINT AND SEATBELT
MAINTENANCE
Inspect the vehicle seatbelts and child safetyseat systems periodically to make sure theywork properly and are not damaged. Inspectthe vehicle and child restraint seatbelts tomake sure there are no nicks, tears or cuts.Replace if necessary. All vehicle seatbeltassemblies, including retractors, buckles,front seatbelt buckle assemblies, bucklesupport assemblies (slide bar-if equipped),shoulder belt height adjusters (if equipped),shoulder belt guide on seat backrest (ifequipped), child safety seat LATCH andtether anchors, and attaching hardware,should be inspected after a crash. Read thechild restraint manufacturer's instructions foradditional inspection and maintenanceinformation specific to the child restraint.
We recommend that all seatbelt assembliesin use in vehicles involved in a crash bereplaced. However, if the crash was minorand an authorized dealer finds that the beltsdo not show damage and continue tooperate properly, they do not need to bereplaced. Seatbelt assemblies not in useduring a crash should also be inspected andreplaced if either damage or improperoperation is noted.
Properly care for seatbelts. See VehicleCare (page 378).
SEATBELT EXTENSION
WARNING: Persons who fit into thevehicle's seatbelt should not use anextension. Unnecessary use could resultin serious personal injury in the event of acrash.
48
Navigator (TB9) Canada/United States of America, enUSA, Edition date: 201808, First-Printing
Seatbelts
Page 57 of 645
FRONT PASSENGER SENSING
SYSTEM
WARNING: Even with advancedrestraints systems, properly restrainchildren 12 and under in a rear seatingposition. Failure to follow this couldseriously increase the risk of injury ordeath.
WARNING: Sitting improperly, out ofposition or with the seatback reclined toofar can take weight off the seat cushionand affect the decision of the passengersensing system, resulting in serious injuryor death in the event of a crash. Always situpright against your seat back, with yourfeet on the floor.
WARNING: Any alteration ormodification to the front passenger seatmay affect the performance of the frontpassenger sensing system. This couldseriously increase the risk of injury ordeath.
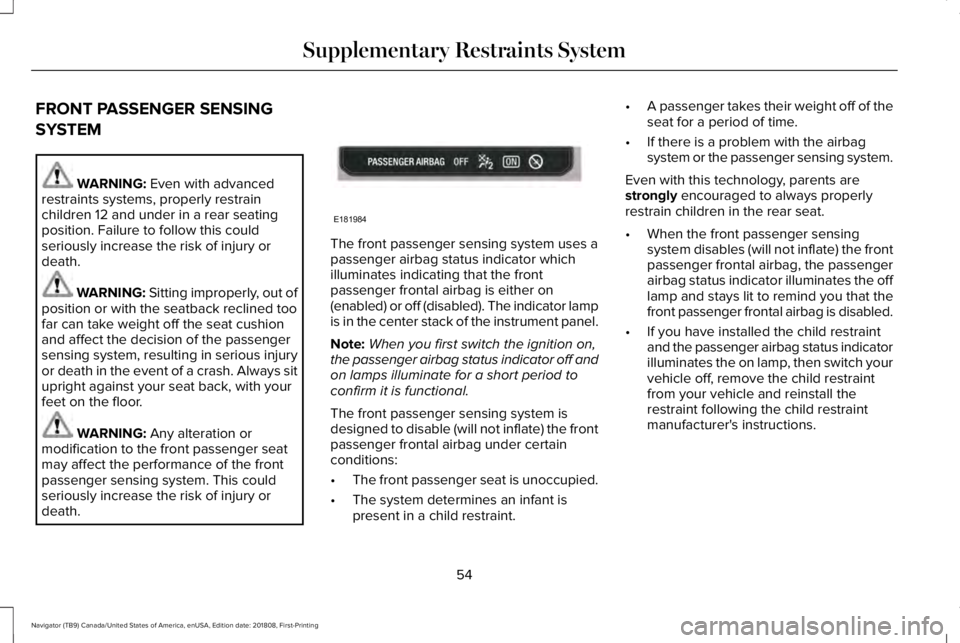
The front passenger sensing system uses apassenger airbag status indicator whichilluminates indicating that the frontpassenger frontal airbag is either on(enabled) or off (disabled). The indicator lampis in the center stack of the instrument panel.
Note:When you first switch the ignition on,the passenger airbag status indicator off andon lamps illuminate for a short period toconfirm it is functional.
The front passenger sensing system isdesigned to disable (will not inflate) the frontpassenger frontal airbag under certainconditions:
•The front passenger seat is unoccupied.
•The system determines an infant ispresent in a child restraint.
•A passenger takes their weight off of theseat for a period of time.
•If there is a problem with the airbagsystem or the passenger sensing system.
Even with this technology, parents arestrongly encouraged to always properlyrestrain children in the rear seat.
•When the front passenger sensingsystem disables (will not inflate) the frontpassenger frontal airbag, the passengerairbag status indicator illuminates the offlamp and stays lit to remind you that thefront passenger frontal airbag is disabled.
•If you have installed the child restraintand the passenger airbag status indicatorilluminates the on lamp, then switch yourvehicle off, remove the child restraintfrom your vehicle and reinstall therestraint following the child restraintmanufacturer's instructions.
54
Navigator (TB9) Canada/United States of America, enUSA, Edition date: 201808, First-Printing
Supplementary Restraints SystemE181984
Page 62 of 645
The design and development of the SafetyCanopy included recommended testingprocedures that were developed by a groupof automotive safety experts known as theSide Airbag Technical Working Group. Theserecommended testing procedures helpreduce the risk of injuries related to thedeployment of side airbags (including theSafety Canopy).
CRASH SENSORS AND AIRBAG
INDICATOR
WARNING: Modifying or addingequipment to the front end of your vehicle(including hood, bumper system, frame,front end body structure, tow hooks andhood pins) may affect the performance ofthe airbag system, increasing the risk ofinjury. Do not modify or add equipment tothe front end of your vehicle.
Your vehicle has a collection of crash andoccupant sensors which provide informationto the restraints control module whichdeploys (activates) the front seatbeltpretensioners, driver airbag, passengerairbag, rear inflatable belts, seat mountedside airbags, and the Safety Canopy. Basedon the type of crash, the restraints controlmodule will deploy the appropriate safetydevices.
The restraints control module also monitorsthe readiness of the above safety devicesplus the crash and occupant sensors. Thereadiness of the safety system is indicatedby a warning indicator light in the instrumentcluster or by a backup tone if the warninglight is not working. See Instrument Cluster(page 113). Routine maintenance of theairbag is not required.
A difficulty with the system is indicated byone or more of the following:
The readiness light will notilluminate immediately after youswitch the ignition on.
•The readiness light either flashes or stayslit.
•A series of five beeps will be heard. Thetone pattern will repeat periodically untilthe problem, the light or both arerepaired.
If any of these things happen, evenintermittently, have the supplementalrestraint system serviced at an authorizeddealer immediately. Unless serviced, thesystem may not function properly in theevent of a crash.
59
Navigator (TB9) Canada/United States of America, enUSA, Edition date: 201808, First-Printing
Supplementary Restraints SystemE67017
Page 67 of 645
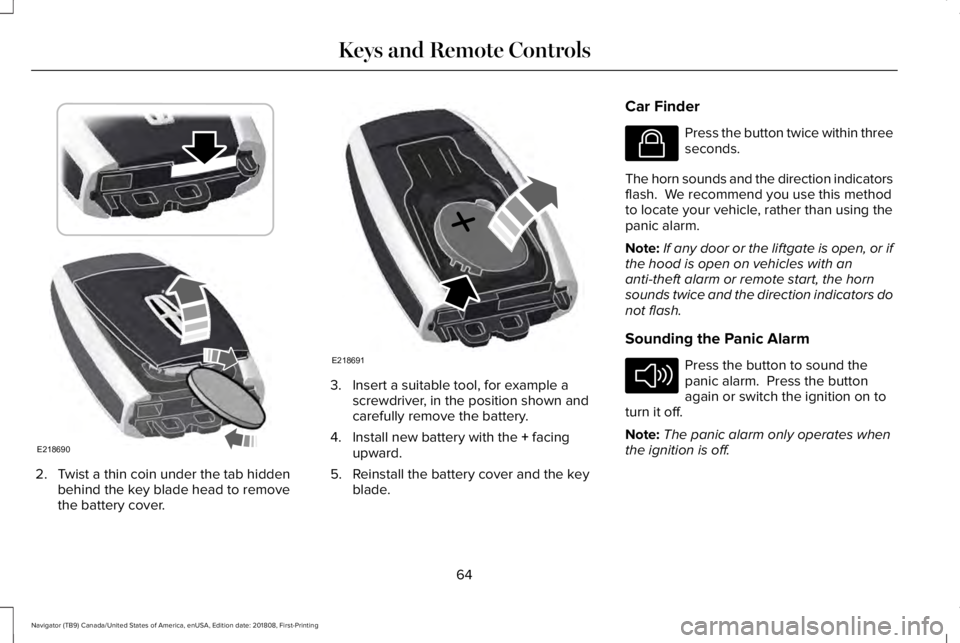
2. Twist a thin coin under the tab hiddenbehind the key blade head to removethe battery cover.
3. Insert a suitable tool, for example ascrewdriver, in the position shown andcarefully remove the battery.
4. Install new battery with the + facingupward.
5. Reinstall the battery cover and the keyblade.
Car Finder
Press the button twice within threeseconds.
The horn sounds and the direction indicatorsflash. We recommend you use this methodto locate your vehicle, rather than using thepanic alarm.
Note:If any door or the liftgate is open, or ifthe hood is open on vehicles with ananti-theft alarm or remote start, the hornsounds twice and the direction indicators donot flash.
Sounding the Panic Alarm
Press the button to sound thepanic alarm. Press the buttonagain or switch the ignition on toturn it off.
Note:The panic alarm only operates whenthe ignition is off.
64
Navigator (TB9) Canada/United States of America, enUSA, Edition date: 201808, First-Printing
Keys and Remote ControlsE218690 E218691 E138623 E138624
Page 68 of 645
Remote Start
WARNING: To avoid exhaust fumes,do not use remote start if your vehicle isparked indoors or in areas that are not wellventilated.
Note:Do not use remote start if your fuellevel is low.
The remote start button is on thetransmitter.
This feature allows you to start your vehiclefrom outside the vehicle. The transmitter hasan extended operating range.
Vehicles with automatic climate control canbe configured to operate when the vehicleis remote started. See Automatic ClimateControl (page 152).
Many states and provinces have restrictionsfor the use of remote start. Check your localand state or provincial laws for specificrequirements regarding remote startsystems.
The system does not work if:
•The ignition is on.
•The anti-theft alarm triggers.
•You switch off the feature in theinformation display. See GeneralInformation (page 120).
•The hood is open.
•The transmission is not in park (P).
•The battery voltage is below theminimum operating voltage.
Remote Starting your Vehicle
Note: You must press each button withinthree seconds of each other. If you do notfollow this sequence, your vehicle does notstart remotely, the direction indicators donot flash twice and the horn does not sound.
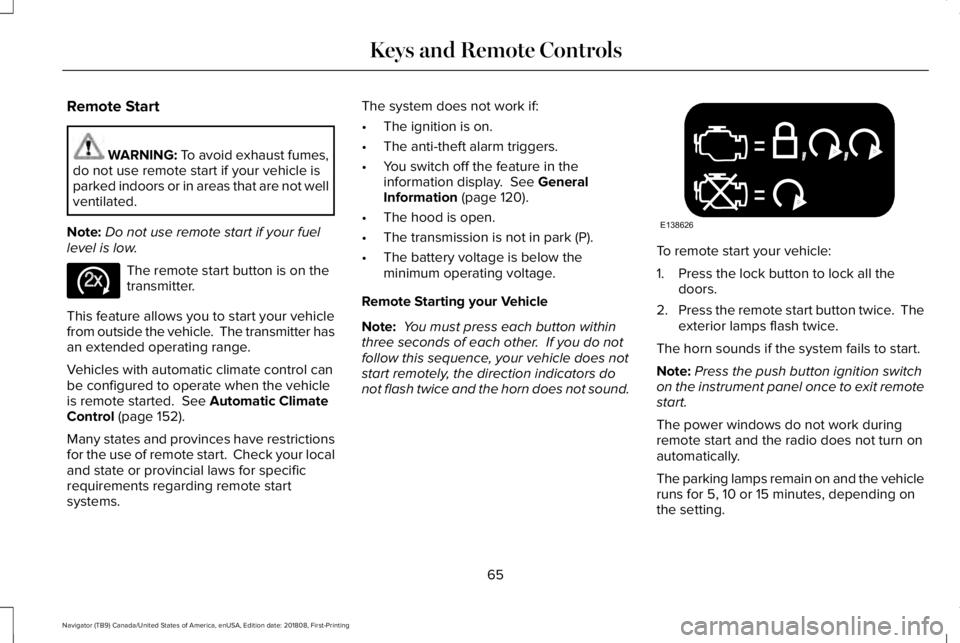
To remote start your vehicle:
1. Press the lock button to lock all thedoors.
2.Press the remote start button twice. Theexterior lamps flash twice.
The horn sounds if the system fails to start.
Note:Press the push button ignition switchon the instrument panel once to exit remotestart.
The power windows do not work duringremote start and the radio does not turn onautomatically.
The parking lamps remain on and the vehicleruns for 5, 10 or 15 minutes, depending onthe setting.
65
Navigator (TB9) Canada/United States of America, enUSA, Edition date: 201808, First-Printing
Keys and Remote ControlsE138625 E138626
Page 71 of 645
Note:Not every feature applies to everyvehicle in every market. When they areavailable for your vehicle, then they appearin your information display, providing choicesto switch them on or off, or to select a morespecific setting.
•Various vehicle speed limits so theMyKey driver cannot exceed certainspeeds. The information display showswarnings followed by an audible tonewhen the MyKey driver reaches the setspeed. You cannot override the setspeed by fully depressing the acceleratorpedal.
WARNING: Do not set MyKeymaximum speed limit to a limit that willprevent the driver from maintaining a safespeed considering posted speed limits andprevailing road conditions. The driver isalways responsible to drive in accordancewith local laws and prevailing conditions.Failure to do so could result in accident orinjury.
•Various vehicle speed reminders soMyKey drivers know when their vehiclespeed approaches the limits. Warningsappear in your information display and atone sounds when the MyKey driversexceed the set vehicle speed.
•The audio system's maximum volumelimits to 45% so MyKey drivers canconcentrate on the road. A messageappears in the information display whenMyKey drivers attempt to exceed thelimited volume. MyKey also disables theautomatic volume control. Note: If yourvehicle includes an AM/FM radio or avery basic audio system, then the radiomay not limit.
•Always on setting. This setting forcescertain features to remain on and activefor MyKey drivers. For example, E911 oremergency assistance and the do notdisturb features stay on even if a MyKeydriver uses the feature's control to switchit off. When you select, you will not beable to turn off Advance Trac or tractioncontrol (if your vehicle has this feature).
CREATING A MYKEY
Use the information display to create aMyKey:
1. Insert the key you want to program intothe ignition. See Starting a GasolineEngine (page 192). If your vehicle isequipped with a push-button start, placethe remote control into the backup slot.See Passive Anti-Theft System (page83).
2. Switch the ignition on.
3.Access the main menu in the informationdisplay and then scroll through themenus to change the settings of yourMyKey. From the MyKey menu select theoption Create MyKey. See InformationDisplays (page 120).
4.When prompted, hold the OK button untilyou see a message informing you to labelthis key as a MyKey. The programmedrestrictions apply when you key off, openand close the driver door and restart yourvehicle with the programmed key ortransmitter.
68
Navigator (TB9) Canada/United States of America, enUSA, Edition date: 201808, First-Printing
MyKey™
Page 72 of 645
MyKey is successfully created. Make sureyou label it so you can distinguish it from theadmin keys.
You can also program configurable settingsfor the key(s). See Programming andChanging Configurable Settings.
Programming and ChangingConfigurable Settings
Use the information display to access yourconfigurable MyKey settings.
1.Switch the ignition on using an admin keyor transmitter you want to program.
2.Access the main menu in the informationdisplay and then scroll through themenus to change the settings of yourMyKey. See Information Displays (page120).
3. Follow the instructions in the display.
Note:You can clear or change your MyKeysettings at any time during the same keycycle as you created the MyKey. Once youhave switched the vehicle off, however, youwill need an admin key to change or clearyour MyKey settings.
CLEARING ALL MYKEYS
When you clear your MyKeys, you removeall restrictions and return all MyKeys to theiroriginal admin key status at once. To clearall MyKeys of all MyKey settings, use theinformation display.
1. Switch the ignition on using an adminkey.
2.Access the main menu in the informationdisplay and then scroll through themenus to begin clearing your MyKeyprogramming. See Information Displays(page 120).
3. Follow the instructions in the display.
4. A confirmation message appears in thedisplay after you finish clearing yourMyKeys.
Note:When you clear your MyKeys, youremove all restrictions and return all MyKeysto their original admin key status. You cannotremove the MyKey restrictions individually.
CHECKING MYKEY SYSTEM
STATUS
You can find information about yourprogrammed MyKeys by using theinformation display. See InformationDisplays (page 120).
MyKey Distance
Tracks the distance when drivers use aMyKey. The only way to delete theaccumulated distance is by using an adminkey to clear all MyKeys. If the distance doesnot accumulate as expected, then theintended user is not using the MyKey, or anadmin key user recently cleared and thenrecreated a MyKey.
Number of MyKeys
Indicates the number of MyKeysprogrammed to your vehicle. Use this featureto detect how many MyKeys you have foryour vehicle and determine when all MyKeyshave been deleted.
69
Navigator (TB9) Canada/United States of America, enUSA, Edition date: 201808, First-Printing
MyKey™
Page 75 of 645
LOCKING AND UNLOCKING
You can use the power door lock control orthe remote control to lock and unlock yourvehicle.
Power Door Locks
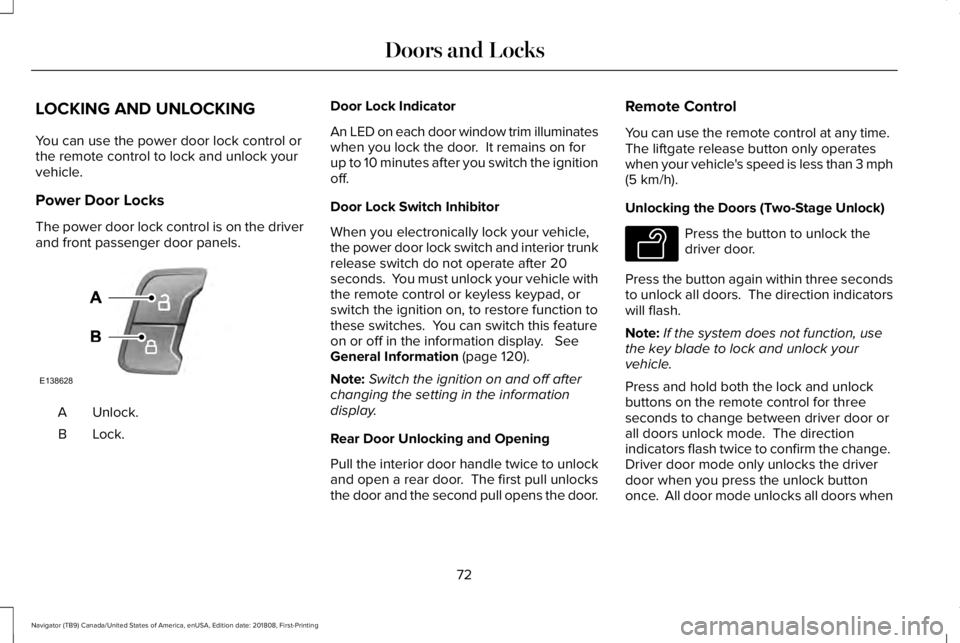
The power door lock control is on the driverand front passenger door panels.
Unlock.A
Lock.B
Door Lock Indicator
An LED on each door window trim illuminateswhen you lock the door. It remains on forup to 10 minutes after you switch the ignitionoff.
Door Lock Switch Inhibitor
When you electronically lock your vehicle,the power door lock switch and interior trunkrelease switch do not operate after 20seconds. You must unlock your vehicle withthe remote control or keyless keypad, orswitch the ignition on, to restore function tothese switches. You can switch this featureon or off in the information display. SeeGeneral Information (page 120).
Note:Switch the ignition on and off afterchanging the setting in the informationdisplay.
Rear Door Unlocking and Opening
Pull the interior door handle twice to unlockand open a rear door. The first pull unlocksthe door and the second pull opens the door.
Remote Control
You can use the remote control at any time. The liftgate release button only operateswhen your vehicle's speed is less than 3 mph(5 km/h).
Unlocking the Doors (Two-Stage Unlock)
Press the button to unlock thedriver door.
Press the button again within three secondsto unlock all doors. The direction indicatorswill flash.
Note:If the system does not function, usethe key blade to lock and unlock yourvehicle.
Press and hold both the lock and unlockbuttons on the remote control for threeseconds to change between driver door orall doors unlock mode. The directionindicators flash twice to confirm the change. Driver door mode only unlocks the driverdoor when you press the unlock buttononce. All door mode unlocks all doors when
72
Navigator (TB9) Canada/United States of America, enUSA, Edition date: 201808, First-Printing
Doors and LocksE138628 E138629