light LINCOLN NAVIGATOR 2020 Owners Manual
[x] Cancel search | Manufacturer: LINCOLN, Model Year: 2020, Model line: NAVIGATOR, Model: LINCOLN NAVIGATOR 2020Pages: 622, PDF Size: 6.47 MB
Page 412 of 622
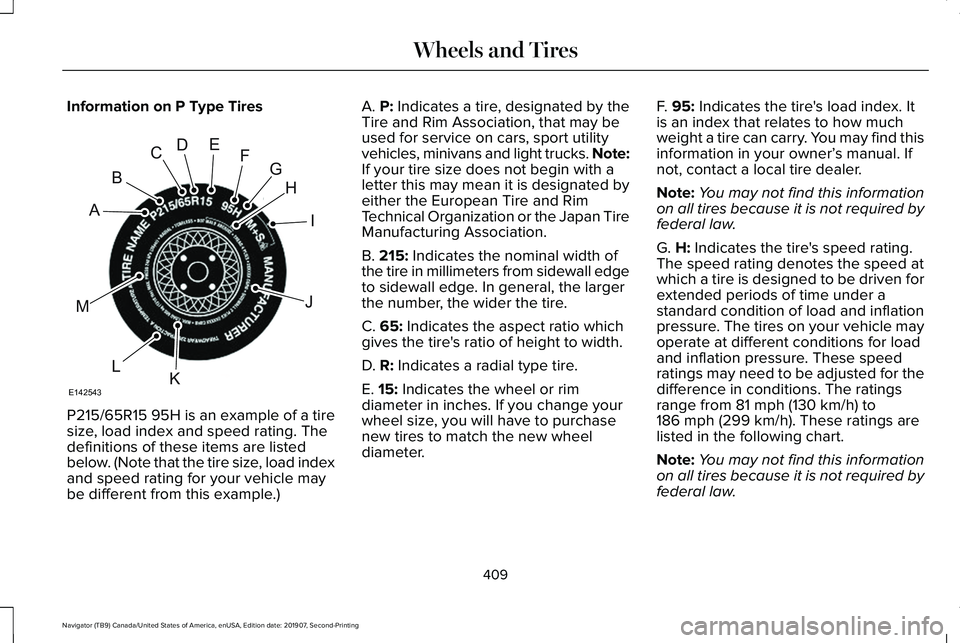
Information on P Type Tires
P215/65R15 95H is an example of a tire
size, load index and speed rating. The
definitions of these items are listed
below. (Note that the tire size, load index
and speed rating for your vehicle may
be different from this example.) A. P: Indicates a tire, designated by the
Tire and Rim Association, that may be
used for service on cars, sport utility
vehicles, minivans and light trucks.
Note:
If your tire size does not begin with a
letter this may mean it is designated by
either the European Tire and Rim
Technical Organization or the Japan Tire
Manufacturing Association.
B.
215: Indicates the nominal width of
the tire in millimeters from sidewall edge
to sidewall edge. In general, the larger
the number, the wider the tire.
C.
65: Indicates the aspect ratio which
gives the tire's ratio of height to width.
D.
R: Indicates a radial type tire.
E.
15: Indicates the wheel or rim
diameter in inches. If you change your
wheel size, you will have to purchase
new tires to match the new wheel
diameter. F.
95: Indicates the tire's load index. It
is an index that relates to how much
weight a tire can carry. You may find this
information in your owner’ s manual. If
not, contact a local tire dealer.
Note: You may not find this information
on all tires because it is not required by
federal law.
G.
H: Indicates the tire's speed rating.
The speed rating denotes the speed at
which a tire is designed to be driven for
extended periods of time under a
standard condition of load and inflation
pressure. The tires on your vehicle may
operate at different conditions for load
and inflation pressure. These speed
ratings may need to be adjusted for the
difference in conditions. The ratings
range from
81 mph (130 km/h) to
186 mph (299 km/h). These ratings are
listed in the following chart.
Note: You may not find this information
on all tires because it is not required by
federal law.
409
Navigator (TB9) Canada/United States of America, enUSA, Edition date: 201907, Second-Printing Wheels and TiresH
I
J
KL
M
A
B
CDEFG
E142543
Page 415 of 622
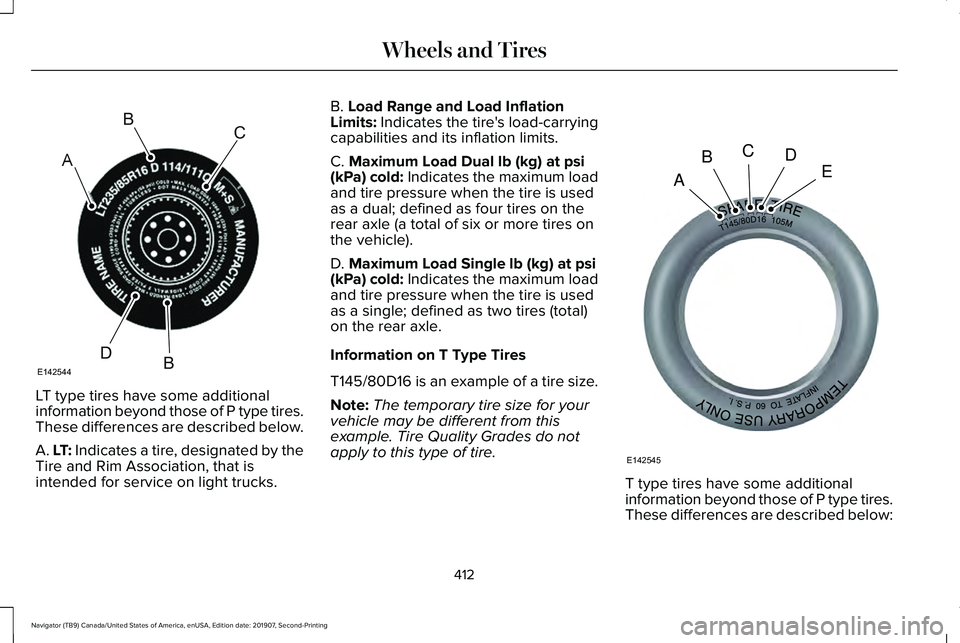
LT type tires have some additional
information beyond those of P type tires.
These differences are described below.
A. LT: Indicates a tire, designated by the
Tire and Rim Association, that is
intended for service on light trucks. B. Load Range and Load Inflation
Limits: Indicates the tire's load-carrying
capabilities and its inflation limits.
C.
Maximum Load Dual lb (kg) at psi
(kPa) cold: Indicates the maximum load
and tire pressure when the tire is used
as a dual; defined as four tires on the
rear axle (a total of six or more tires on
the vehicle).
D.
Maximum Load Single lb (kg) at psi
(kPa) cold: Indicates the maximum load
and tire pressure when the tire is used
as a single; defined as two tires (total)
on the rear axle.
Information on T Type Tires
T145/80D16 is an example of a tire size.
Note: The temporary tire size for your
vehicle may be different from this
example. Tire Quality Grades do not
apply to this type of tire. T type tires have some additional
information beyond those of P type tires.
These differences are described below:
412
Navigator (TB9) Canada/United States of America, enUSA, Edition date: 201907, Second-Printing Wheels and TiresA
BC
BDE142544 A
BCDE
E142545
Page 416 of 622
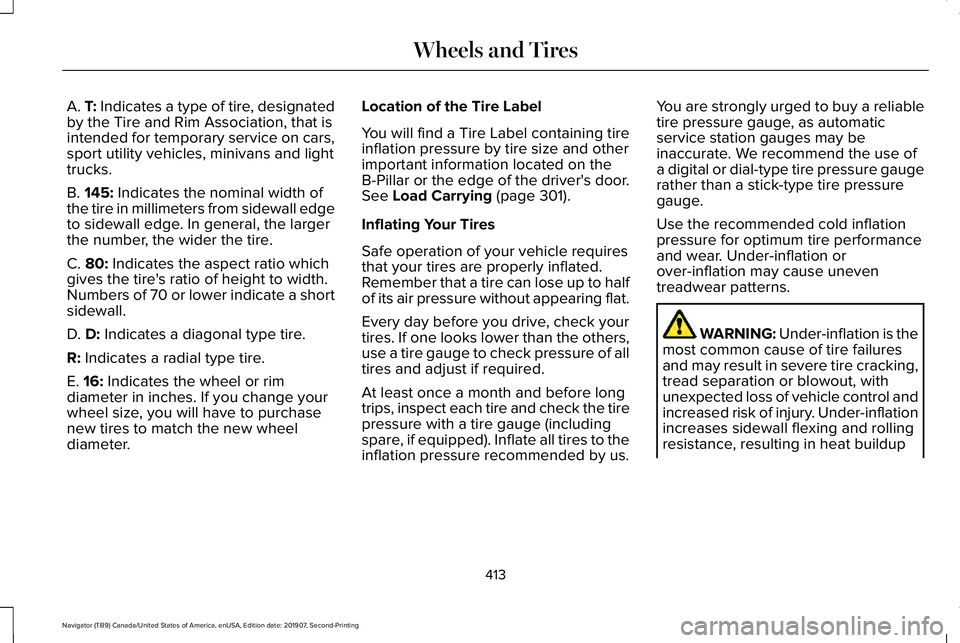
A. T: Indicates a type of tire, designated
by the Tire and Rim Association, that is
intended for temporary service on cars,
sport utility vehicles, minivans and light
trucks.
B.
145: Indicates the nominal width of
the tire in millimeters from sidewall edge
to sidewall edge. In general, the larger
the number, the wider the tire.
C.
80: Indicates the aspect ratio which
gives the tire's ratio of height to width.
Numbers of 70 or lower indicate a short
sidewall.
D.
D: Indicates a diagonal type tire.
R:
Indicates a radial type tire.
E.
16: Indicates the wheel or rim
diameter in inches. If you change your
wheel size, you will have to purchase
new tires to match the new wheel
diameter. Location of the Tire Label
You will find a Tire Label containing tire
inflation pressure by tire size and other
important information located on the
B-Pillar or the edge of the driver's door.
See
Load Carrying (page 301).
Inflating Your Tires
Safe operation of your vehicle requires
that your tires are properly inflated.
Remember that a tire can lose up to half
of its air pressure without appearing flat.
Every day before you drive, check your
tires. If one looks lower than the others,
use a tire gauge to check pressure of all
tires and adjust if required.
At least once a month and before long
trips, inspect each tire and check the tire
pressure with a tire gauge (including
spare, if equipped). Inflate all tires to the
inflation pressure recommended by us. You are strongly urged to buy a reliable
tire pressure gauge, as automatic
service station gauges may be
inaccurate. We recommend the use of
a digital or dial-type tire pressure gauge
rather than a stick-type tire pressure
gauge.
Use the recommended cold inflation
pressure for optimum tire performance
and wear. Under-inflation or
over-inflation may cause uneven
treadwear patterns.
WARNING: Under-inflation is the
most common cause of tire failures
and may result in severe tire cracking,
tread separation or blowout, with
unexpected loss of vehicle control and
increased risk of injury. Under-inflation
increases sidewall flexing and rolling
resistance, resulting in heat buildup
413
Navigator (TB9) Canada/United States of America, enUSA, Edition date: 201907, Second-Printing Wheels and Tires
Page 417 of 622
and internal damage to the tire. It also
may result in unnecessary tire stress,
irregular wear, loss of vehicle control
and accidents. A tire can lose up to
half of its air pressure and not appear
to be flat!
Always inflate your tires to the our
recommended inflation pressure even
if it is less than the maximum inflation
pressure information found on the tire.
Our recommended tire inflation pressure
is found on the Safety Compliance
Certification Label or Tire Label (affixed
to either the door hinge pillar, door-latch
post, or the door edge that meets the
door-latch post, next to the driver's
seating position), or Tire Label located
on the B-pillar or the edge of the driver's
door. Failure to follow the tire pressure
recommendations can cause uneven
treadwear patterns and adversely affect
the way your vehicle handles. Note:
Do not reduce tire pressure to
change the ride characteristics of the
vehicle. If you do not maintain the
inflation pressure at the levels specified
by us, your vehicle may experience a
condition known as shimmy. Shimmy is
a severe vibration and oscillation in the
steering wheel after the vehicle travels
over a bump or dip in the road that does
not dampen out by itself. Shimmy may
result from significant under-inflation of
the tires, improper tires (load range, size,
or type), or vehicle modifications such
as lift-kits. In the event that your vehicle
experiences shimmy, you should slowly
reduce speed by either lifting off the
accelerator pedal or lightly applying the
brakes. The shimmy will cease as the
vehicle speed decreases.
Maximum Inflation Pressure is the tire
manufacturer's maximum permissible
pressure and the pressure at which the
maximum load can be carried by the tire.
This pressure is normally higher than the
manufacturer’ s recommended cold
inflation pressure which can be found
on the Safety Compliance Certification Label (affixed to either the door hinge
pillar, door-latch post, or the door edge
that meets the door-latch post, next to
the driver's seating position), or Tire
Label located on the B-pillar or the edge
of the driver's door. The cold inflation
pressure should never be set lower than
the recommended pressure on the
Safety Compliance Certification Label
or Tire Label.
When weather temperature changes
occur, tire inflation pressures also
change. A 10°F (6°C) temperature drop
can cause a corresponding drop of 1 psi
(7 kPa) in inflation pressure. Check your
tire pressures frequently and adjust
them to the proper pressure which can
be found on the Safety Compliance
Certification Label or Tire Label.
To check the pressure in your tire(s):
1. Make sure the tires are cool, meaning
they are not hot from driving even a
mile.
414
Navigator (TB9) Canada/United States of America, enUSA, Edition date: 201907, Second-Printing Wheels and Tires
Page 426 of 622
Changing Tires With a Tire Pressure
Monitoring System
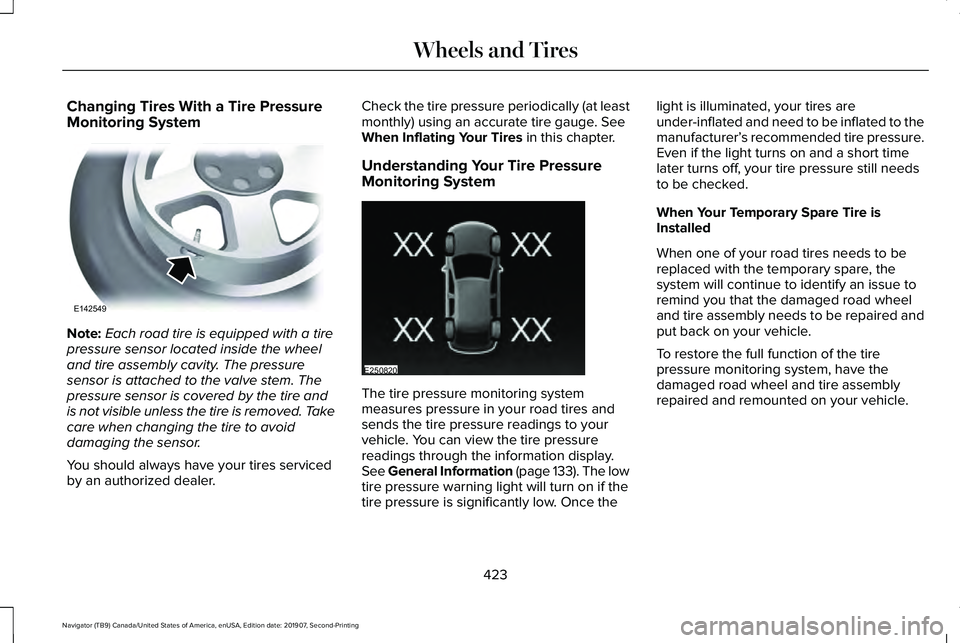
Note:
Each road tire is equipped with a tire
pressure sensor located inside the wheel
and tire assembly cavity. The pressure
sensor is attached to the valve stem. The
pressure sensor is covered by the tire and
is not visible unless the tire is removed. Take
care when changing the tire to avoid
damaging the sensor.
You should always have your tires serviced
by an authorized dealer. Check the tire pressure periodically (at least
monthly) using an accurate tire gauge. See
When Inflating Your Tires in this chapter.
Understanding Your Tire Pressure
Monitoring System The tire pressure monitoring system
measures pressure in your road tires and
sends the tire pressure readings to your
vehicle. You can view the tire pressure
readings through the information display.
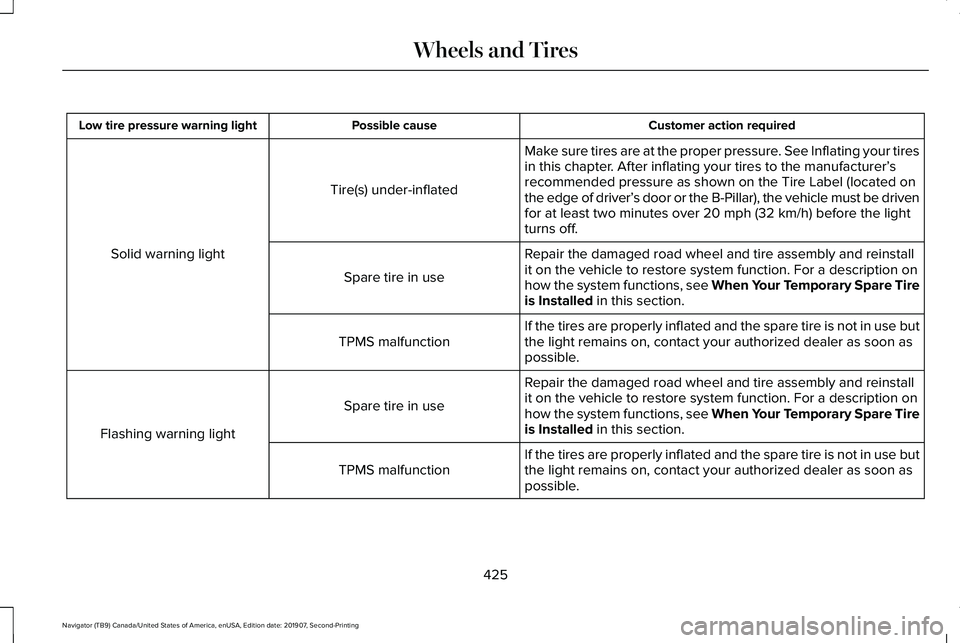
See General Information (page 133
). The low
tire pressure warning light will turn on if the
tire pressure is significantly low. Once the light is illuminated, your tires are
under-inflated and need to be inflated to the
manufacturer’
s recommended tire pressure.
Even if the light turns on and a short time
later turns off, your tire pressure still needs
to be checked.
When Your Temporary Spare Tire is
Installed
When one of your road tires needs to be
replaced with the temporary spare, the
system will continue to identify an issue to
remind you that the damaged road wheel
and tire assembly needs to be repaired and
put back on your vehicle.
To restore the full function of the tire
pressure monitoring system, have the
damaged road wheel and tire assembly
repaired and remounted on your vehicle.
423
Navigator (TB9) Canada/United States of America, enUSA, Edition date: 201907, Second-Printing Wheels and TiresE142549 E250820
Page 428 of 622
Customer action required
Possible cause
Low tire pressure warning light
Make sure tires are at the proper pressure. See Inflating your tires
in this chapter. After inflating your tires to the manufacturer’s
recommended pressure as shown on the Tire Label (located on
the edge of driver’ s door or the B-Pillar), the vehicle must be driven
for at least two minutes over 20 mph (32 km/h) before the light
turns off.
Tire(s) under-inflated
Solid warning light Repair the damaged road wheel and tire assembly and reinstall
it on the vehicle to restore system function. For a description on
how the system functions, see When Your Temporary Spare Tire
is Installed
in this section.
Spare tire in use
If the tires are properly inflated and the spare tire is not in use but
the light remains on, contact your authorized dealer as soon as
possible.
TPMS malfunction
Repair the damaged road wheel and tire assembly and reinstall
it on the vehicle to restore system function. For a description on
how the system functions, see When Your Temporary Spare Tire
is Installed
in this section.
Spare tire in use
Flashing warning light If the tires are properly inflated and the spare tire is not in use but
the light remains on, contact your authorized dealer as soon as
possible.
TPMS malfunction
425
Navigator (TB9) Canada/United States of America, enUSA, Edition date: 201907, Second-Printing Wheels and Tires
Page 429 of 622
When Inflating Your Tires
WARNING: Do not use the tire
pressure displayed in the information
display as a tire pressure gauge. Failure to
follow this instruction could result in
personal injury or death.
When putting air into your tires (such as at a
gas station or in your garage), the tire
pressure monitoring system will not respond
immediately to the air added to your tires.
It could take up to two minutes of driving
over
20 mph (32 km/h) for the light to turn
off after you have filled your tires to the
recommended inflation pressure.
How Temperature Affects Your Tire
Pressure
The tire pressure monitoring system monitors
tire pressure in each pneumatic tire. While
driving in a normal manner, a typical
passenger tire inflation pressure could
increase about
2–4 psi (14–28 kPa) from a
cold start situation. If the vehicle is stationary
overnight with the outside temperature significantly lower than the daytime
temperature, the tire pressure could
decrease about
3 psi (21 kPa) for a drop of
30°F (17°C) in ambient temperature. This
lower pressure value could be detected by
the tire pressure monitoring system as being
significantly lower than the recommended
inflation pressure and activate the system
warning light for low tire pressure. If the low
tire pressure warning light is on, visually
check each tire to verify that no tire is flat. If
one or more tires are flat, repair as
necessary. Check the air pressure in the road
tires. If any tire is under-inflated, carefully
drive the vehicle to the nearest location
where air can be added to the tires. Inflate
all the tires to the recommended inflation
pressure.
CHANGING A ROAD WHEEL WARNING:
If the tire pressure
monitor sensor becomes damaged it may
not function. Note:
You should only use tire sealants in
roadside emergencies as they may cause
damage to the tire pressure monitoring
system sensor.
Note: The tire pressure monitoring system
indicator light illuminates when the spare
tire is in use. To restore the full function of
the monitoring system, all road wheels
equipped with tire pressure monitoring
sensors must be mounted on this vehicle.
If you get a flat tire when driving, do not
apply the brake heavily. Instead, gradually
decrease your speed. Hold the steering
wheel firmly and slowly move to a safe place
on the side of the road.
Have a flat serviced by an authorized dealer
in order to prevent damage to the system
sensors.
See Tire Pressure Monitoring
System (page 421). Replace the spare tire
with a road tire as soon as possible. During
repairing or replacing of the flat tire, have
the authorized dealer inspect the system
sensor for damage.
426
Navigator (TB9) Canada/United States of America, enUSA, Edition date: 201907, Second-Printing Wheels and Tires
Page 432 of 622
WARNING: Switch off the running
boards before jacking or placing any object
under your vehicle. Never place your hand
between the extended running board and
your vehicle. A moving running board may
cause injury. WARNING: Only use the spare wheel
carrier to stow the wheel provided with
your vehicle. Other wheel sizes could
cause the spare wheel carrier to fail if it
does not fit securely or is too heavy. 1.
Park the vehicle on firm, level ground and
activate the hazard flashers. 2. Apply the parking brake, place the
transmission in park (P) and switch the
ignition off.
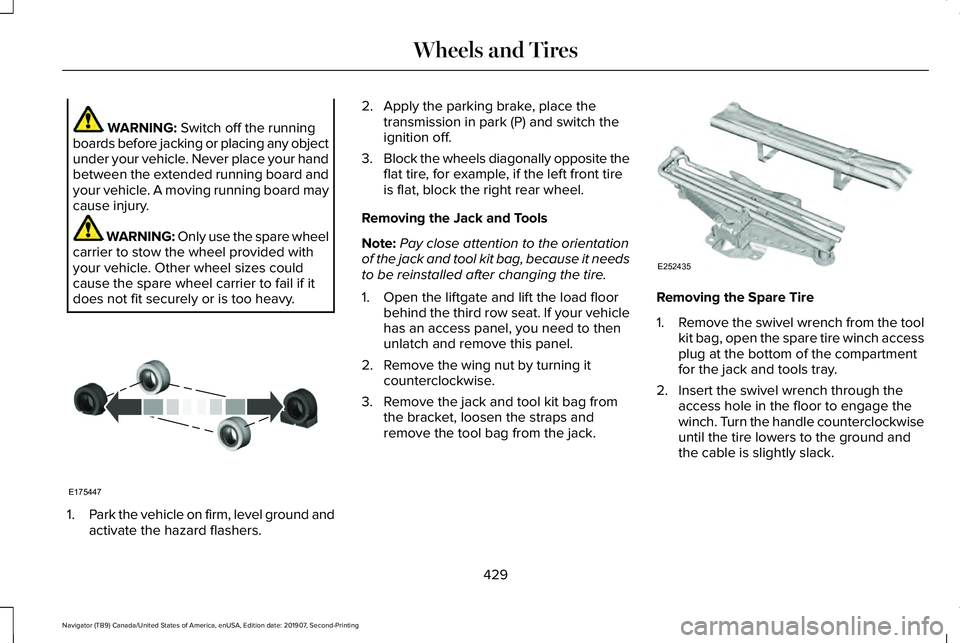
3. Block the wheels diagonally opposite the
flat tire, for example, if the left front tire
is flat, block the right rear wheel.
Removing the Jack and Tools
Note: Pay close attention to the orientation
of the jack and tool kit bag, because it needs
to be reinstalled after changing the tire.
1. Open the liftgate and lift the load floor behind the third row seat. If your vehicle
has an access panel, you need to then
unlatch and remove this panel.
2. Remove the wing nut by turning it counterclockwise.
3. Remove the jack and tool kit bag from the bracket, loosen the straps and
remove the tool bag from the jack. Removing the Spare Tire
1.
Remove the swivel wrench from the tool
kit bag, open the spare tire winch access
plug at the bottom of the compartment
for the jack and tools tray.
2. Insert the swivel wrench through the access hole in the floor to engage the
winch. Turn the handle counterclockwise
until the tire lowers to the ground and
the cable is slightly slack.
429
Navigator (TB9) Canada/United States of America, enUSA, Edition date: 201907, Second-Printing Wheels and TiresE175447 E252435
Page 453 of 622
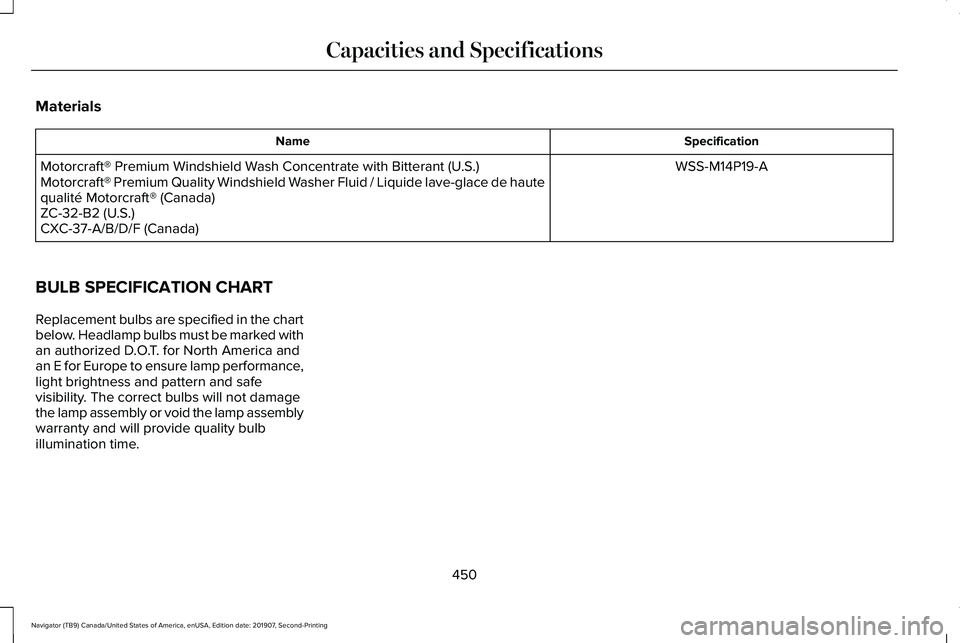
Materials
Specification
Name
WSS-M14P19-A
Motorcraft® Premium Windshield Wash Concentrate with Bitterant (U.S.)
Motorcraft® Premium Quality Windshield Washer Fluid / Liquide lave-glace de haute
qualité Motorcraft® (Canada)
ZC-32-B2 (U.S.)
CXC-37-A/B/D/F (Canada)
BULB SPECIFICATION CHART
Replacement bulbs are specified in the chart
below. Headlamp bulbs must be marked with
an authorized D.O.T. for North America and
an E for Europe to ensure lamp performance,
light brightness and pattern and safe
visibility. The correct bulbs will not damage
the lamp assembly or void the lamp assembly
warranty and will provide quality bulb
illumination time.
450
Navigator (TB9) Canada/United States of America, enUSA, Edition date: 201907, Second-Printing Capacities and Specifications
Page 454 of 622
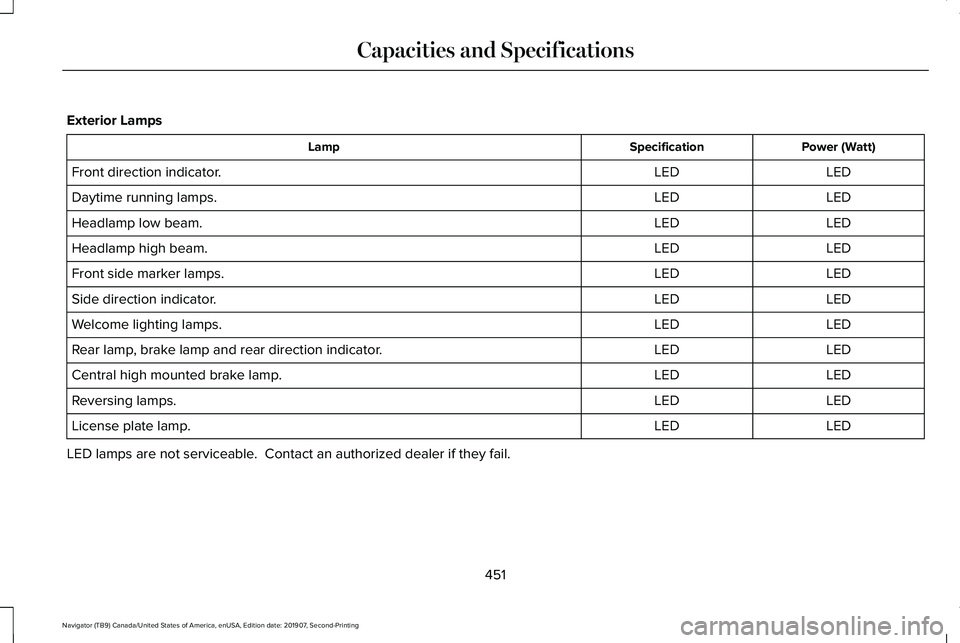
Exterior Lamps
Power (Watt)
Specification
Lamp
LED
LED
Front direction indicator.
LED
LED
Daytime running lamps.
LED
LED
Headlamp low beam.
LED
LED
Headlamp high beam.
LED
LED
Front side marker lamps.
LED
LED
Side direction indicator.
LED
LED
Welcome lighting lamps.
LED
LED
Rear lamp, brake lamp and rear direction indicator.
LED
LED
Central high mounted brake lamp.
LED
LED
Reversing lamps.
LED
LED
License plate lamp.
LED lamps are not serviceable. Contact an authorized dealer if they fail.
451
Navigator (TB9) Canada/United States of America, enUSA, Edition date: 201907, Second-Printing Capacities and Specifications