ESP LINCOLN NAVIGATOR 2020 User Guide
[x] Cancel search | Manufacturer: LINCOLN, Model Year: 2020, Model line: NAVIGATOR, Model: LINCOLN NAVIGATOR 2020Pages: 622, PDF Size: 6.47 MB
Page 82 of 622
Note:
Not every feature applies to every
vehicle in every market. When they are
available for your vehicle, then they appear
in your information display, providing choices
to switch them on or off, or to select a more
specific setting.
• Various vehicle speed limits so the
MyKey driver cannot exceed certain
speeds. The information display shows
warnings followed by an audible tone
when the MyKey driver reaches the set
speed. You cannot override the set
speed by fully depressing the accelerator
pedal. WARNING: Do not set MyKey
maximum speed limit to a limit that will
prevent the driver from maintaining a safe
speed considering posted speed limits and
prevailing road conditions. The driver is
always responsible to drive in accordance
with local laws and prevailing conditions.
Failure to do so could result in accident or
injury. •
Various vehicle speed reminders so
MyKey drivers know when their vehicle
speed approaches the limits. Warnings
appear in your information display and a
tone sounds when the MyKey drivers
exceed the set vehicle speed.
• The audio system's maximum volume
limits to 45% so MyKey drivers can
concentrate on the road. A message
appears in the information display when
MyKey drivers attempt to exceed the
limited volume. MyKey also disables the
automatic volume control.
Note: If your
vehicle includes an AM/FM radio or a
very basic audio system, then the radio
may not limit.
• Always on setting. This setting forces
certain features to remain on and active
for MyKey drivers. For example, E911 or
emergency assistance and the do not
disturb features stay on even if a MyKey
driver uses the feature's control to switch
it off. When selected, you will not be able
to turn off Advance Trac or traction
control (if your vehicle has this feature). CREATING A MYKEY
Use the information display to create a
MyKey:
1. Insert the key you want to program into
the ignition. If your vehicle is equipped
with a push-button start, place the remote
control into the backup slot. See Starting
a Gasoline Engine
(page 204).
2. Switch the ignition on.
3. Access the main menu in the information
display and then scroll through the
menus to change the settings of your
MyKey. From the MyKey menu select the
option Create MyKey.
See Information
Displays (page 133).
4. When prompted, hold the OK button until
you see a message informing you to label
this key as a MyKey. The programmed
restrictions apply when you key off, open
and close the driver door and restart your
vehicle with the programmed key or
transmitter.
MyKey is successfully created. Make sure
you label it so you can distinguish it from the
admin keys.
79
Navigator (TB9) Canada/United States of America, enUSA, Edition date: 201907, Second-Printing MyKey™
Page 93 of 622

POWER LIFTGATE
WARNING: It is extremely dangerous
to ride in a cargo area, inside or outside of
a vehicle. In a crash, people riding in these
areas are more likely to be seriously
injured or killed. Do not allow people to
ride in any area of your vehicle that is not
equipped with seats and seatbelts. Make
sure everyone in your vehicle is in a seat
and properly using a seatbelt. Failure to
follow this warning could result in serious
personal injury or death. WARNING: Make sure that you fully
close the liftgate to prevent exhaust fumes
from entering your vehicle. If you are
unable to fully close the liftgate, open the
air vents or the windows to allow fresh air
to enter your vehicle. Failure to follow this
instruction could result in personal injury
or death. WARNING:
Make sure that you fully
close the liftgate to prevent passengers
and cargo from falling out. Failure to follow
this instruction could result in personal
injury or death. WARNING:
Keep keys out of reach
of children. Do not allow children to
operate or play near an open or moving
power liftgate. You should supervise the
operation of the power liftgate at all times.
Note: Make sure that you close the liftgate
before operating or moving your vehicle,
especially in an enclosure, like a garage or
a parking structure. This could damage the
liftgate and its components.
Note: Do not hang anything, for example a
bike rack, from the glass or liftgate. This
could damage the liftgate and its
components.
The liftgate only operates with the
transmission in park (P). Three warning tones sound as the liftgate
begins to power close. If there is a problem
with the open or close request, one of the
following may occur:
•
One tone sounds if the ignition is on and
the transmission is not in park (P).
• Three tones sound if the battery voltage
is below the minimum operating voltage.
• One tone sounds if the vehicle speed is
at or above
3 mph (5 km/h)
If the liftgate starts to close after it has fully
opened, this indicates there may be
excessive weight on the liftgate or a possible
strut failure. A repetitive tone sounds and
the liftgate closes under control. Remove
any excessive weight from the liftgate. If the
liftgate continues to close after opening,
have the system checked as soon as
possible.
Opening and Closing the Liftgate WARNING:
Make sure all persons
are clear of the power liftgate area before
using the power liftgate control.
90
Navigator (TB9) Canada/United States of America, enUSA, Edition date: 201907, Second-Printing Liftgate
Page 113 of 622
Headlamp High Beam
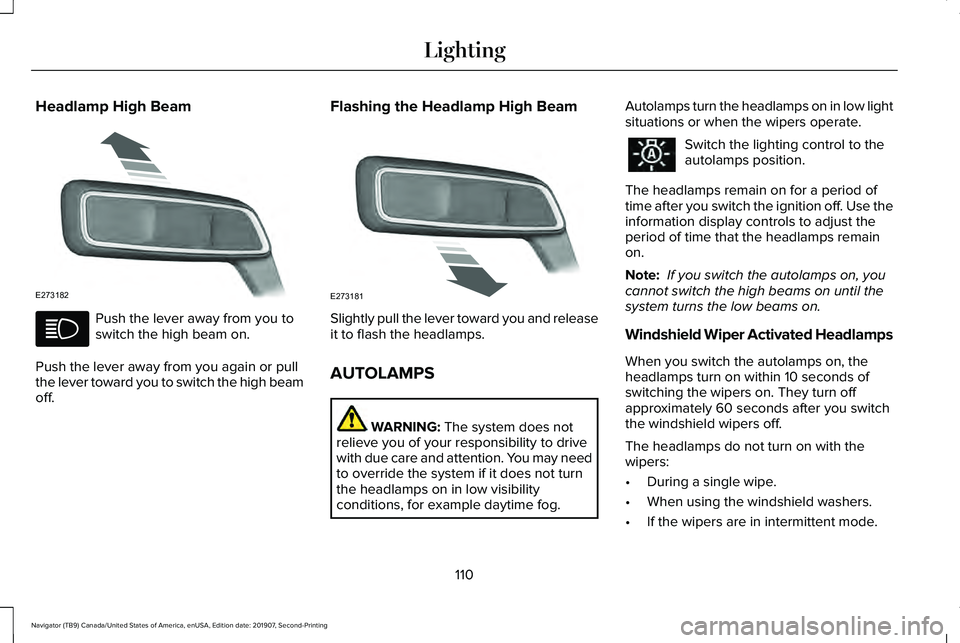
Push the lever away from you to
switch the high beam on.
Push the lever away from you again or pull
the lever toward you to switch the high beam
off. Flashing the Headlamp High Beam
Slightly pull the lever toward you and release
it to flash the headlamps.
AUTOLAMPS
WARNING: The system does not
relieve you of your responsibility to drive
with due care and attention. You may need
to override the system if it does not turn
the headlamps on in low visibility
conditions, for example daytime fog. Autolamps turn the headlamps on in low light
situations or when the wipers operate. Switch the lighting control to the
autolamps position.
The headlamps remain on for a period of
time after you switch the ignition off. Use the
information display controls to adjust the
period of time that the headlamps remain
on.
Note: If you switch the autolamps on, you
cannot switch the high beams on until the
system turns the low beams on.
Windshield Wiper Activated Headlamps
When you switch the autolamps on, the
headlamps turn on within 10 seconds of
switching the wipers on. They turn off
approximately 60 seconds after you switch
the windshield wipers off.
The headlamps do not turn on with the
wipers:
• During a single wipe.
• When using the windshield washers.
• If the wipers are in intermittent mode.
110
Navigator (TB9) Canada/United States of America, enUSA, Edition date: 201907, Second-Printing LightingE273182 E273181
Page 120 of 622
AUTOMATIC HIGH BEAM
CONTROL INDICATORS
The indicator illuminates to confirm
when the system is ready to assist.
OVERRIDING AUTOMATIC HIGH
BEAM CONTROL WARNING: The system does not
relieve you of your responsibility to drive
with due care and attention. You may need
to override the system if it does not turn
the high beams on or off. WARNING:
You may need to
override the system when approaching
other road users. WARNING:
You may need to
override the system during inclement
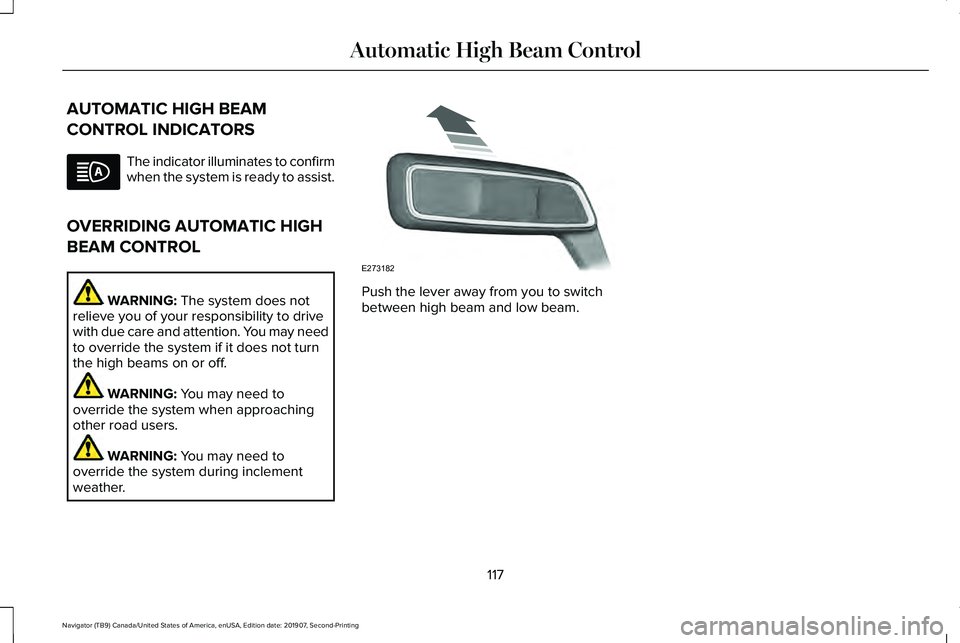
weather. Push the lever away from you to switch
between high beam and low beam.
117
Navigator (TB9) Canada/United States of America, enUSA, Edition date: 201907, Second-Printing Automatic High Beam Control E273182
Page 131 of 622
Indicates engine coolant temperature. At
normal operating temperature, the level
indicator will be in the normal range. If the
engine coolant temperature exceeds the
normal range, stop your vehicle as soon as
safely possible, switch off the engine and let
the engine cool.
WARNING LAMPS AND
INDICATORS
The following warning lamps and indicators
alert you to a vehicle condition that may
become serious. Some lamps illuminate
when you start your vehicle to make sure
they work. If any lamps remain on after
starting your vehicle, refer to the respective
system warning lamp for further information.
Note:
Some warning indicators appear in
the information display and operate the
same as a warning lamp but do not
illuminate when you start your vehicle. Adaptive Cruise Control Indicator (If
Equipped) It illuminates when you switch the
system on.
It illuminates white when the
system is in standby mode. It illuminates
green when you set the adaptive cruise
speed.
See
Using Adaptive Cruise Control (page
269).
Anti-Lock Brake System Warning Lamp If it illuminates when you are
driving, this indicates a
malfunction. Your vehicle
continues to have normal braking without
the anti-lock brake system function. Have
your vehicle checked as soon as possible.
Auto Hold Active Illuminates when the system holds
your vehicle stationary.Auto Hold Unavailable Illuminates when the system is on,
but unavailable to hold your
vehicle stationary.
Auto-Start-Stop Indicator It illuminates when the engine has
automatically stopped. It flashes
to inform you when the engine
needs to restart. The indicator is shown with
a strikethrough if the system is not available.
See
Auto-Start-Stop (page 208).
Automatic Headlamp High Beam
Indicator
(If Equipped) It illuminates when the system
automatically turns the headlamp
high beam on.
See
What Is Automatic High Beam Control
(page 116).
128
Navigator (TB9) Canada/United States of America, enUSA, Edition date: 201907, Second-Printing Instrument ClusterE144524 E197933 E197934
Page 133 of 622
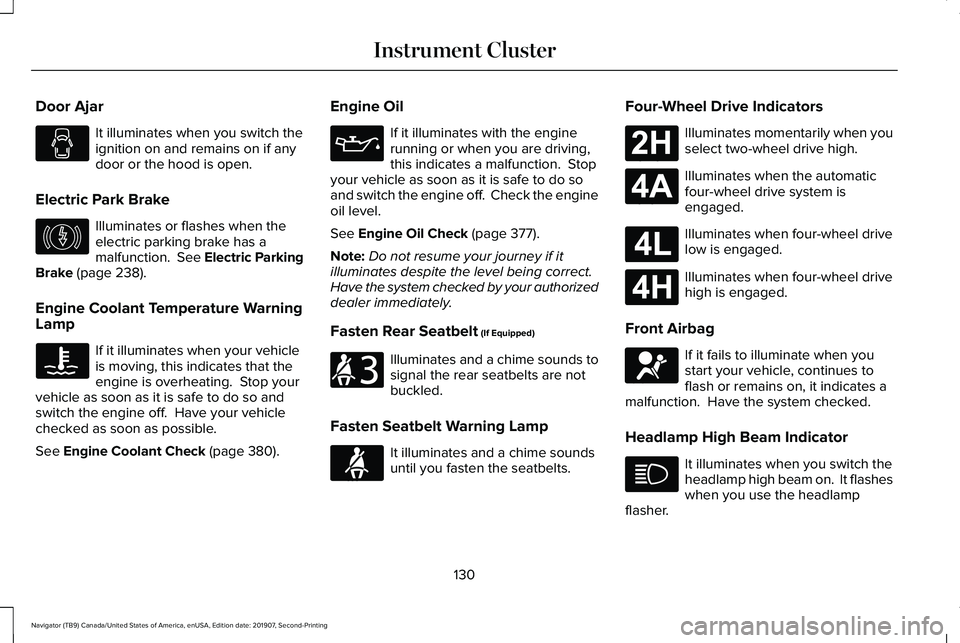
Door Ajar
It illuminates when you switch the
ignition on and remains on if any
door or the hood is open.
Electric Park Brake Illuminates or flashes when the
electric parking brake has a
malfunction. See Electric Parking
Brake (page 238).
Engine Coolant Temperature Warning
Lamp If it illuminates when your vehicle
is moving, this indicates that the
engine is overheating. Stop your
vehicle as soon as it is safe to do so and
switch the engine off. Have your vehicle
checked as soon as possible.
See
Engine Coolant Check (page 380). Engine Oil If it illuminates with the engine
running or when you are driving,
this indicates a malfunction. Stop
your vehicle as soon as it is safe to do so
and switch the engine off. Check the engine
oil level.
See
Engine Oil Check (page 377).
Note: Do not resume your journey if it
illuminates despite the level being correct.
Have the system checked by your authorized
dealer immediately.
Fasten Rear Seatbelt
(If Equipped) Illuminates and a chime sounds to
signal the rear seatbelts are not
buckled.
Fasten Seatbelt Warning Lamp It illuminates and a chime sounds
until you fasten the seatbelts.Four-Wheel Drive Indicators Illuminates momentarily when you
select two-wheel drive high.
Illuminates when the automatic
four-wheel drive system is
engaged.
Illuminates when four-wheel drive
low is engaged.
Illuminates when four-wheel drive
high is engaged.
Front Airbag If it fails to illuminate when you
start your vehicle, continues to
flash or remains on, it indicates a
malfunction. Have the system checked.
Headlamp High Beam Indicator It illuminates when you switch the
headlamp high beam on. It flashes
when you use the headlamp
flasher.
130
Navigator (TB9) Canada/United States of America, enUSA, Edition date: 201907, Second-Printing Instrument Cluster E146190 E206718 E71880 E181778 E181781 E181780 E181779 E67017
Page 136 of 622
GENERAL INFORMATION
WARNING: Driving while distracted
can result in loss of vehicle control, crash
and injury. We strongly recommend that
you use extreme caution when using any
device that may take your focus off the
road. Your primary responsibility is the safe
operation of your vehicle. We recommend
against the use of any hand-held device
while driving and encourage the use of
voice-operated systems when possible.
Make sure you are aware of all applicable
local laws that may affect the use of
electronic devices while driving.
You can control various systems on your
vehicle using the quick action menu (QAM)
buttons on the right-hand side of the steering
wheel. The information display provides the
corresponding information.
Note: Some options may appear slightly
different or not at all if the items are optional.
Note: Trailer options are not available if your
vehicle speed is greater than 3 mph (5 km/h). Note:
Some MyKey menu options only
appear if MyKey is enabled and at least one
MyKey is programmed. This icon gives you the ability to
switch a feature on or off. A check
in the box indicates the feature is
on, and unchecked indicates the feature is
off.
133
Navigator (TB9) Canada/United States of America, enUSA, Edition date: 201907, Second-Printing Information DisplaysE204495
Page 193 of 622
Folds the second-row bench
center seat or both second-row
captain chair seats.
E
Folds the right-hand second-row
seat.
F
To return the second-row seat backrest to
the original position, rotate the seat backrest
up until it latches in the upright position. The
seat backrest clicks when it is locked into
position.
To return the third-row seat backrest to the
original position, press the corresponding
control again.
If the power rear seat is disabled after 10
minutes, you can enable the seat by:
• Opening any door.
• Pressing the unlock button on the key
fob.
• Pressing any keyless entry keypad
button.
• Switching the ignition on. Folding Down the Rear Seats to the Load
Floor WARNING: To prevent possible
damage to the seat or seatbelts, make sure
that the seatbelts are not fastened before
folding the seatback. WARNING:
Do not place cargo or
any objects behind the seatback before
returning it to the original position.
The third-row seats have obstacle detection
that prevents the seats from folding or
returning if they are obstructed.
Reclining the Third Row Power Seats WARNING:
Do not recline a rear seat
on which a child restraint is installed.
Failure to follow this instruction could
reduce the effectiveness of the child
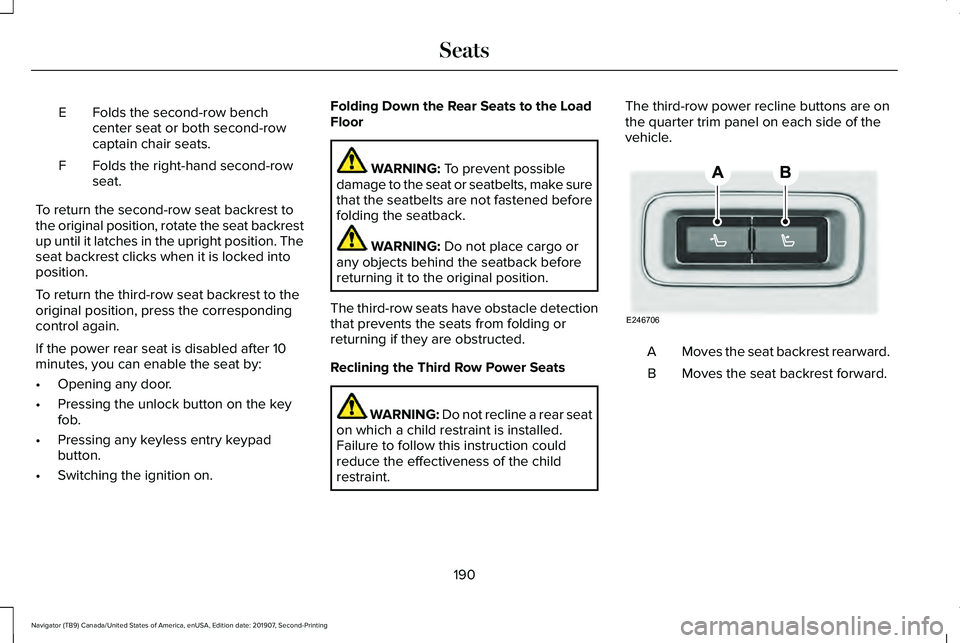
restraint. The third-row power recline buttons are on
the quarter trim panel on each side of the
vehicle.
Moves the seat backrest rearward.
A
Moves the seat backrest forward.
B
190
Navigator (TB9) Canada/United States of America, enUSA, Edition date: 201907, Second-Printing SeatsE246706
Page 194 of 622
HEATED SEATS (IF EQUIPPED)
WARNING:
Use caution when using
the heated seat if you are unable to feel
pain to your skin because of advanced
age, chronic illness, diabetes, spinal cord
injury, medication, alcohol use, exhaustion
or other physical conditions. The heated
seat could cause burns even at low
temperatures, especially if used for long
periods of time. Failure to follow this
instruction could result in personal injury. WARNING:
Do not poke sharp
objects into the seat cushion or seat
backrest. This could damage the heated
seat element and cause it to overheat.
Failure to follow this instruction could result
in personal injury. WARNING:
Do not place anything on
the seat that blocks the heat, for example
a seat cover or a cushion. This could cause
the seat to overheat. Failure to follow this
instruction could result in personal injury. Front Seats
Do not do the following:
•
Place heavy objects on the seat.
• Operate the heated seat if water or any
other liquid spills on the seat. Allow the
seat to dry thoroughly.
Note: The engine must be running to use
this feature. Press the heated seat symbol to cycle
through the various heat settings and off.
More indicator lights indicate warmer
settings.
Note:
The heated seats switch on during a
remote start if they are enabled. Note:
The heated seats may switch on when
you start your vehicle if they were on when
you previously switched your vehicle off.
Automatic Climate Controlled Seats
(If
Equipped)
When you switch on the auto setting, the
seats switch between the heated seats and
ventilated seats to match your climate control
setting.
Second Row Heated Seats
The heated seat controls are on the rear of
the center console.
VENTILATED SEATS
(IF EQUIPPED)
Do not do the following:
• Spill liquid on the front seats. This may
cause the air vent holes to become
blocked and not work properly.
• Place cargo or objects under the seats.
They may block the air intake causing
the air vents to not work properly.
191
Navigator (TB9) Canada/United States of America, enUSA, Edition date: 201907, Second-Printing SeatsE146322
Page 199 of 622
2. The indicator light begins to flash after
20 seconds. Without releasing the
button, follow Step 1 in the Programming
section.
For questions or comments, contact
HomeLink at www.homelink.com,
www.youtube.com/user/HomeLinkGentex
or by calling the toll-free help line at
1-800-355-3515.
FCC and RSS-210 Industry Canada
Compliance
This device complies with Part 15 of the FCC
Rules and with RSS-210 of Industry Canada.
Operation is subject to the following two
conditions: (1) this device may not cause
harmful interference, and (2) this device must
accept any interference received, including
interference that may cause undesired
operation. WARNING: Changes or modifications
not expressively approved by the party
responsible for compliance could void the
user's authority to operate the equipment.
The term "IC:" before the radio certification
number only signifies that Industry Canada
technical specifications were met.
This equipment complies with FCC radiation
exposure limits set forth for an uncontrolled
environment. End Users must follow the
specific operating instructions for satisfying
RF exposure compliance. This transmitter
must be at least 8 in (20 cm) from the user
and must not be co-located or operating in
conjunction with any other antenna or
transmitter.
The term “IC:” before the
certification/registration number only signifies
that Industry Canada technical specifications
were met.
196
Navigator (TB9) Canada/United States of America, enUSA, Edition date: 201907, Second-Printing Garage Door Opener