information page LINCOLN NAVIGATOR 2020 User Guide
[x] Cancel search | Manufacturer: LINCOLN, Model Year: 2020, Model line: NAVIGATOR, Model: LINCOLN NAVIGATOR 2020Pages: 622, PDF Size: 6.47 MB
Page 76 of 622
Remote Start
WARNING: To avoid exhaust fumes,
do not use remote start if your vehicle is
parked indoors or in areas that are not well
ventilated.
Note: Do not use remote start if your fuel
level is low. The remote start button is on the
transmitter.
This feature allows you to start your vehicle
from outside the vehicle. The transmitter has
an extended operating range.
Vehicles with automatic climate control can
be configured to operate when the vehicle
is remote started.
See Automatic Climate
Control (page 165).
Many states and provinces have restrictions
for the use of remote start. Check your local
and state or provincial laws for specific
requirements regarding remote start
systems. The system does not work if:
•
The ignition is on.
• The anti-theft alarm triggers.
• You switch off the feature in the
information display.
See General
Information (page 133).
• The hood is open.
• The transmission is not in park (P).
• The battery voltage is below the
minimum operating voltage.
Remote Control Feedback
An LED on the remote control provides status
feedback of remote start or stop commands. Status
LED
Remote startsuccessful
Solid green
Remote stopsuccessful
Solid red
Request failed or
status not received
Blinking red
Status incomplete
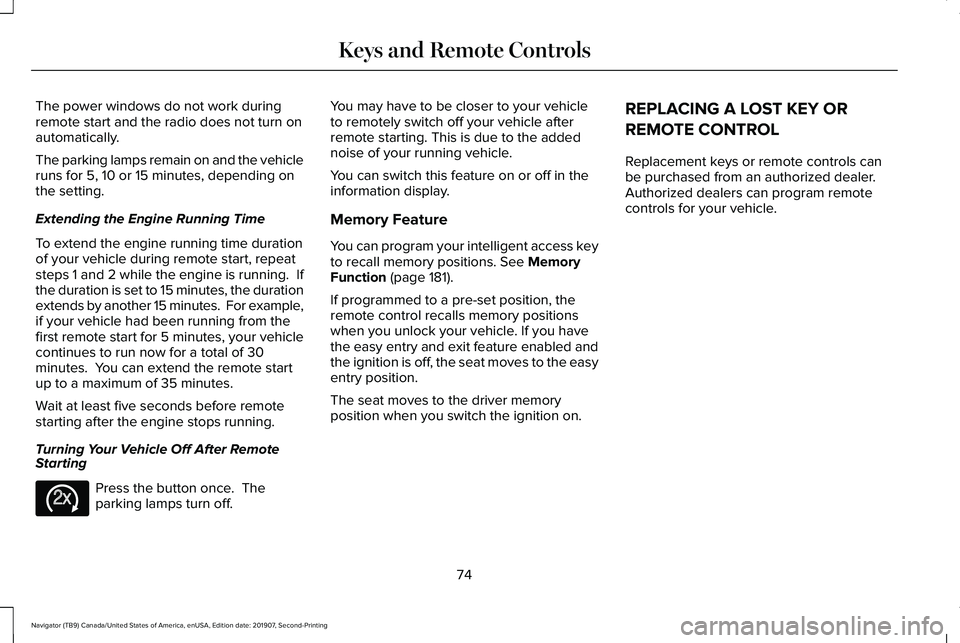
Blinking green Remote Starting Your Vehicle
Note:
You must press each button within
three seconds of each other. If you do not
follow this sequence, your vehicle does not
start remotely, the direction indicators do
not flash twice and the horn does not sound. To remote start your vehicle:
1. Press the lock button to lock all the
doors.
2. Press the remote start button twice. The
exterior lamps flash twice.
The horn sounds if the system fails to start.
Note: Press the push button ignition switch
on the instrument panel once to exit remote
start.
73
Navigator (TB9) Canada/United States of America, enUSA, Edition date: 201907, Second-Printing Keys and Remote ControlsE138625 E138626
Page 77 of 622
The power windows do not work during
remote start and the radio does not turn on
automatically.
The parking lamps remain on and the vehicle
runs for 5, 10 or 15 minutes, depending on
the setting.
Extending the Engine Running Time
To extend the engine running time duration
of your vehicle during remote start, repeat
steps 1 and 2 while the engine is running. If
the duration is set to 15 minutes, the duration
extends by another 15 minutes. For example,
if your vehicle had been running from the
first remote start for 5 minutes, your vehicle
continues to run now for a total of 30
minutes. You can extend the remote start
up to a maximum of 35 minutes.
Wait at least five seconds before remote
starting after the engine stops running.
Turning Your Vehicle Off After Remote
Starting
Press the button once. The
parking lamps turn off. You may have to be closer to your vehicle
to remotely switch off your vehicle after
remote starting. This is due to the added
noise of your running vehicle.
You can switch this feature on or off in the
information display.
Memory Feature
You can program your intelligent access key
to recall memory positions. See Memory
Function (page 181).
If programmed to a pre-set position, the
remote control recalls memory positions
when you unlock your vehicle. If you have
the easy entry and exit feature enabled and
the ignition is off, the seat moves to the easy
entry position.
The seat moves to the driver memory
position when you switch the ignition on. REPLACING A LOST KEY OR
REMOTE CONTROL
Replacement keys or remote controls can
be purchased from an authorized dealer.
Authorized dealers can program remote
controls for your vehicle.
74
Navigator (TB9) Canada/United States of America, enUSA, Edition date: 201907, Second-Printing Keys and Remote ControlsE138625
Page 82 of 622
Note:
Not every feature applies to every
vehicle in every market. When they are
available for your vehicle, then they appear
in your information display, providing choices
to switch them on or off, or to select a more
specific setting.
• Various vehicle speed limits so the
MyKey driver cannot exceed certain
speeds. The information display shows
warnings followed by an audible tone
when the MyKey driver reaches the set
speed. You cannot override the set
speed by fully depressing the accelerator
pedal. WARNING: Do not set MyKey
maximum speed limit to a limit that will
prevent the driver from maintaining a safe
speed considering posted speed limits and
prevailing road conditions. The driver is
always responsible to drive in accordance
with local laws and prevailing conditions.
Failure to do so could result in accident or
injury. •
Various vehicle speed reminders so
MyKey drivers know when their vehicle
speed approaches the limits. Warnings
appear in your information display and a
tone sounds when the MyKey drivers
exceed the set vehicle speed.
• The audio system's maximum volume
limits to 45% so MyKey drivers can
concentrate on the road. A message
appears in the information display when
MyKey drivers attempt to exceed the
limited volume. MyKey also disables the
automatic volume control.
Note: If your
vehicle includes an AM/FM radio or a
very basic audio system, then the radio
may not limit.
• Always on setting. This setting forces
certain features to remain on and active
for MyKey drivers. For example, E911 or
emergency assistance and the do not
disturb features stay on even if a MyKey
driver uses the feature's control to switch
it off. When selected, you will not be able
to turn off Advance Trac or traction
control (if your vehicle has this feature). CREATING A MYKEY
Use the information display to create a
MyKey:
1. Insert the key you want to program into
the ignition. If your vehicle is equipped
with a push-button start, place the remote
control into the backup slot. See Starting
a Gasoline Engine
(page 204).
2. Switch the ignition on.
3. Access the main menu in the information
display and then scroll through the
menus to change the settings of your
MyKey. From the MyKey menu select the
option Create MyKey.
See Information
Displays (page 133).
4. When prompted, hold the OK button until
you see a message informing you to label
this key as a MyKey. The programmed
restrictions apply when you key off, open
and close the driver door and restart your
vehicle with the programmed key or
transmitter.
MyKey is successfully created. Make sure
you label it so you can distinguish it from the
admin keys.
79
Navigator (TB9) Canada/United States of America, enUSA, Edition date: 201907, Second-Printing MyKey™
Page 83 of 622

You can also program configurable settings
for the key(s). See Programming and
Changing Configurable Settings.
Programming and Changing
Configurable Settings
Use the information display to access your
configurable MyKey settings.
1. Switch the ignition on using an admin key
or transmitter you want to program.
2. Access the main menu in the information
display and then scroll through the
menus to change the settings of your
MyKey. See Information Displays (page
133
).
3. Follow the instructions in the display. The
programmed restrictions apply when you
switch the vehicle off, open and close the
driver door and restart your vehicle with
the programmed key or transmitter. Note:
You can clear or change your MyKey
settings at any time during the same key
cycle as you created the MyKey. Once you
have switched the vehicle off, however, you
will need an admin key to change or clear
your MyKey settings. When you make any
changes to your MyKey settings, you change
the settings for every MyKey. You cannot
make individual changes to apply to certain
MyKeys.
CLEARING ALL MYKEYS
When you clear your MyKeys, you remove
all restrictions and return all MyKeys to their
original admin key status at once. To clear
all MyKeys of all MyKey settings, use the
information display.
1. Switch the ignition on using an admin key.
2. Access the main menu in the information
display and then scroll through the
menus to begin clearing your MyKey
programming. See Information Displays
(page
133).
3. Follow the instructions in the display. 4. A confirmation message appears in the
display after you finish clearing your
MyKeys.
Note: When you clear your MyKeys, you
remove all restrictions and return all MyKeys
to their original admin key status. You cannot
remove the MyKey restrictions individually.
CHECKING MYKEY SYSTEM
STATUS
You can find information about your
programmed MyKeys by using the
information display.
See Information
Displays (page 133).
MyKey Distance
Tracks the distance when drivers use a
MyKey. The only way to delete the
accumulated distance is by using an admin
key to clear all MyKeys. If the distance does
not accumulate as expected, then the
intended user is not using the MyKey, or an
admin key user recently cleared and then
recreated a MyKey.
80
Navigator (TB9) Canada/United States of America, enUSA, Edition date: 201907, Second-Printing MyKey™
Page 86 of 622
LOCKING AND UNLOCKING
You can use the power door lock control or
the remote control to lock and unlock your
vehicle.
Power Door Locks
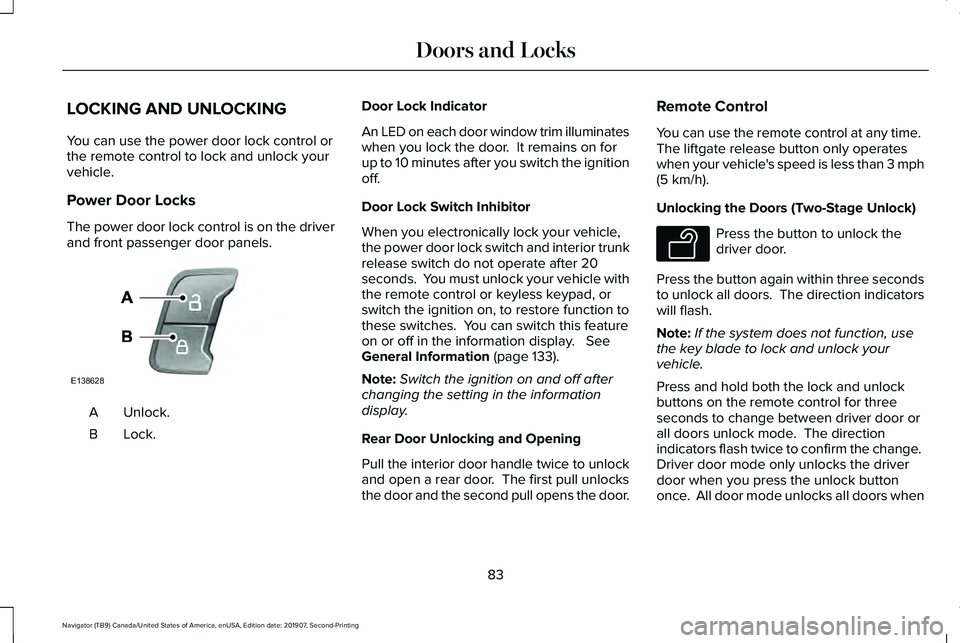
The power door lock control is on the driver
and front passenger door panels.
Unlock.
A
Lock.B Door Lock Indicator
An LED on each door window trim illuminates
when you lock the door. It remains on for
up to 10 minutes after you switch the ignition
off.
Door Lock Switch Inhibitor
When you electronically lock your vehicle,
the power door lock switch and interior trunk
release switch do not operate after 20
seconds. You must unlock your vehicle with
the remote control or keyless keypad, or
switch the ignition on, to restore function to
these switches. You can switch this feature
on or off in the information display. See
General Information (page 133).
Note: Switch the ignition on and off after
changing the setting in the information
display.
Rear Door Unlocking and Opening
Pull the interior door handle twice to unlock
and open a rear door. The first pull unlocks
the door and the second pull opens the door. Remote Control
You can use the remote control at any time.
The liftgate release button only operates
when your vehicle's speed is less than 3 mph
(5 km/h)
.
Unlocking the Doors (Two-Stage Unlock) Press the button to unlock the
driver door.
Press the button again within three seconds
to unlock all doors. The direction indicators
will flash.
Note: If the system does not function, use
the key blade to lock and unlock your
vehicle.
Press and hold both the lock and unlock
buttons on the remote control for three
seconds to change between driver door or
all doors unlock mode. The direction
indicators flash twice to confirm the change.
Driver door mode only unlocks the driver
door when you press the unlock button
once. All door mode unlocks all doors when
83
Navigator (TB9) Canada/United States of America, enUSA, Edition date: 201907, Second-Printing Doors and LocksE138628 E138629
Page 87 of 622
you press the unlock button once. The
unlocking mode applies to the remote
control, keyless entry keypad and intelligent
access. You can also change between the
unlocking modes using the information
display. See General Information (page 133).
Reprogramming the Unlocking Function
Note:
When you press the unlock button,
either all the doors are unlocked or only the
driver door is unlocked. Pressing the unlock
button again unlocks all the doors.
Press and hold the unlock and lock buttons
on the remote control simultaneously for at
least four seconds with the ignition off. The
direction indicators flash twice to confirm the
change.
To return to the original unlocking function,
repeat the process.
Locking the Doors Press the button to lock all doors.
The direction indicators will flash. Press the button again within three seconds
to confirm that all the doors are closed. The
door lock again, the horn sounds and the
direction indicators flash if all the doors and
the liftgate are closed.
Note:
If the system does not function, use
the key blade to lock and unlock your
vehicle.
Mislock
If any door or the liftgate is open, or if
the hood is open on vehicles with an
anti-theft alarm or remote start, the horn
sounds twice and the direction
indicators do not flash. You can switch
this feature on or off in the information
display. See General Information (page
133).
Opening the Liftgate Press twice within three seconds
to open the liftgate.Activating Intelligent Access
General Information
You can unlock and lock the vehicle without
taking the keys out of your pocket or purse
when your intelligent access key is within
3 ft (1 m)
of your vehicle. Intelligent access
uses a sensor on the back of the door handle
for unlocking and a separate sensor on the
face of each door handle for locking.
The system does not function if:
• Your vehicle battery has no charge.
• The key battery has no charge.
• The key frequencies are jammed.
Note: The system may not function if the key
is close to metal objects or electronic
devices, for example keys or a cell phone.
Note: If the system does not function, use
the key blade to lock and unlock your
vehicle.
See Remote Control (page 69).
84
Navigator (TB9) Canada/United States of America, enUSA, Edition date: 201907, Second-Printing Doors and LocksE138623 E267940
Page 90 of 622
Enabling or Disabling Autounlock
You can enable or disable the autounlock
feature in the information display or an
authorized dealer can do it for you. See
General Information (page 133).
Illuminated Entry
The interior lamps and some exterior lamps
illuminate when you unlock the doors with
the remote control.
The lamps turn off if:
• The ignition is on.
• You press the remote control lock button.
• 25 seconds have elapsed.
The lamps do not turn off if:
• You turn them on with the lamp control.
• Any door is open.
Illuminated Exit
The interior lamps and some exterior lamps
illuminate when all doors are closed and you
switch the ignition off. The lamps turn off if all the doors remain
closed and:
•
25 seconds have elapsed.
• You press the push button ignition
switch.
Approach Detection Illumination
When you approach your vehicle and a valid
key is detected, the exterior door handles
and some exterior lamps illuminate.
Battery Saver
If you leave the courtesy lamps, interior
lamps or headlamps on, the battery saver
shuts them off 10 minutes after you switch
the ignition off.
Battery Saver for Intelligent Access Keys
If you leave the ignition switched on, it shuts
off when it detects a certain amount of
battery drain, or after 30 minutes. KEYLESS ENTRY
SECURICODE™ KEYLESS ENTRY
KEYPAD
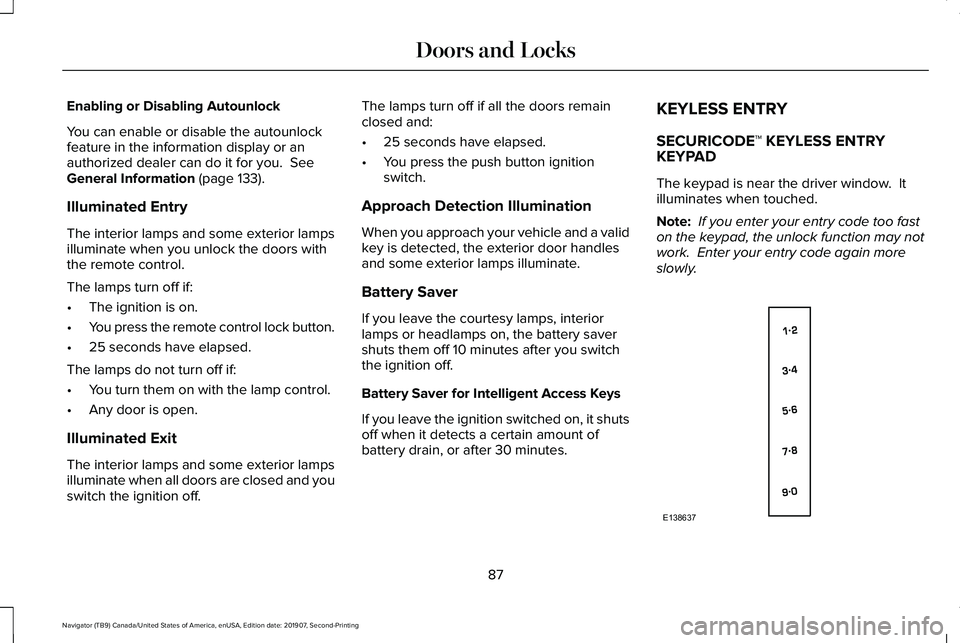
The keypad is near the driver window. It
illuminates when touched.
Note:
If you enter your entry code too fast
on the keypad, the unlock function may not
work. Enter your entry code again more
slowly. 87
Navigator (TB9) Canada/United States of America, enUSA, Edition date: 201907, Second-Printing Doors and LocksE138637
Page 95 of 622
You can stop the liftgate movement by doing
any of the following:
•
Pressing the liftgate control button.
• Pressing the liftgate button on the remote
control twice.
• Pressing the liftgate button on the
instrument panel.
Setting the Liftgate Open Height
1. Open the liftgate.
2. Stop the liftgate movement by pressing the control button on the liftgate when it
reaches the desired height.
Note: Once the liftgate has stopped moving,
you can also manually move it to the desired
height.
3. Press and hold the liftgate control button
on the liftgate until a tone sounds,
indicating programming is complete.
Note: You can only use the liftgate control
button to program the height.
Note: You cannot program the height if the
liftgate position is too low. The new open liftgate height is recalled
when the power liftgate is opened. To
change the programmed height, repeat the
above procedure. Once you open the power
liftgate, you can manually move it to a
different height.
Note:
The system recalls the new
programmed height, even if you disconnect
the battery.
When operating the power liftgate after you
have programmed a lower height than fully
open, you can fully open the liftgate by
manually pushing it upward to the maximum
open position.
Obstacle Detection
Note: Entering your vehicle while the liftgate
is closing can cause your vehicle to bounce
and activate obstacle detection. To prevent
this, let the power liftgate close completely
before you enter your vehicle. Before driving
off, check the instrument cluster for a liftgate
or door ajar message or warning indicator.
Failure to do this could result in
unintentionally leaving the liftgate open
when driving. When Closing
The system stops when it detects an
obstacle. Three tones sound and the system
reverses to open. When you remove the
obstacle, you can power close the liftgate.
When Opening
The system stops when it detects an
obstacle and two short tones sound.
Remove the obstacle to operate the liftgate.
Switching the Power Liftgate On or Off
You can switch the power liftgate on or off
through the vehicle settings menu. See
General Information (page 133).
When switched off, the liftgate only unlatches
and will not power open or close.
Using the Hands-Free Liftgate
(If Equipped)
Make sure you have an intelligent access
key within
3 ft (1 m) of the liftgate.
1. Stand behind your vehicle, and face the liftgate.
92
Navigator (TB9) Canada/United States of America, enUSA, Edition date: 201907, Second-Printing Liftgate
Page 99 of 622
ANTI-THEFT ALARM (IF EQUIPPED)
The active anti-theft system is designed to
warn you in the event of unauthorized
vehicle entry and is also designed to help
prevent unwanted towing of your vehicle.
You can choose what is monitored by arming
the system in different ways.
See
Information Displays (page 133).
The direction indicators flash and the horn
sounds if the system triggers while the alarm
is armed.
Take all remote controls to an authorized
dealer if there is any potential alarm problem
with your vehicle.
Using the System
You can select two levels of alarm security.
You can change the level of security when
the ignition is switched off through the
information display with the two options
below: Perimeter Only (If Equipped)
Perimeter only monitors the following:
•
Doors.
• Hood.
• Liftgate.
All Sensors (If Equipped)
All sensors monitors the following:
• Doors.
• Hood.
• Liftgate.
• Movement inside your vehicle.
• Change in vehicle inclination, for
example, unwanted towing.
Note: Do not choose all sensors monitor
mode when the vehicle is in transport or if
movement within the vehicle is likely to
occur. Note:
For correct operation of the interior
motion detection system, make sure you
close all the windows prior to arming the
system. This helps prevent accidental alarm
activation due to external influences.
Additionally, the interior motion sensing
system does not arm if any door is ajar.
Arming the Alarm
The alarm is ready to arm when there is not
a key in the ignition. Lock your vehicle using
the remote control or keyless entry keypad.
You can also lock your vehicle using the lock
sensor on the exterior door handle if your
vehicle is equipped with intelligent access.
See
Locking and Unlocking (page 83).
The direction indicators flash once after you
lock your vehicle. This indicates the alarm is
in the pre-armed mode. It fully arms after 20
seconds.
96
Navigator (TB9) Canada/United States of America, enUSA, Edition date: 201907, Second-Printing Security
Page 102 of 622
Manual Power Deploy
You can manually operate the running
boards in the advanced settings of the
information display. See General
Information (page 133).
Set the running boards in the deployed
position to access the roof.
The running boards return to the stowed
position and enter automatic mode when the
vehicle speed exceeds
5 mph (8 km/h).
Enabling and Disabling
You can enable and disable the power
running board feature in the advanced
settings of the information display.
See
General Information (page 133).
• When disabled (OFF), the running boards
move to the stowed position regardless
of the door position.
• When enabled (
AUTO), the running
boards move back to the correct
positions based on the door position. Bounce-back
The running board will reverse direction and
move to the end of travel if it encounters an
object while moving.
99
Navigator (TB9) Canada/United States of America, enUSA, Edition date: 201907, Second-Printing Power Running Boards