display LINCOLN NAVIGATOR 2020 Manual PDF
[x] Cancel search | Manufacturer: LINCOLN, Model Year: 2020, Model line: NAVIGATOR, Model: LINCOLN NAVIGATOR 2020Pages: 622, PDF Size: 6.47 MB
Page 166 of 622
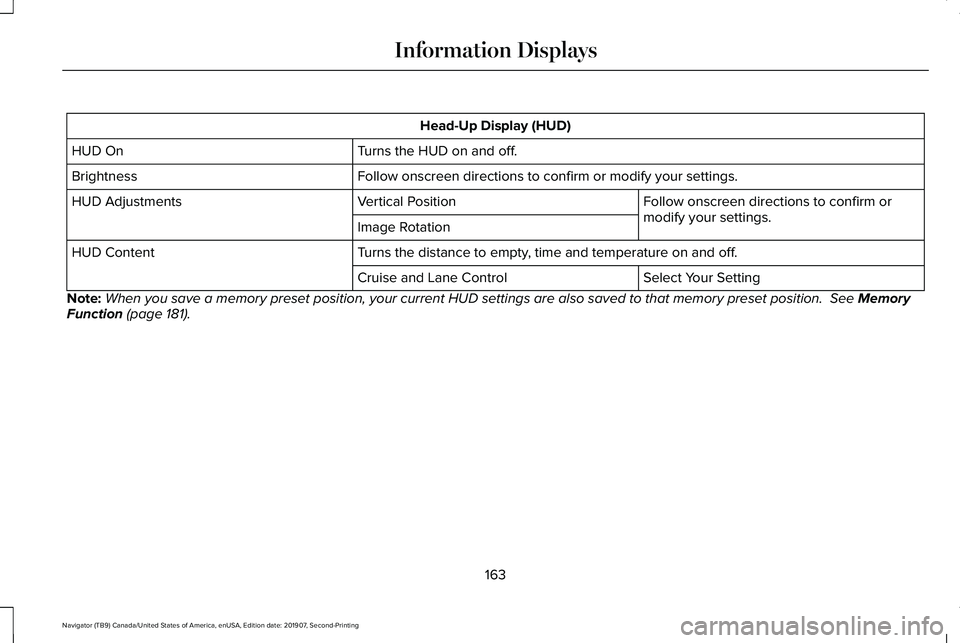
Head-Up Display (HUD)
Turns the HUD on and off.
HUD On
Follow onscreen directions to confirm or modify your settings.
Brightness
Follow onscreen directions to confirm or
modify your settings.
Vertical Position
HUD Adjustments
Image Rotation
Turns the distance to empty, time and temperature on and off.
HUD Content
Select Your Setting
Cruise and Lane Control
Note: When you save a memory preset position, your current HUD settings are al\
so saved to that memory preset position. See Memory
Function (page 181).
163
Navigator (TB9) Canada/United States of America, enUSA, Edition date: 201907, Second-Printing Information Displays
Page 167 of 622
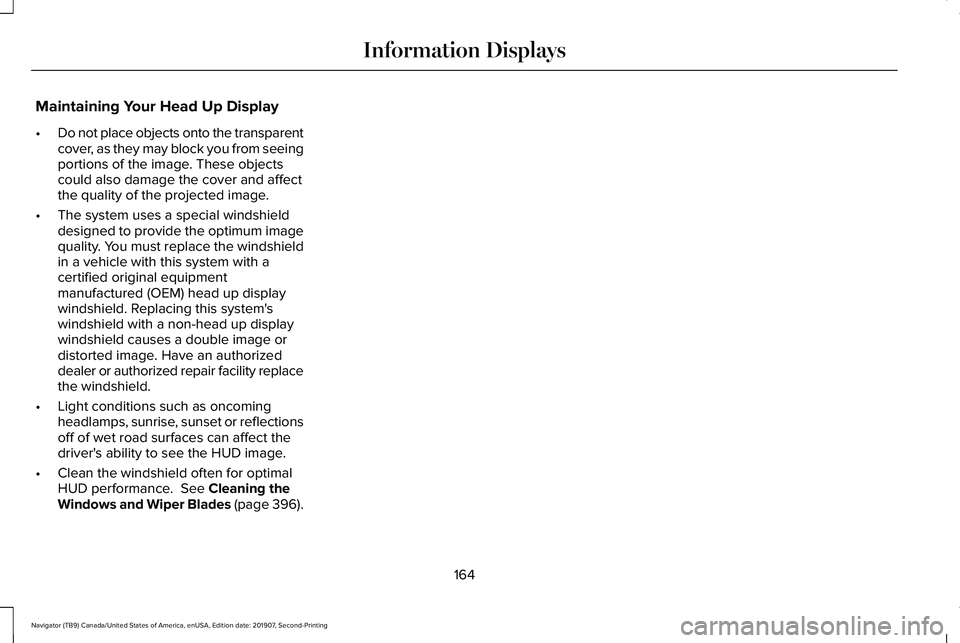
Maintaining Your Head Up Display
•
Do not place objects onto the transparent
cover, as they may block you from seeing
portions of the image. These objects
could also damage the cover and affect
the quality of the projected image.
• The system uses a special windshield
designed to provide the optimum image
quality. You must replace the windshield
in a vehicle with this system with a
certified original equipment
manufactured (OEM) head up display
windshield. Replacing this system's
windshield with a non-head up display
windshield causes a double image or
distorted image. Have an authorized
dealer or authorized repair facility replace
the windshield.
• Light conditions such as oncoming
headlamps, sunrise, sunset or reflections
off of wet road surfaces can affect the
driver's ability to see the HUD image.
• Clean the windshield often for optimal
HUD performance. See Cleaning the
Windows and Wiper Blades (page 396).
164
Navigator (TB9) Canada/United States of America, enUSA, Edition date: 201907, Second-Printing Information Displays
Page 174 of 622
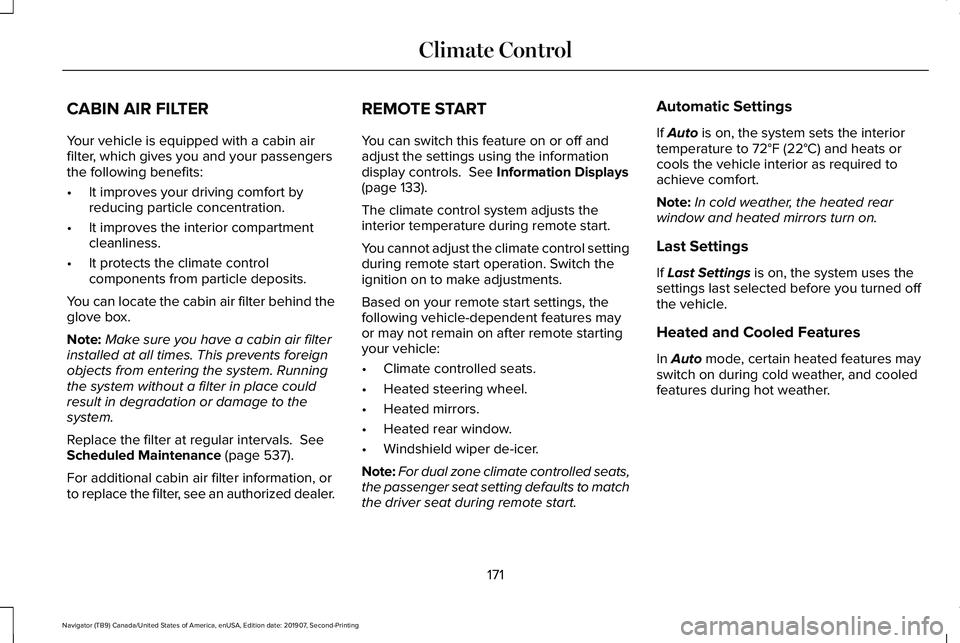
CABIN AIR FILTER
Your vehicle is equipped with a cabin air
filter, which gives you and your passengers
the following benefits:
•
It improves your driving comfort by
reducing particle concentration.
• It improves the interior compartment
cleanliness.
• It protects the climate control
components from particle deposits.
You can locate the cabin air filter behind the
glove box.
Note: Make sure you have a cabin air filter
installed at all times. This prevents foreign
objects from entering the system. Running
the system without a filter in place could
result in degradation or damage to the
system.
Replace the filter at regular intervals. See
Scheduled Maintenance (page 537).
For additional cabin air filter information, or
to replace the filter, see an authorized dealer. REMOTE START
You can switch this feature on or off and
adjust the settings using the information
display controls.
See Information Displays
(page 133).
The climate control system adjusts the
interior temperature during remote start.
You cannot adjust the climate control setting
during remote start operation. Switch the
ignition on to make adjustments.
Based on your remote start settings, the
following vehicle-dependent features may
or may not remain on after remote starting
your vehicle:
• Climate controlled seats.
• Heated steering wheel.
• Heated mirrors.
• Heated rear window.
• Windshield wiper de-icer.
Note: For dual zone climate controlled seats,
the passenger seat setting defaults to match
the driver seat during remote start. Automatic Settings
If
Auto is on, the system sets the interior
temperature to 72°F (22°C) and heats or
cools the vehicle interior as required to
achieve comfort.
Note: In cold weather, the heated rear
window and heated mirrors turn on.
Last Settings
If
Last Settings is on, the system uses the
settings last selected before you turned off
the vehicle.
Heated and Cooled Features
In
Auto mode, certain heated features may
switch on during cold weather, and cooled
features during hot weather.
171
Navigator (TB9) Canada/United States of America, enUSA, Edition date: 201907, Second-Printing Climate Control
Page 184 of 622
You can also adjust this feature through the
touchscreen.
Press the Menu Settings icon, then
Vehicle. Choose Multi-Contour
Seats.
When switched on, the system displays
directions for you to adjust the lumbar
settings in your seat or to set the massage
function.
To access and make adjustments to the
lumbar setting:
1. Choose the seat you would like to adjust.
2. Press the + or - to adjust the lumbar intensity.
To access and make adjustments to the
massage setting:
1. Press the Menu Settings icon, then Vehicle. Choose Multi-Contour Seats.
2. Choose the seat you would like to adjust.
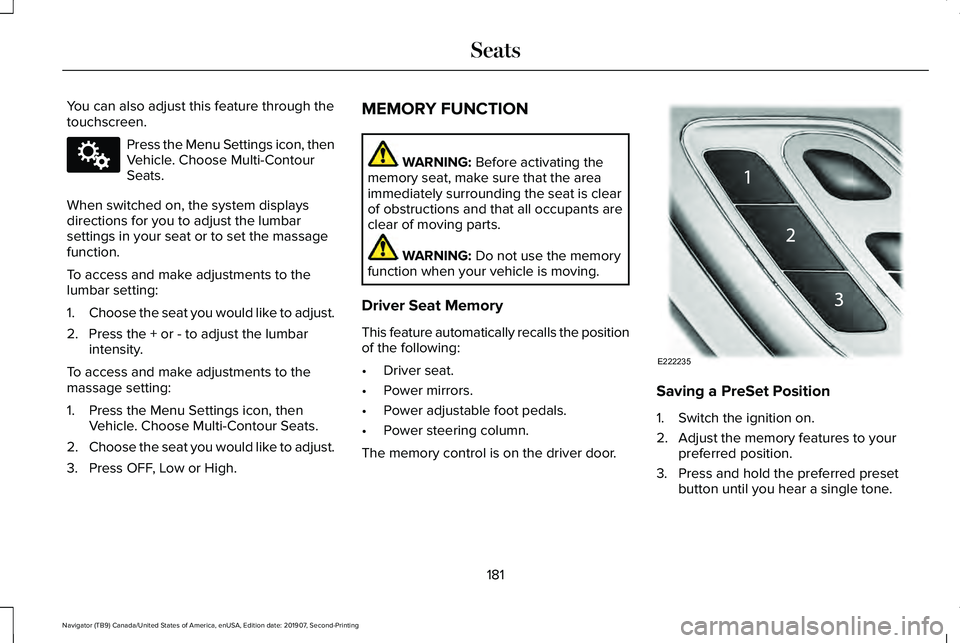
3. Press OFF, Low or High. MEMORY FUNCTION WARNING: Before activating the
memory seat, make sure that the area
immediately surrounding the seat is clear
of obstructions and that all occupants are
clear of moving parts. WARNING:
Do not use the memory
function when your vehicle is moving.
Driver Seat Memory
This feature automatically recalls the position
of the following:
• Driver seat.
• Power mirrors.
• Power adjustable foot pedals.
• Power steering column.
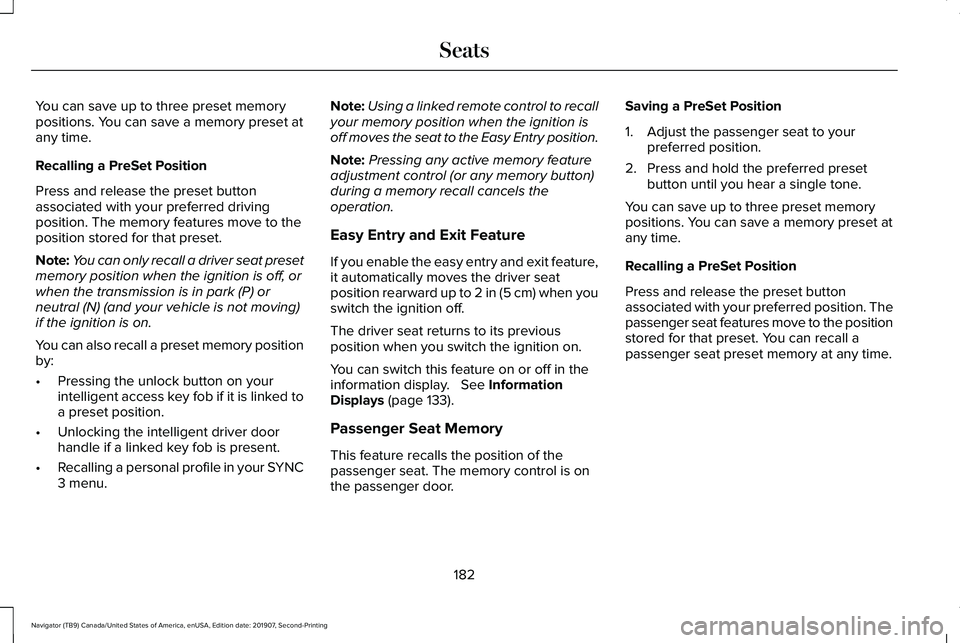
The memory control is on the driver door. Saving a PreSet Position
1. Switch the ignition on.
2. Adjust the memory features to your
preferred position.
3. Press and hold the preferred preset button until you hear a single tone.
181
Navigator (TB9) Canada/United States of America, enUSA, Edition date: 201907, Second-Printing SeatsE142607 E222235
Page 185 of 622
You can save up to three preset memory
positions. You can save a memory preset at
any time.
Recalling a PreSet Position
Press and release the preset button
associated with your preferred driving
position. The memory features move to the
position stored for that preset.
Note:
You can only recall a driver seat preset
memory position when the ignition is off, or
when the transmission is in park (P) or
neutral (N) (and your vehicle is not moving)
if the ignition is on.
You can also recall a preset memory position
by:
• Pressing the unlock button on your
intelligent access key fob if it is linked to
a preset position.
• Unlocking the intelligent driver door
handle if a linked key fob is present.
• Recalling a personal profile in your SYNC
3 menu. Note:
Using a linked remote control to recall
your memory position when the ignition is
off moves the seat to the Easy Entry position.
Note: Pressing any active memory feature
adjustment control (or any memory button)
during a memory recall cancels the
operation.
Easy Entry and Exit Feature
If you enable the easy entry and exit feature,
it automatically moves the driver seat
position rearward up to 2 in (5 cm) when you
switch the ignition off.
The driver seat returns to its previous
position when you switch the ignition on.
You can switch this feature on or off in the
information display.
See Information
Displays (page 133).
Passenger Seat Memory
This feature recalls the position of the
passenger seat. The memory control is on
the passenger door. Saving a PreSet Position
1. Adjust the passenger seat to your
preferred position.
2. Press and hold the preferred preset button until you hear a single tone.
You can save up to three preset memory
positions. You can save a memory preset at
any time.
Recalling a PreSet Position
Press and release the preset button
associated with your preferred position. The
passenger seat features move to the position
stored for that preset. You can recall a
passenger seat preset memory at any time.
182
Navigator (TB9) Canada/United States of America, enUSA, Edition date: 201907, Second-Printing Seats
Page 186 of 622
Personal Profiles
This feature allows you to create multiple
personal profiles enabling users to
personalize vehicle
’s settings. You can
create one profile for each preset memory
seat button along with a guest profile. You
can recall a profile using SYNC 3 or the
preset button you selected when you created
your profile. You can also link a remote
control or mobile device to your profile,
which is used to recall it.
Creating a Personal Profile
Use the SYNC display to create a personal
profile.
1. Switch the ignition on and leave the vehicle in park (P).
2. Select the Personal Profiles button under
Settings.
3. Follow the instructions on the display. Linking a Personal Profile to your Remote
Control or Mobile Device
You can save preset memory positions for
up to three remote controls by assigning a
remote control to a personal profile in your
SYNC 3. You can assign three additional
remote controls set up as Phone as a Key.
See Keys and Remote Controls (page 69).
Use the SYNC display to link a remote
control, mobile device or both to a personal
profile.
1. Switch the ignition on and leave the vehicle in park (P).
2. Select the Personal Profiles button under
Settings.
3. Touch the arrow for the profile you wish to link to a remote control or mobile
device.
4. Select the correct button to link a remote
control, mobile device or both.
5. Follow the instructions on the display. Note:
To successfully link a mobile device,
the mobile device must be present in your
vehicle, and must have previously been
setup as a remote control for your vehicle.
Note: If more than one linked remote control
or intelligent access key is in range, the
memory function moves to the settings of
the first key to initiate a memory recall.
Note: The guest profile consists of existing
settings when there is no driver profile
created. After you create a driver profile, the
guest profile serves as an additional driver
profile.
Note: You cannot link a personalized name,
a memory seat button or a keyfob to a guest
profile.
Personal Settings
Personal profiles allow you to personalize
positional settings such as seats and mirrors,
as well as non-positional settings such as
radio, navigation, driver assist and system
settings.
See SYNC™ 3 (page 472). You
cannot change the menu locations and
settings of those personalized features with
personal profiles.
183
Navigator (TB9) Canada/United States of America, enUSA, Edition date: 201907, Second-Printing Seats
Page 202 of 622
The system supports one Qi wireless
charging compatible device on the charging
area.
Keep the charging area clean and remove
foreign objects prior to charging a device.
Do not place items with a magnetic strip, for
example passports, parking tickets or credit
cards, near the charging area when charging
a device. Damage may occur to the magnetic
strip.
Do not place metal objects, for example
remote controls, coins and candy wrappers,
on or near the charging area when charging
a device. Metal objects may heat up and
degrade the charging performance.
Note:
The device controls the rate of charge,
or charging power. During charging, the
device and the charger may heat up, this is
normal. If the battery gets hotter than usual,
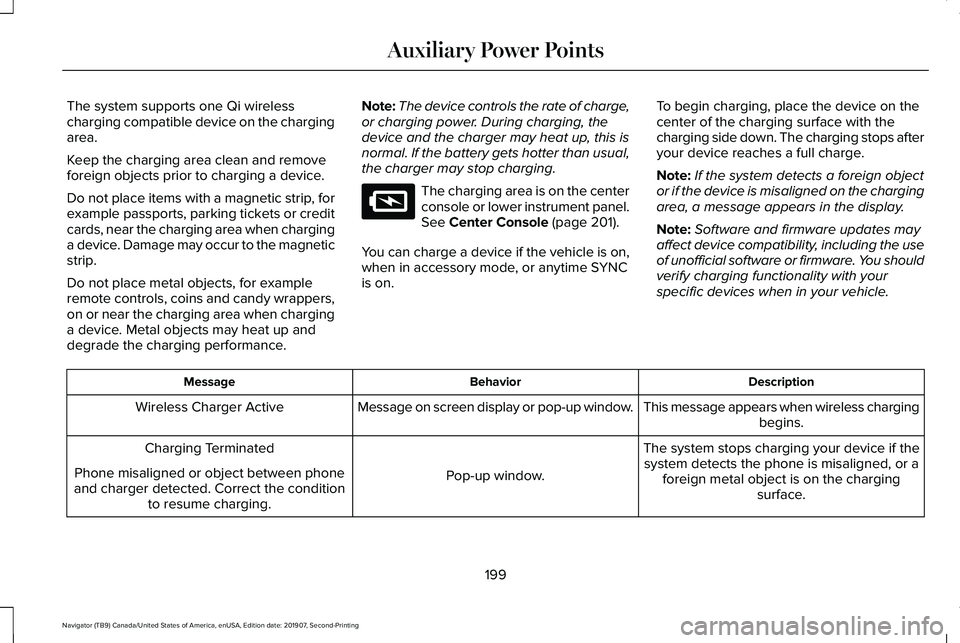
the charger may stop charging. The charging area is on the center
console or lower instrument panel.
See Center Console (page 201).
You can charge a device if the vehicle is on,
when in accessory mode, or anytime SYNC
is on. To begin charging, place the device on the
center of the charging surface with the
charging side down. The charging stops after
your device reaches a full charge.
Note:
If the system detects a foreign object
or if the device is misaligned on the charging
area, a message appears in the display.
Note: Software and firmware updates may
affect device compatibility, including the use
of unofficial software or firmware. You should
verify charging functionality with your
specific devices when in your vehicle. Description
Behavior
Message
This message appears when wireless chargingbegins.
Message on screen display or pop-up window.
Wireless Charger Active
The system stops charging your device if thesystem detects the phone is misaligned, or a foreign metal object is on the charging surface.
Pop-up window.
Charging Terminated
Phone misaligned or object between phone
and charger detected. Correct the condition to resume charging.
199
Navigator (TB9) Canada/United States of America, enUSA, Edition date: 201907, Second-Printing Auxiliary Power PointsE297549
Page 208 of 622
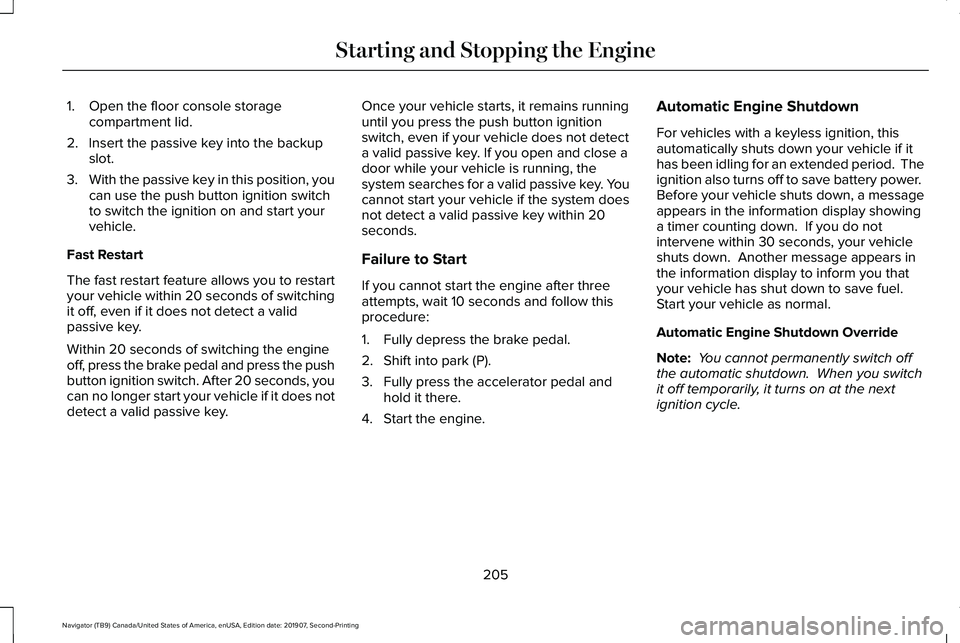
1. Open the floor console storage
compartment lid.
2. Insert the passive key into the backup slot.
3. With the passive key in this position, you
can use the push button ignition switch
to switch the ignition on and start your
vehicle.
Fast Restart
The fast restart feature allows you to restart
your vehicle within 20 seconds of switching
it off, even if it does not detect a valid
passive key.
Within 20 seconds of switching the engine
off, press the brake pedal and press the push
button ignition switch. After 20 seconds, you
can no longer start your vehicle if it does not
detect a valid passive key. Once your vehicle starts, it remains running
until you press the push button ignition
switch, even if your vehicle does not detect
a valid passive key. If you open and close a
door while your vehicle is running, the
system searches for a valid passive key. You
cannot start your vehicle if the system does
not detect a valid passive key within 20
seconds.
Failure to Start
If you cannot start the engine after three
attempts, wait 10 seconds and follow this
procedure:
1. Fully depress the brake pedal.
2. Shift into park (P).
3. Fully press the accelerator pedal and
hold it there.
4. Start the engine. Automatic Engine Shutdown
For vehicles with a keyless ignition, this
automatically shuts down your vehicle if it
has been idling for an extended period. The
ignition also turns off to save battery power.
Before your vehicle shuts down, a message
appears in the information display showing
a timer counting down. If you do not
intervene within 30 seconds, your vehicle
shuts down. Another message appears in
the information display to inform you that
your vehicle has shut down to save fuel.
Start your vehicle as normal.
Automatic Engine Shutdown Override
Note:
You cannot permanently switch off
the automatic shutdown. When you switch
it off temporarily, it turns on at the next
ignition cycle.
205
Navigator (TB9) Canada/United States of America, enUSA, Edition date: 201907, Second-Printing Starting and Stopping the Engine
Page 209 of 622
You can stop the shutdown, or reset the
timer, at any point before the 30-second
countdown has expired by doing any of the
following:
•
Interacting with your vehicle, for example
pressing the brake or accelerator pedal.
• You can temporarily switch off the
shutdown feature any time the ignition is
on using the information display. See
Information Displays (page 133). The
feature only remains off for the current
ignition cycle.
• During the 30-second countdown, the
system prompts you to press OK or
RESET to temporarily switch the feature
off for the current ignition cycle only.
Stopping the Engine When Your
Vehicle is Stationary
1. Shift into park (P).
2. Press the push button ignition switch.
3. Apply the parking brake.
Note: The ignition, all electrical circuits and
all warning lamps and indicators will be
turned off. Note:
If the engine is idling for 30 minutes,
the ignition and engine automatically shuts
down.
Stopping the Engine When Your
Vehicle is Moving WARNING:
Switching off the engine
when the vehicle is still moving will result
in a loss of brake and steering assistance.
The steering will not lock, but higher effort
will be required. When the ignition is
switched off, some electrical circuits,
including air bags, warning lamps and
indicators may also be off. If the ignition
was turned off accidentally, you can shift
into neutral (N) and re-start the engine.
1. Shift into neutral and use the brakes to bring your vehicle to a safe stop.
2. When your vehicle has stopped, shift into
park (P).
3. Press and hold the push button ignition switch, or press it three times within two
seconds.
4. Apply the parking brake. Guarding Against Exhaust Fumes WARNING: Exhaust leaks may result
in entry of harmful and potentially lethal
fumes into the passenger compartment. If
you smell exhaust fumes inside your
vehicle, have your vehicle inspected
immediately. Do not drive if you smell
exhaust fumes.
Important Ventilating Information
If you stop your vehicle and then leave the
engine idling for long periods, we
recommend that you do one of the following:
• Open the windows at least
1 in (3 cm).
• Set your climate control to outside air.
ENGINE BLOCK HEATER
(IF EQUIPPED) WARNING:
Failure to follow engine
block heater instructions could result in
property damage or serious personal
injury.
206
Navigator (TB9) Canada/United States of America, enUSA, Edition date: 201907, Second-Printing Starting and Stopping the Engine
Page 211 of 622
AUTO-START-STOP
The system helps reduce fuel consumption
by automatically stopping and restarting the
engine when your vehicle has stopped. The
engine restarts automatically when you
release the brake pedal.
In some situations, your vehicle may restart
automatically, for example:
•
To maintain interior comfort.
• To recharge the battery.
Note: Power assist steering turns off when
the engine is off.
Note: If your vehicle is flex fuel capable,
Auto-Start-Stop is inhibited for a short time
after a refuel event when the system is
verifying the fuel type being used. WARNING: Always fully apply the
parking brake. Make sure you shift into
park (P) for vehicles with an automatic
transmission. Switch the ignition off and
remove the key whenever you leave your
vehicle. WARNING: Before opening the hood
or performing any maintenance, fully apply
the parking brake, shift into park (P) or
neutral (N) and switch the ignition off. WARNING: Always switch the ignition
off before leaving the vehicle. If the ignition
is switched on an automatic restart may
occur at any time. WARNING:
The system may require
the engine to automatically restart when
the auto-start-stop indicator illuminates
green or flashes amber. Failure to follow
this instruction could result in personal
injury.
The Auto-Start-Stop system status is
available at a glance within the information
display.
See Information Displays (page
133).
Enabling Auto-Start-Stop
The system automatically enables every time
you start your vehicle if: •
You do not press the Auto-Start-Stop
button (not illuminated).
• Your vehicle exceeds an initial speed of
3 mph (5 km/h)
after you have initially
started your vehicle.
• You have stopped your vehicle.
• Your foot is on the brake pedal.
• The transmission is in drive.
• Not in Excite mode (enable by pressing
the Auto-Start-Stop button).
• The driver door is closed.
• There is adequate brake vacuum.
• The interior compartment has cooled or
warmed to an acceptable level.
• The front windshield defroster is off.
• You have not turned the steering wheel
rapidly or you do not have it at a sharp
angle.
• The vehicle is not on a steep road grade.
• The battery is within optimal operating
conditions, (with the battery state of
charge and temperature in range).
• The engine coolant is at operating
temperature.
208
Navigator (TB9) Canada/United States of America, enUSA, Edition date: 201907, Second-Printing Unique Driving Characteristics