display LINCOLN NAVIGATOR 2020 Manual Online
[x] Cancel search | Manufacturer: LINCOLN, Model Year: 2020, Model line: NAVIGATOR, Model: LINCOLN NAVIGATOR 2020Pages: 622, PDF Size: 6.47 MB
Page 213 of 622
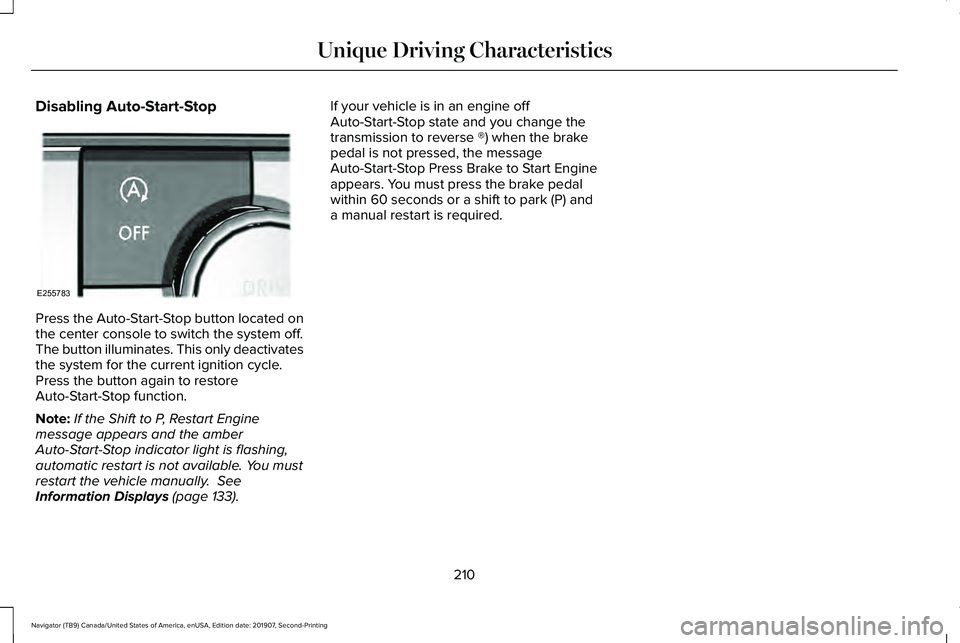
Disabling Auto-Start-Stop
Press the Auto-Start-Stop button located on
the center console to switch the system off.
The button illuminates. This only deactivates
the system for the current ignition cycle.
Press the button again to restore
Auto-Start-Stop function.
Note:
If the Shift to P, Restart Engine
message appears and the amber
Auto-Start-Stop indicator light is flashing,
automatic restart is not available. You must
restart the vehicle manually. See
Information Displays (page 133). If your vehicle is in an engine off
Auto-Start-Stop state and you change the
transmission to reverse ®) when the brake
pedal is not pressed, the message
Auto-Start-Stop Press Brake to Start Engine
appears. You must press the brake pedal
within 60 seconds or a shift to park (P) and
a manual restart is required.
210
Navigator (TB9) Canada/United States of America, enUSA, Edition date: 201907, Second-Printing Unique Driving CharacteristicsE255783
Page 219 of 622
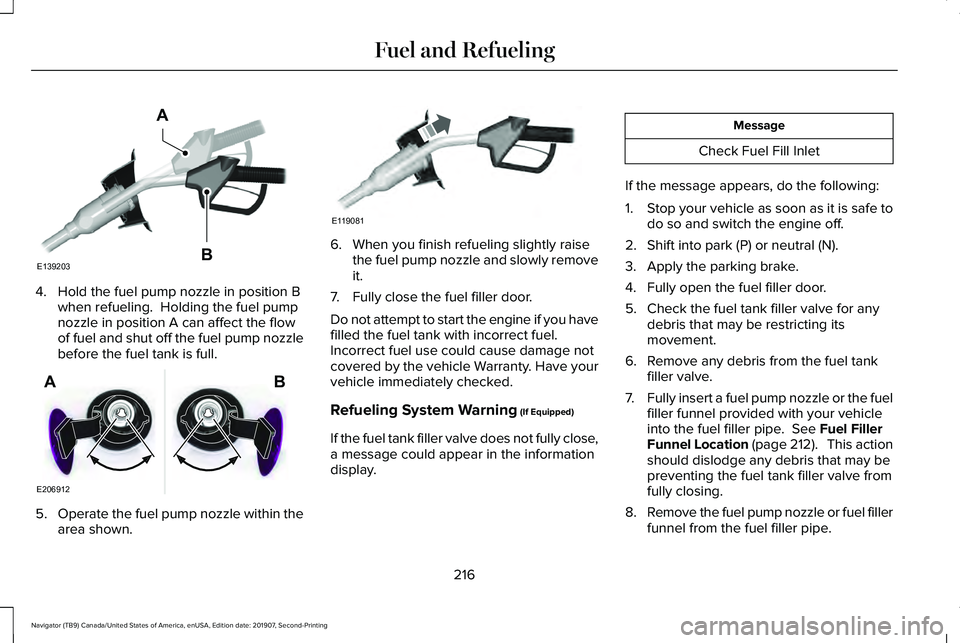
4. Hold the fuel pump nozzle in position B
when refueling. Holding the fuel pump
nozzle in position A can affect the flow
of fuel and shut off the fuel pump nozzle
before the fuel tank is full. 5.
Operate the fuel pump nozzle within the
area shown. 6. When you finish refueling slightly raise
the fuel pump nozzle and slowly remove
it.
7. Fully close the fuel filler door.
Do not attempt to start the engine if you have
filled the fuel tank with incorrect fuel.
Incorrect fuel use could cause damage not
covered by the vehicle Warranty. Have your
vehicle immediately checked.
Refueling System Warning (If Equipped)
If the fuel tank filler valve does not fully close,
a message could appear in the information
display. Message
Check Fuel Fill Inlet
If the message appears, do the following:
1. Stop your vehicle as soon as it is safe to
do so and switch the engine off.
2. Shift into park (P) or neutral (N).
3. Apply the parking brake.
4. Fully open the fuel filler door.
5. Check the fuel tank filler valve for any debris that may be restricting its
movement.
6. Remove any debris from the fuel tank filler valve.
7. Fully insert a fuel pump nozzle or the fuel
filler funnel provided with your vehicle
into the fuel filler pipe.
See Fuel Filler
Funnel Location (page 212). This action
should dislodge any debris that may be
preventing the fuel tank filler valve from
fully closing.
8. Remove the fuel pump nozzle or fuel filler
funnel from the fuel filler pipe.
216
Navigator (TB9) Canada/United States of America, enUSA, Edition date: 201907, Second-Printing Fuel and RefuelingE139203
A
B E206912
AB E119081
Page 225 of 622
AUTOMATIC TRANSMISSION
WARNING: Always fully apply the
parking brake and make sure you shift into
park (P). Failure to follow this instruction
could result in personal injury or death. WARNING:
Do not use tow/haul
when the road surface is slippery. Failure
to follow this instruction could result in the
loss of control of your vehicle. WARNING:
When your vehicle is
stationary, keep the brake pedal fully
pressed when shifting gears. Failure to
follow this instruction could result in
personal injury, death or property damage.
Note: You may not be able to shift out of
park (P) unless the intelligent access key is
inside your vehicle. Understanding the Shift Positions of
your Automatic Transmission
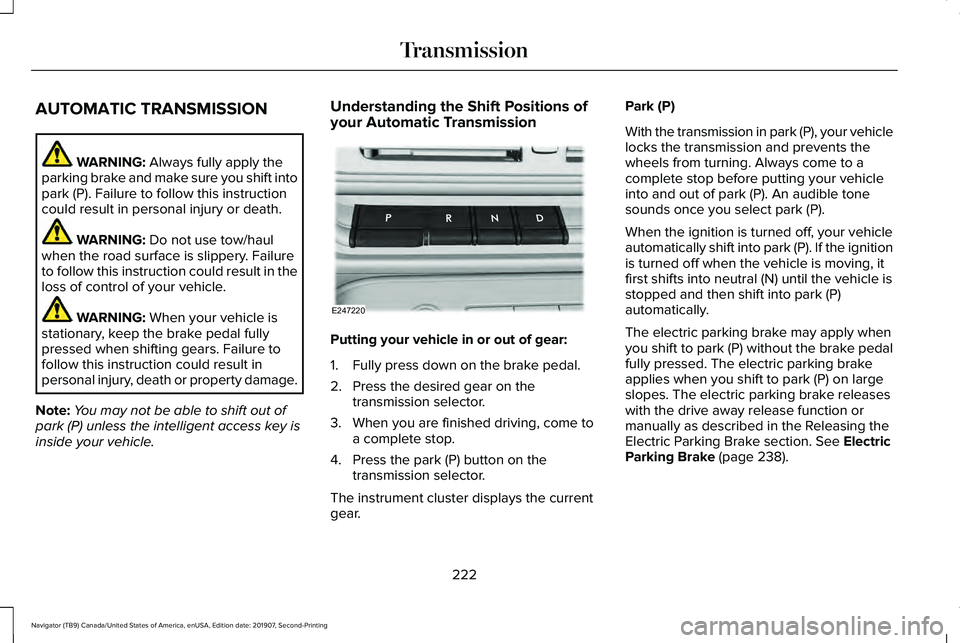
Putting your vehicle in or out of gear:
1. Fully press down on the brake pedal.
2. Press the desired gear on the
transmission selector.
3. When you are finished driving, come to a complete stop.
4. Press the park (P) button on the transmission selector.
The instrument cluster displays the current
gear. Park (P)
With the transmission in park (P), your vehicle
locks the transmission and prevents the
wheels from turning. Always come to a
complete stop before putting your vehicle
into and out of park (P). An audible tone
sounds once you select park (P).
When the ignition is turned off, your vehicle
automatically shift into park (P). If the ignition
is turned off when the vehicle is moving, it
first shifts into neutral (N) until the vehicle is
stopped and then shift into park (P)
automatically.
The electric parking brake may apply when
you shift to park (P) without the brake pedal
fully pressed. The electric parking brake
applies when you shift to park (P) on large
slopes. The electric parking brake releases
with the drive away release function or
manually as described in the Releasing the
Electric Parking Brake section.
See Electric
Parking Brake (page 238).
222
Navigator (TB9) Canada/United States of America, enUSA, Edition date: 201907, Second-Printing TransmissionE247220
Page 226 of 622
Automatic Return to Park
Note:
This feature does not operate when
your vehicle is in Stay in Neutral mode or
neutral tow.
Your vehicle has a feature that automatically
shifts your vehicle into park (P) when any of
the following conditions occur:
• You turn the vehicle off.
• You open the driver's door with your
seatbelt unlatched with the vehicle
stopped.
• You unlatch your seatbelt when the
driver's door is open with the vehicle
stopped.
If you turn your vehicle off when moving,
your vehicle first shifts into neutral (N) until
it stops and then shift into park (P)
automatically.
Note: If you have waited an extended period
of time, 2-15 minutes before starting your
vehicle, unlatching your seatbelt can cause
this feature to activate, even with the driver
door closed. Note:
This feature may not work properly if
the door ajar switch is malfunctioning. If your
door ajar indicator does not illuminate when
you open the driver’ s door or the indicator
illuminates with the driver’ s door closed, see
your authorized dealer.
Reverse (R)
With the selector in reverse (R), your vehicle
moves backward. Always come to a
complete stop before shifting into and out
of reverse (R).
Neutral (N)
With the selector in neutral (N), your vehicle
can be started and is free to roll. Hold the
brake pedal down when in this position.
Stay in Neutral Mode
Note: Stay in neutral mode is a temporary
vehicle state with the ignition off. Once in
this mode, sufficient battery voltage must be
maintained or your vehicle returns to park.
Extended usage of Stay in Neutral mode
may result in a battery voltage reduction to
a level where the vehicle may no longer
start. Do not tow your vehicle in this mode. Note:
Always put your vehicle in Stay in
Neutral mode when entering an automatic
car wash. Failure to do this could result in
vehicle damage not covered by warranty.
Stay in Neutral mode allows your vehicle to
stay in neutral when you exit your vehicle.
Your vehicle must be stationary to enter this
mode.
To enter Stay in Neutral mode:
• Press the neutral (N) button on the
transmission selector.
• Press the neutral (N) button again to
enter Stay in Neutral mode.
A message appears in your information
display screen when your vehicle has
entered Stay in Neutral mode.
To exit Stay in Neutral mode, apply the brake
and select a different gear.
Stay in Neutral Mode - No Start
Use this to move your transmission from the
park position in the event of a no start
situation. If your vehicle has a dead battery,
an external power source is required. Do not
tow your vehicle in this mode.
223
Navigator (TB9) Canada/United States of America, enUSA, Edition date: 201907, Second-Printing Transmission
Page 227 of 622
Note:
This only functions if your 12-volt
battery has power and the starter can spin
the engine. If vehicle battery voltage is not
sufficient, an external 12-volt power source
such as jumper cables, battery charger or
jump pack may be required for this feature
to function.
Note: Once in this mode, sufficient battery
voltage must be maintained or your vehicle
returns to park. WARNING: When doing this
procedure, you need to take the
transmission out of park (P) which means
your vehicle can roll freely. To avoid
unwanted vehicle movement, always fully
apply the parking brake prior to doing this
procedure. Use wheels chocks if
appropriate.
1. Do not press the brake pedal. Press the START/STOP
button.
2. Fully press down on the brake pedal. Keep the brakes applied through step 7.
3. Press the accelerator pedal to the floor and hold through step 7. 4. Press the neutral (N) button on the
transmission selector.
5. Press the neutral (N) button again to enter Stay in Neutral mode.
6. Press and release the push to start button, the transmission needs a
minimum of 2 seconds to exit park.
7. When neutral (N) is displayed, the brake and accelerator pedals can be released.
To exit Stay in Neutral mode, select a
different gear.
A message appears in your information
display screen when your vehicle has
entered Stay in Neutral mode.
Drive (D)
Drive (D) is the normal driving position for
the best fuel economy. The overdrive
function allows automatic upshifts and
downshifts through gears one through ten. Adaptive Tow/Haul Mode WARNING:
Do not use tow/haul
when the road surface is slippery. Failure
to follow this instruction could result in the
loss of control of your vehicle.
Adaptive tow/haul has two modes, automatic
that is enabled by default and off.
To turn adaptive tow/haul off or on, use the
information display controls.
See General
Information (page 133). The indicator light
illuminates in the instrument cluster.
Key adaptive tow/haul features:
• The system remains in the same mode,
even after a key cycle.
• Is only available in normal drive modes
(Normal 2H and Normal 4A).
The adaptive tow/haul feature improves
transmission operation when towing a trailer
or a heavy load. All transmission gear ranges
are available when using adaptive tow/haul.
For information on towing.
See Towing (page
311).
224
Navigator (TB9) Canada/United States of America, enUSA, Edition date: 201907, Second-Printing Transmission
Page 228 of 622
SelectShift™ Automatic Transmission
Your vehicle is equipped with a SelectShift
Automatic transmission. The SelectShift
Automatic transmission gives you the ability
to change gears up or down, without a
clutch, as desired.
In order to prevent the engine from running
at too low of an RPM, which may cause it to
stall, SelectShift still automatically makes
some downshifts if it has determined that
you have not downshifted in time. Although
SelectShift makes some downshifts for you,
it still allows you to downshift at any time as
long as the SelectShift determines that
damage to the engine does not occur from
over-revving.
Note:
Engine damage may occur if you
maintain excessive engine revving without
shifting.
SelectShift does not automatically upshift,
even if the engine is approaching the RPM
limit. It must be shifted manually by pressing
the + paddle.
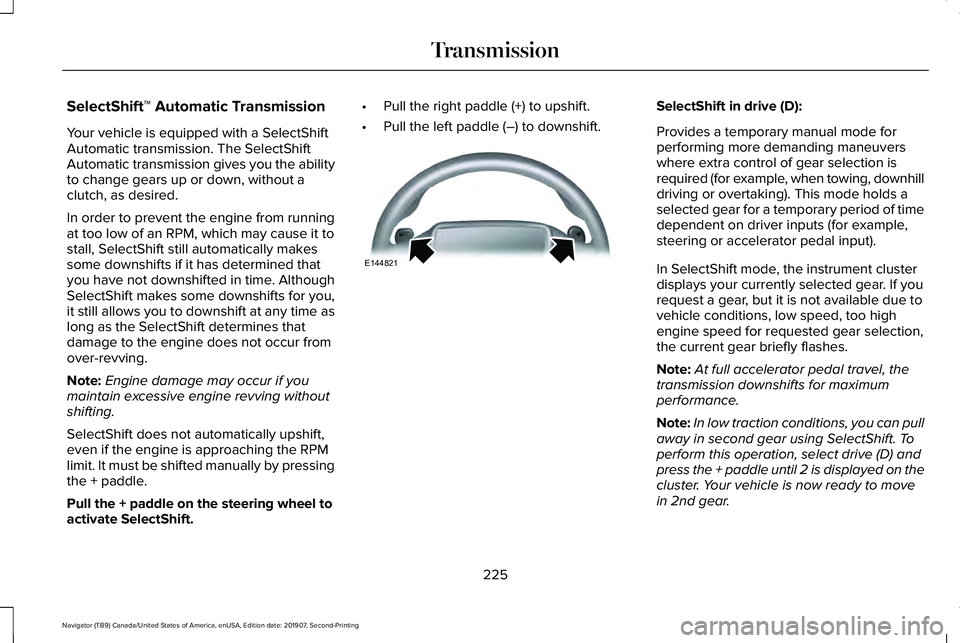
Pull the + paddle on the steering wheel to
activate SelectShift. •
Pull the right paddle (+) to upshift.
• Pull the left paddle (–) to downshift. SelectShift in drive (D):
Provides a temporary manual mode for
performing more demanding maneuvers
where extra control of gear selection is
required (for example, when towing, downhill
driving or overtaking). This mode holds a
selected gear for a temporary period of time
dependent on driver inputs (for example,
steering or accelerator pedal input).
In SelectShift mode, the instrument cluster
displays your currently selected gear. If you
request a gear, but it is not available due to
vehicle conditions, low speed, too high
engine speed for requested gear selection,
the current gear briefly flashes.
Note:
At full accelerator pedal travel, the
transmission downshifts for maximum
performance.
Note: In low traction conditions, you can pull
away in second gear using SelectShift. To
perform this operation, select drive (D) and
press the + paddle until 2 is displayed on the
cluster. Your vehicle is now ready to move
in 2nd gear.
225
Navigator (TB9) Canada/United States of America, enUSA, Edition date: 201907, Second-Printing TransmissionE144821
Page 231 of 622
USING FOUR-WHEEL DRIVE
Note:
For important information regarding
safe operation of this type of vehicle, see
General Information in the Wheels and Tires
chapter.
Note: Do not use SLIPPERY, DEEP
CONDITIONS or SLOW CLIMB on dry, hard
surfaced roads. Doing so produces
excessive noise, increases tire wear and may
damage drive components. The 4X4 system
in these modes is only intended for
consistently slippery or loose surfaces.
Note: If you select a drive mode that uses
4L when your vehicle is moving above 3 mph
(5 km/h), the 4WD system does not perform
a shift. This is normal and should be no
reason for concern. Refer to Shifting to or
from 4L for proper operation.
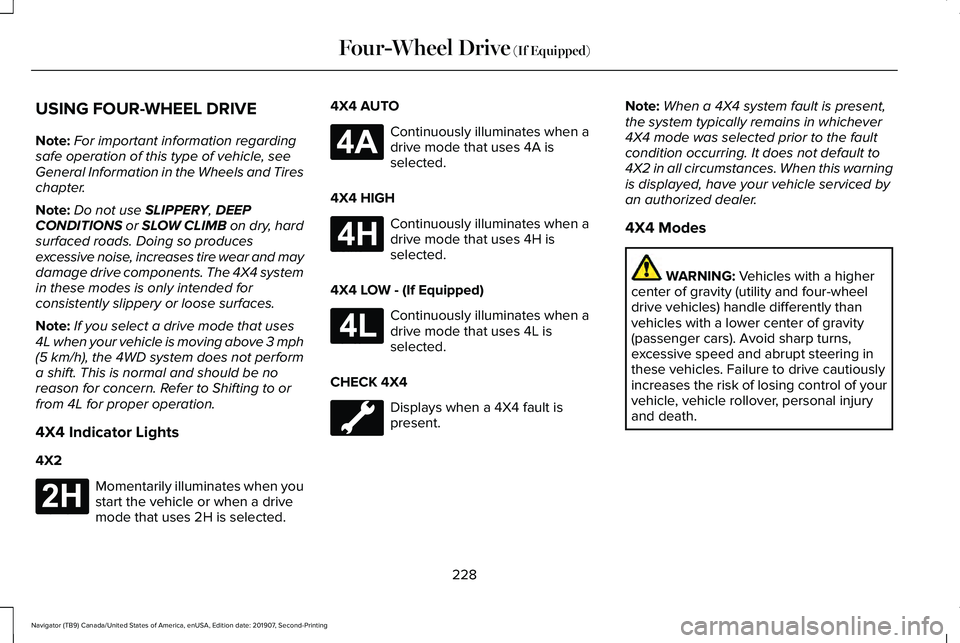
4X4 Indicator Lights
4X2 Momentarily illuminates when you
start the vehicle or when a drive
mode that uses 2H is selected. 4X4 AUTO Continuously illuminates when a
drive mode that uses 4A is
selected.
4X4 HIGH Continuously illuminates when a
drive mode that uses 4H is
selected.
4X4 LOW - (If Equipped) Continuously illuminates when a
drive mode that uses 4L is
selected.
CHECK 4X4 Displays when a 4X4 fault is
present.Note:
When a 4X4 system fault is present,
the system typically remains in whichever
4X4 mode was selected prior to the fault
condition occurring. It does not default to
4X2 in all circumstances. When this warning
is displayed, have your vehicle serviced by
an authorized dealer.
4X4 Modes WARNING:
Vehicles with a higher
center of gravity (utility and four-wheel
drive vehicles) handle differently than
vehicles with a lower center of gravity
(passenger cars). Avoid sharp turns,
excessive speed and abrupt steering in
these vehicles. Failure to drive cautiously
increases the risk of losing control of your
vehicle, vehicle rollover, personal injury
and death.
228
Navigator (TB9) Canada/United States of America, enUSA, Edition date: 201907, Second-Printing Four-Wheel Drive
(If Equipped)E181778 E181781 E181779 E181780
Page 232 of 622
Note:
The AdvanceTrac® with RSC® stability
enhancement system can be switched off
by deselecting the feature in the cluster
menu. See Using Traction Control (page
243). This disables the engine management
feature, allowing the vehicle to maintain full
power and enhanced momentum through
the obstacle.
Note: The AdvanceTrac system can take
control of the transfer case clutch and
disable it during driving maneuvers when
necessary.
Your vehicle engages 4X4 modes based on
the currently selected Drive Mode.
See
Drive Mode Control (page 299).
Note: The information display could show
messages during 4WD operation.
See
Information Messages (page 138).
2H - 4X2
2H turns on when you select
NORMAL or
CONSERVE. Power is delivered to the rear
wheels only. This mode is appropriate for
normal on-road driving on dry pavement and
provides the best fuel economy. 4A - 4X4 Auto
4A turns on when you select
EXCITE,
NORMAL 4x4 AUTO or SLIPPERY. It
provides electronically controlled four-wheel
drive with power delivered to all four wheels,
as required, for increased traction. 4A is
calibrated in conjunction with Drive Mode.
4A in EXCITE is less aggressively tuned and
is appropriate for dry road surfaces. 4A in
NORMAL 4x4 AUTO
is appropriate for all
on-road driving conditions, such as dry road
surfaces, wet pavement, light snow or gravel.
4A in
SLIPPERY is more aggressively tuned
and is appropriate for slippery surfaces, such
as light snow or gravel.
4H - 4X4 High
4H turns on when you select
DEEP
CONDITIONS. It provides electronically
locked four-wheel drive power to both the
front and rear wheels for use in off-road or
winter conditions such as deep snow, sand
or mud. This mode is not for use on dry
pavement. 4L - 4X4 Low - (If Equipped)
4L turns on when you select
SLOW CLIMB.
It provides electronically locked four-wheel
drive power to both the front and rear wheels
for use on low traction surfaces, but does so
with additional gearing for increased torque
multiplication. Intended only for off-road
applications such as deep sand, steep
grades or pulling heavy objects. 4L does not
engage when your vehicle is moving above
3 mph (5 km/h); this is normal and should be
no reason for concern.
Shifting Between 4WD System Modes
Note: Momentarily releasing the accelerator
pedal when a shift in progress message
displays improves engagement and
disengagement performance.
Note: Do not perform this operation if the
rear wheels are slipping.
Note: You may hear some noise as the
system shifts or engages; this is normal.
229
Navigator (TB9) Canada/United States of America, enUSA, Edition date: 201907, Second-Printing Four-Wheel Drive
(If Equipped)
Page 233 of 622
Shifting to or from 4L - 4X4 LOW
Note:
4L mode is not intended for use on dry
pavement.
1. Bring the vehicle to a rolling speed of 3 mph (5 km/h) or less.
2. Place the gearshift in neutral (N).
3. Rotate the drive mode knob to desired mode.
The information display shows a message
indicating a 4X4 shift is in progress. The
information display shows the system mode
selected. If any of the previous shift
conditions are not present, the shift does not
occur and the information display shows the
information guiding the driver through the
proper shifting procedures. If the previous
conditions are not satisfied in 30 seconds,
the system reverts back to the previous 4WD
mode or drive mode. If
Shift Delayed Pull Forward displays in the
information display, transfer case gear tooth
blockage is present. To alleviate this
condition, place the transmission in a forward
gear, move the vehicle forward
approximately
5 ft (2 m), and shift the
transmission back to neutral (N) to allow the
transfer case to complete the range shift.
Operating 4WD Vehicles with Spare or
Mismatched Tires
On four-wheel drive vehicles, the size of the
spare tire can affect the 4X4 system. If there
is a significant difference between the size
of the spare tire and the remaining tires, you
may have limited four-wheel drive
functionality.
When driving with the full-size dissimilar
spare wheel and tire assembly, it is
recommended that you do not:
• Exceed
50 mph (80 km/h) with a 4WD
mode turned on.
• Turn on a 4WD mode unless the vehicle
is stationary.
• Use a 4WD mode on dry pavement. Use of a dissimilar spare wheel and tire
assembly may lead to impairment of the
following:
•
Comfort and noise.
• Winter weather driving capability.
• Wet driving capability.
• Four-wheel drive capability.
How Your Vehicle Differs from Other
Vehicles WARNING:
Vehicles with a higher
center of gravity (utility and four-wheel
drive vehicles) handle differently than
vehicles with a lower center of gravity
(passenger cars). Avoid sharp turns,
excessive speed and abrupt steering in
these vehicles. Failure to drive cautiously
increases the risk of losing control of your
vehicle, vehicle rollover, personal injury
and death.
230
Navigator (TB9) Canada/United States of America, enUSA, Edition date: 201907, Second-Printing Four-Wheel Drive
(If Equipped)
Page 239 of 622
LIMITED SLIP DIFFERENTIAL (IF
EQUIPPED)
The Electronic Limited Slip Differential (eLSD)
system directs torque, enabling the vehicle
to drive over terrain and road conditions that
a conventional axle cannot. The system is
active at all times and requires no input from
the driver.
Note: If your vehicle is not at optimal
operating conditions or a system fault is
present, a warning may be displayed in the
instrument cluster. Depending on the
warning, your vehicle may need to be
serviced. You can find more information
regarding the system information messages
in the Information Displays chapter.
See
Information Messages (page 138).
Spare Tire
If your vehicle has an Electronic Limited Slip
Differential, do not use a spare tire of a
different size than the tire provided. If a spare
tire is installed, a message may appear,
indicating the system has disabled
automatically or reduced function to prevent system overheat and damage. It is
recommended to reinstall the repaired or
replaced road tire as soon as possible. When
the road tire is replaced, the system will
resume normal operation on the next key
cycle.
Trailer Towing
The Electronic Limited Slip Differential
enhances vehicle stability during trailer tow
operation. During high demand trailering
events, such as steep slopes, high speeds
or with a spare tire, the system may provide
a warning in the instrument cluster and
reduce function or enter a temporarily
disabled state. To resume normal function,
stop the vehicle in a safe location and allow
the unit to adequately cool. Once the system
has reached normal operating temperatures,
system function will be restored and the
Electronic Limited Slip Differential Restored
message will be displayed.
236
Navigator (TB9) Canada/United States of America, enUSA, Edition date: 201907, Second-Printing Rear Axle