radio controls LINCOLN NAVIGATOR 2020 Owners Manual
[x] Cancel search | Manufacturer: LINCOLN, Model Year: 2020, Model line: NAVIGATOR, Model: LINCOLN NAVIGATOR 2020Pages: 622, PDF Size: 6.47 MB
Page 4 of 622
Introduction
About This Manual
...........................................9
Symbols Glossary ............................................
9
Data Recording ...............................................
12
Perchlorate .......................................................
16
Lincoln Automotive Financial Services ........................................................................\
..
16
Replacement Parts Recommendation ........................................................................\
..
17
Special Notices ................................................
17
Mobile Communications Equipment .........
18
Export Unique Options ..................................
19
Environment
Protecting the Environment ........................
20
At a Glance
Instrument Panel .............................................
21
Child Safety
General Information ......................................
24
Installing Child Restraints ............................
26
Booster Seats .................................................
39Child Restraint Positioning
..........................
42
Child Safety Locks .........................................
44
Seatbelts
Principle of Operation ..................................
45
Fastening the Seatbelts ...............................
46
Seatbelt Height Adjustment ........................
51
Seatbelt Warning Lamp and Indicator Chime ............................................................
51
Seatbelt Reminder .........................................
52
Child Restraint and Seatbelt Maintenance ........................................................................\
.
54
Seatbelt Extensions ......................................
55
Personal Safety System ™
Personal Safety System ™.............................
56
Supplementary Restraints System
Principle of Operation ..................................
57
Driver and Passenger Airbags ...................
58
Front Passenger Sensing System .............
60
Side Airbags ...................................................
62Safety Canopy™
..............................................
63
Crash Sensors and Airbag Indicator ........
65
Airbag Disposal ..............................................
66
911 Assist
What Is 911 Assist ...........................................
67
Emergency Call Requirements ...................
67
Emergency Call Limitations ........................
68
Keys and Remote Controls
General Information on Radio Frequencies ........................................................................\
69
Remote Control ..............................................
69
Replacing a Lost Key or Remote Control ........................................................................\
.
74
Phone as a Key
What Is Phone As a Key ...............................
75
Phone as a Key Limitations .........................
75
Programming Your Phone ..........................
75
Using the Valet Mode ...................................
75
Using the Backup Starting Passcode .......
76
Phone as a Key – Troubleshooting ...........
76
1
Navigator (TB9) Canada/United States of America, enUSA, Edition date: 201907, Second-Printing Table of Contents
Page 72 of 622
GENERAL INFORMATION ON
RADIO FREQUENCIES
This device complies with Part 15 of the FCC
Rules and with Industry Canada
license-exempt RSS standard(s). Operation
is subject to the following two conditions: (1)
This device may not cause harmful
interference, and (2) This device must accept
any interference received, including
interference that may cause undesired
operation.
WARNING: Changes or modifications
not expressively approved by the party
responsible for compliance could void the
user's authority to operate the equipment.
The term "IC:" before the radio certification
number only signifies that Industry Canada
technical specifications were met.
The typical operating range for your
transmitter is approximately 33 ft (10 m).
Vehicles with the remote start feature will
have a greater range. One of the following could cause a decrease
in operating range:
•
Weather conditions.
• Nearby radio towers.
• Structures around the vehicle.
• Other vehicles parked next to your
vehicle.
The radio frequency used by your remote
control can also be used by other radio
transmitters, for example amateur radios,
medical equipment, wireless headphones,
wireless remote controls, cell phones, battery
chargers and alarm systems. If the
frequencies are jammed, you will not be able
to use your remote control. You can lock and
unlock the doors with the key.
Note: Make sure to lock your vehicle before
leaving it unattended.
Note: If you are in range, the remote control
will operate if you press any button
unintentionally.
Note: The remote control contains sensitive
electrical components. Exposure to moisture
or impact may cause permanent damage. Intelligent Access
(If Equipped)
The system uses a radio frequency signal to
communicate with your vehicle and authorize
your vehicle to unlock when one of the
following conditions are met:
• You activate the front exterior door
handle switch.
• You press the luggage compartment
button.
• You press a button on the transmitter.
If excessive radio frequency interference is
present in the area or if the transmitter
battery is low, you may need to mechanically
unlock your door. You can use the
mechanical key blade in your intelligent
access key to open the driver door in this
situation.
See Remote Control (page 69).
REMOTE CONTROL
Intelligent Access Key
Note: You may not be able to shift out of
park (P) unless the intelligent access key is
inside your vehicle.
69
Navigator (TB9) Canada/United States of America, enUSA, Edition date: 201907, Second-Printing Keys and Remote Controls
Page 77 of 622
The power windows do not work during
remote start and the radio does not turn on
automatically.
The parking lamps remain on and the vehicle
runs for 5, 10 or 15 minutes, depending on
the setting.
Extending the Engine Running Time
To extend the engine running time duration
of your vehicle during remote start, repeat
steps 1 and 2 while the engine is running. If
the duration is set to 15 minutes, the duration
extends by another 15 minutes. For example,
if your vehicle had been running from the
first remote start for 5 minutes, your vehicle
continues to run now for a total of 30
minutes. You can extend the remote start
up to a maximum of 35 minutes.
Wait at least five seconds before remote
starting after the engine stops running.
Turning Your Vehicle Off After Remote
Starting
Press the button once. The
parking lamps turn off. You may have to be closer to your vehicle
to remotely switch off your vehicle after
remote starting. This is due to the added
noise of your running vehicle.
You can switch this feature on or off in the
information display.
Memory Feature
You can program your intelligent access key
to recall memory positions. See Memory
Function (page 181).
If programmed to a pre-set position, the
remote control recalls memory positions
when you unlock your vehicle. If you have
the easy entry and exit feature enabled and
the ignition is off, the seat moves to the easy
entry position.
The seat moves to the driver memory
position when you switch the ignition on. REPLACING A LOST KEY OR
REMOTE CONTROL
Replacement keys or remote controls can
be purchased from an authorized dealer.
Authorized dealers can program remote
controls for your vehicle.
74
Navigator (TB9) Canada/United States of America, enUSA, Edition date: 201907, Second-Printing Keys and Remote ControlsE138625
Page 186 of 622
Personal Profiles
This feature allows you to create multiple
personal profiles enabling users to
personalize vehicle
’s settings. You can
create one profile for each preset memory
seat button along with a guest profile. You
can recall a profile using SYNC 3 or the
preset button you selected when you created
your profile. You can also link a remote
control or mobile device to your profile,
which is used to recall it.
Creating a Personal Profile
Use the SYNC display to create a personal
profile.
1. Switch the ignition on and leave the vehicle in park (P).
2. Select the Personal Profiles button under
Settings.
3. Follow the instructions on the display. Linking a Personal Profile to your Remote
Control or Mobile Device
You can save preset memory positions for
up to three remote controls by assigning a
remote control to a personal profile in your
SYNC 3. You can assign three additional
remote controls set up as Phone as a Key.
See Keys and Remote Controls (page 69).
Use the SYNC display to link a remote
control, mobile device or both to a personal
profile.
1. Switch the ignition on and leave the vehicle in park (P).
2. Select the Personal Profiles button under
Settings.
3. Touch the arrow for the profile you wish to link to a remote control or mobile
device.
4. Select the correct button to link a remote
control, mobile device or both.
5. Follow the instructions on the display. Note:
To successfully link a mobile device,
the mobile device must be present in your
vehicle, and must have previously been
setup as a remote control for your vehicle.
Note: If more than one linked remote control
or intelligent access key is in range, the
memory function moves to the settings of
the first key to initiate a memory recall.
Note: The guest profile consists of existing
settings when there is no driver profile
created. After you create a driver profile, the
guest profile serves as an additional driver
profile.
Note: You cannot link a personalized name,
a memory seat button or a keyfob to a guest
profile.
Personal Settings
Personal profiles allow you to personalize
positional settings such as seats and mirrors,
as well as non-positional settings such as
radio, navigation, driver assist and system
settings.
See SYNC™ 3 (page 472). You
cannot change the menu locations and
settings of those personalized features with
personal profiles.
183
Navigator (TB9) Canada/United States of America, enUSA, Edition date: 201907, Second-Printing Seats
Page 464 of 622
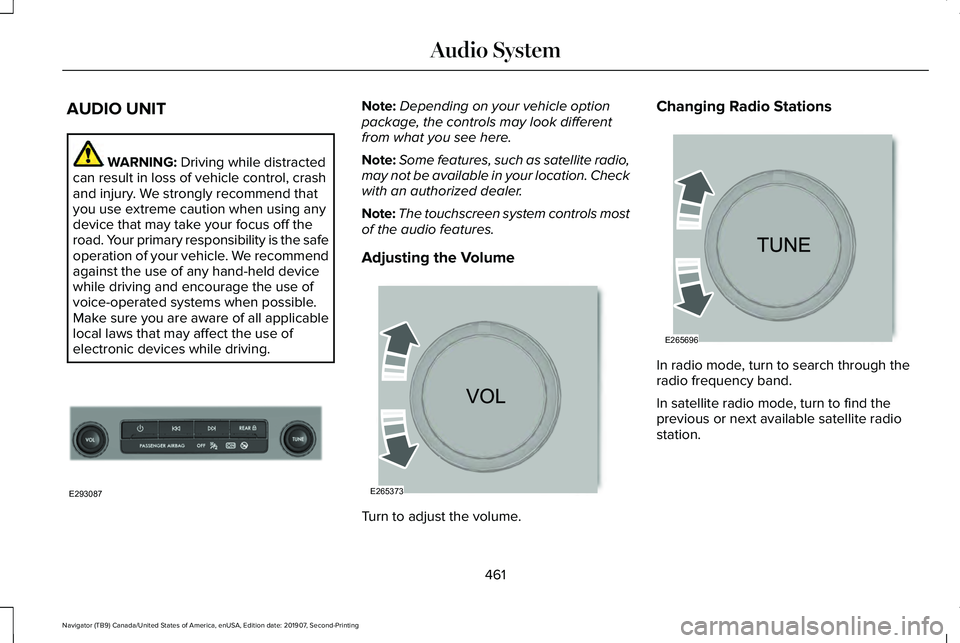
AUDIO UNIT
WARNING: Driving while distracted
can result in loss of vehicle control, crash
and injury. We strongly recommend that
you use extreme caution when using any
device that may take your focus off the
road. Your primary responsibility is the safe
operation of your vehicle. We recommend
against the use of any hand-held device
while driving and encourage the use of
voice-operated systems when possible.
Make sure you are aware of all applicable
local laws that may affect the use of
electronic devices while driving. Note:
Depending on your vehicle option
package, the controls may look different
from what you see here.
Note: Some features, such as satellite radio,
may not be available in your location. Check
with an authorized dealer.
Note: The touchscreen system controls most
of the audio features.
Adjusting the Volume Turn to adjust the volume.Changing Radio Stations
In radio mode, turn to search through the
radio frequency band.
In satellite radio mode, turn to find the
previous or next available satellite radio
station.
461
Navigator (TB9) Canada/United States of America, enUSA, Edition date: 201907, Second-Printing Audio SystemE293087 E265373 E265696
Page 465 of 622
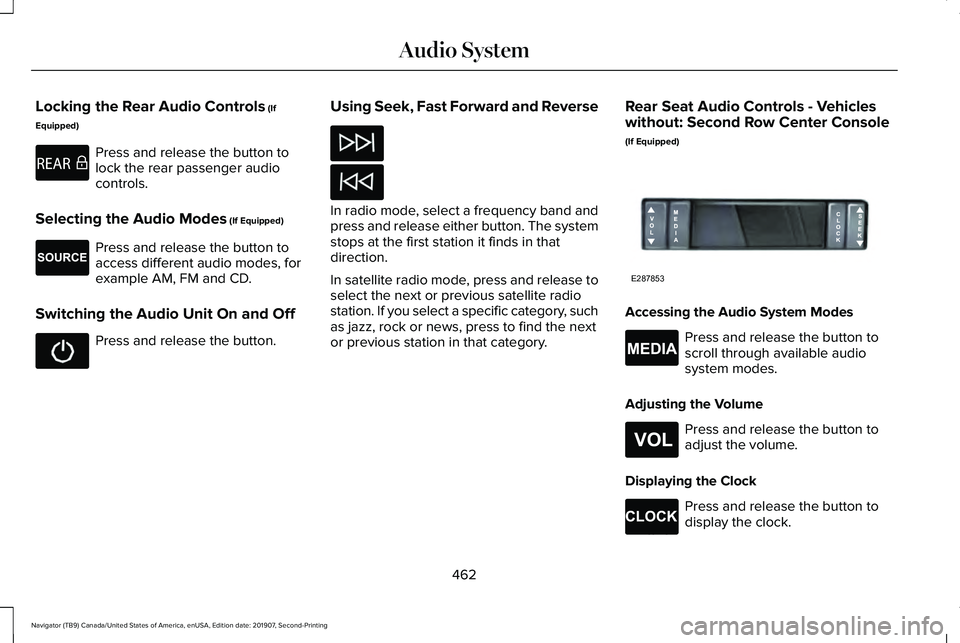
Locking the Rear Audio Controls (If
Equipped) Press and release the button to
lock the rear passenger audio
controls.
Selecting the Audio Modes
(If Equipped) Press and release the button to
access different audio modes, for
example AM, FM and CD.
Switching the Audio Unit On and Off Press and release the button.
Using Seek, Fast Forward and Reverse In radio mode, select a frequency band and
press and release either button. The system
stops at the first station it finds in that
direction.
In satellite radio mode, press and release to
select the next or previous satellite radio
station. If you select a specific category, such
as jazz, rock or news, press to find the next
or previous station in that category.
Rear Seat Audio Controls - Vehicles
without: Second Row Center Console
(If Equipped) Accessing the Audio System Modes
Press and release the button to
scroll through available audio
system modes.
Adjusting the Volume Press and release the button to
adjust the volume.
Displaying the Clock Press and release the button to
display the clock.
462
Navigator (TB9) Canada/United States of America, enUSA, Edition date: 201907, Second-Printing Audio SystemE270448 E265276 E287853 E265035 E265304 E265278
Page 466 of 622
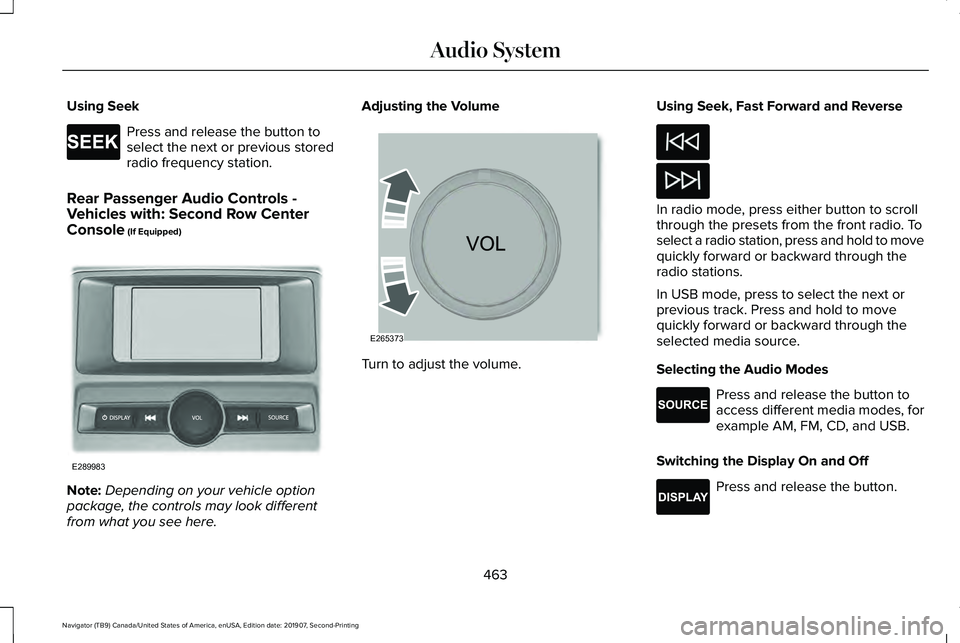
Using Seek
Press and release the button to
select the next or previous stored
radio frequency station.
Rear Passenger Audio Controls -
Vehicles with: Second Row Center
Console (If Equipped) Note:
Depending on your vehicle option
package, the controls may look different
from what you see here. Adjusting the Volume
Turn to adjust the volume.Using Seek, Fast Forward and Reverse In radio mode, press either button to scroll
through the presets from the front radio. To
select a radio station, press and hold to move
quickly forward or backward through the
radio stations.
In USB mode, press to select the next or
previous track. Press and hold to move
quickly forward or backward through the
selected media source.
Selecting the Audio Modes
Press and release the button to
access different media modes, for
example AM, FM, CD, and USB.
Switching the Display On and Off Press and release the button.
463
Navigator (TB9) Canada/United States of America, enUSA, Edition date: 201907, Second-Printing Audio SystemE265273 E289983 E265373 E265276 E268786
Page 489 of 622
Menu Item
The name of the USB that is plugged in displays here.
USB
Bluetooth Stereo
If you have SYNC 3 compatible apps on your connected smart phone, they display here as individual source selections.
Apps
1 This feature may not be available in all markets and requires an active subscription.
AM/FM Radio
Tuning a Station
You can use the tune or seek controls on the
radio bezel to select a station.
To tune a station using the touchscreen,
select: Menu Item
Direct Tune
A pop up appears, allowing you to type in
the frequency of a station. You can only enter
a valid station for the source you are
currently listening to. You can press the backspace button to
delete the previously entered number.
Once you have entered the station's call
numbers, you can select: Action and Descrip-
tion
Menu Item
Press to begin
playing the station
you have entered.
Enter
Press to exit without
changing the station.
Cancel
Presets
To set a new preset, tune to the station and
then press and hold one of the memory
preset buttons. The audio mutes briefly while
the system saves the station and then
returns.
486
Navigator (TB9) Canada/United States of America, enUSA, Edition date: 201907, Second-Printing SYNC™ 3
Page 500 of 622
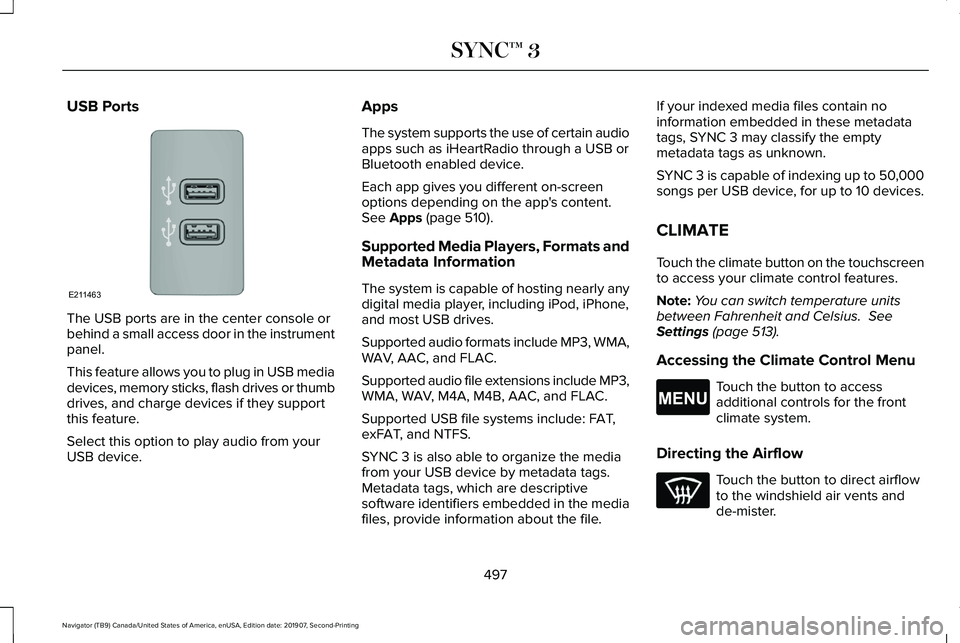
USB Ports
The USB ports are in the center console or
behind a small access door in the instrument
panel.
This feature allows you to plug in USB media
devices, memory sticks, flash drives or thumb
drives, and charge devices if they support
this feature.
Select this option to play audio from your
USB device. Apps
The system supports the use of certain audio
apps such as iHeartRadio through a USB or
Bluetooth enabled device.
Each app gives you different on-screen
options depending on the app's content.
See Apps (page 510).
Supported Media Players, Formats and
Metadata Information
The system is capable of hosting nearly any
digital media player, including iPod, iPhone,
and most USB drives.
Supported audio formats include MP3, WMA,
WAV, AAC, and FLAC.
Supported audio file extensions include MP3,
WMA, WAV, M4A, M4B, AAC, and FLAC.
Supported USB file systems include: FAT,
exFAT, and NTFS.
SYNC 3 is also able to organize the media
from your USB device by metadata tags.
Metadata tags, which are descriptive
software identifiers embedded in the media
files, provide information about the file. If your indexed media files contain no
information embedded in these metadata
tags, SYNC 3 may classify the empty
metadata tags as unknown.
SYNC 3 is capable of indexing up to 50,000
songs per USB device, for up to 10 devices.
CLIMATE
Touch the climate button on the touchscreen
to access your climate control features.
Note:
You can switch temperature units
between Fahrenheit and Celsius.
See
Settings (page 513).
Accessing the Climate Control Menu Touch the button to access
additional controls for the front
climate system.
Directing the Airflow Touch the button to direct airflow
to the windshield air vents and
de-mister.
497
Navigator (TB9) Canada/United States of America, enUSA, Edition date: 201907, Second-Printing SYNC™ 3E211463 E265038
Page 609 of 622
Audio Unit.......................................................461
Adjusting the Volume.........................................461
Changing Radio Stations...................................461
Locking the Rear Audio Controls...................462
Rear Passenger Audio Controls - Vehicles
with: Second Row Center Console...........463
Rear Seat Audio Controls - Vehicles without: Second Row Center Console.....................462
Selecting the Audio Modes.............................462
Switching the Audio Unit On and Off............462
Using Seek, Fast Forward and Reverse.......462
Auto Hold
........................................................241
Using Auto Hold.................................................242
Autolamps........................................................110 Windshield Wiper Activated Headlamps.......110
Automatic Climate Control
.........................165
Accessing Rear Climate Controls...................165
Accessing the Climate Control Menu............165
Setting the Blower Motor Speed....................165
Setting the Temperature...................................165
Switching Auto Mode On and Off...................
165
Switching Defrost On and Off..........................166
Switching Maximum Air Conditioning On and Off.......................................................................167
Switching Recirculated Air On and Off..........167
Switching the Air Conditioning On and Off.......................................................................166
Switching the Heated Seats On and Off.......
167 Switching the Ventilated Seats On and
Off.......................................................................167
Automatic High Beam Control
....................116
Automatic High Beam Control Indicators.......................................................117
Automatic Transmission
.............................222
Automatic Transmission Adaptive
Learning............................................................227
Brake-Shift Interlock Override........................226
If Your Vehicle Gets Stuck In Mud or Snow.................................................................227
SelectShift™ Automatic Transmission............225
Understanding the Shift Positions of your Automatic Transmission...............................222
Automatic Transmission Fluid Check............................................................384
Auto-Start-Stop.............................................208 Disabling Auto-Start-Stop.................................210
Enabling Auto-Start-Stop..................................208
Autowipers......................................................106 Autowipers Settings...........................................106
Auxiliary Power Points
..................................197
110 Volt AC Power Point.....................................197
12 Volt DC Power Point......................................197
USB Port and Power Point Locations.............197 B
Battery
See: Changing the 12V Battery.......................
387
Blind Spot Information System.................284 ........................................................................\
.........284
Blind Spot Information System with Trailer
Tow....................................................................285
Switching the System On and Off..................288
System Errors......................................................288
Using the Blind Spot Information System..............................................................284
BLIS See: Blind Spot Information System..............284
Body Styling Kits...........................................403
Bonnet Lock See: Opening and Closing the Hood............
373
Booster Seats..................................................39 Types of Booster Seats.......................................39
Brake Fluid Check
........................................385
Brake Fluid Service Interval.............................386
Brakes ..............................................................
237
General Information...........................................237
Breaking-In.....................................................338
Bulb Specification Chart
.............................450
606
Navigator (TB9) Canada/United States of America, enUSA, Edition date: 201907, Second-Printing Index