3.
Using the swivel wrench, insert it through
the access hole behind the third row seat
and engage the winch.
4. Turn the swivel wrench clockwise until the tire is raised to its stowed position
underneath the vehicle. The wrench
becomes harder to turn and the spare
tire winch ratchets or slips when the tire
is raised to maximum tightness. A clicking
sound can be heard from the winch
indicating that the tire is properly stowed.
5. Carefully place all tools back into the tool
kit bag.
6. Reinstall the tool kit bag on the jack and
tighten the straps.
7. Reinstall the jack properly on the bracket
and secure with the wing nut.
8. Close the access hole with the rubber plug.
9. If the vehicle has an access panel, reinstall.
10. Unblock the wheel. WHEEL NUTS WARNING: When you install a wheel,
always remove any corrosion, dirt or
foreign materials present on the mounting
surfaces of the wheel or the surface of the
wheel hub, brake drum or brake disc that
contacts the wheel. Make sure to secure
any fasteners that attach the rotor to the
hub so they do not interfere with the
mounting surfaces of the wheel. Installing
wheels without correct metal-to-metal
contact at the wheel mounting surfaces
can cause the wheel nuts to loosen and
the wheel to come off while your vehicle
is in motion, resulting in loss of vehicle
control, personal injury or death. lb.ft (Nm)
1
Bolt Size
150 lb.ft (204 Nm)
M14 x 1.5
1 Torque specifications are for nut and bolt
threads free of dirt and rust. Use only our
recommended replacement wheel nuts and
or wheel bolts. Retighten the wheel nuts to the specified
torque within 100 mi (160 km) after any wheel
disturbance, such as tire rotation, changing
a flat tire or wheel removal.
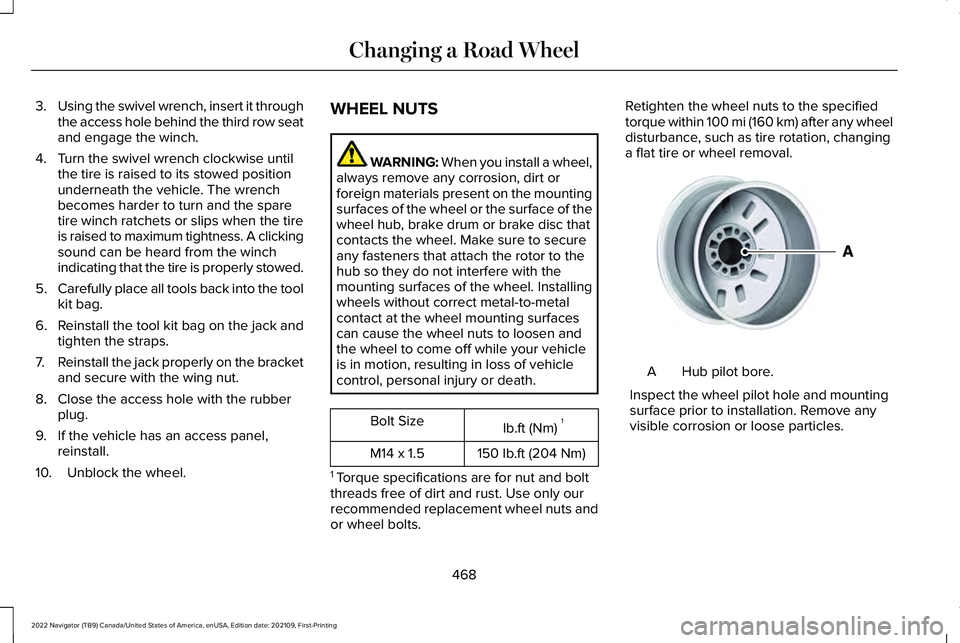
Hub pilot bore.
A
Inspect the wheel pilot hole and mounting
surface prior to installation. Remove any
visible corrosion or loose particles.
468
2022 Navigator (TB9) Canada/United States of America, enUSA, Edition date: 202109, First-Printing Changing a Road WheelE145950
