ESP LINCOLN NAVIGATOR 2022 Workshop Manual
[x] Cancel search | Manufacturer: LINCOLN, Model Year: 2022, Model line: NAVIGATOR, Model: LINCOLN NAVIGATOR 2022Pages: 646, PDF Size: 7.29 MB
Page 379 of 646

WHAT IS TRAILER REVERSE
GUIDANCE
Trailer reverse guidance provides views and
graphics on the touchscreen to help you
steer your vehicle when you backup a trailer.
HOW DOES TRAILER REVERSE
GUIDANCE WORK
Trailer reverse guidance uses a sticker to
detect the trailer angle relative to the towing
vehicle and provides instructions, graphics
and camera views on the touchscreen.
TRAILER REVERSE GUIDANCE
PRECAUTIONS
WARNING: Driving while distracted
can result in loss of vehicle control, crash
and injury. We strongly recommend that
you use extreme caution when using any
device that may take your focus off the
road. Your primary responsibility is the safe operation of your vehicle. We recommend
against the use of any hand-held device
while driving and encourage the use of
voice-operated systems when possible.
Make sure you are aware of all applicable
local laws that may affect the use of
electronic devices while driving.
WARNING:
This system is an extra
driving aid. It does not replace your
attention and judgment, or the need to
apply the brakes. This system does NOT
automatically brake your vehicle. If you fail
to press the brake pedal when necessary,
you may collide with another vehicle.
Note: The system is not a substitute for safe
driving practices. Always be aware of your
vehicle and trailer combination, and the
surrounding environment.
Note: The system does not detect or prevent
your vehicle or trailer from making contact
with obstacles in the surrounding
environment.
Note: The front end of your vehicle swings
out when changing the direction of the
trailer. Note:
In certain conditions, the trailer could
turn faster or the trailer angle could increase
more than anticipated. Always monitor the
clearance between the trailer and vehicle
and the surroundings.
SETTING UP TRAILER REVERSE
GUIDANCE FOR A CONVENTIONAL
TRAILER
CONFIGURING THE TRAILER
You must configure a trailer in the system to
use trailer reverse guidance. This is a
one-time setup process and the trailer
information is saved in the system for the
next time you use that trailer.
The system only works with conventional
trailers. It does not work with other types
including fifth-wheel and gooseneck trailers.
The following illustration shows examples of
conventional trailers on the left-hand side.
375
2022 Navigator (TB9) Canada/United States of America, enUSA, Edition date: 202109, First-Printing Trailer Reverse Guidance
(If Equipped)
Page 394 of 646
ROADSIDE ASSISTANCE
Vehicles sold in the United States:
Getting Roadside Assistance
To fully assist you should you have a vehicle
concern, Lincoln offers a complimentary
roadside assistance program. This program
is separate from the New Vehicle Limited
Warranty.
The service is available:
•
Throughout the life of the vehicle for
original owners.
• For six years or 70,000 mi (110,000 km),
whichever comes first, for subsequent
owners.
Roadside Assistance covers:
• A flat tire change with a good spare. For
vehicles with an unusable tire inflation
kit, we provide towing service.
• Battery jump start.
• Lock-out assistance - key replacement
cost is the client's responsibility. •
Fuel delivery — independent service
contractors, if not prohibited by state,
local or municipal law shall deliver up to
2 gal (8 L)
of gasoline fuel to a disabled
vehicle. Roadside Assistance limits fuel
delivery service to two no-charge
occurrences within a 12-month period.
• Winch out — available within 100 ft (30 m)
of a paved or county maintained road,
no recoveries. •
Towing — independent service
contractors, if not prohibited by state,
local or municipal law shall tow Lincoln
eligible vehicles to the client's selling or
preferred dealer within 100 mi (160 km)
of the disablement location or to the
nearest Lincoln dealer. If a client requests
a tow to a selling or preferred dealer that
is more than
100 mi (160 km) from the
disablement location, the client is
responsible for any mileage costs in
excess of
100 mi (160 km).
• Roadside Assistance includes up to $200
for a towed trailer if the disabled eligible
vehicle requires service at the nearest
authorized dealer. If the towing vehicle
is operational but the trailer is not, then
the trailer does not qualify for any
roadside services.
Vehicles Sold in the United States:
Using Roadside Assistance
United States clients who require roadside
assistance, call 1-800-521-4140 or contact
Roadside Assistance using the Lincoln Way
mobile app.
390
2022 Navigator (TB9) Canada/United States of America, enUSA, Edition date: 202109, First-Printing Crash and Breakdown Information
Page 442 of 646

The traction grades, from highest to
lowest are AA, A, B, and C. The grades
represent the tire
’s ability to stop on wet
pavement as measured under controlled
conditions on specified government test
surfaces of asphalt and concrete. A tire
marked C may have poor traction
performance.
Temperature A B C WARNING: The temperature
grade for this tire is established for a
tire that is properly inflated and not
overloaded. Excessive speed,
underinflation, or excessive loading,
either separately or in combination,
can cause heat buildup and possible
tire failure.
The temperature grades are A (the
highest), B and C, representing the tire ’s
resistance to the generation of heat and
its ability to dissipate heat when tested
under controlled conditions on a
specified indoor laboratory test wheel.
Sustained high temperature can cause the material of the tire to degenerate
and reduce tire life, and excessive
temperature can lead to sudden tire
failure. The grade C corresponds to a
level of performance which all
passenger car tires must meet under the
Federal Motor Vehicle Safety Standard
No. 139. Grades B and A represent
higher levels of performance on the
laboratory test wheel than the minimum
required by law.
INFORMATION ON THE TIRE
SIDEWALL
Both United States and Canada Federal
regulations require tire manufacturers
to place standardized information on the
sidewall of all tires. This information
identifies and describes the fundamental
characteristics of the tire and also
provides a U.S. DOT Tire Identification
Number for safety standard certification
and in case of a recall.
Information on P Type Tires
P215/65R15 95H is an example of a tire
size, load index and speed rating. The
definitions of these items are listed
below. (Note that the tire size, load index
and speed rating for your vehicle may
be different from this example.)
438
2022 Navigator (TB9) Canada/United States of America, enUSA, Edition date: 202109, First-Printing Wheel and Tire InformationH
I
J
KL
M
A
B
CDEFGE142543
Page 457 of 646
WHAT IS THE TIRE PRESSURE
MONITORING SYSTEM
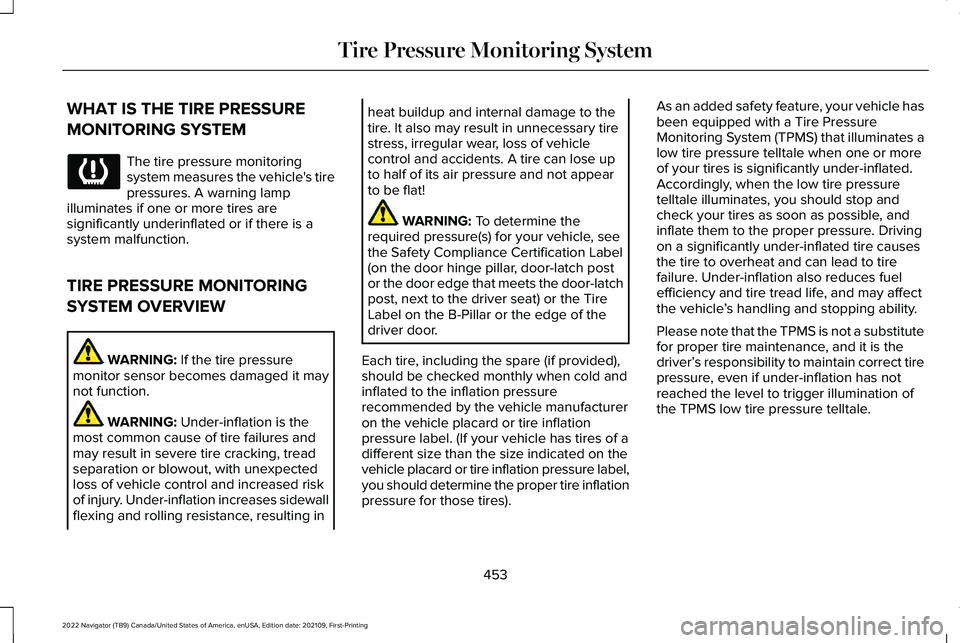
The tire pressure monitoring
system measures the vehicle's tire
pressures. A warning lamp
illuminates if one or more tires are
significantly underinflated or if there is a
system malfunction.
TIRE PRESSURE MONITORING
SYSTEM OVERVIEW WARNING: If the tire pressure
monitor sensor becomes damaged it may
not function. WARNING:
Under-inflation is the
most common cause of tire failures and
may result in severe tire cracking, tread
separation or blowout, with unexpected
loss of vehicle control and increased risk
of injury. Under-inflation increases sidewall
flexing and rolling resistance, resulting in heat buildup and internal damage to the
tire. It also may result in unnecessary tire
stress, irregular wear, loss of vehicle
control and accidents. A tire can lose up
to half of its air pressure and not appear
to be flat!
WARNING:
To determine the
required pressure(s) for your vehicle, see
the Safety Compliance Certification Label
(on the door hinge pillar, door-latch post
or the door edge that meets the door-latch
post, next to the driver seat) or the Tire
Label on the B-Pillar or the edge of the
driver door.
Each tire, including the spare (if provided),
should be checked monthly when cold and
inflated to the inflation pressure
recommended by the vehicle manufacturer
on the vehicle placard or tire inflation
pressure label. (If your vehicle has tires of a
different size than the size indicated on the
vehicle placard or tire inflation pressure label,
you should determine the proper tire inflation
pressure for those tires). As an added safety feature, your vehicle has
been equipped with a Tire Pressure
Monitoring System (TPMS) that illuminates a
low tire pressure telltale when one or more
of your tires is significantly under-inflated.
Accordingly, when the low tire pressure
telltale illuminates, you should stop and
check your tires as soon as possible, and
inflate them to the proper pressure. Driving
on a significantly under-inflated tire causes
the tire to overheat and can lead to tire
failure. Under-inflation also reduces fuel
efficiency and tire tread life, and may affect
the vehicle
’s handling and stopping ability.
Please note that the TPMS is not a substitute
for proper tire maintenance, and it is the
driver’ s responsibility to maintain correct tire
pressure, even if under-inflation has not
reached the level to trigger illumination of
the TPMS low tire pressure telltale.
453
2022 Navigator (TB9) Canada/United States of America, enUSA, Edition date: 202109, First-Printing Tire Pressure Monitoring System
Page 458 of 646
Your vehicle has also been equipped with a
TPMS malfunction indicator to indicate when
the system is not operating properly. The
TPMS malfunction indicator is combined with
the low tire pressure telltale. When the
system detects a malfunction, the telltale will
flash for approximately one minute and then
remain continuously illuminated. This
sequence will continue upon subsequent
vehicle start-ups as long as the malfunction
exists.
When the malfunction indicator is illuminated,
the system may not be able to detect or
signal low tire pressure as intended. TPMS
malfunctions may occur for a variety of
reasons, including the installation of
replacement or alternate tires or wheels on
the vehicle that prevent the TPMS from
functioning properly. Always check the TPMS
malfunction telltale after replacing one or
more tires or wheels on your vehicle to
ensure that the replacement or alternate tires
and wheels allow the TPMS to continue to
function properly.
WARNING: Changes or modifications
not expressively approved by the party
responsible for compliance could void the
user's authority to operate the equipment.
The term "IC:" before the radio certification
number only signifies that Industry Canada
technical specifications were met.
This device complies with Part 15 of the FCC
Rules and with License exempt RSS
Standards of Industry Canada. Operation is
subject to the following two conditions:
1. This device may not cause harmful interference, and
2. This device must accept any interference
received, including interference that may
cause undesired operation. TIRE PRESSURE MONITORING
SYSTEM PRECAUTIONS WARNING: The tire pressure
monitoring system is not a substitute for
manually checking tire pressures. You
should periodically check tire pressures
using a pressure gauge. Failure to correctly
maintain tire pressures could increase the
risk of tire failure, loss of control, vehicle
rollover and personal injury. WARNING:
Do not use the tire
pressure displayed in the information
display as a tire pressure gauge. Failure to
follow this instruction could result in
personal injury or death.
Note: The use of tire sealants can damage
the tire pressure monitoring system.
454
2022 Navigator (TB9) Canada/United States of America, enUSA, Edition date: 202109, First-Printing Tire Pressure Monitoring System
Page 460 of 646
Note:
To reduce the chances of
interference from another vehicle,
perform the system reset procedure at
least three feet, one meter, away from
another vehicle undergoing the system
reset procedure at the same time.
Note: Do not wait more than two
minutes between resetting each tire
sensor or the system can time-out and
you need to repeat the entire procedure
on all four wheels.
1. Drive the vehicle above 20 mph
(32 km/h) for at least two minutes,
then park in a safe location where
you can easily get to all four tires and
have access to an air pump.
2. Switch the ignition off.
3. Switch the ignition on but do not start
the engine.
4. Switch the hazard flashers on then off three times. Note:
You must accomplish this within
10 seconds. If you successfully enter the
reset mode, the horn sounds once, the
system indicator flashes and a message
shows in the information display.
Note: If the system does not enter reset
mode, try again starting at Step 2. If
after repeated attempts to enter the
reset mode, the horn does not sound,
the system indicator does not flash and
no message shows in the information
display, contact your authorized dealer.
5. Remove the valve cap from the valve
stem on the left front tire. Decrease
the air pressure until the horn
sounds.
Note: The single horn tone confirms that
the sensor identification code has been
learned by the module for this position.
If the horn sounds twice, the reset
procedure was unsuccessful, and you
must repeat it.
6. Remove the valve cap from the valve
stem on the right front tire. Decrease
the air pressure until the horn
sounds. 7.
Repeat the previous step on the right
rear tire and then on the left rear tire.
8. Switch the ignition off.
Note: If the horn sounds twice again
after switching the ignition off, and
repeating the procedure, contact your
authorized dealer and have your vehicle
checked as soon as possible.
9. Set all four tires to the recommended
air pressure as indicated on the
Safety Compliance Certification
Label.
Trailer Tire Pressure Monitoring
System
(If Equipped)
Note: Additional equipment may be
required for your vehicle to support
trailer tire pressure and temperature
monitoring. See your authorized dealer
for more information.
Note: The trailer tire pressure
monitoring system is not a substitute for
proper tire maintenance. It is your
responsibility to maintain correct tire
pressures at all times.
456
2022 Navigator (TB9) Canada/United States of America, enUSA, Edition date: 202109, First-Printing Tire Pressure Monitoring System
Page 492 of 646
AUDIO SYSTEM PRECAUTIONS
WARNING: Driving while distracted
can result in loss of vehicle control, crash
and injury. We strongly recommend that
you use extreme caution when using any
device that may take your focus off the
road. Your primary responsibility is the safe
operation of your vehicle. We recommend
against the use of any hand-held device
while driving and encourage the use of
voice-operated systems when possible.
Make sure you are aware of all applicable
local laws that may affect the use of
electronic devices while driving.
Listening to loud audio for long periods of
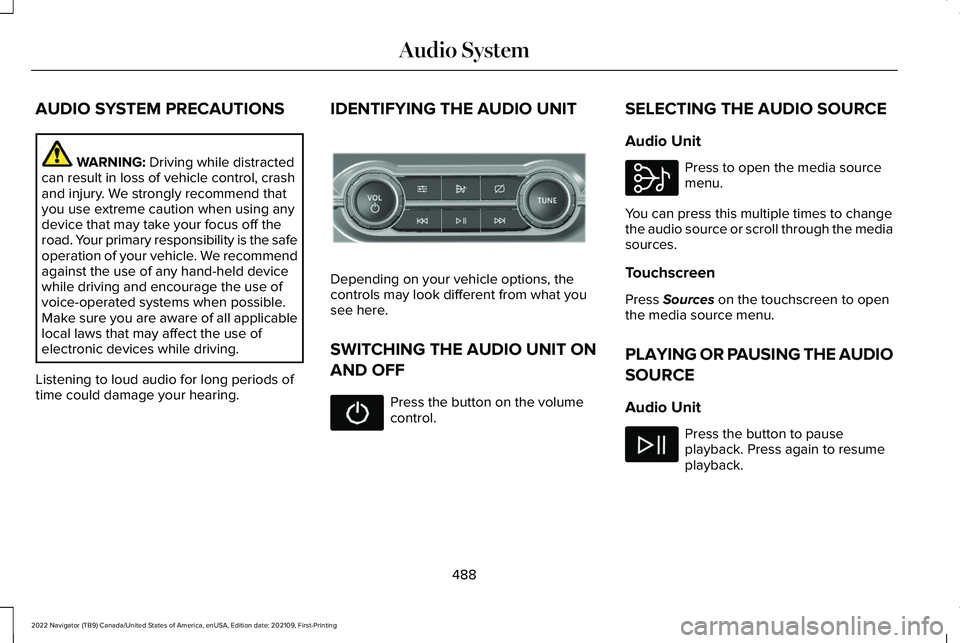
time could damage your hearing. IDENTIFYING THE AUDIO UNIT Depending on your vehicle options, the
controls may look different from what you
see here.
SWITCHING THE AUDIO UNIT ON
AND OFF
Press the button on the volume
control.SELECTING THE AUDIO SOURCE
Audio Unit Press to open the media source
menu.
You can press this multiple times to change
the audio source or scroll through the media
sources.
Touchscreen
Press
Sources on the touchscreen to open
the media source menu.
PLAYING OR PAUSING THE AUDIO
SOURCE
Audio Unit Press the button to pause
playback. Press again to resume
playback.
488
2022 Navigator (TB9) Canada/United States of America, enUSA, Edition date: 202109, First-Printing Audio SystemE308144 E308143
Page 496 of 646
HD Radio Technology is manufactured under
license from iBiquity Digital Corporation and
foreign patents. HD Radio and the HD and
HD Radio logos are proprietary trademarks
of DTS. The vehicle manufacturer and DTS
are not responsible for the content sent using
HD Radio technology. Content may be
changed, added or deleted at any time at
the station owner's discretion.
HOW DOES DIGITAL RADIO WORK
Your system has a special receiver that
allows it to receive digital broadcasts in
addition to analog broadcasts.
HD1 signifies the main programming status
and is available in both analog and digital
broadcasts. Other multicast stations are only
available digitally and could contain new or
different content.
Note:
When the system first receives an HD1
station, it plays the station in the analog
version until it verifies the station is an HD
Radio station. Then it shifts to the digital
version. Note:
There is an audio mute delay when
switching to an HD2 or HD3 station because
the system has to reacquire and decode the
digital signal.
DIGITAL RADIO LIMITATIONS
If you are outside the reception area, the
system could not work.
If you are on the fringe of the reception area,
the station could mute due to weak signal
strength.
Note: If you are listening to HD1, the system
changes back to the analog broadcast until
the digital broadcast is available again. If
you are listening to any other multicast
channels, the station mutes and stays muted
unless it is able to connect to the digital
signal again.
Depending on the station quality, you could
hear a slight sound change when the station
changes between analog and digital audio.
You cannot access a saved HD station if your
vehicle is outside the station ’s reception
area. SWITCHING DIGITAL RADIO
RECEPTION ON AND OFF
1. Press Settings on the touchscreen.
2. Press
Radio Settings.
3. Switch
AM HD Radio or FM HD Radio
on or off.
DIGITAL RADIO INDICATORS
HD Radio Indicator
The indicator appears when HD Radio is on
and you tune to a station broadcasting HD
Radio technology. The color of the indicator changes to indicate
the system status.
492
2022 Navigator (TB9) Canada/United States of America, enUSA, Edition date: 202109, First-Printing Audio SystemE142616
Page 505 of 646
CENTER DISPLAY PRECAUTIONS
WARNING: Driving while distracted
can result in loss of vehicle control, crash
and injury. We strongly recommend that
you use extreme caution when using any
device that may take your focus off the
road. Your primary responsibility is the safe
operation of your vehicle. We recommend
against the use of any hand-held device
while driving and encourage the use of
voice-operated systems when possible.
Make sure you are aware of all applicable
local laws that may affect the use of
electronic devices while driving.
CENTER DISPLAY LIMITATIONS
Speed-restricted Features
For your safety, some features are not
available while the vehicle is in motion at or
above
5 mph (8 km/h). Settings that are not
critical while driving your vehicle are shown
as restricted on your display. Some of these
settings include: •
System updates.
• Personal profiles setup.
• Valet mode setup.
• Driver assistance settings.
Vehicle Settings
• MyKey setup.
• Door keypad code setup.
• Backup start passcode setup.
These restricted features become available
when your vehicle is no longer in motion.
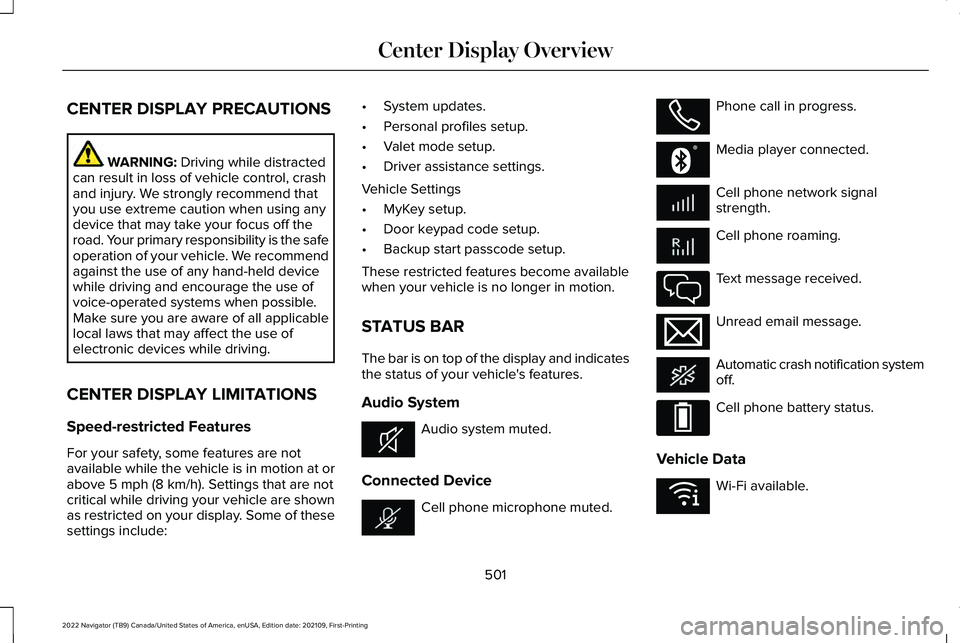
STATUS BAR
The bar is on top of the display and indicates
the status of your vehicle's features.
Audio System Audio system muted.
Connected Device Cell phone microphone muted. Phone call in progress.
Media player connected.
Cell phone network signal
strength.
Cell phone roaming.
Text message received.
Unread email message.
Automatic crash notification system
off.
Cell phone battery status.
Vehicle Data Wi-Fi available.
501
2022 Navigator (TB9) Canada/United States of America, enUSA, Edition date: 202109, First-Printing Center Display OverviewE353221 E353213 E353208 E335295 E353216 E335293 E353219
Page 510 of 646
PHONE PRECAUTIONS
WARNING: Driving while distracted
can result in loss of vehicle control, crash
and injury. We strongly recommend that
you use extreme caution when using any
device that may take your focus off the
road. Your primary responsibility is the safe
operation of your vehicle. We recommend
against the use of any hand-held device
while driving and encourage the use of
voice-operated systems when possible.
Make sure you are aware of all applicable
local laws that may affect the use of
electronic devices while driving.
CONNECTING YOUR PHONE
Go to the settings menu on your device and
switch
Bluetooth® on. Press the phone option on the
feature bar.
1. Press
Add Phone. Note:
A prompt alerts you to search for your
vehicle on your cell phone.
2. Select your vehicle on your cell phone.
Note: A number appears on your cell phone
and on the touchscreen.
3. Confirm the number on your cell phone matches the number on the touchscreen.
Note: The touchscreen indicates that you
have successfully paired your cell phone.
4. Download the phonebook from your cell
phone when you are prompted.
Note: If you pair more than one cell phone,
use the phone settings on the center display
to specify the primary phone. You can
change this setting at any time.
PHONE MENU
This menu becomes available after pairing
a phone.
Recent Call List
Display and select an entry from a list of
previous calls. Contacts
Display a smart search form to look up your
contacts. Use the List button to alphabetically
sort your contacts.
Favorites
Display the list of favorite contacts that are
set up on your phone.
Messaging
Displays the list of text messages to read,
listen to, or respond to.
Email
Displays the list of emails to read, listen to,
or respond to.
Phone List
Display the list of paired or connected
devices that you can select.
Note:
Up to 12 devices can be stored.
506
2022 Navigator (TB9) Canada/United States of America, enUSA, Edition date: 202109, First-Printing Phone