LINCOLN TOWN CAR 1997 Owners Manual
TOWN CAR 1997
LINCOLN
LINCOLN
https://www.carmanualsonline.info/img/15/7040/w960_7040-0.png
LINCOLN TOWN CAR 1997 Owners Manual
Trending: torque, turn signal, transmission oil, catalytic converter, air condition, maintenance, oil additives
Page 151 of 305
147
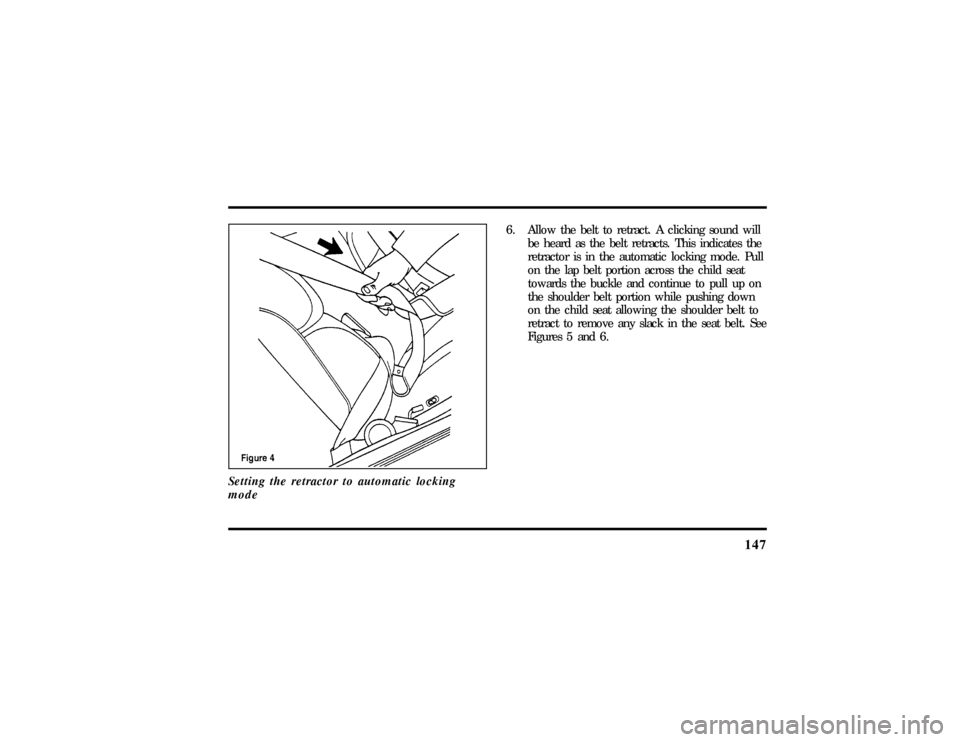
Setting the retractor to automatic locking
mode
6. Allow the belt to retract. A clicking sound will
be heard as the belt retracts. This indicates the
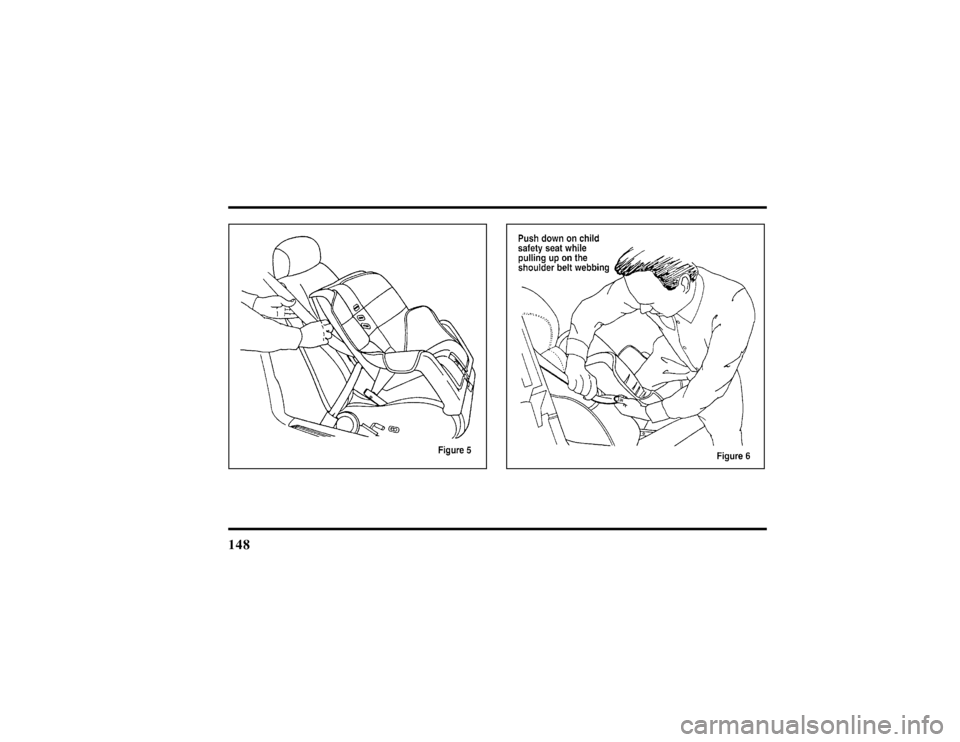
retractor is in the automatic locking mode. Pull
on the lap belt portion across the child seat
towards the buckle and continue to pull up on
the shoulder belt portion while pushing down
on the child seat allowing the shoulder belt to
retract to remove any slack in the seat belt. See
Figures 5 and 6.
File:06fnsst.ex
Update:Fri Jun 21 08:57:53 1996
Page 152 of 305
148
File:06fnsst.ex
Update:Fri Jun 21 08:57:53 1996
Page 153 of 305
149
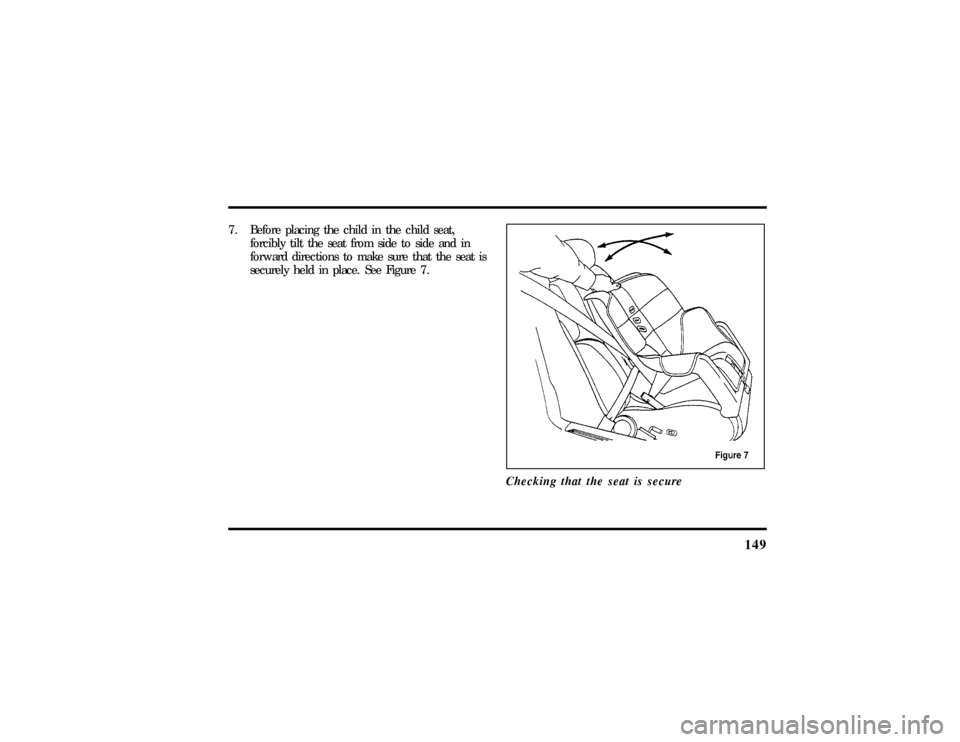
7. Before placing the child in the child seat,
forcibly tilt the seat from side to side and in
forward directions to make sure that the seat is
securely held in place. See Figure 7.
Checking that the seat is secure
File:06fnsst.ex
Update:Fri Jun 21 08:57:53 1996
Page 154 of 305
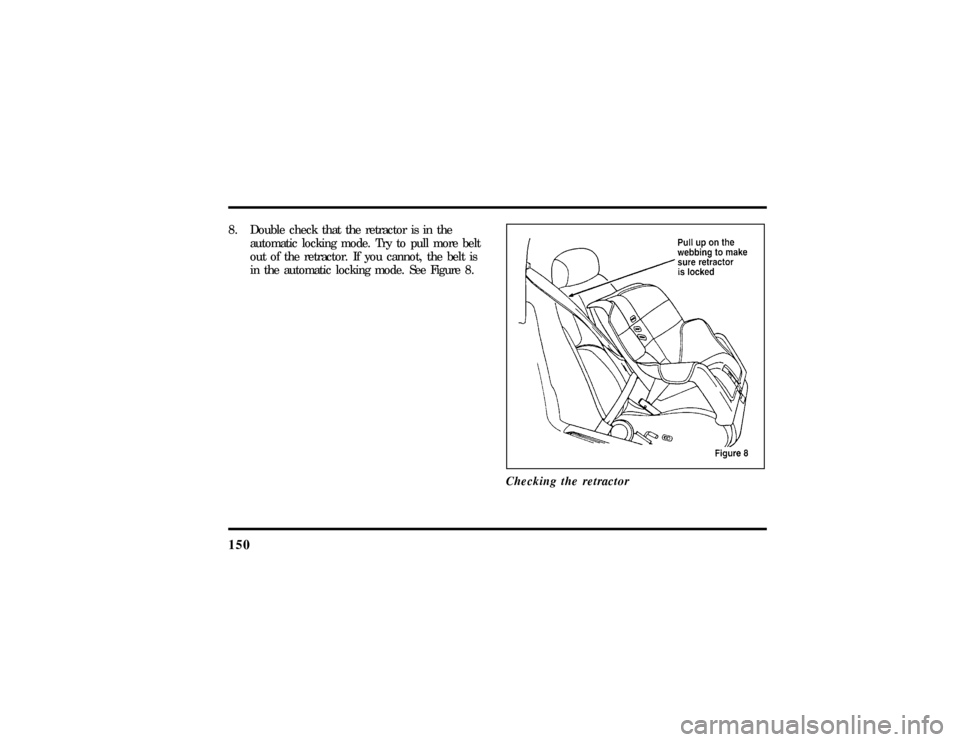
1508. Double check that the retractor is in the
automatic locking mode. Try to pull more belt
out of the retractor. If you cannot, the belt is
in the automatic locking mode. See Figure 8.
Checking the retractor
File:06fnsst.ex
Update:Fri Jun 21 08:57:53 1996
Page 155 of 305
151
9. Check to make sure that the child seat is
properly secured prior to each use. If the
retractor is not locked, repeat steps 6 through
8.
NOTE:To remove the retractor from automatic
lock mode, allow seat belt to retract fully to its
stowed position and the retractor will automatically
switch back to the vehicle sensitive locking mode
for normal adult usage.Installing Child Safety Seats in the Rear
Outboard Seating PositionsYour rear outboard seating positions are equipped
with a cinch tongue on the safety belts. Use the
following procedure for installing a child safety seat
in these locations.
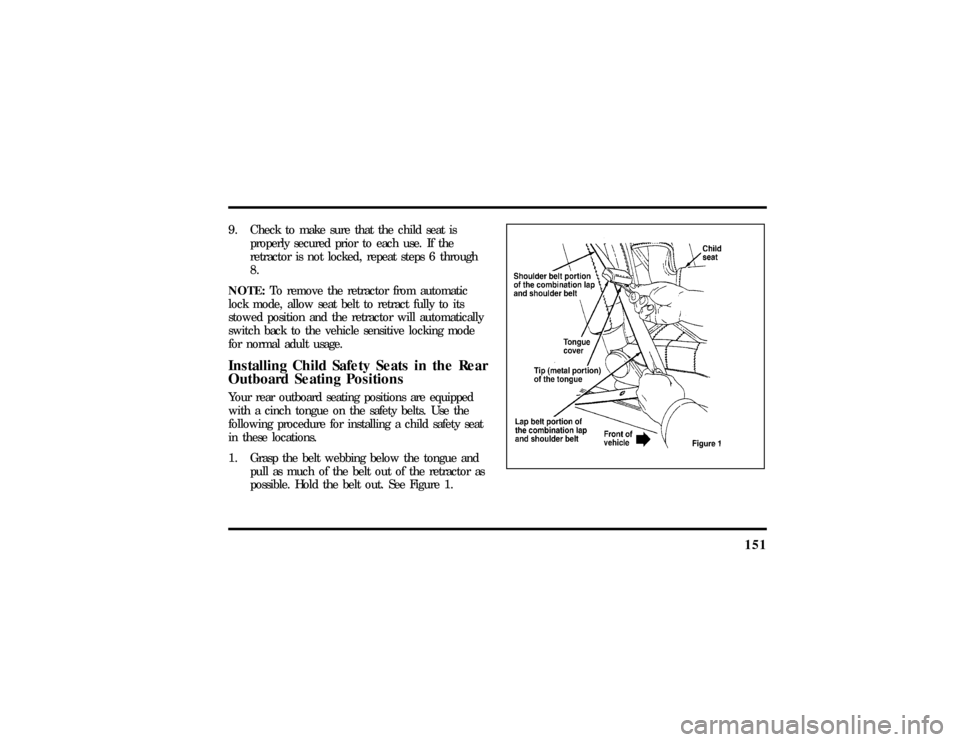
1. Grasp the belt webbing below the tongue and
pull as much of the belt out of the retractor as
possible. Hold the belt out. See Figure 1.
File:06fnsst.ex
Update:Fri Jun 21 08:57:53 1996
Page 156 of 305

152NOTE:The belt webbing below the tongue is the
lap belt portion of the combination lap/shoulder
belt, and the belt webbing above the tongue is the
shoulder belt portion of the combination
lap/shoulder belt.
2. With your other hand, grasp the tip (metal
portion) of the tongue (not the cover) and slide
the tongue up the webbing as far as it will go.
See Figure 1. Release the tongue, but do not
let go of the lap portion of the belt webbing.3. While still holding the belt webbing below the
tongue in one hand, use your other hand to
grasp the tip (metal portion) of the tongue and
belt webbing together, and again pull out as
much of the belt as possible. Then, let go of
the lap portion of the belt webbing.
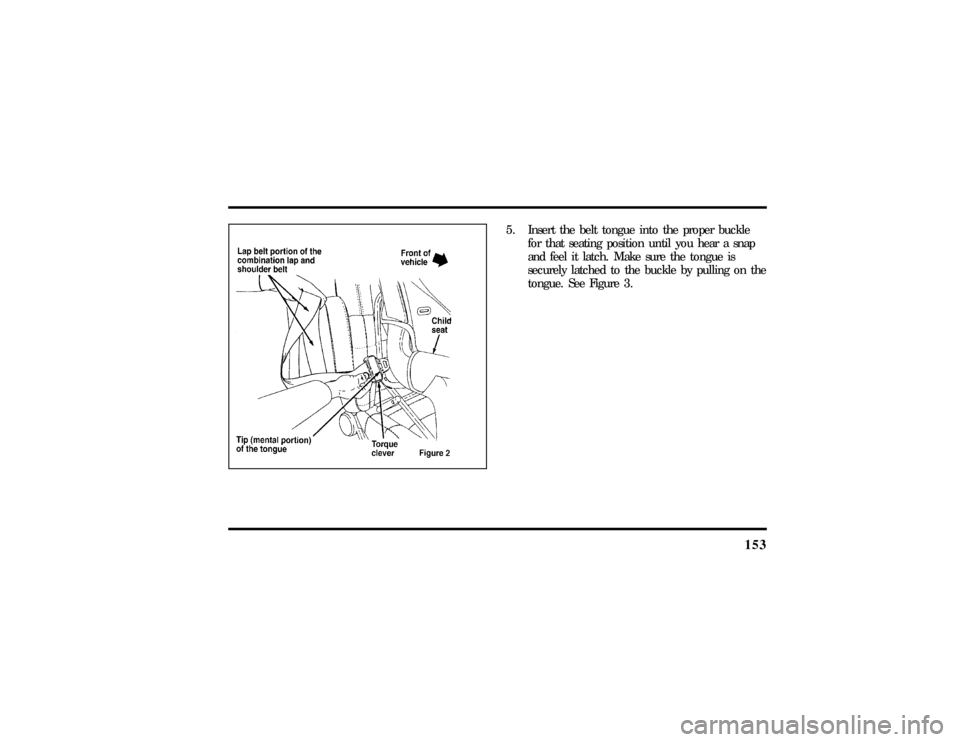
4. While holding the shoulder and lap belt
portions together, route the tongue and
webbing through the child seat according to the
child seat manufacturer's instructions. See
Figure 2. Be sure that the belt webbing is not
twisted.
File:06fnsst.ex
Update:Fri Jun 21 08:57:53 1996
Page 157 of 305
153
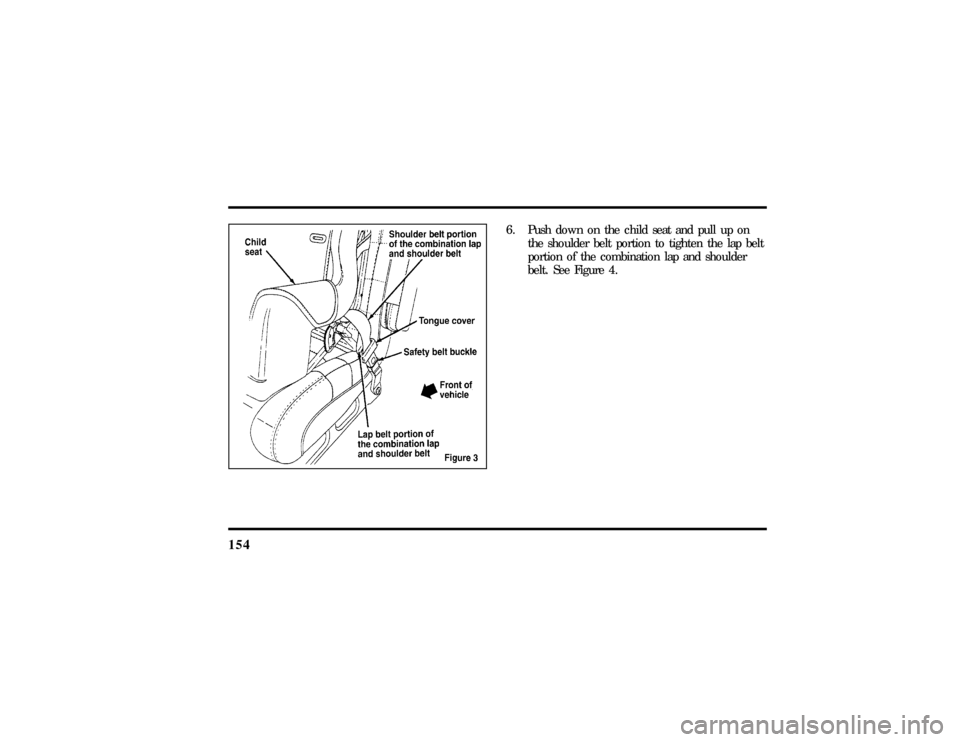
5. Insert the belt tongue into the proper buckle
for that seating position until you hear a snap
and feel it latch. Make sure the tongue is
securely latched to the buckle by pulling on the
tongue. See Figure 3.
File:06fnsst.ex
Update:Fri Jun 21 08:57:53 1996
Page 158 of 305
154
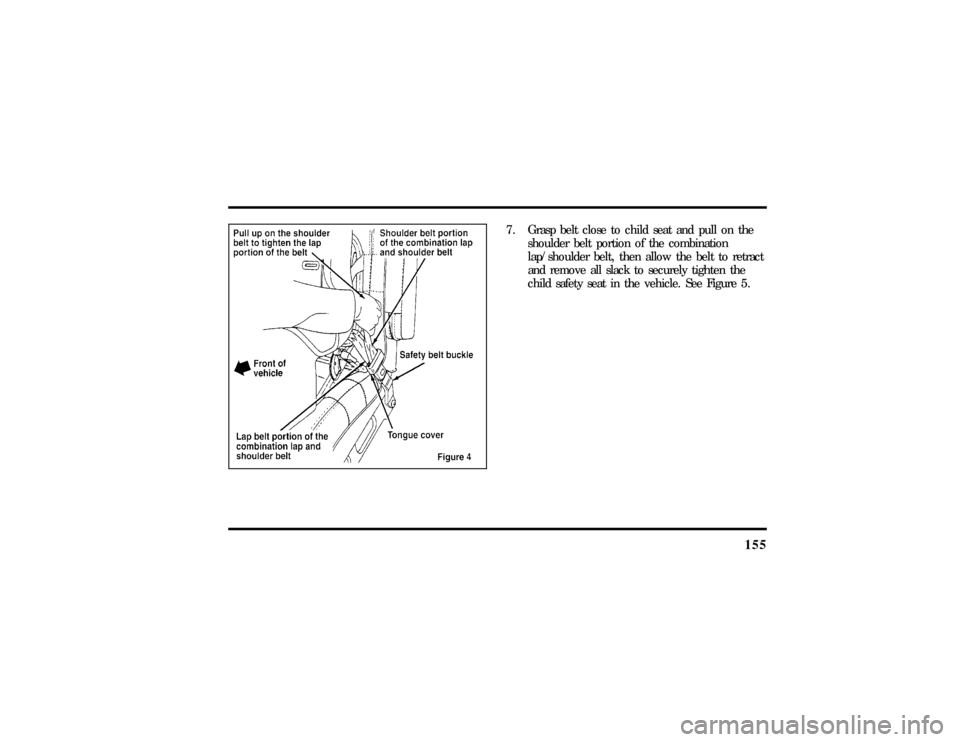
6. Push down on the child seat and pull up on
the shoulder belt portion to tighten the lap belt
portion of the combination lap and shoulder
belt. See Figure 4.
File:06fnsst.ex
Update:Fri Jun 21 08:57:53 1996
Page 159 of 305
155
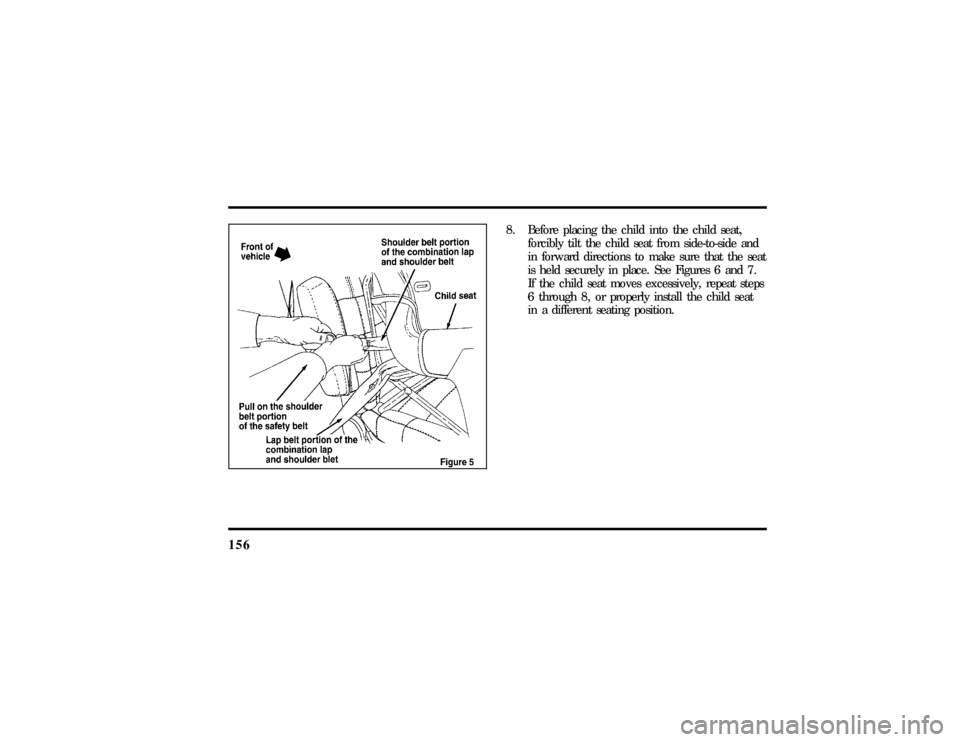
7. Grasp belt close to child seat and pull on the
shoulder belt portion of the combination
lap/shoulder belt, then allow the belt to retract
and remove all slack to securely tighten the
child safety seat in the vehicle. See Figure 5.
File:06fnsst.ex
Update:Fri Jun 21 08:57:53 1996
Page 160 of 305
156
8. Before placing the child into the child seat,
forcibly tilt the child seat from side-to-side and
in forward directions to make sure that the seat
is held securely in place. See Figures 6 and 7.
If the child seat moves excessively, repeat steps
6 through 8, or properly install the child seat
in a different seating position.
File:06fnsst.ex
Update:Fri Jun 21 08:57:53 1996
Trending: fuel additives, jump start terminals, radio antenna, flat tire, jump cable, oil type, fuel pump
