Gears LINCOLN TOWN CAR 2000 Owners Manual
[x] Cancel search | Manufacturer: LINCOLN, Model Year: 2000, Model line: TOWN CAR, Model: LINCOLN TOWN CAR 2000Pages: 224, PDF Size: 1.73 MB
Page 6 of 224
OFF
P102030405060
70
80
90
100
120206080
40100
120
160 140
180MPHkm/h110HF
E1
2FILL ON
LEFT<
CHECK
TRAC
SERVICE
ENGINE
SOON
PANEL
DIMLO
F
S
OFF
MIST
VOL
PUSH ON
AM
EXT
RESUME
SET ACCEL
COAST
OFF
ONNEXT
MODEVOL
TEMP FAN
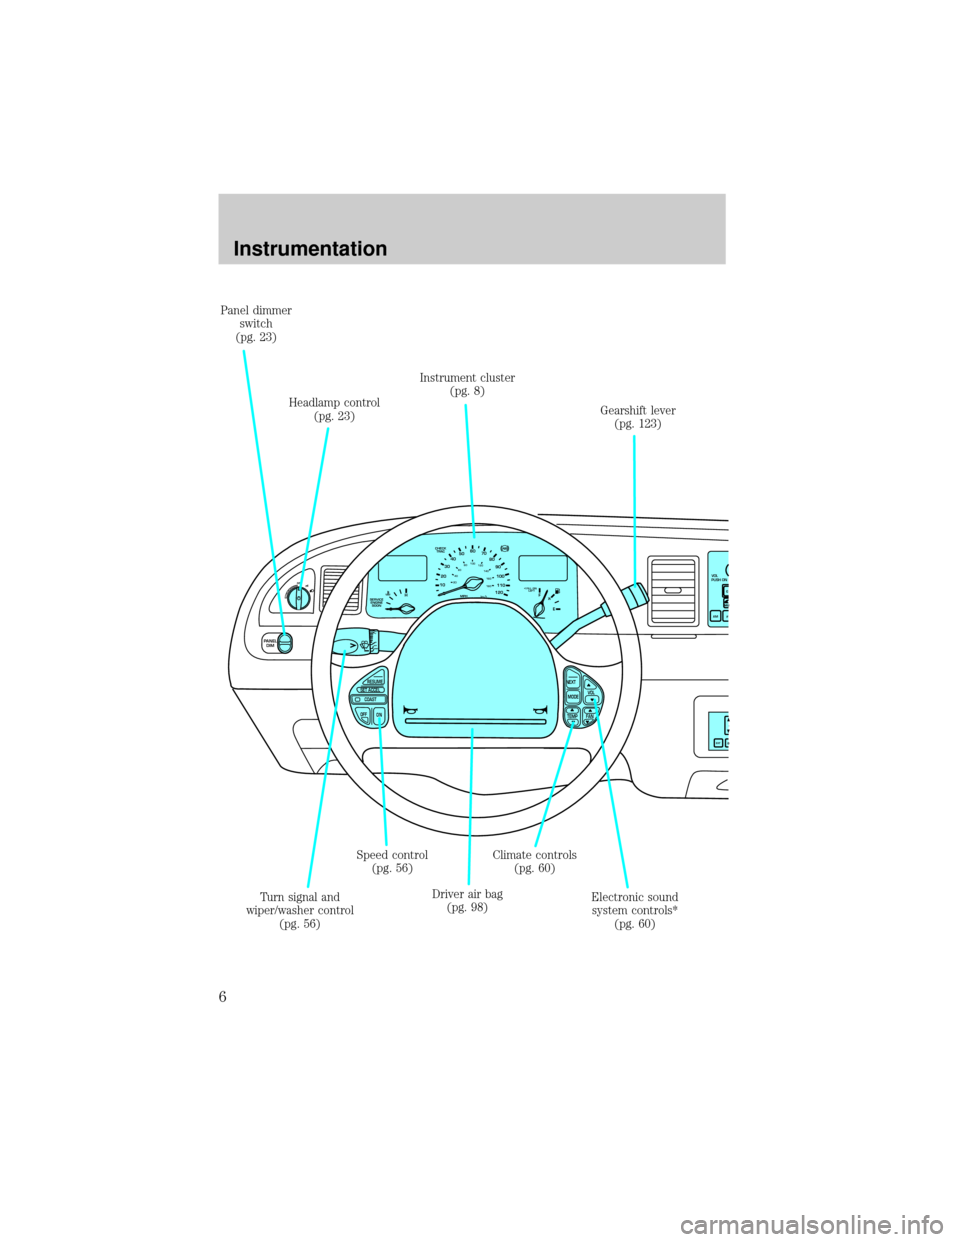
Panel dimmer
switch
(pg. 23)
Headlamp control
(pg. 23)
Speed control
(pg. 56)Gearshift lever
(pg. 123)
Driver air bag
(pg. 98) Turn signal and
wiper/washer control
(pg. 56)Instrument cluster
(pg. 8)
Electronic sound
system controls*
(pg. 60) Climate controls
(pg. 60)
Instrumentation
6
Page 54 of 224
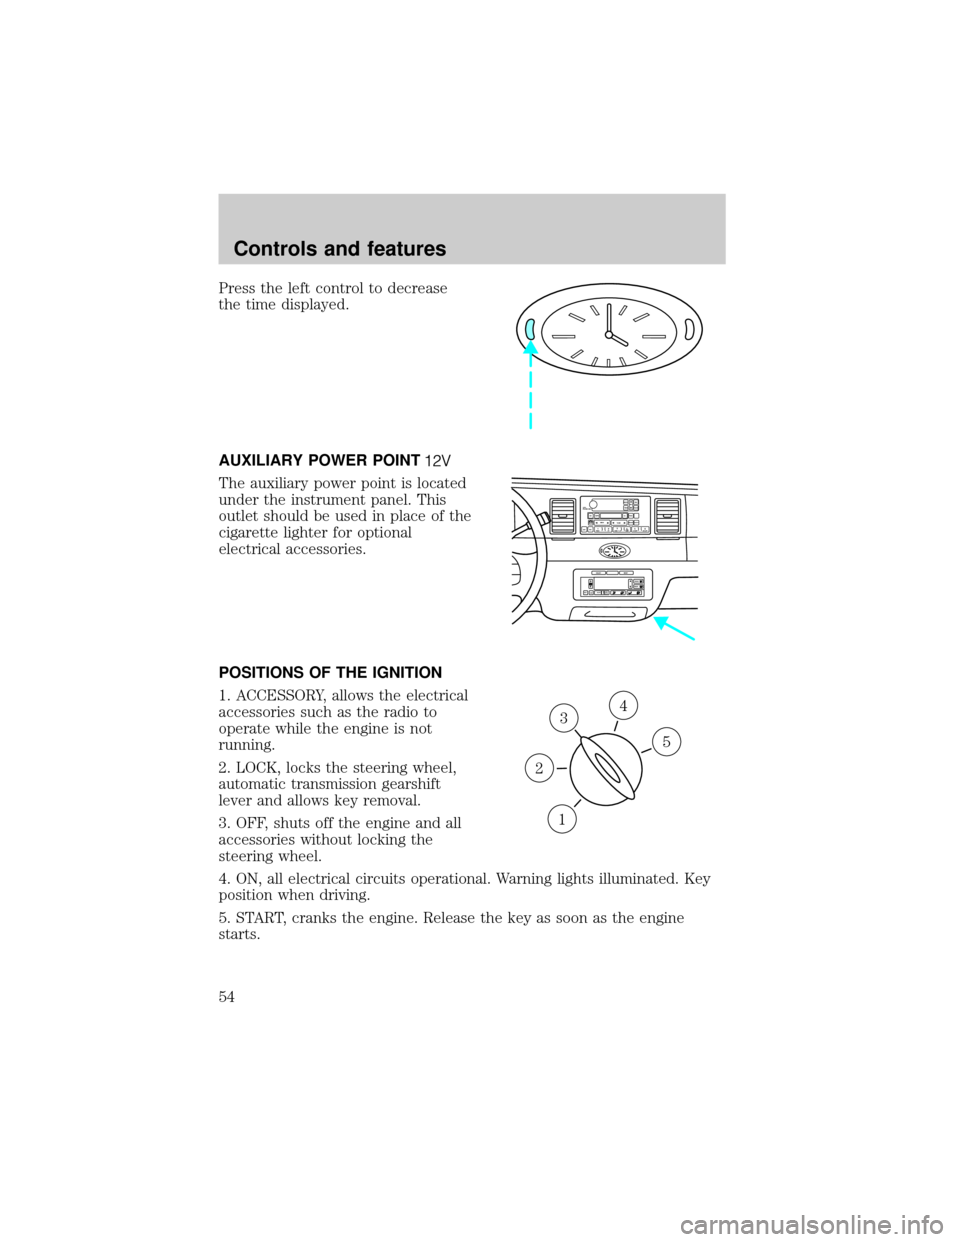
Press the left control to decrease
the time displayed.
AUXILIARY POWER POINT
The auxiliary power point is located
under the instrument panel. This
outlet should be used in place of the
cigarette lighter for optional
electrical accessories.
POSITIONS OF THE IGNITION
1. ACCESSORY, allows the electrical
accessories such as the radio to
operate while the engine is not
running.
2. LOCK, locks the steering wheel,
automatic transmission gearshift
lever and allows key removal.
3. OFF, shuts off the engine and all
accessories without locking the
steering wheel.
4. ON, all electrical circuits operational. Warning lights illuminated. Key
position when driving.
5. START, cranks the engine. Release the key as soon as the engine
starts.
VOL
PUSH ONTAPE
MUTESEEK
TUNE
AM
FM
REW
FFSIDE 1 2
COMP
SHUFFCDEJ
RDS
SCAN AUTO123
4
56
BASS
TREBSELBAL
FADE
EXT
OFFMAX
A/CAUTOFRONT
REARSELECTRESET
3
1
2
5
4
Controls and features
54
Page 57 of 224
Do not shift the gearshift lever into N (Neutral) with the speed
control on.
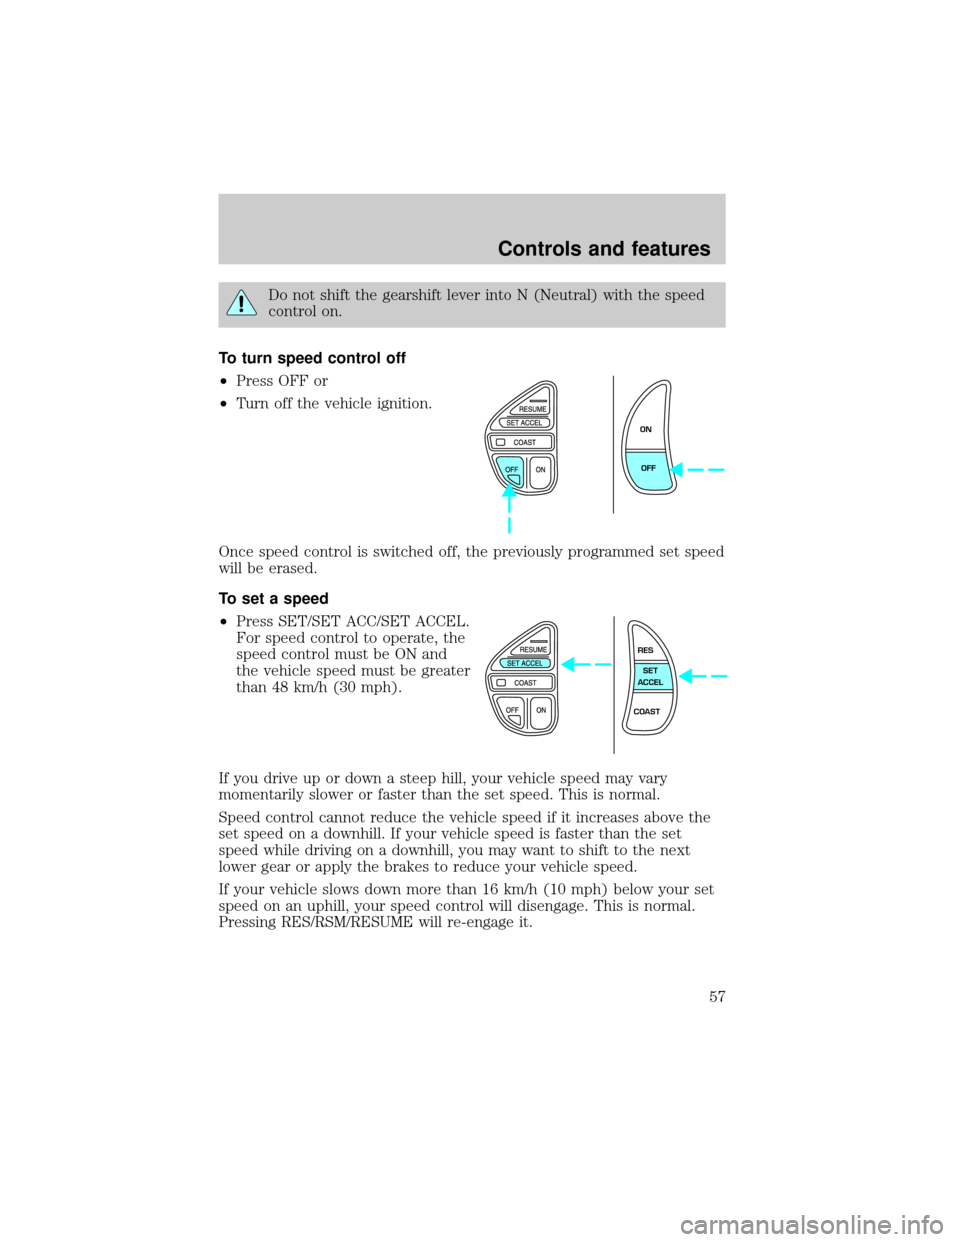
To turn speed control off
²Press OFF or
²Turn off the vehicle ignition.
Once speed control is switched off, the previously programmed set speed
will be erased.
To set a speed
²Press SET/SET ACC/SET ACCEL.
For speed control to operate, the
speed control must be ON and
the vehicle speed must be greater
than 48 km/h (30 mph).
If you drive up or down a steep hill, your vehicle speed may vary
momentarily slower or faster than the set speed. This is normal.
Speed control cannot reduce the vehicle speed if it increases above the
set speed on a downhill. If your vehicle speed is faster than the set
speed while driving on a downhill, you may want to shift to the next
lower gear or apply the brakes to reduce your vehicle speed.
If your vehicle slows down more than 16 km/h (10 mph) below your set
speed on an uphill, your speed control will disengage. This is normal.
Pressing RES/RSM/RESUME will re-engage it.
ON
OFF
RES
SET
ACCEL
COAST
Controls and features
57
Page 60 of 224
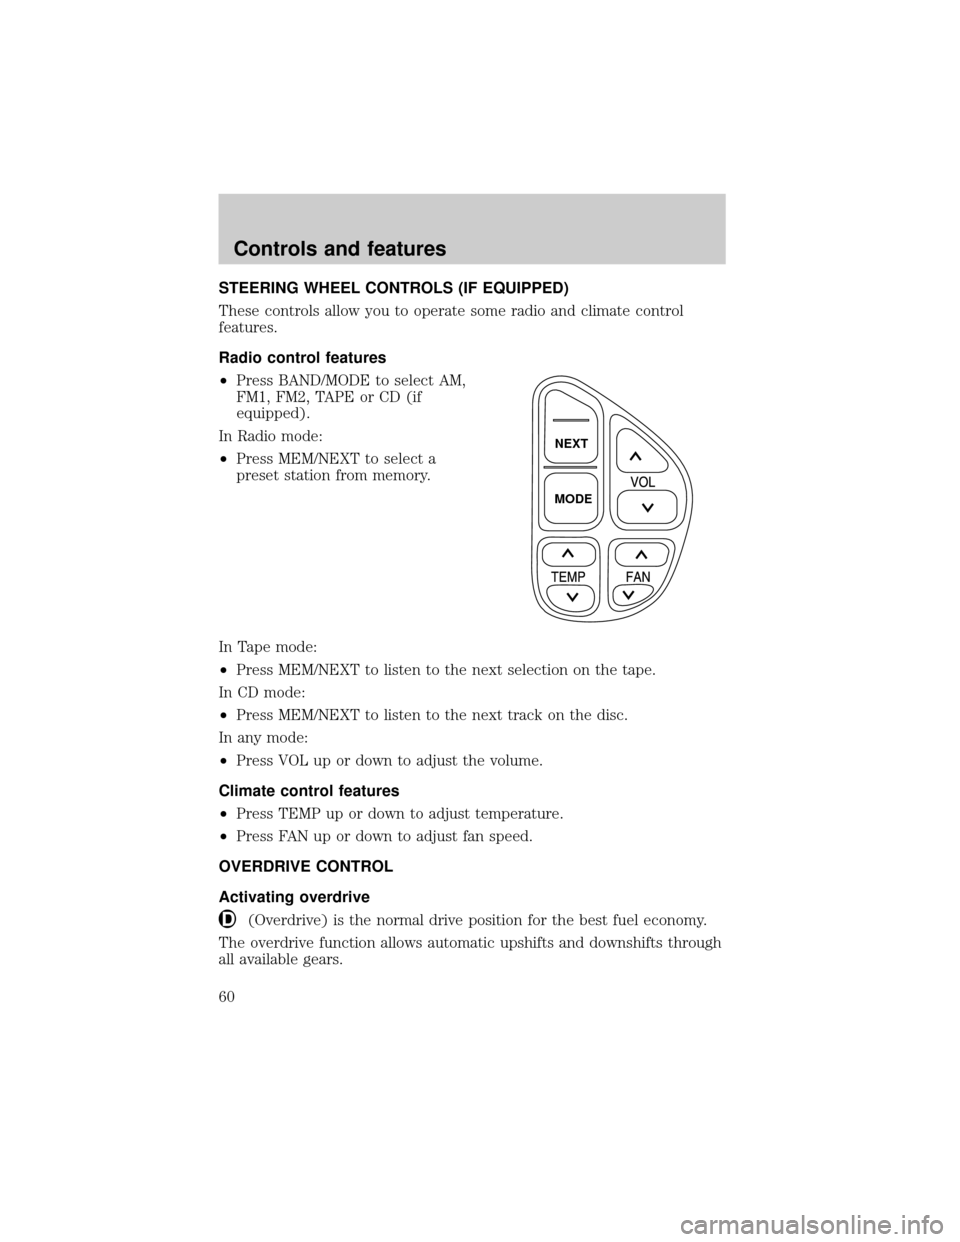
STEERING WHEEL CONTROLS (IF EQUIPPED)
These controls allow you to operate some radio and climate control
features.
Radio control features
²Press BAND/MODE to select AM,
FM1, FM2, TAPE or CD (if
equipped).
In Radio mode:
²Press MEM/NEXT to select a
preset station from memory.
In Tape mode:
²Press MEM/NEXT to listen to the next selection on the tape.
In CD mode:
²Press MEM/NEXT to listen to the next track on the disc.
In any mode:
²Press VOL up or down to adjust the volume.
Climate control features
²Press TEMP up or down to adjust temperature.
²Press FAN up or down to adjust fan speed.
OVERDRIVE CONTROL
Activating overdrive
(Overdrive) is the normal drive position for the best fuel economy.
The overdrive function allows automatic upshifts and downshifts through
all available gears.
NEXT
MODE
Controls and features
60
Page 61 of 224
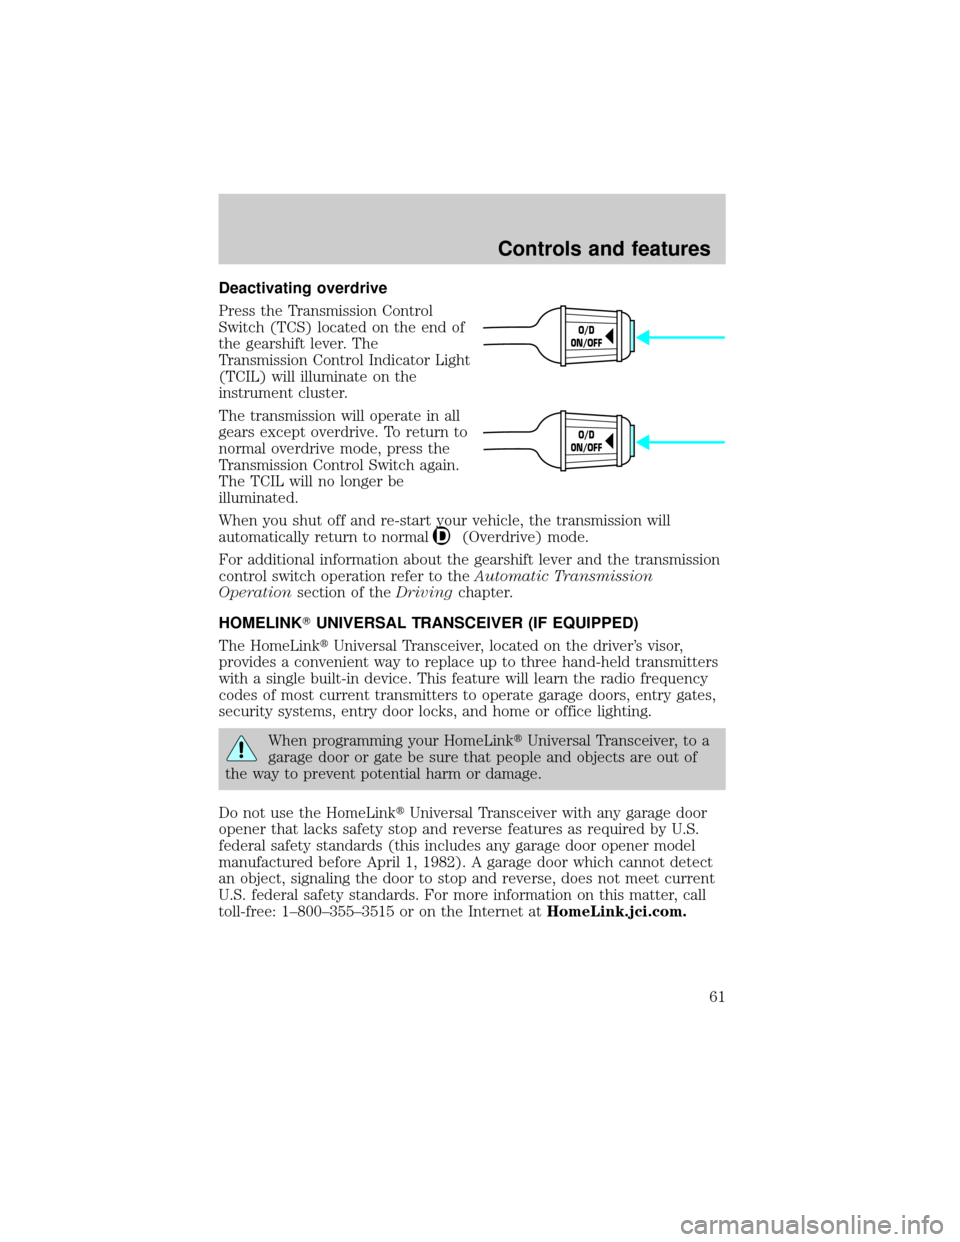
Deactivating overdrive
Press the Transmission Control
Switch (TCS) located on the end of
the gearshift lever. The
Transmission Control Indicator Light
(TCIL) will illuminate on the
instrument cluster.
The transmission will operate in all
gears except overdrive. To return to
normal overdrive mode, press the
Transmission Control Switch again.
The TCIL will no longer be
illuminated.
When you shut off and re-start your vehicle, the transmission will
automatically return to normal
(Overdrive) mode.
For additional information about the gearshift lever and the transmission
control switch operation refer to theAutomatic Transmission
Operationsection of theDrivingchapter.
HOMELINKTUNIVERSAL TRANSCEIVER (IF EQUIPPED)
The HomeLinktUniversal Transceiver, located on the driver's visor,
provides a convenient way to replace up to three hand-held transmitters
with a single built-in device. This feature will learn the radio frequency
codes of most current transmitters to operate garage doors, entry gates,
security systems, entry door locks, and home or office lighting.
When programming your HomeLinktUniversal Transceiver, to a
garage door or gate be sure that people and objects are out of
the way to prevent potential harm or damage.
Do not use the HomeLinktUniversal Transceiver with any garage door
opener that lacks safety stop and reverse features as required by U.S.
federal safety standards (this includes any garage door opener model
manufactured before April 1, 1982). A garage door which cannot detect
an object, signaling the door to stop and reverse, does not meet current
U.S. federal safety standards. For more information on this matter, call
toll-free: 1±800±355±3515 or on the Internet atHomeLink.jci.com.
O/D
ON/OFF
O/D
ON/OFF
Controls and features
61
Page 70 of 224
²To program position two, repeat the previous procedure using control 2.
A position can only be set or recalled when the transmission gearshift is in
Park or Neutral. A memory seat position may be programmed at any time.
The memory seat positions are also recalled when you press your remote
entry transmitter UNLOCK control.
To program the memory seat to remote entry transmitter, refer to
Remote entry systemin theControls and featureschapter.
REAR CENTER CONSOLE FEATURES (IF EQUIPPED)
The rear center console incorporates the following features:
²utility compartment
²cupholders
²auxiliary power point (if equipped)
²remote radio/climate controls (if equipped)
²remote seat adjustment (if equipped)
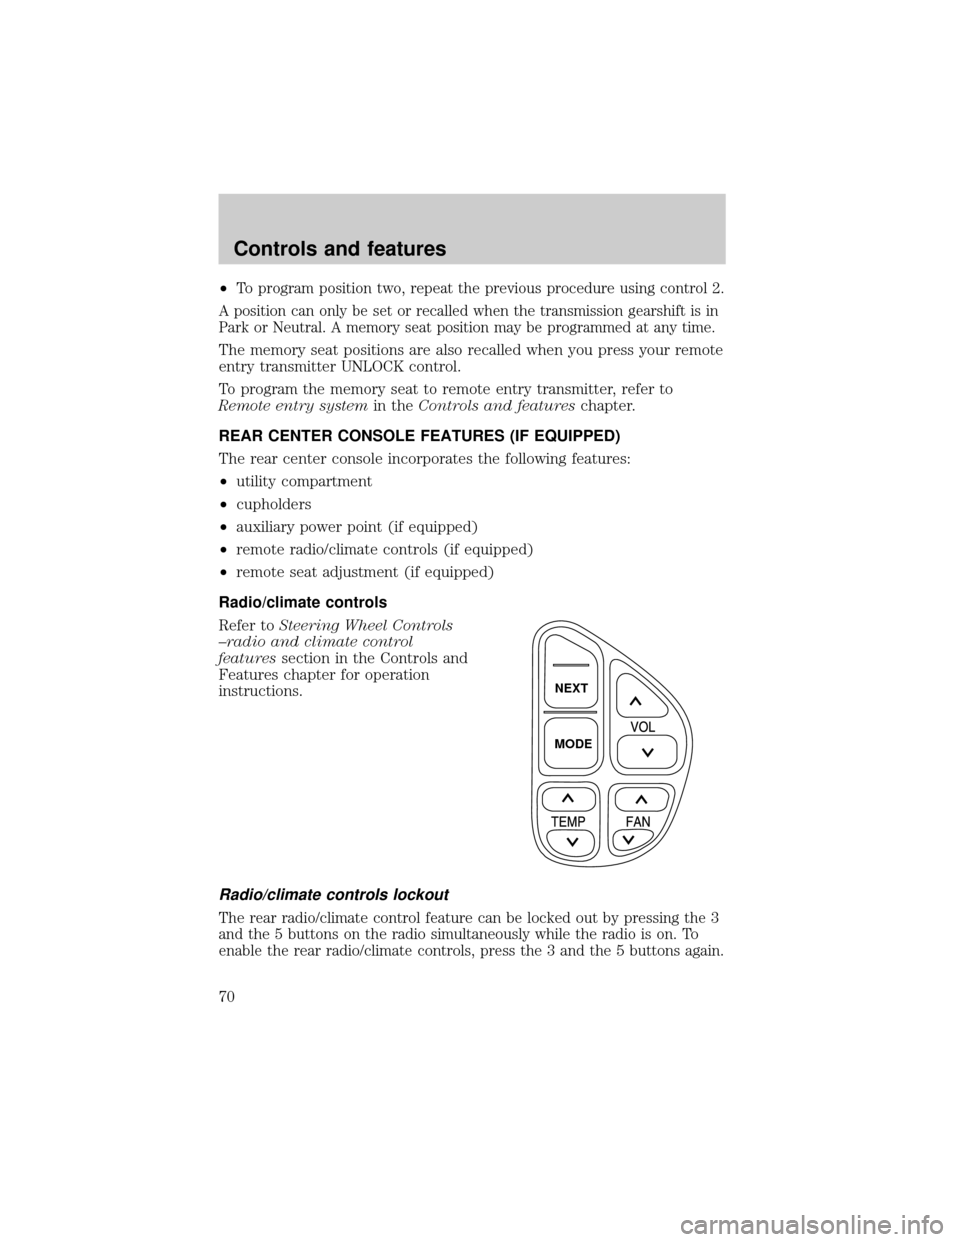
Radio/climate controls
Refer toSteering Wheel Controls
±radio and climate control
featuressection in the Controls and
Features chapter for operation
instructions.
Radio/climate controls lockout
The rear radio/climate control feature can be locked out by pressing the 3
and the 5 buttons on the radio simultaneously while the radio is on. To
enable the rear radio/climate controls, press the 3 and the 5 buttons again.
NEXT
MODE
Controls and features
70
Page 73 of 224
1. Turn ignition key to ON.
2. Press power door unlock control on the door panel 3 times.
3. Turn ignition key from ON to OFF.
4. Press power door unlock control 3 times.
5. Turn ignition key back to ON. The doors will lock and unlock.
6. Press unlock control twice within 5 seconds. The horn will chirp twice
upon successful toggling of the horn chirp feature.
7. Turn ignition to OFF.
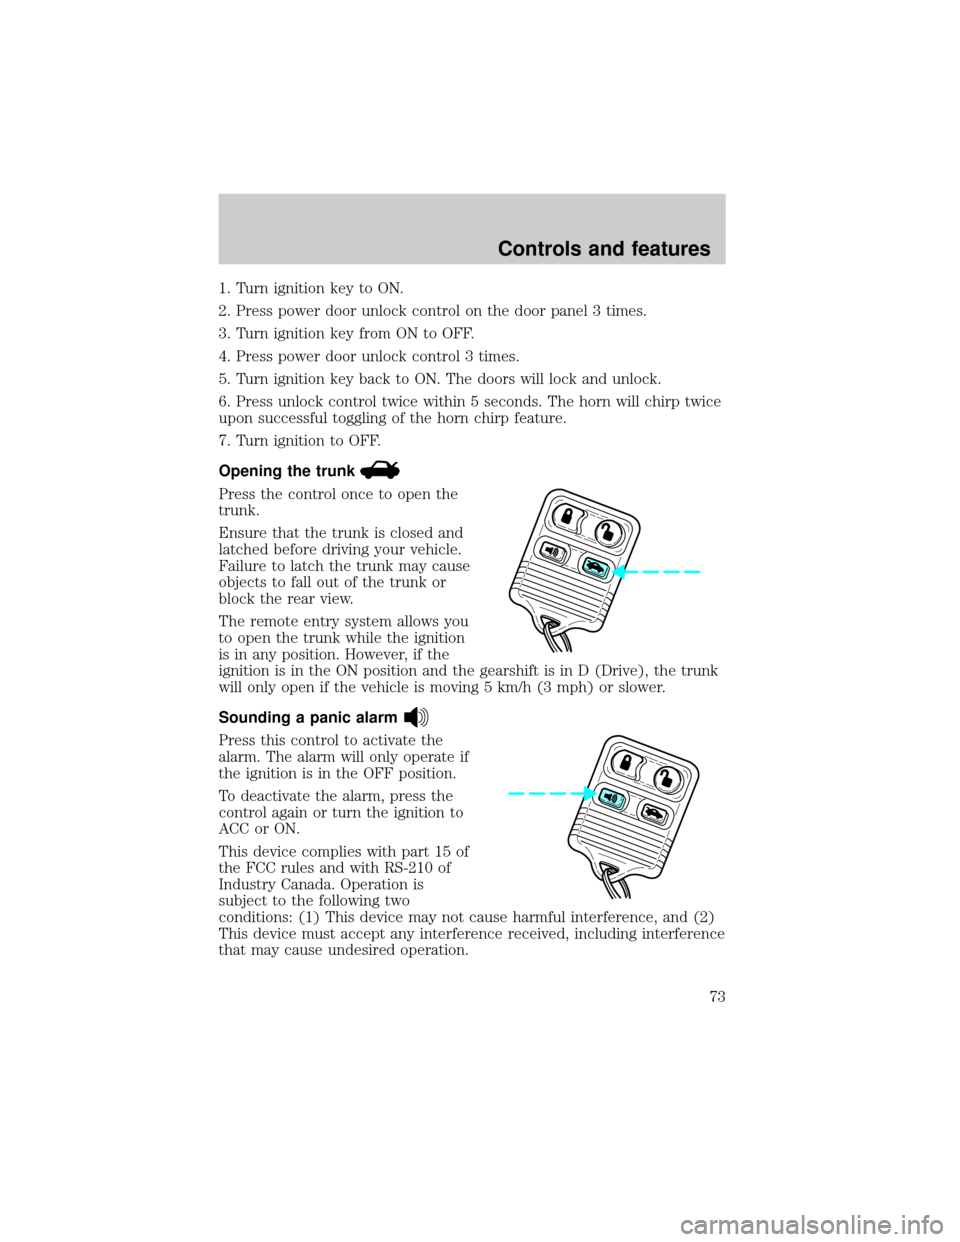
Opening the trunk
Press the control once to open the
trunk.
Ensure that the trunk is closed and
latched before driving your vehicle.
Failure to latch the trunk may cause
objects to fall out of the trunk or
block the rear view.
The remote entry system allows you
to open the trunk while the ignition
is in any position. However, if the
ignition is in the ON position and the gearshift is in D (Drive), the trunk
will only open if the vehicle is moving 5 km/h (3 mph) or slower.
Sounding a panic alarm
Press this control to activate the
alarm. The alarm will only operate if
the ignition is in the OFF position.
To deactivate the alarm, press the
control again or turn the ignition to
ACC or ON.
This device complies with part 15 of
the FCC rules and with RS-210 of
Industry Canada. Operation is
subject to the following two
conditions: (1) This device may not cause harmful interference, and (2)
This device must accept any interference received, including interference
that may cause undesired operation.
Controls and features
73
Page 88 of 224
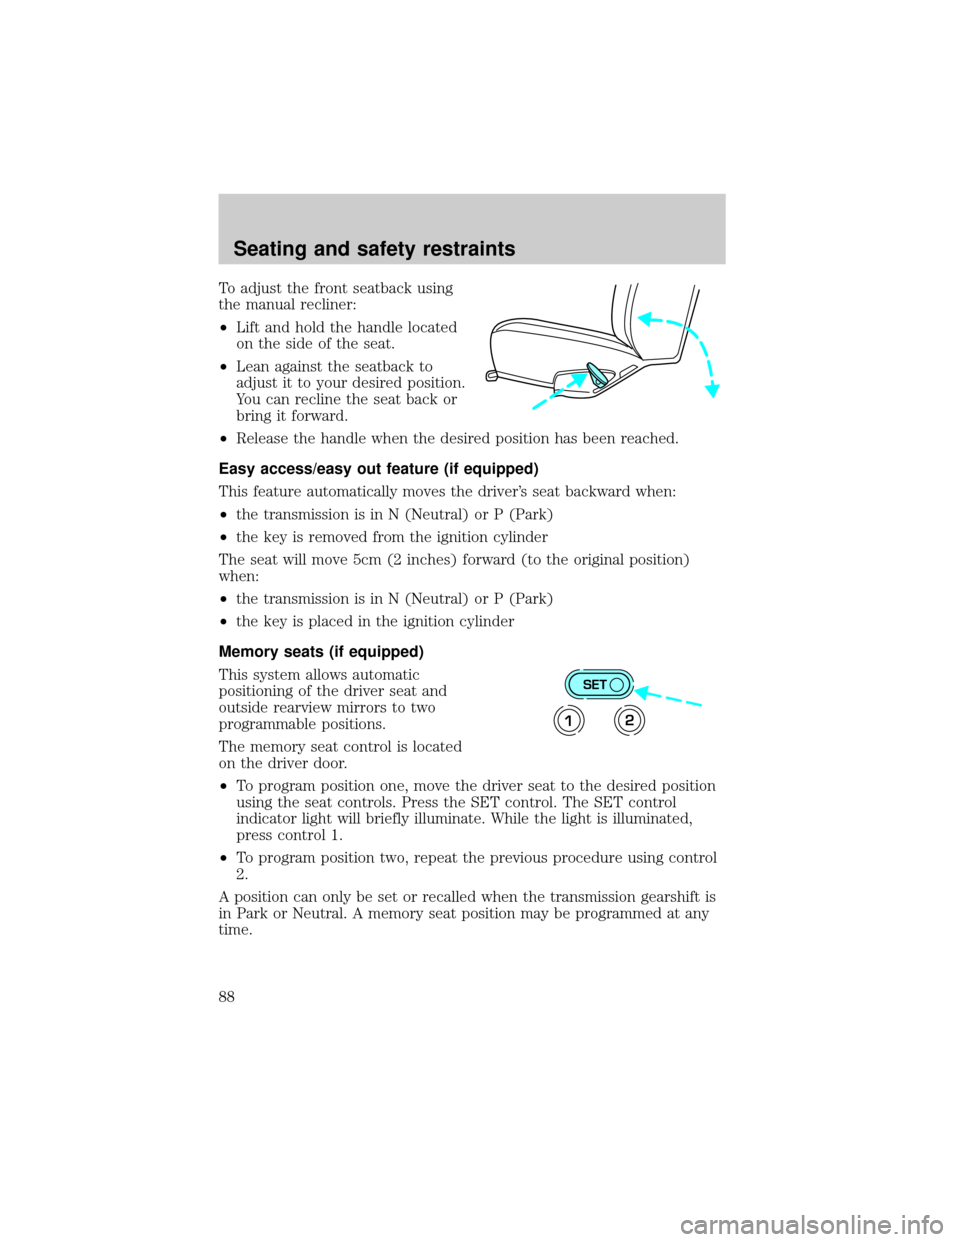
To adjust the front seatback using
the manual recliner:
²Lift and hold the handle located
on the side of the seat.
²Lean against the seatback to
adjust it to your desired position.
You can recline the seat back or
bring it forward.
²Release the handle when the desired position has been reached.
Easy access/easy out feature (if equipped)
This feature automatically moves the driver's seat backward when:
²the transmission is in N (Neutral) or P (Park)
²the key is removed from the ignition cylinder
The seat will move 5cm (2 inches) forward (to the original position)
when:
²the transmission is in N (Neutral) or P (Park)
²the key is placed in the ignition cylinder
Memory seats (if equipped)
This system allows automatic
positioning of the driver seat and
outside rearview mirrors to two
programmable positions.
The memory seat control is located
on the driver door.
²To program position one, move the driver seat to the desired position
using the seat controls. Press the SET control. The SET control
indicator light will briefly illuminate. While the light is illuminated,
press control 1.
²To program position two, repeat the previous procedure using control
2.
A position can only be set or recalled when the transmission gearshift is
in Park or Neutral. A memory seat position may be programmed at any
time.
SET
12
Seating and safety restraints
88
Page 97 of 224
Before following the procedure, make sure that:
²the parking brake is set
²the gearshift is in P (Park) (automatic transmission).
²the ignition switch is in the OFF position
²all vehicle doors are closed
²the driver's safety belt is unbuckled
²the parklamps/headlamps are in OFF position (If vehicle is equipped
with Autolamps, this will not affect the procedure.)
To reduce the risk of injury, do not deactivate/activate the Belt
Minder feature while driving the vehicle.
1. Turn the ignition switch to the RUN (or ON) position. (DO NOT
START THE ENGINE)
2. Wait until the safety belt warning light turns off. (Approximately 1±2
minutes)
²Steps 3±5 must be completed within 60 seconds or the procedure will
have to be repeated.
3. Buckle then unbuckle the safety belt three times, ending with the
safety belt unbuckled. This can be done before or during Belt Minder
warning activation.
4. Turn on the parklamps/headlamps, turn off the parklamps/headlamps.
5. Buckle then unbuckle the safety belt three times, ending with the
safety belt unbuckled.
²After step 5 the safety belt warning light will be turned on for three
seconds.
6. Within seven seconds of the safety belt warning light turning off,
buckle then unbuckle the safety belt.
²This will disable Belt Minder if it is currently enabled, or enable Belt
Minder if it is currently disabled.
7. Confirmation of disabling Belt Minder is provided by flashing the
safety belt warning light four times per second for three seconds.
8.
Confirmation of enabling Belt Minder is provided by flashing the safety
belt warning light four times per second for three seconds, followed by three
seconds with the safety belt warning light off, then followed by flashing the
safety belt warning light four times per second for three seconds again.
Seating and safety restraints
97
Page 115 of 224
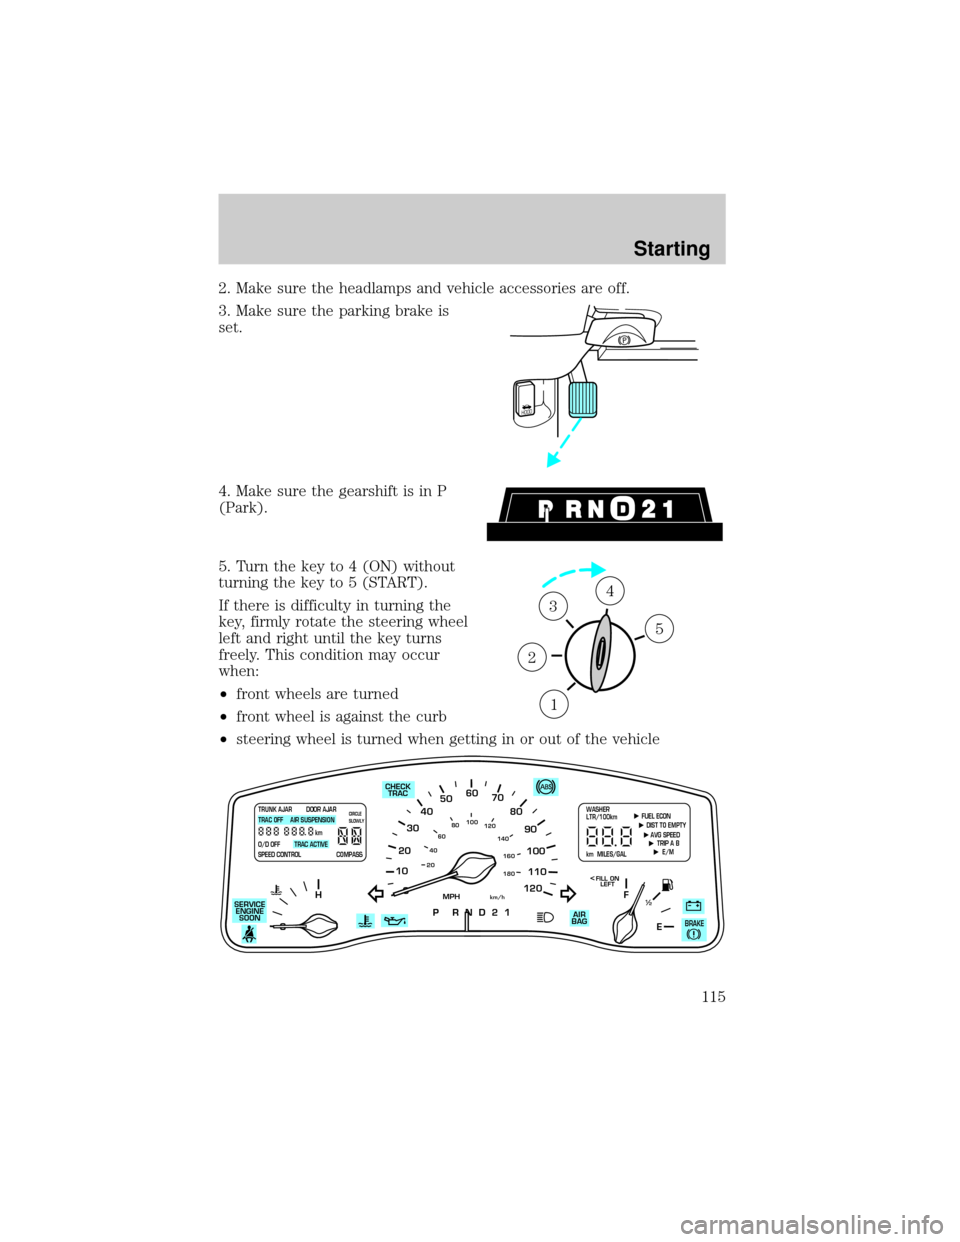
2. Make sure the headlamps and vehicle accessories are off.
3. Make sure the parking brake is
set.
4. Make sure the gearshift is in P
(Park).
5. Turn the key to 4 (ON) without
turning the key to 5 (START).
If there is difficulty in turning the
key, firmly rotate the steering wheel
left and right until the key turns
freely. This condition may occur
when:
²front wheels are turned
²front wheel is against the curb
²steering wheel is turned when getting in or out of the vehicle
HOOD
1
2
34
5
10
2030405060
70
80
90
100
120206080
40100
120
160 140
180
P R N D 2 1
MPHkm/h
110
HF
E1
2
FILL ON
LEFT<
AIR
BAG CHECK
TRAC
SERVICE
ENGINE
SOON
TRUNK AJAR DOOR AJAR
TRAC OFF AIR SUSPENSION
O/D OFF TRAC ACTIVE
SPEED CONTROL COMPASSkmCIRCLE
SLOWLY FUEL ECON
DIST TO EMPTY
AVG SPEED
TRIP A B
E/M
km MILES/GALWASHER
LTR/100km
BRAKE
Starting
115