LINCOLN TOWN CAR 2006 Owners Manual
Manufacturer: LINCOLN, Model Year: 2006, Model line: TOWN CAR, Model: LINCOLN TOWN CAR 2006Pages: 328, PDF Size: 4.56 MB
Page 91 of 328
•roads under cliffs
Ensure that you do not have any metal objects on the rear parcel shelf.
If your windows are tinted, ensure that you use non-metal tinting instead
of metal oxide tinting. Both of these factors can interrupt GPS reception.
Cleaning the display
Do not spray cleaning fluid directly onto the unit. Instead, spray onto a
soft cloth and gently wipe the unit. Only recommended products should
be used.
•Recommended products- Rubbing alcohol based cleaner (i.e., methyl
alcohol) or a damp clean cloth.
•Not harmful but not recommended- ammonia cleaner, neutral
detergent.
•Harmful to system and not recommended- acid cleaner, alkali cleaner,
benzene cleaner.
Do not clean any part of the system with benzene, paint thinner or any
other solvent.
Do not spill liquids of any kind onto the unit.
Loading the map DVD
•Your navigation DVD unit is located in the trunk (mounted under the
rear window or in a left side compartment with access door).
•Ensure that the vehicle ignition is ON.
•If a DVD is already loaded in the Navigation unit, push the eject
button.
•Load the DVD with the printed side up. Do not allow moisture or
foreign objects to enter the slot.
The navigation system utilizes a database stored in a special format on a
DVD. It is recommended always to use the latest update of this map
DVD.
•The navigation system will only work with DVDs specifically intended
for your navigation system.
•Always store the map DVDs in their protective cases when not in use.
2006 Town Car(tow)
Owners Guide (post-2002-fmt)
USA(fus)
Entertainment Systems
91
Page 92 of 328
Ordering additional map DVDs
If you wish to order a replacement or additional map, please call
1–888–NAV-MAPS (1–888–628–6277) or to log onto www.navtech.com.
Latest map DVDs
The map content is constantly changing due to new roads, traffic
restrictions, etc. . Therefore, it is not always possible to exactly match
the DVD map with the current roadways. For best results, always use the
latest version of the map DVD. Map information is regularly updated, but
all areas are not necessarily covered to the same level of detail. Some
areas, in particular private roads, may not be included on the database.
To help with accuracy, always use the latest DVD version for navigation.
Customer service
If you need help operating your navigation/audio system, want to report
a map database error or want to obtain a map DVD, please call 1 (888)
628–6277 (NAV-MAPS) or log onto www.navtech.com.
2006 Town Car(tow)
Owners Guide (post-2002-fmt)
USA(fus)
Entertainment Systems
92
Page 93 of 328
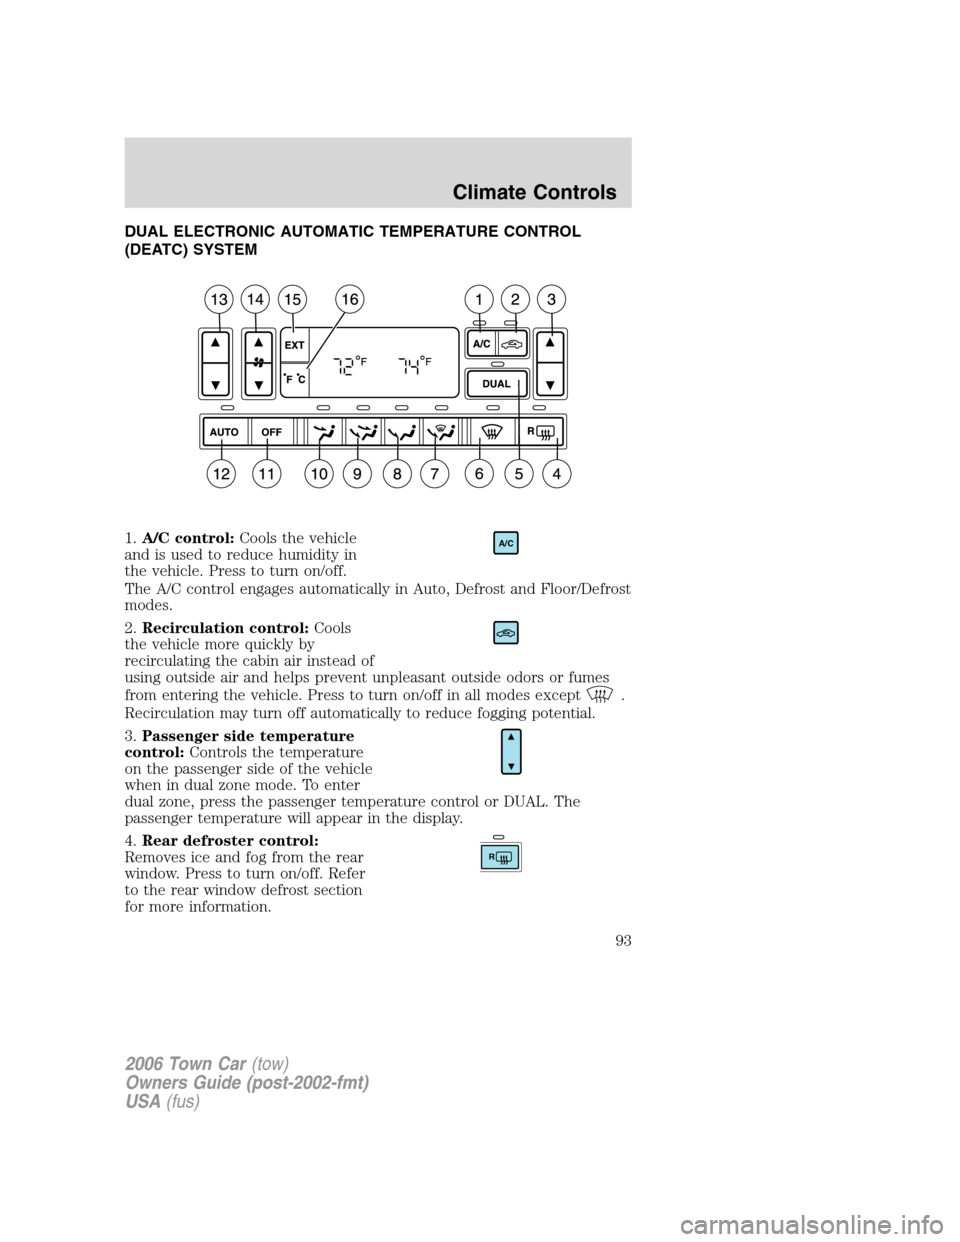
DUAL ELECTRONIC AUTOMATIC TEMPERATURE CONTROL
(DEATC) SYSTEM
1.A/C control:Cools the vehicle
and is used to reduce humidity in
the vehicle. Press to turn on/off.
The A/C control engages automatically in Auto, Defrost and Floor/Defrost
modes.
2.Recirculation control:Cools
the vehicle more quickly by
recirculating the cabin air instead of
using outside air and helps prevent unpleasant outside odors or fumes
from entering the vehicle. Press to turn on/off in all modes except
.
Recirculation may turn off automatically to reduce fogging potential.
3.Passenger side temperature
control:Controls the temperature
on the passenger side of the vehicle
when in dual zone mode. To enter
dual zone, press the passenger temperature control or DUAL. The
passenger temperature will appear in the display.
4.Rear defroster control:
Removes ice and fog from the rear
window. Press to turn on/off. Refer
to the rear window defrost section
for more information.
A/C
R
2006 Town Car(tow)
Owners Guide (post-2002-fmt)
USA(fus)
Climate Controls
93
Page 94 of 328
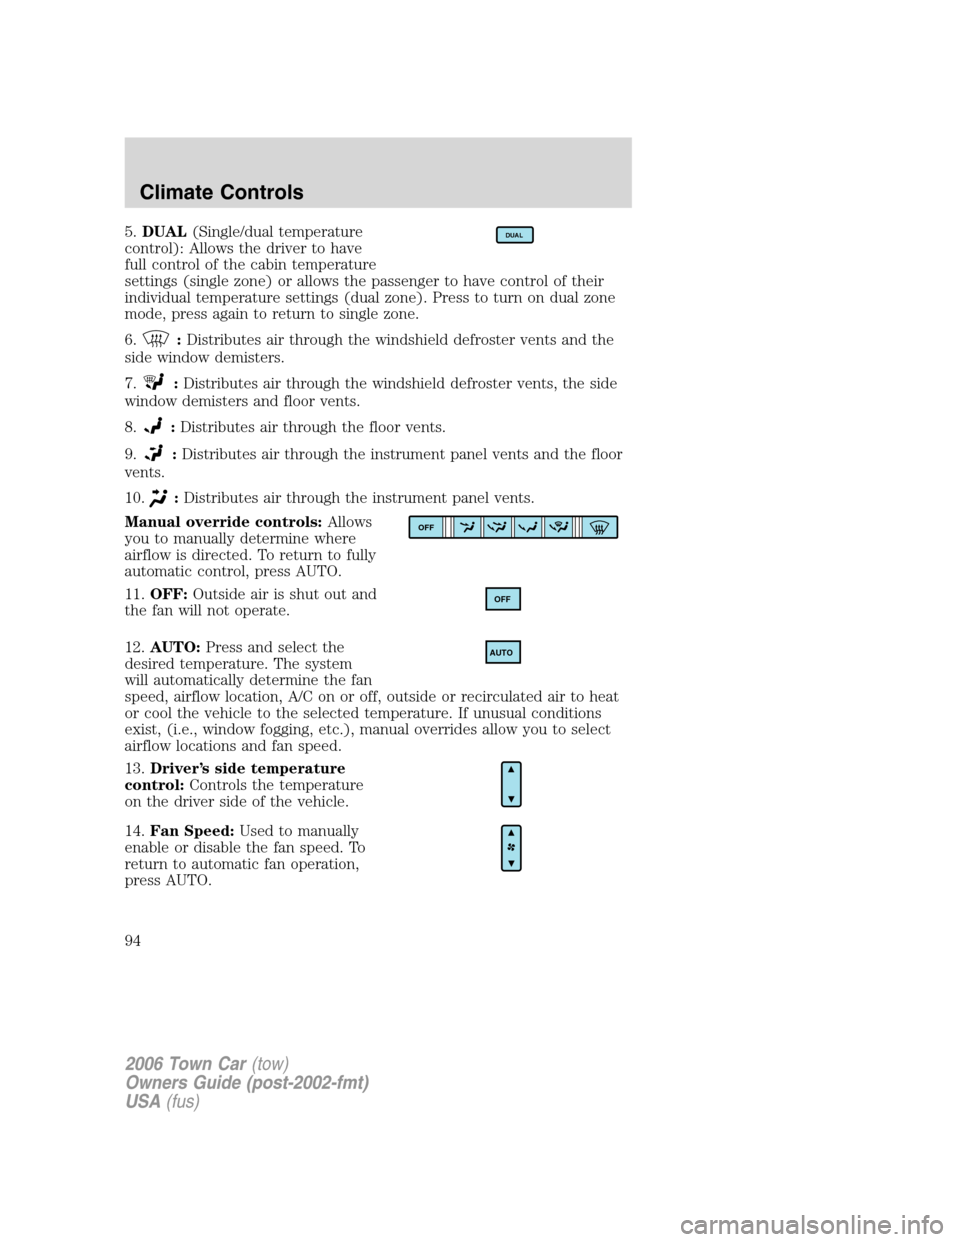
5.DUAL(Single/dual temperature
control): Allows the driver to have
full control of the cabin temperature
settings (single zone) or allows the passenger to have control of their
individual temperature settings (dual zone). Press to turn on dual zone
mode, press again to return to single zone.
6.
:Distributes air through the windshield defroster vents and the
side window demisters.
7.
:Distributes air through the windshield defroster vents, the side
window demisters and floor vents.
8.
:Distributes air through the floor vents.
9.
:Distributes air through the instrument panel vents and the floor
vents.
10.
:Distributes air through the instrument panel vents.
Manual override controls:Allows
you to manually determine where
airflow is directed. To return to fully
automatic control, press AUTO.
11.OFF:Outside air is shut out and
the fan will not operate.
12.AUTO:Press and select the
desired temperature. The system
will automatically determine the fan
speed, airflow location, A/C on or off, outside or recirculated air to heat
or cool the vehicle to the selected temperature. If unusual conditions
exist, (i.e., window fogging, etc.), manual overrides allow you to select
airflow locations and fan speed.
13.Driver’s side temperature
control:Controls the temperature
on the driver side of the vehicle.
14.Fan Speed:Used to manually
enable or disable the fan speed. To
return to automatic fan operation,
press AUTO.
DUAL
OFF
OFF
AUTO
2006 Town Car(tow)
Owners Guide (post-2002-fmt)
USA(fus)
Climate Controls
94
Page 95 of 328
15.EXT:Displays the outside air
temperature. It will remain
displayed until the EXT control is
pressed again. The external
temperature will be most accurate when the vehicle has been moving for
a period of time.
16.Temperature conversion:
Press to toggle between Fahrenheit
and Celsius temperature on the
DEATC display only. The set point
temperatures in Celsius will be displayed in half-degree increments.
OPERATING TIPS
•To reduce fog build up on the windshield during humid weather, place
the air flow selector in the
position.
•To reduce humidity build up inside the vehicle: do not drive with the
recirculation control on or the system turned off.
•To improve the A/C cool down, drive with the windows slightly open
for 2–3 minutes after start up or until the vehicle has been “aired out.”
•Do not put objects under the front seats that will interfere with the
airflow to the back seats.
•Remove any snow, ice or leaves from the air intake area at the base of
the windshield.
To aid in side window defogging/demisting in cold weather:
1. Select
.
2. Select A/C.
3. Adjust the temperature control to maintain comfort.
4. Set the fan to the highest speed.
5. Direct the outer instrument panel vents towards the side windows.
To increase airflow to the outer instrument panel vents, close the vents
located in the middle of the instrument panel.
Do not place objects on top of the instrument panel as these
objects may become projectiles in a collision or sudden stop.
2006 Town Car(tow)
Owners Guide (post-2002-fmt)
USA(fus)
Climate Controls
95
Page 96 of 328
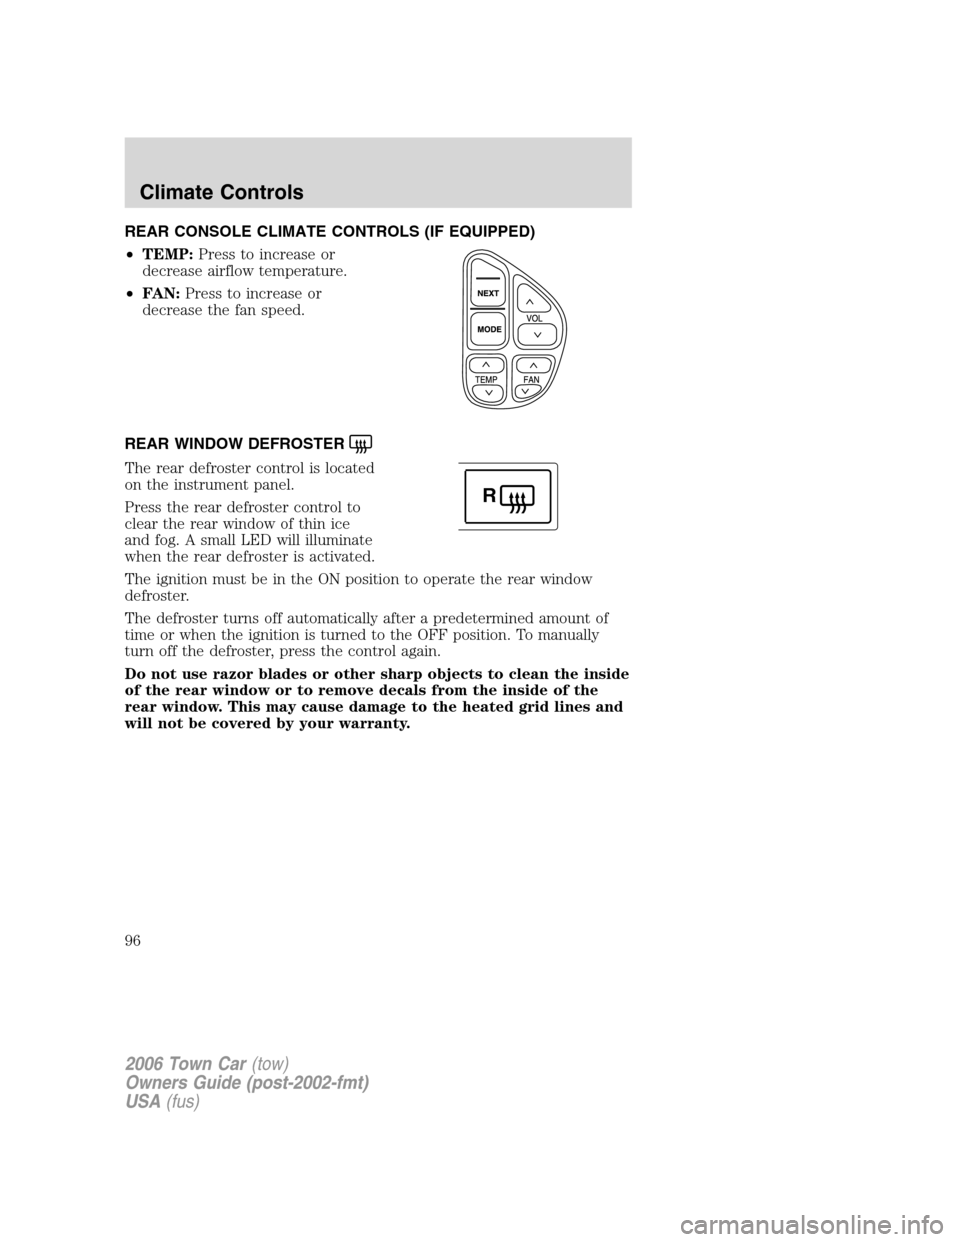
REAR CONSOLE CLIMATE CONTROLS (IF EQUIPPED)
•TEMP:Press to increase or
decrease airflow temperature.
•FAN:Press to increase or
decrease the fan speed.
REAR WINDOW DEFROSTER
The rear defroster control is located
on the instrument panel.
Press the rear defroster control to
clear the rear window of thin ice
and fog. A small LED will illuminate
when the rear defroster is activated.
The ignition must be in the ON position to operate the rear window
defroster.
The defroster turns off automatically after a predetermined amount of
time or when the ignition is turned to the OFF position. To manually
turn off the defroster, press the control again.
Do not use razor blades or other sharp objects to clean the inside
of the rear window or to remove decals from the inside of the
rear window. This may cause damage to the heated grid lines and
will not be covered by your warranty.
R
2006 Town Car(tow)
Owners Guide (post-2002-fmt)
USA(fus)
Climate Controls
96
Page 97 of 328
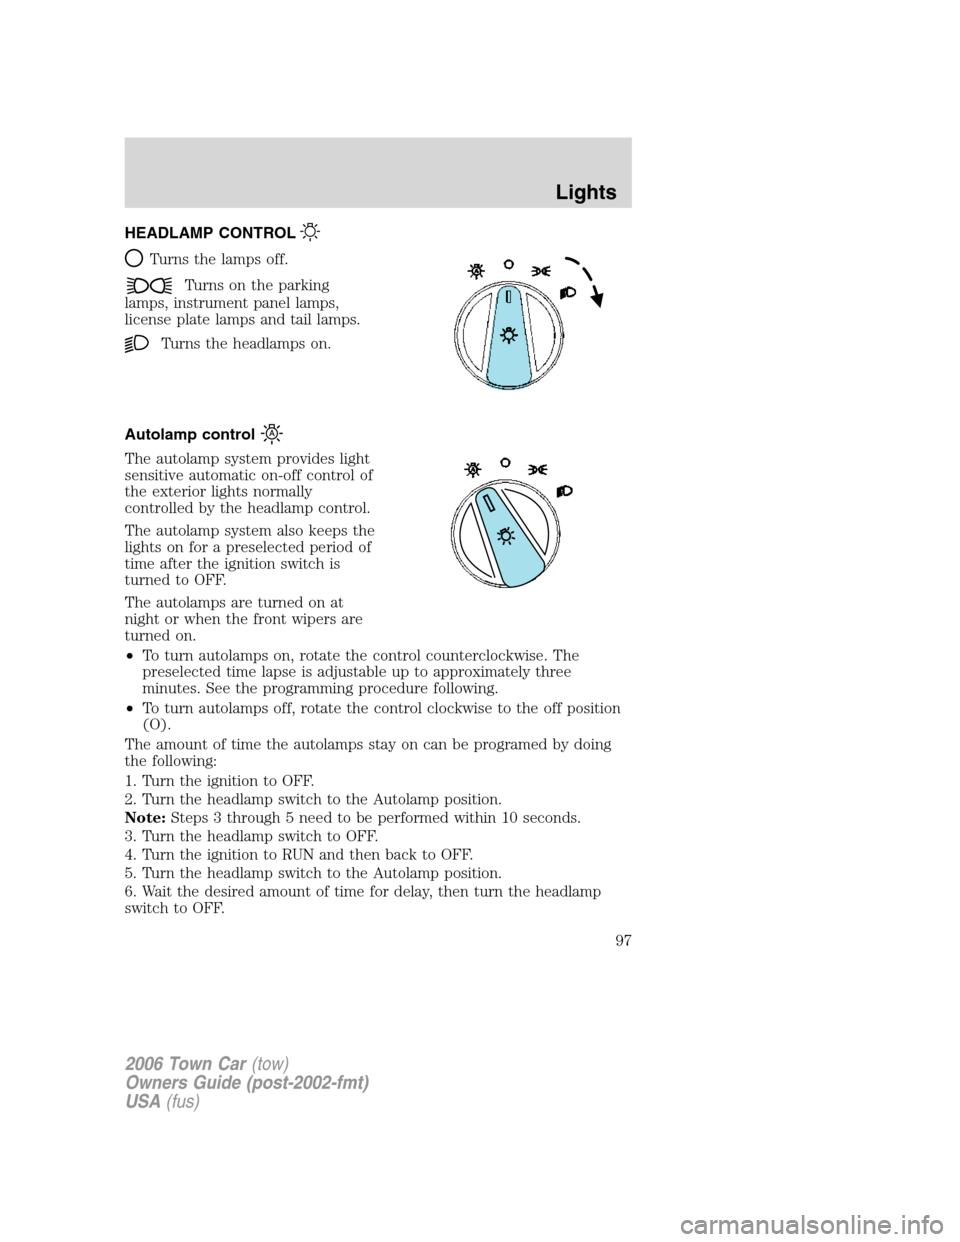
HEADLAMP CONTROL
Turns the lamps off.
Turns on the parking
lamps, instrument panel lamps,
license plate lamps and tail lamps.
Turns the headlamps on.
Autolamp control
The autolamp system provides light
sensitive automatic on-off control of
the exterior lights normally
controlled by the headlamp control.
The autolamp system also keeps the
lights on for a preselected period of
time after the ignition switch is
turned to OFF.
The autolamps are turned on at
night or when the front wipers are
turned on.
•To turn autolamps on, rotate the control counterclockwise. The
preselected time lapse is adjustable up to approximately three
minutes. See the programming procedure following.
•To turn autolamps off, rotate the control clockwise to the off position
(O).
The amount of time the autolamps stay on can be programed by doing
the following:
1. Turn the ignition to OFF.
2. Turn the headlamp switch to the Autolamp position.
Note:Steps 3 through 5 need to be performed within 10 seconds.
3. Turn the headlamp switch to OFF.
4. Turn the ignition to RUN and then back to OFF.
5. Turn the headlamp switch to the Autolamp position.
6. Wait the desired amount of time for delay, then turn the headlamp
switch to OFF.
2006 Town Car(tow)
Owners Guide (post-2002-fmt)
USA(fus)
Lights
97
Page 98 of 328
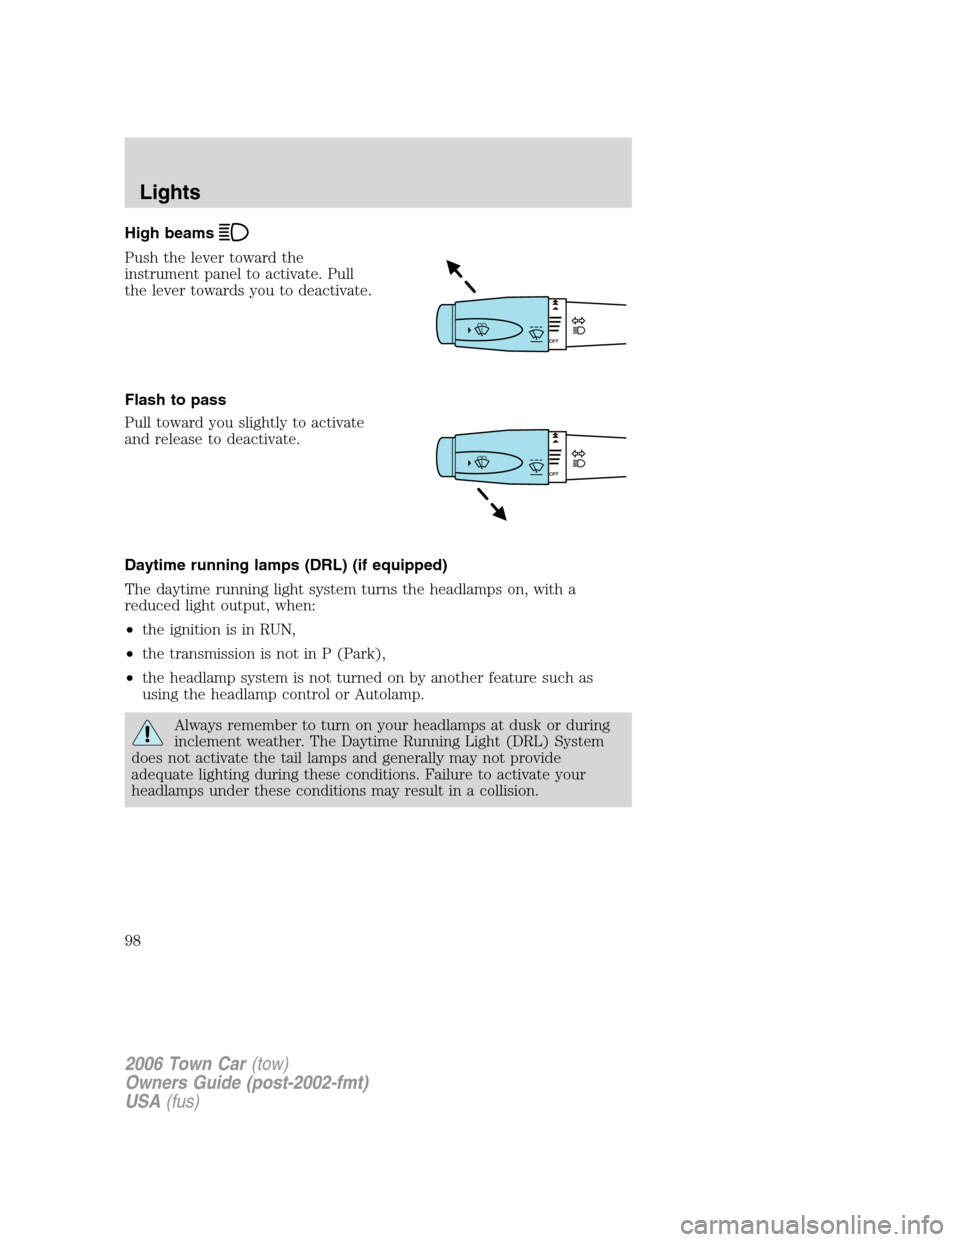
High beams
Push the lever toward the
instrument panel to activate. Pull
the lever towards you to deactivate.
Flash to pass
Pull toward you slightly to activate
and release to deactivate.
Daytime running lamps (DRL) (if equipped)
The daytime running light system turns the headlamps on, with a
reduced light output, when:
•the ignition is in RUN,
•the transmission is not in P (Park),
•the headlamp system is not turned on by another feature such as
using the headlamp control or Autolamp.
Always remember to turn on your headlamps at dusk or during
inclement weather. The Daytime Running Light (DRL) System
does not activate the tail lamps and generally may not provide
adequate lighting during these conditions. Failure to activate your
headlamps under these conditions may result in a collision.
2006 Town Car(tow)
Owners Guide (post-2002-fmt)
USA(fus)
Lights
98
Page 99 of 328
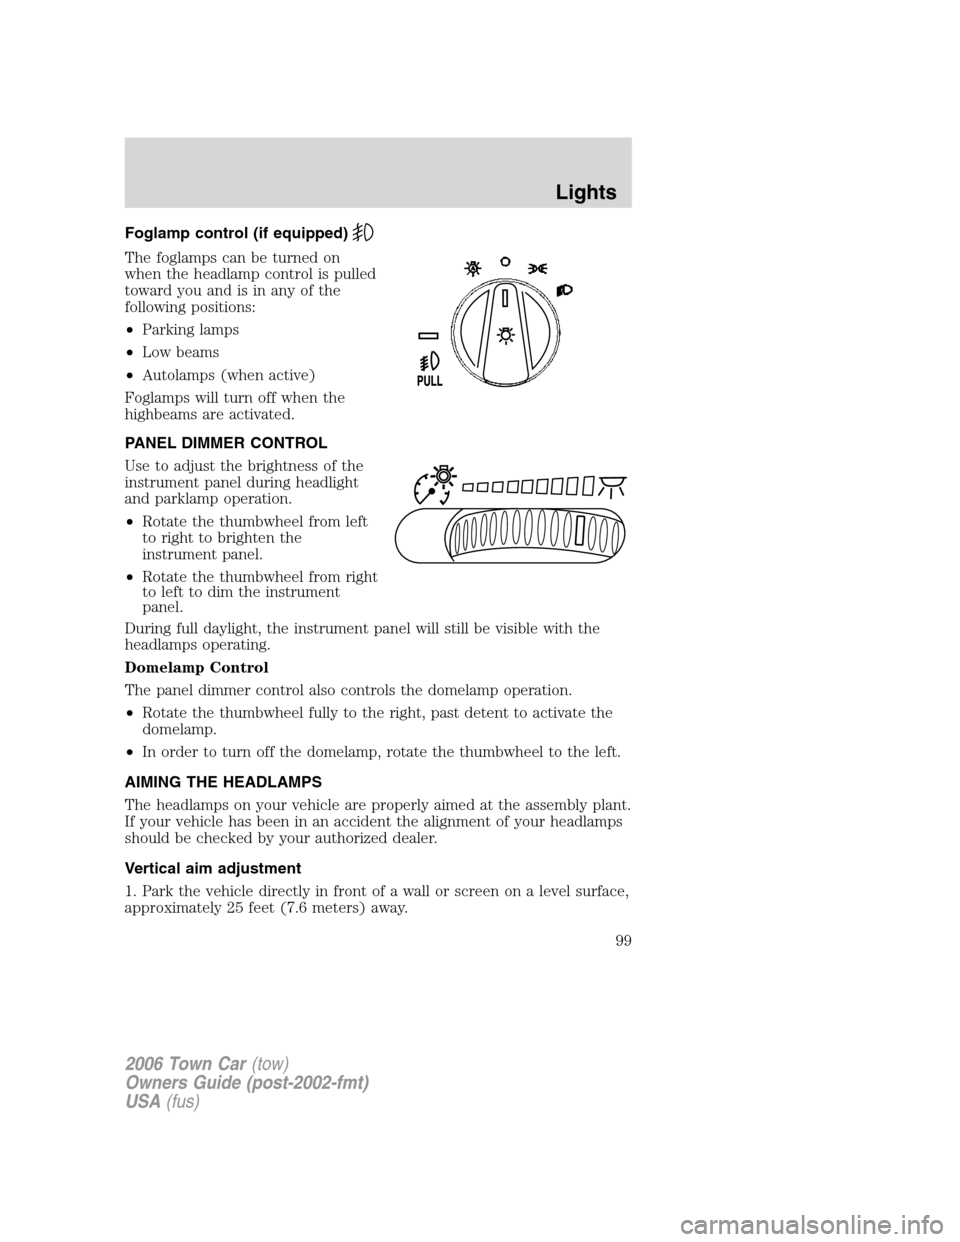
Foglamp control (if equipped)
The foglamps can be turned on
when the headlamp control is pulled
toward you and is in any of the
following positions:
•Parking lamps
•Low beams
•Autolamps (when active)
Foglamps will turn off when the
highbeams are activated.
PANEL DIMMER CONTROL
Use to adjust the brightness of the
instrument panel during headlight
and parklamp operation.
•Rotate the thumbwheel from left
to right to brighten the
instrument panel.
•Rotate the thumbwheel from right
to left to dim the instrument
panel.
During full daylight, the instrument panel will still be visible with the
headlamps operating.
Domelamp Control
The panel dimmer control also controls the domelamp operation.
•Rotate the thumbwheel fully to the right, past detent to activate the
domelamp.
•In order to turn off the domelamp, rotate the thumbwheel to the left.
AIMING THE HEADLAMPS
The headlamps on your vehicle are properly aimed at the assembly plant.
If your vehicle has been in an accident the alignment of your headlamps
should be checked by your authorized dealer.
Vertical aim adjustment
1. Park the vehicle directly in front of a wall or screen on a level surface,
approximately 25 feet (7.6 meters) away.
2006 Town Car(tow)
Owners Guide (post-2002-fmt)
USA(fus)
Lights
99
Page 100 of 328
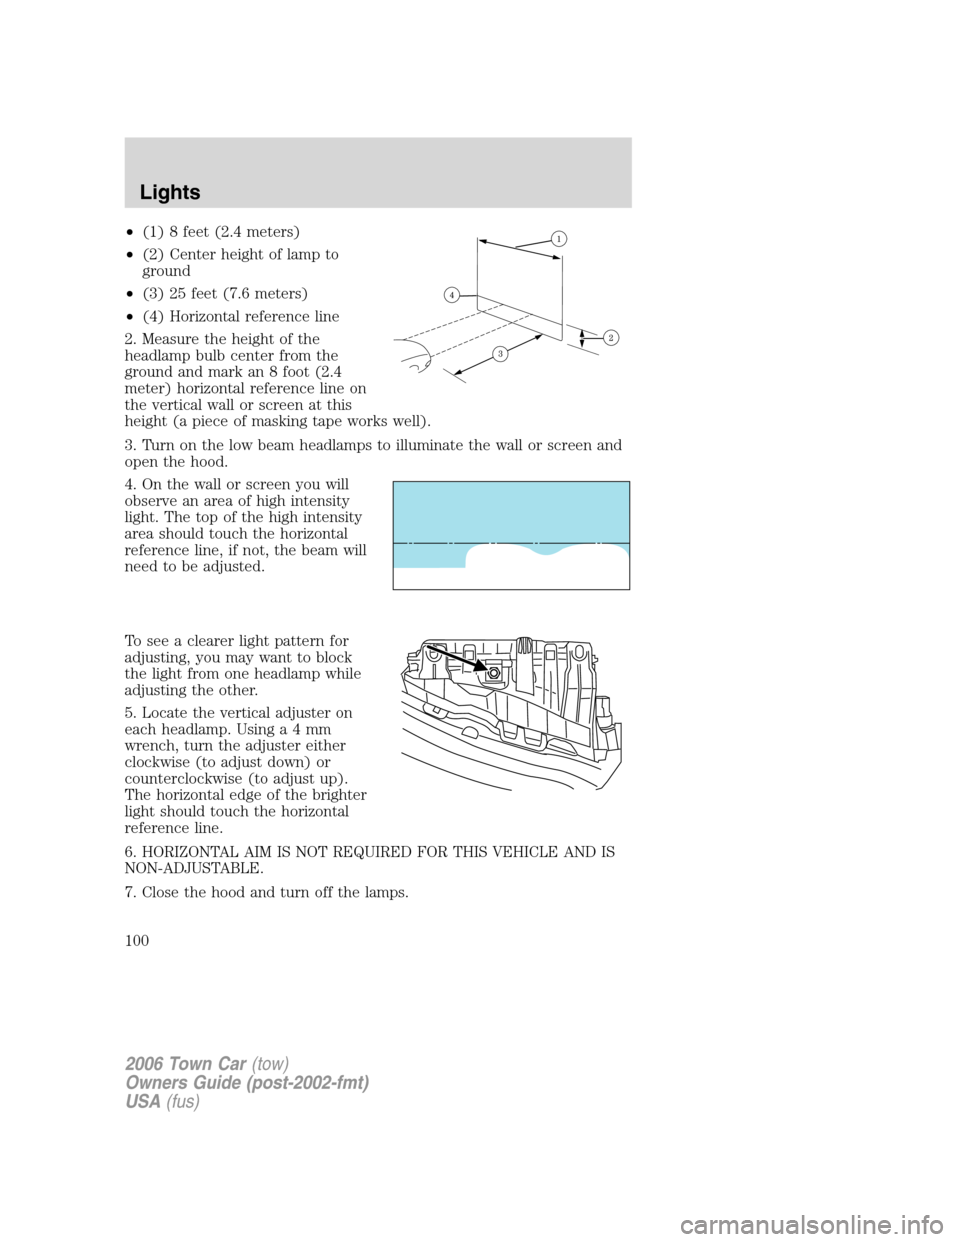
•(1) 8 feet (2.4 meters)
•(2) Center height of lamp to
ground
•(3) 25 feet (7.6 meters)
•(4) Horizontal reference line
2. Measure the height of the
headlamp bulb center from the
ground and mark an 8 foot (2.4
meter) horizontal reference line on
the vertical wall or screen at this
height (a piece of masking tape works well).
3. Turn on the low beam headlamps to illuminate the wall or screen and
open the hood.
4. On the wall or screen you will
observe an area of high intensity
light. The top of the high intensity
area should touch the horizontal
reference line, if not, the beam will
need to be adjusted.
To see a clearer light pattern for
adjusting, you may want to block
the light from one headlamp while
adjusting the other.
5. Locate the vertical adjuster on
each headlamp. Usinga4mm
wrench, turn the adjuster either
clockwise (to adjust down) or
counterclockwise (to adjust up).
The horizontal edge of the brighter
light should touch the horizontal
reference line.
6. HORIZONTAL AIM IS NOT REQUIRED FOR THIS VEHICLE AND IS
NON-ADJUSTABLE.
7. Close the hood and turn off the lamps.
2006 Town Car(tow)
Owners Guide (post-2002-fmt)
USA(fus)
Lights
100