LINCOLN TOWN CAR 2006 Owners Manual
Manufacturer: LINCOLN, Model Year: 2006, Model line: TOWN CAR, Model: LINCOLN TOWN CAR 2006Pages: 328, PDF Size: 4.56 MB
Page 101 of 328
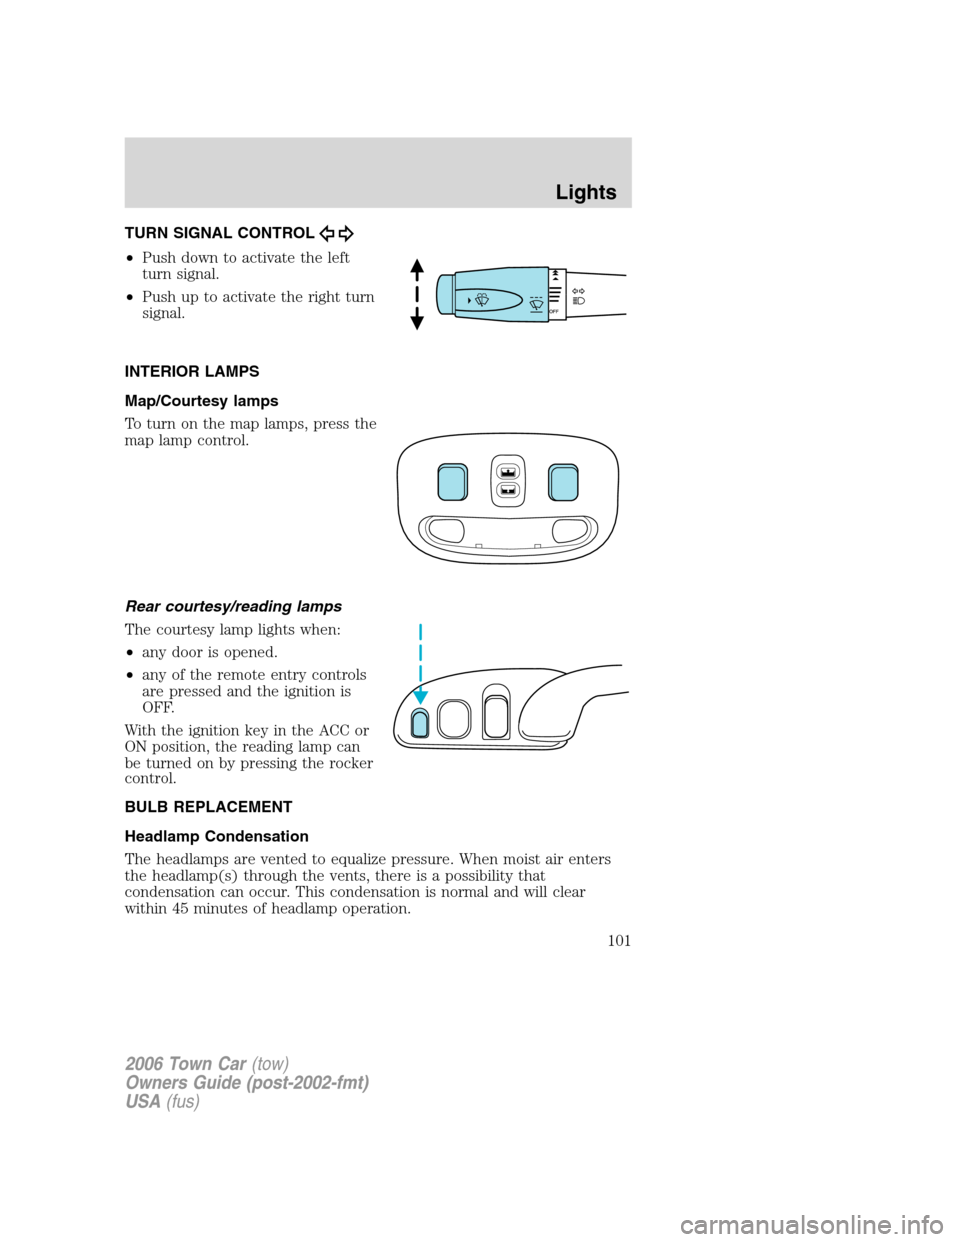
TURN SIGNAL CONTROL
•Push down to activate the left
turn signal.
•Push up to activate the right turn
signal.
INTERIOR LAMPS
Map/Courtesy lamps
To turn on the map lamps, press the
map lamp control.
Rear courtesy/reading lamps
The courtesy lamp lights when:
•any door is opened.
•any of the remote entry controls
are pressed and the ignition is
OFF.
With the ignition key in the ACC or
ON position, the reading lamp can
be turned on by pressing the rocker
control.
BULB REPLACEMENT
Headlamp Condensation
The headlamps are vented to equalize pressure. When moist air enters
the headlamp(s) through the vents, there is a possibility that
condensation can occur. This condensation is normal and will clear
within 45 minutes of headlamp operation.
2006 Town Car(tow)
Owners Guide (post-2002-fmt)
USA(fus)
Lights
101
Page 102 of 328
Replacing exterior bulbs
Check the operation of all the bulbs frequently.
Using the right bulbs
Replacement bulbs are specified in the following chart. Headlamp bulbs
must be marked with an authorized “D.O.T.” for North America and an
“E” for Europe to ensure lamp performance, light brightness and pattern
and safe visibility. The correct bulbs will not damage the lamp assembly
or void the lamp assembly warranty and will provide quality bulb burn
time.
Function Trade Number
Headlamp (HI beam) 9005
Headlamp (LOW beam)* H7
Park and turn lamp (front) 3457 AK
Sidemarker (front) 168
Backup lamp 3156 K
Stop, tail, turn and sidemarker lamp (rear) 3157 K
Cornering lamp 3156 K
Foglamp (if equipped) 9145
License plate lamp 168
High-mount brakelamp - Stop** LED Assembly
Luggage compartment lamp 212-2
Map lamp 578
Visor vanity lamp - Slide on Rail system
(SOR)37
Rear grab handle reading lamps 578
Door courtesy lamp 904
Glove compartment 194
All replacement bulbs are clear in color except where noted.
To replace all instrument panel lights - see your authorized dealer.
* For vehicles with HID lamps, see your authorized dealer for service.
** When replacing the center high mount stop lamp assembly, see your
authorized dealer for replacement bulbs.
Replacing the interior bulbs
Check the operation of all bulbs frequently.
2006 Town Car(tow)
Owners Guide (post-2002-fmt)
USA(fus)
Lights
102
Page 103 of 328
Rear courtesy/reading lamps
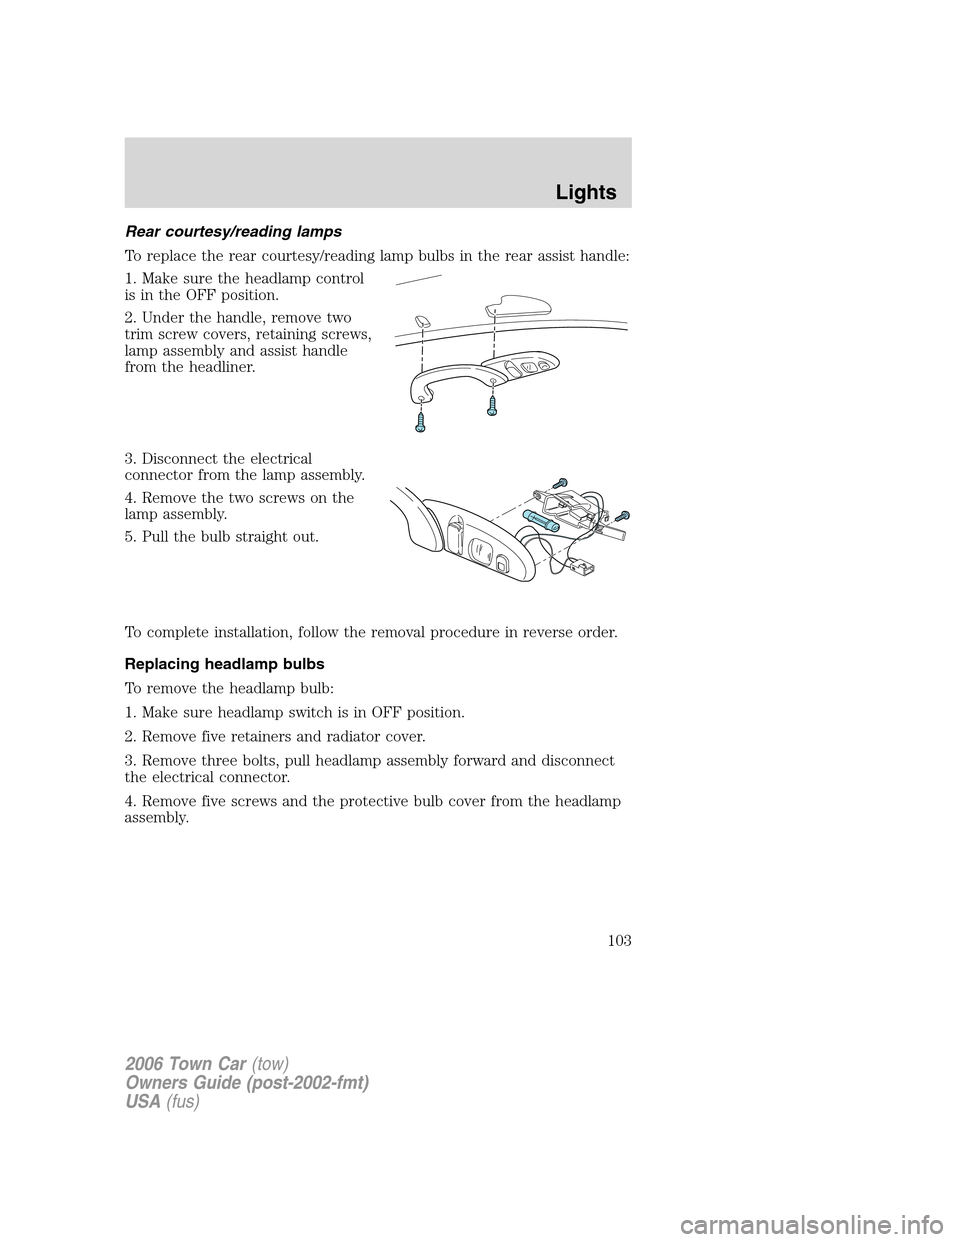
To replace the rear courtesy/reading lamp bulbs in the rear assist handle:
1. Make sure the headlamp control
is in the OFF position.
2. Under the handle, remove two
trim screw covers, retaining screws,
lamp assembly and assist handle
from the headliner.
3. Disconnect the electrical
connector from the lamp assembly.
4. Remove the two screws on the
lamp assembly.
5. Pull the bulb straight out.
To complete installation, follow the removal procedure in reverse order.
Replacing headlamp bulbs
To remove the headlamp bulb:
1. Make sure headlamp switch is in OFF position.
2. Remove five retainers and radiator cover.
3. Remove three bolts, pull headlamp assembly forward and disconnect
the electrical connector.
4. Remove five screws and the protective bulb cover from the headlamp
assembly.
2006 Town Car(tow)
Owners Guide (post-2002-fmt)
USA(fus)
Lights
103
Page 104 of 328
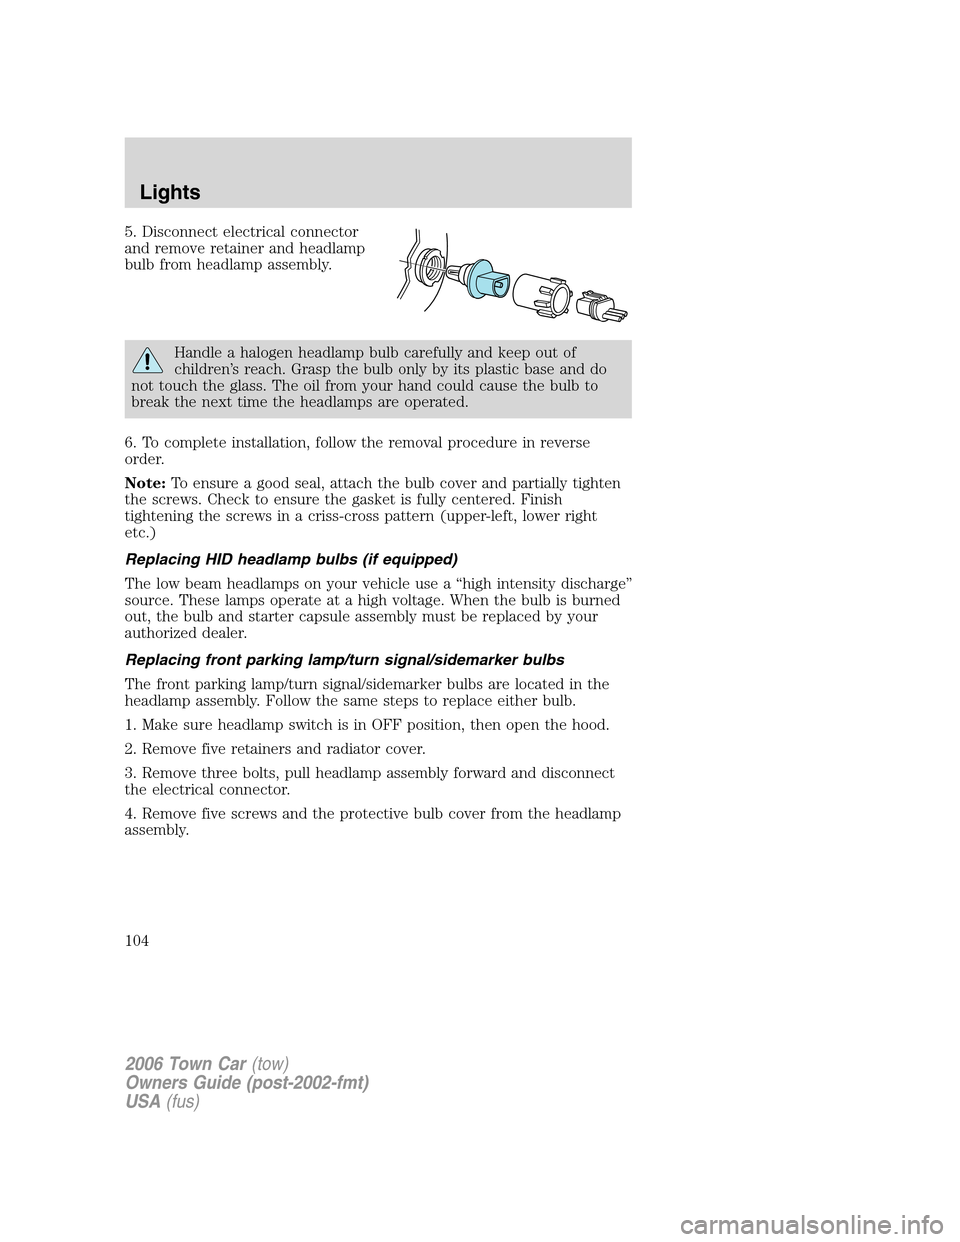
5. Disconnect electrical connector
and remove retainer and headlamp
bulb from headlamp assembly.
Handle a halogen headlamp bulb carefully and keep out of
children’s reach. Grasp the bulb only by its plastic base and do
not touch the glass. The oil from your hand could cause the bulb to
break the next time the headlamps are operated.
6. To complete installation, follow the removal procedure in reverse
order.
Note:To ensure a good seal, attach the bulb cover and partially tighten
the screws. Check to ensure the gasket is fully centered. Finish
tightening the screws in a criss-cross pattern (upper-left, lower right
etc.)
Replacing HID headlamp bulbs (if equipped)
The low beam headlamps on your vehicle use a “high intensity discharge”
source. These lamps operate at a high voltage. When the bulb is burned
out, the bulb and starter capsule assembly must be replaced by your
authorized dealer.
Replacing front parking lamp/turn signal/sidemarker bulbs
The front parking lamp/turn signal/sidemarker bulbs are located in the
headlamp assembly. Follow the same steps to replace either bulb.
1. Make sure headlamp switch is in OFF position, then open the hood.
2. Remove five retainers and radiator cover.
3. Remove three bolts, pull headlamp assembly forward and disconnect
the electrical connector.
4. Remove five screws and the protective bulb cover from the headlamp
assembly.
2006 Town Car(tow)
Owners Guide (post-2002-fmt)
USA(fus)
Lights
104
Page 105 of 328
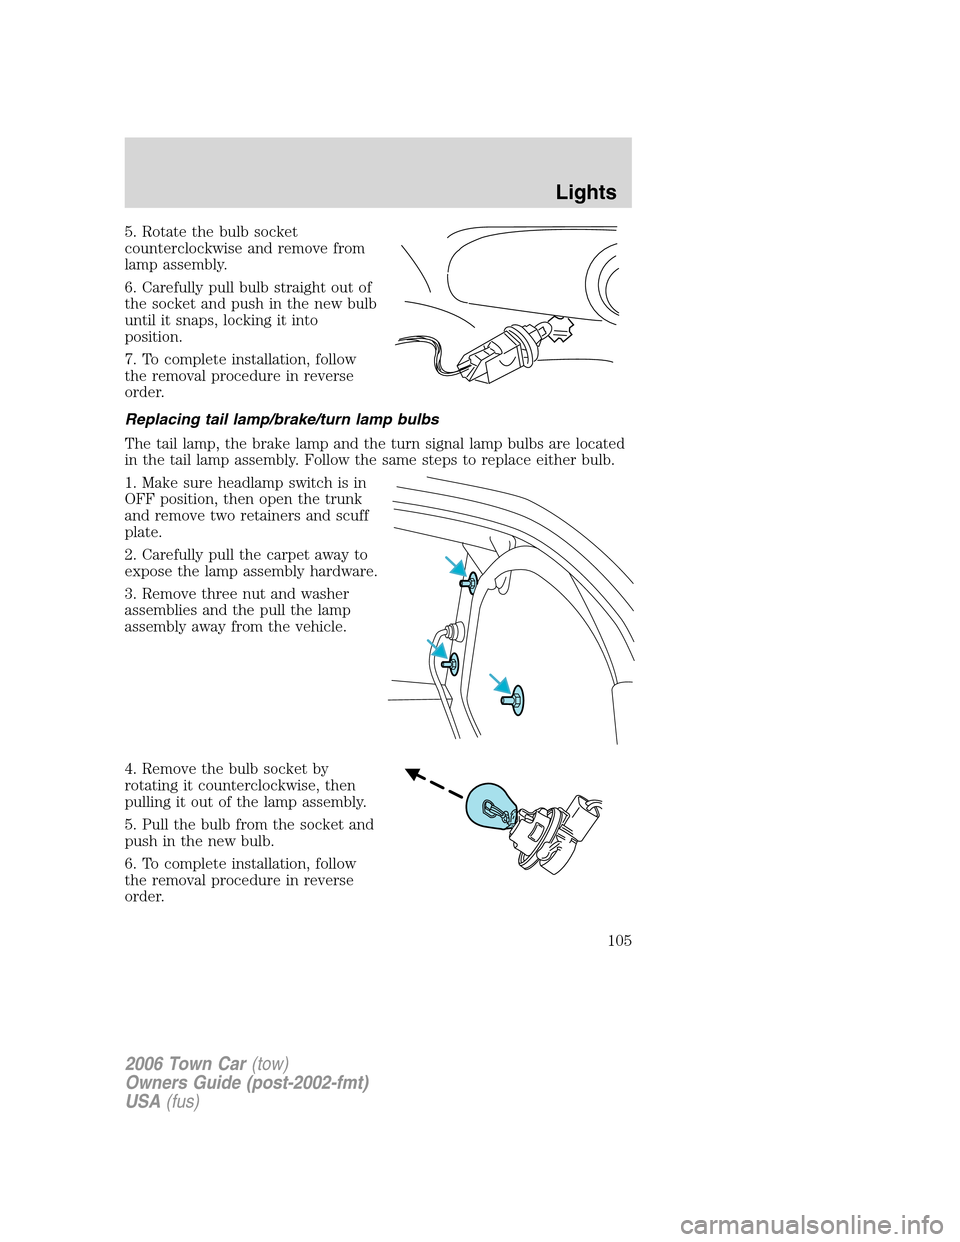
5. Rotate the bulb socket
counterclockwise and remove from
lamp assembly.
6. Carefully pull bulb straight out of
the socket and push in the new bulb
until it snaps, locking it into
position.
7. To complete installation, follow
the removal procedure in reverse
order.
Replacing tail lamp/brake/turn lamp bulbs
The tail lamp, the brake lamp and the turn signal lamp bulbs are located
in the tail lamp assembly. Follow the same steps to replace either bulb.
1. Make sure headlamp switch is in
OFF position, then open the trunk
and remove two retainers and scuff
plate.
2. Carefully pull the carpet away to
expose the lamp assembly hardware.
3. Remove three nut and washer
assemblies and the pull the lamp
assembly away from the vehicle.
4. Remove the bulb socket by
rotating it counterclockwise, then
pulling it out of the lamp assembly.
5. Pull the bulb from the socket and
push in the new bulb.
6. To complete installation, follow
the removal procedure in reverse
order.
2006 Town Car(tow)
Owners Guide (post-2002-fmt)
USA(fus)
Lights
105
Page 106 of 328
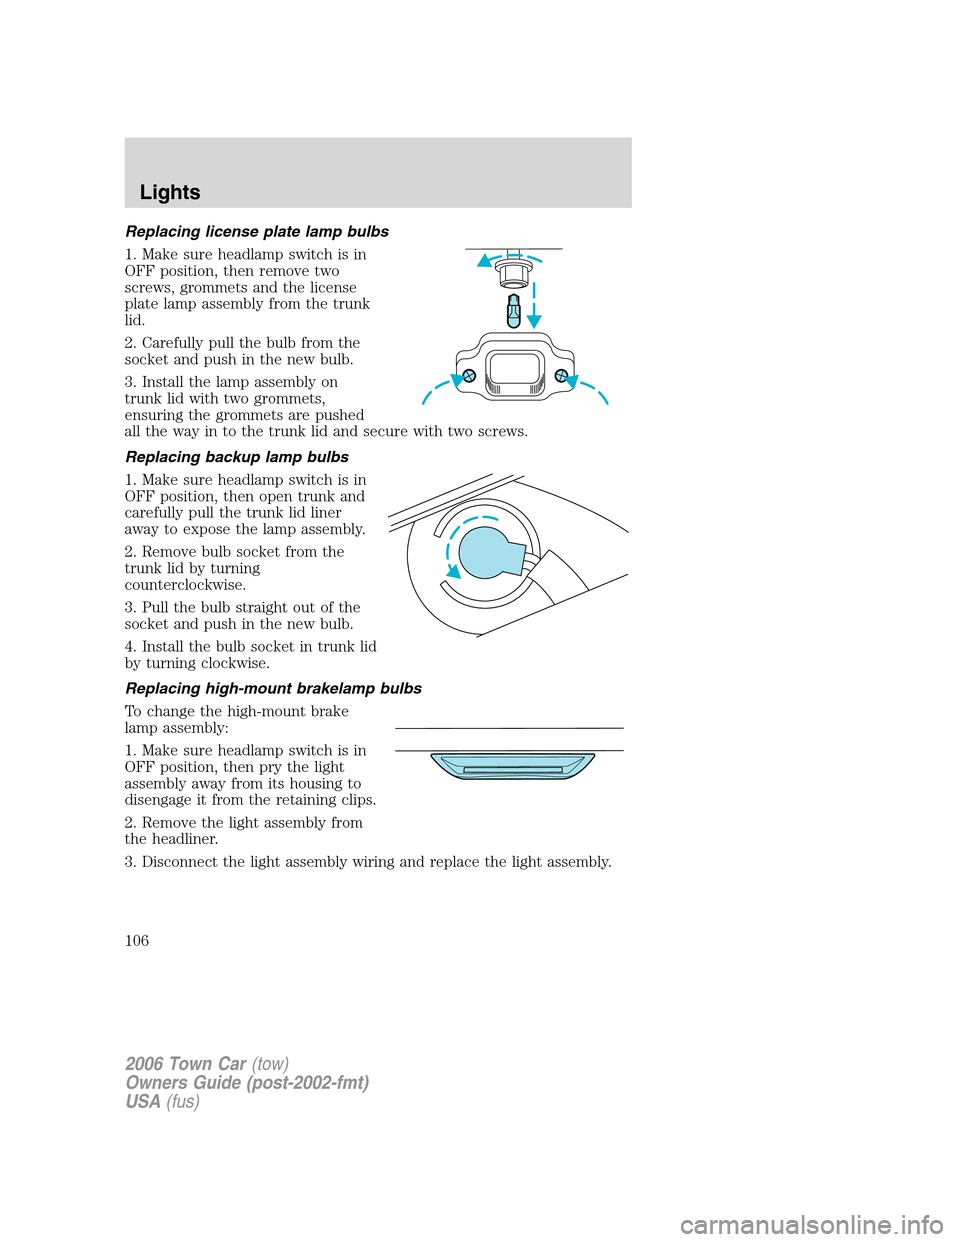
Replacing license plate lamp bulbs
1. Make sure headlamp switch is in
OFF position, then remove two
screws, grommets and the license
plate lamp assembly from the trunk
lid.
2. Carefully pull the bulb from the
socket and push in the new bulb.
3. Install the lamp assembly on
trunk lid with two grommets,
ensuring the grommets are pushed
all the way in to the trunk lid and secure with two screws.
Replacing backup lamp bulbs
1. Make sure headlamp switch is in
OFF position, then open trunk and
carefully pull the trunk lid liner
away to expose the lamp assembly.
2. Remove bulb socket from the
trunk lid by turning
counterclockwise.
3. Pull the bulb straight out of the
socket and push in the new bulb.
4. Install the bulb socket in trunk lid
by turning clockwise.
Replacing high-mount brakelamp bulbs
To change the high-mount brake
lamp assembly:
1. Make sure headlamp switch is in
OFF position, then pry the light
assembly away from its housing to
disengage it from the retaining clips.
2. Remove the light assembly from
the headliner.
3. Disconnect the light assembly wiring and replace the light assembly.
2006 Town Car(tow)
Owners Guide (post-2002-fmt)
USA(fus)
Lights
106
Page 107 of 328
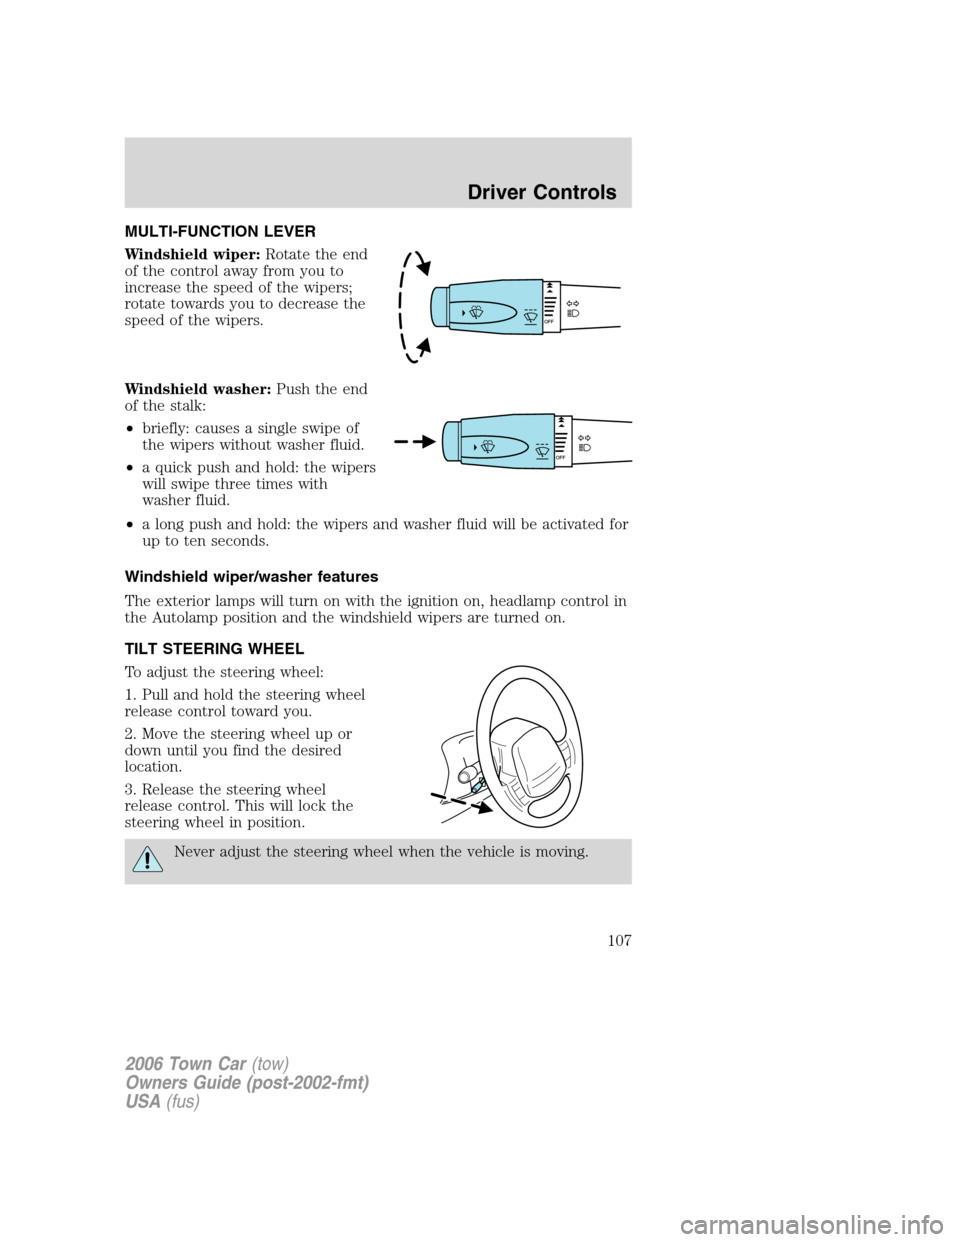
MULTI-FUNCTION LEVER
Windshield wiper:Rotate the end
of the control away from you to
increase the speed of the wipers;
rotate towards you to decrease the
speed of the wipers.
Windshield washer:Push the end
of the stalk:
•briefly: causes a single swipe of
the wipers without washer fluid.
•a quick push and hold: the wipers
will swipe three times with
washer fluid.
•a long push and hold: the wipers and washer fluid will be activated for
up to ten seconds.
Windshield wiper/washer features
The exterior lamps will turn on with the ignition on, headlamp control in
the Autolamp position and the windshield wipers are turned on.
TILT STEERING WHEEL
To adjust the steering wheel:
1. Pull and hold the steering wheel
release control toward you.
2. Move the steering wheel up or
down until you find the desired
location.
3. Release the steering wheel
release control. This will lock the
steering wheel in position.
Never adjust the steering wheel when the vehicle is moving.
2006 Town Car(tow)
Owners Guide (post-2002-fmt)
USA(fus)
Driver Controls
107
Page 108 of 328
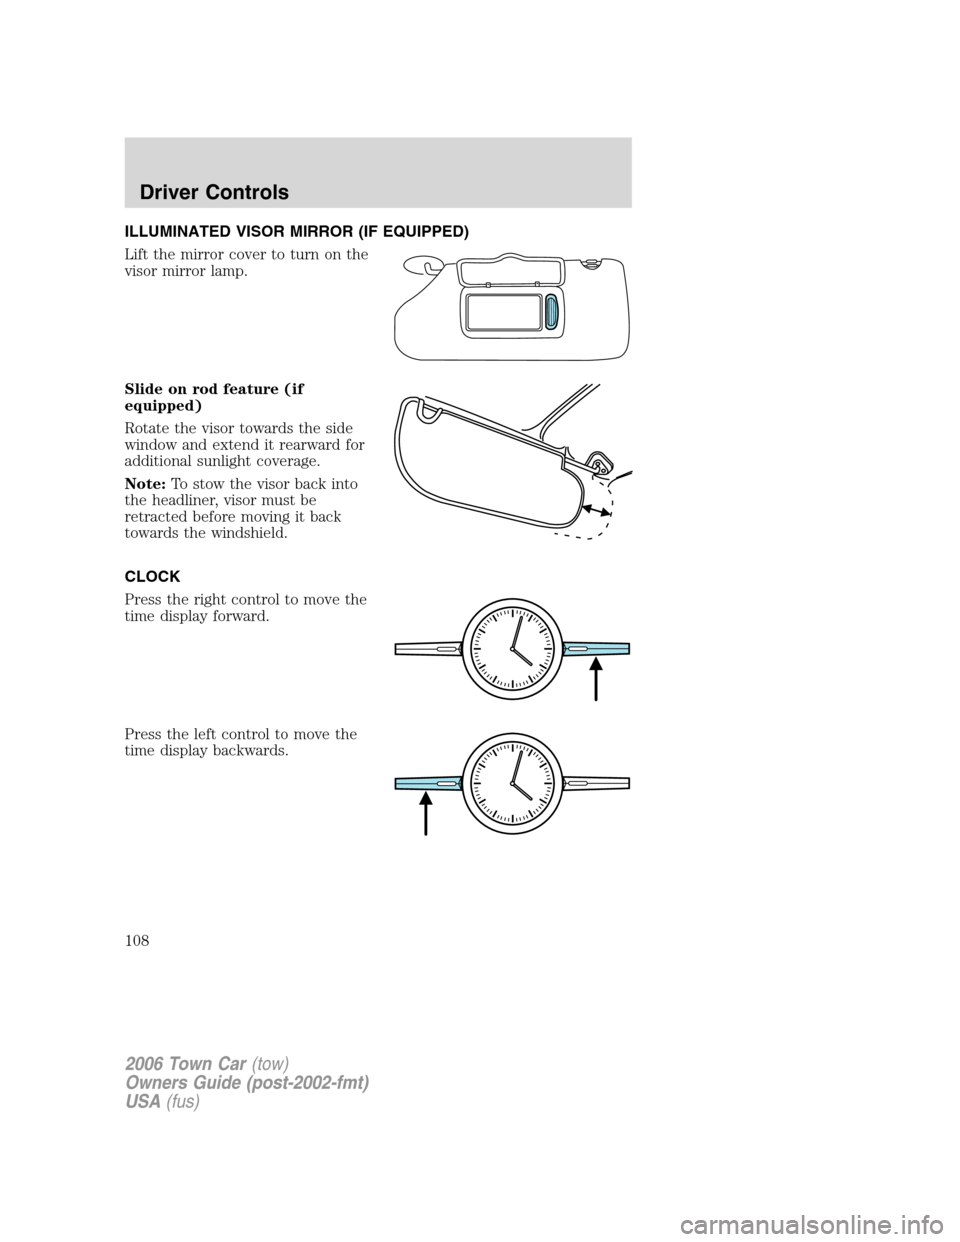
ILLUMINATED VISOR MIRROR (IF EQUIPPED)
Lift the mirror cover to turn on the
visor mirror lamp.
Slide on rod feature (if
equipped)
Rotate the visor towards the side
window and extend it rearward for
additional sunlight coverage.
Note:To stow the visor back into
the headliner, visor must be
retracted before moving it back
towards the windshield.
CLOCK
Press the right control to move the
time display forward.
Press the left control to move the
time display backwards.
2006 Town Car(tow)
Owners Guide (post-2002-fmt)
USA(fus)
Driver Controls
108
Page 109 of 328
AUXILIARY POWER POINT (12VDC)
Power outlets are designed for accessory plugs only. Do not insert
any other object in the power outlet as this will damage the
outlet and blow the fuse. Do not hang any type of accessory or
accessory bracket from the plug. Improper use of the power
outlet can cause damage not covered by your warranty.
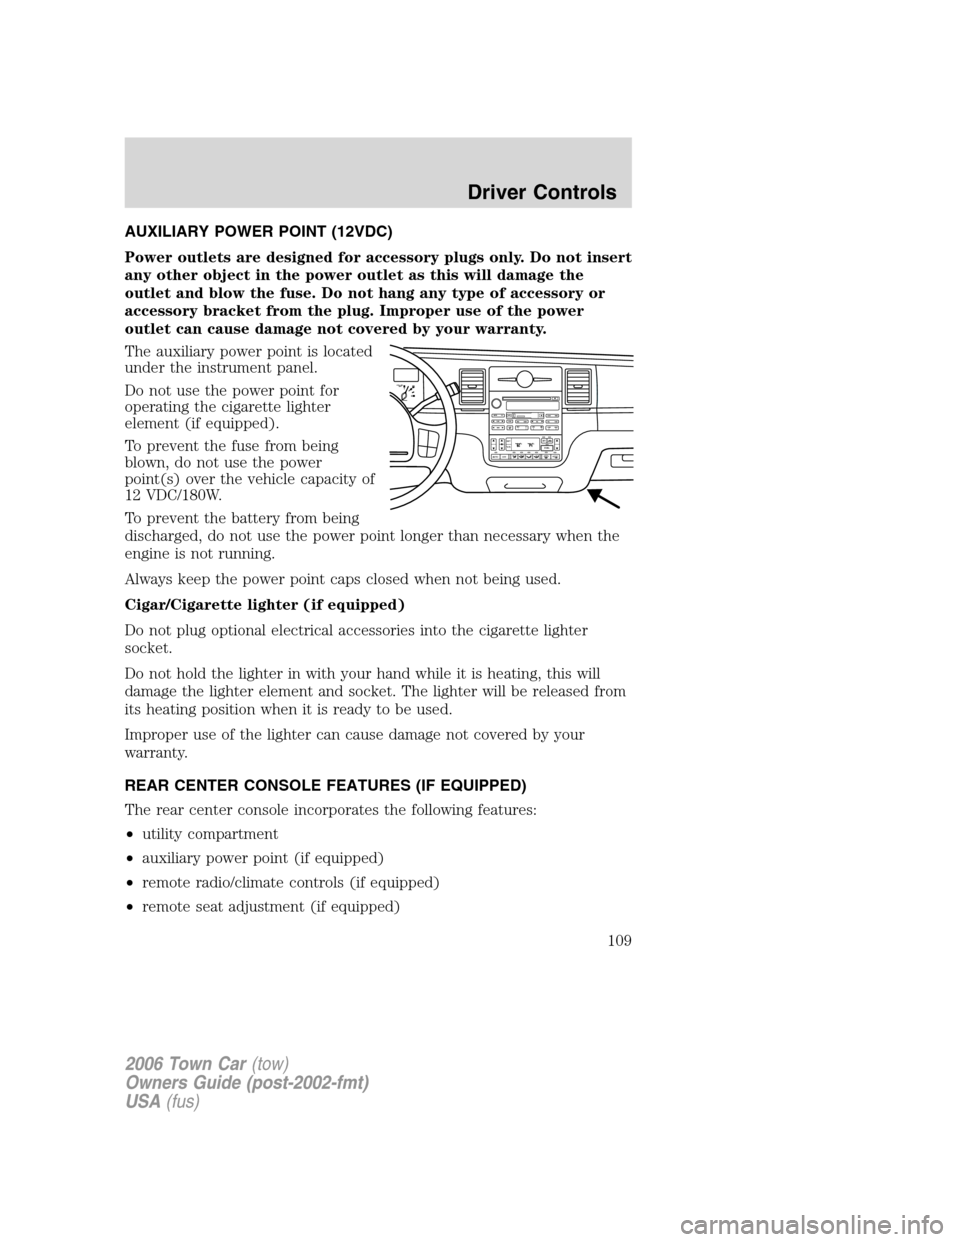
The auxiliary power point is located
under the instrument panel.
Do not use the power point for
operating the cigarette lighter
element (if equipped).
To prevent the fuse from being
blown, do not use the power
point(s) over the vehicle capacity of
12 VDC/180W.
To prevent the battery from being
discharged, do not use the power point longer than necessary when the
engine is not running.
Always keep the power point caps closed when not being used.
Cigar/Cigarette lighter (if equipped)
Do not plug optional electrical accessories into the cigarette lighter
socket.
Do not hold the lighter in with your hand while it is heating, this will
damage the lighter element and socket. The lighter will be released from
its heating position when it is ready to be used.
Improper use of the lighter can cause damage not covered by your
warranty.
REAR CENTER CONSOLE FEATURES (IF EQUIPPED)
The rear center console incorporates the following features:
•utility compartment
•auxiliary power point (if equipped)
•remote radio/climate controls (if equipped)
•remote seat adjustment (if equipped)
F
E1
2FILL ON
LEFT<
SHUF MUTE
SELBALBASS
FADETREB
SCAN CD
AM/FM
SEEKREWFF
COMP
56 34 12SIDE TUNETAPE
RDS
AUTO
SET
AUTO OFFDUAL A/C
R EXT
F/ CFF
2006 Town Car(tow)
Owners Guide (post-2002-fmt)
USA(fus)
Driver Controls
109
Page 110 of 328
Remote seat adjustment
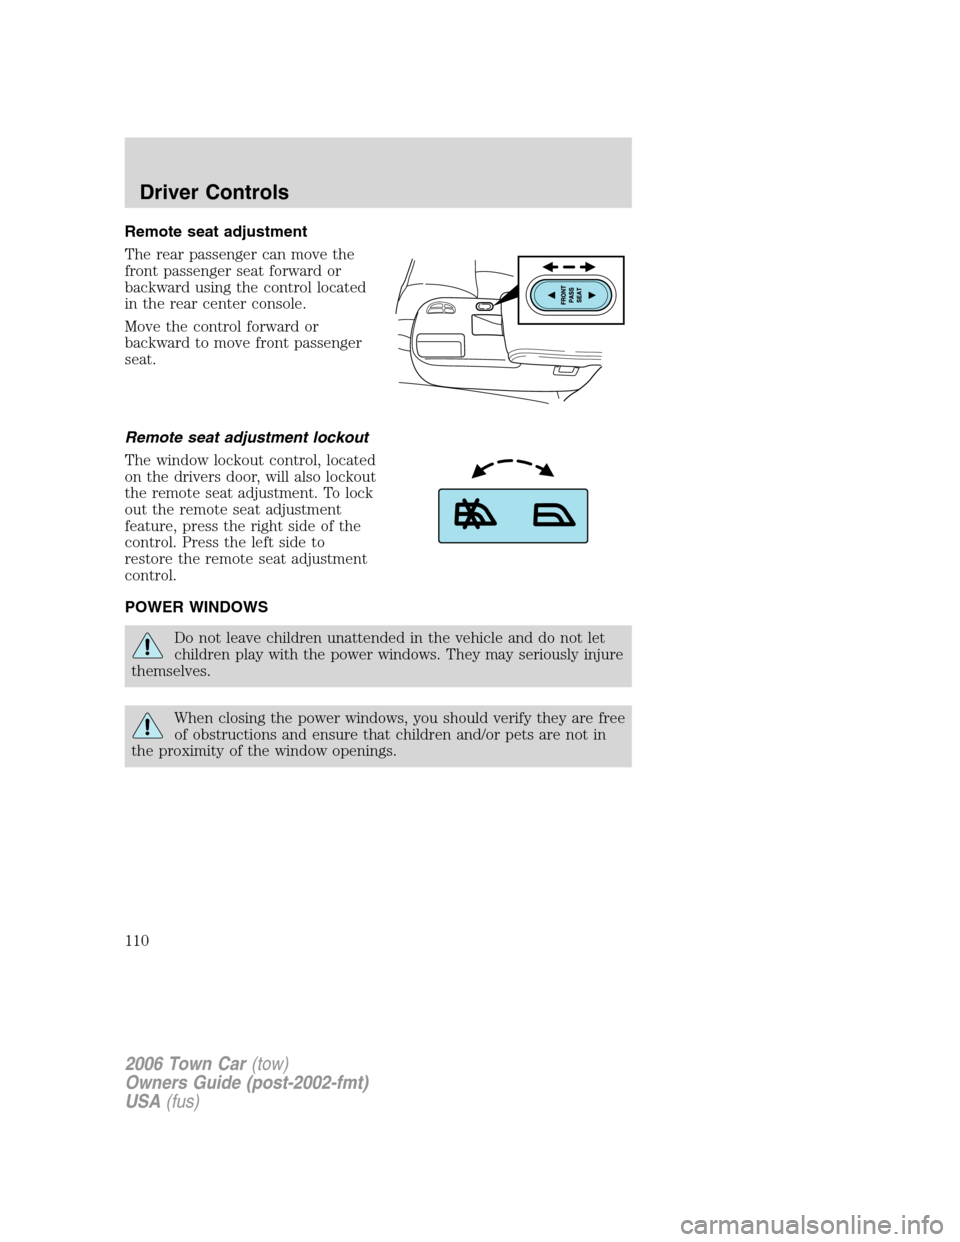
The rear passenger can move the
front passenger seat forward or
backward using the control located
in the rear center console.
Move the control forward or
backward to move front passenger
seat.
Remote seat adjustment lockout
The window lockout control, located
on the drivers door, will also lockout
the remote seat adjustment. To lock
out the remote seat adjustment
feature, press the right side of the
control. Press the left side to
restore the remote seat adjustment
control.
POWER WINDOWS
Do not leave children unattended in the vehicle and do not let
children play with the power windows. They may seriously injure
themselves.
When closing the power windows, you should verify they are free
of obstructions and ensure that children and/or pets are not in
the proximity of the window openings.
2006 Town Car(tow)
Owners Guide (post-2002-fmt)
USA(fus)
Driver Controls
110