tire LUCID AIR 2022 Owners Manual
[x] Cancel search | Manufacturer: LUCID, Model Year: 2022, Model line: AIR, Model: LUCID AIR 2022Pages: 241, PDF Size: 5.15 MB
Page 10 of 241
Floor Mats 166Parts and Accessories 167
Parts, Accessories, and Modifications167
Body Repairs 167
Vehicle Lifting Points 168
Lifting the Vehicle 168Tire & WheelsTire Information 170
Understanding Tire Markings 170 International Tire Approval Marks 173
Uniform Tire Quality Grading 173
Tire and Loading Information Label 174
Tire Care and Maintenance 176
Inspecting and Maintaining Tires 176
Maintaining Tire Pressures 177
Replacing Tires and Wheels 179
Seasonal Tire Types 179 Driving in Low Temperatures 180
Tire Traction Devices 180
Tire Pressure Monitoring System 181 Tire Pressure Monitoring System (TPMS) 181
Vehicle Loading 183
Loading the Vehicle 183
Steps for Determining Correct Load Limit 183Technical DataVehicle Dimensions and Weights 186
Exterior Dimensions 186
Vehicle Weights 187
Wheels and Tires 188
Wheel and Tire Specifications 188
Tire Pressures 189
Vehicle Sub-Systems 190
Steering 190
Brakes 191
Front Suspension 192
Rear Suspension 193
Motors 194
Transmission 194
12V Batteries 194
High-Voltage Battery 194
Page 20 of 241
Exterior
Exterior Overview
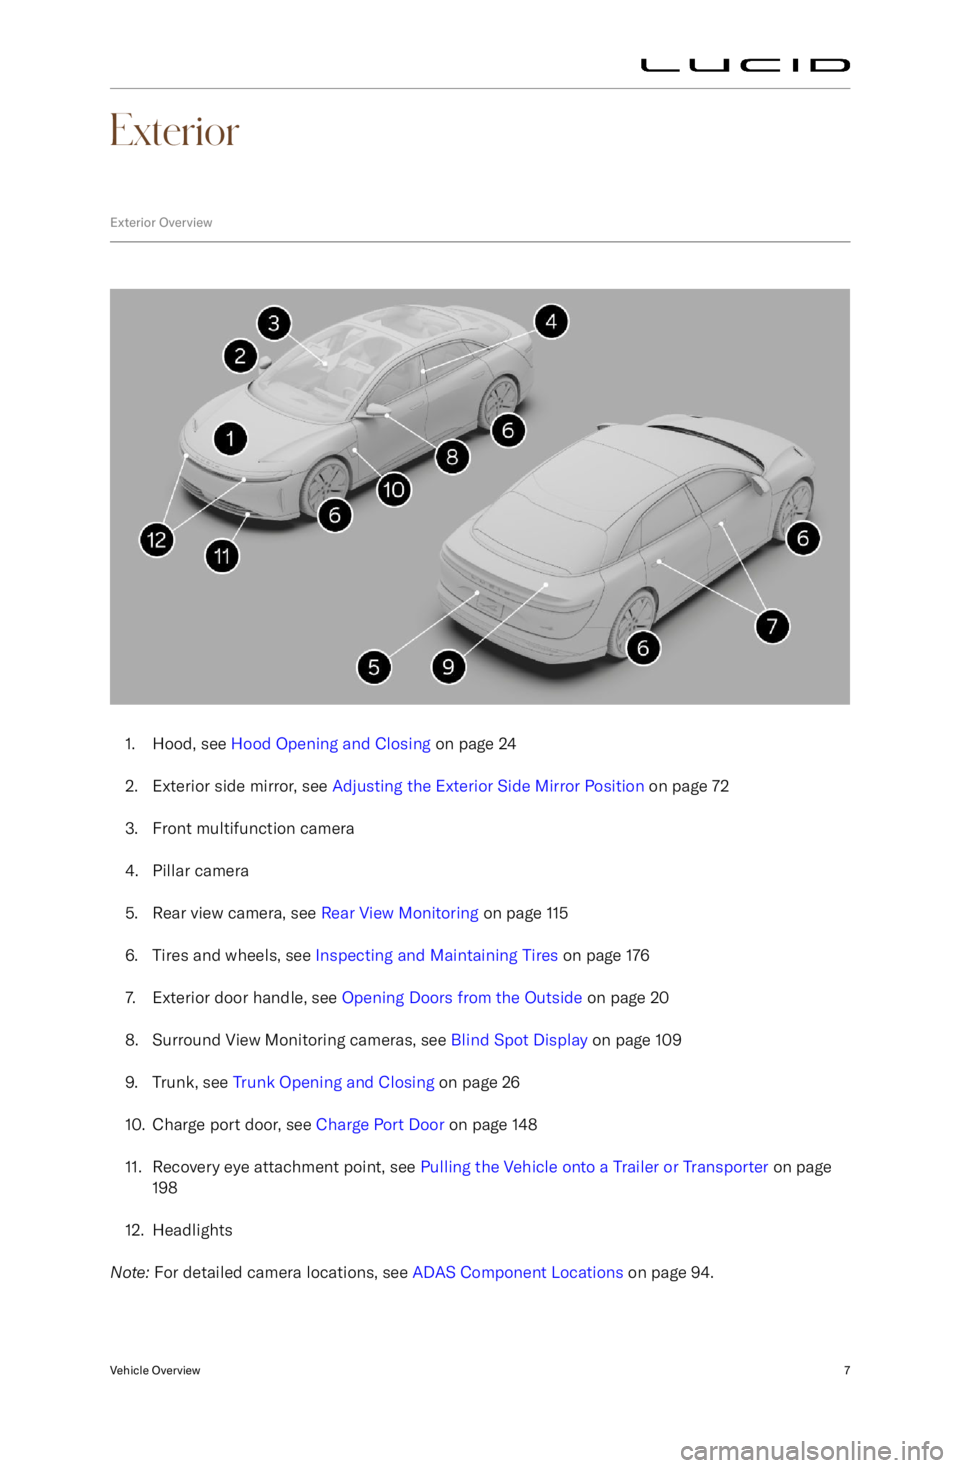
1. Hood, see Hood Opening and Closing on page 24
2. Exterior side mirror, see Adjusting the Exterior Side Mirror Position on page 72
3. Front multifunction camera
4. Pillar camera
5. Rear view camera, see Rear View Monitoring on page 115
6. Tires and wheels, see Inspecting and Maintaining Tires on page 176
7. Exterior door handle, see Opening Doors from the Outside on page 20
8. Surround View Monitoring cameras, see Blind Spot Display on page 109
9. Trunk, see Trunk Opening and Closing on page 26
10. Charge port door, see Charge Port Door on page 148
11. Recovery eye attachment point, see Pulling the Vehicle onto a Trailer or Transporter on page
198
12. Headlights
Note: For detailed camera locations, see ADAS Component Locations on page 94.
Vehicle Overview7
Page 71 of 241

Warning Indicators
The following icons may be displayed on the Center Cockpit Panel to alert you to which features are
operating or if there are any systems with faults.
For further information, refer to the relevant section in this manual.Anti-lock Braking System (ABS) disabled or system fault detectedTire Pressure Management System (TPMS) low tire pressure (solid) or system fault
detected (
Page 83 of 241
Drive Modes
Using Neutral
1. To shift out of park unlock the car witheither the keyfob, the nfc card, a pairedphone, or the phone app with correct
credentials.
2. Once the car is unlocked and powered on, you can open the driver door and
shift to neutral by pressing the brake
pedal and operating the shift lever.
The park brake will disengage, and the
vehicle will be ready to be pushed or
pulled.
3. If the electrical system of the vehicle is dead where the vehicle does not
wake up and unlock when asked for, the operator needs to connect a 12v jump-
start battery to the jump-start terminal so that operations A and B can be
conducted.
Drive Modes
Your vehicle can be set to your preferred
driving and regenerative braking modes.
You can opt for more comfortable and
less responsive vehicle controls in order to increase energy efficiency.
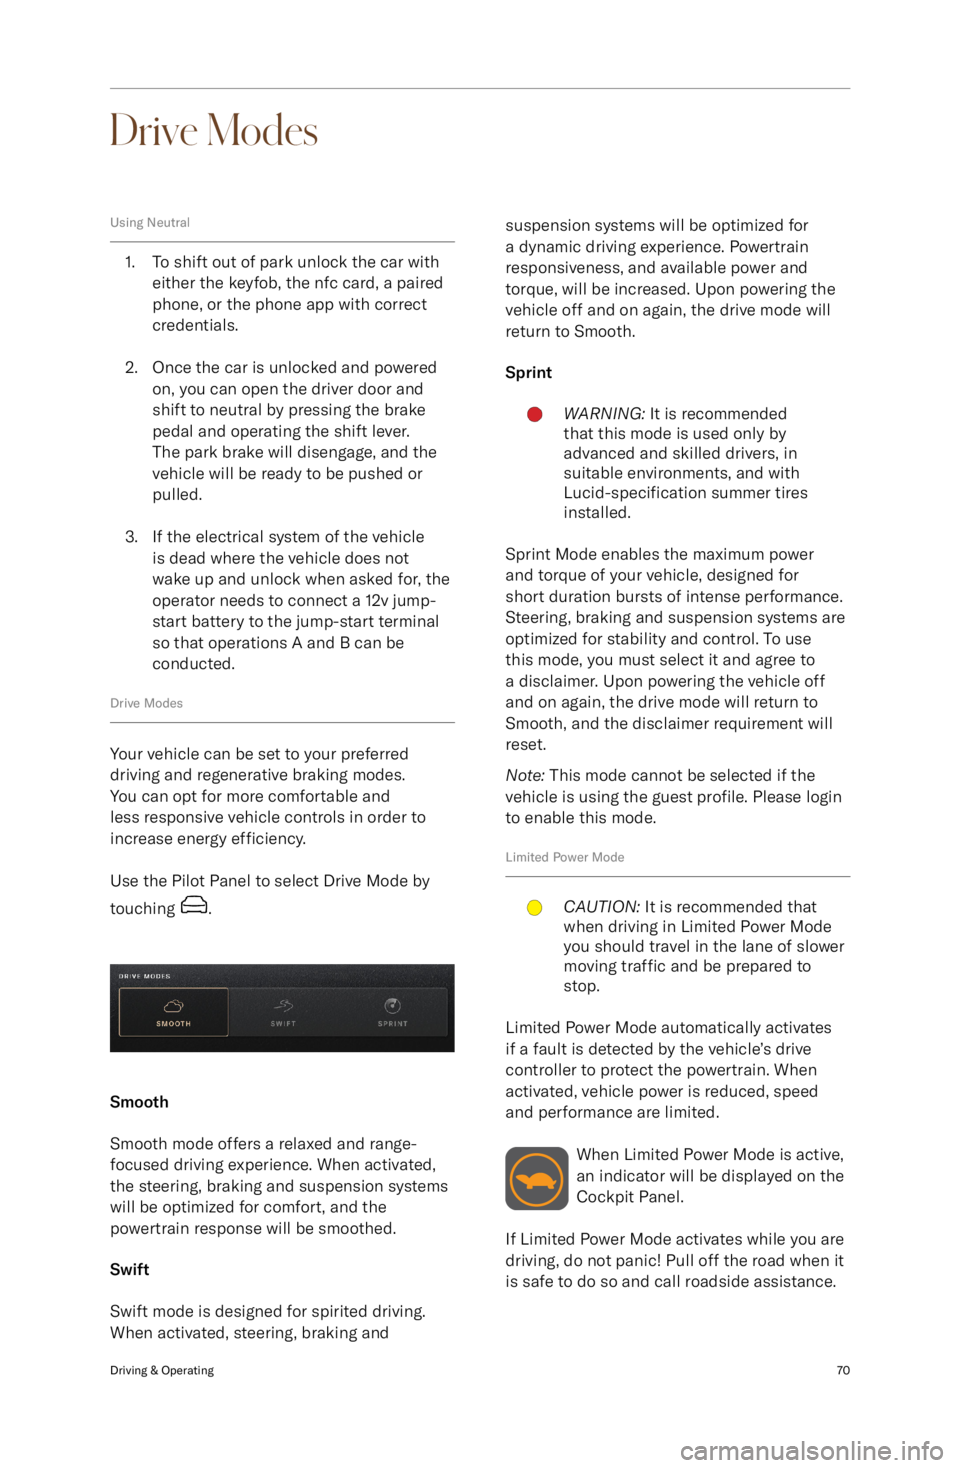
Use the Pilot Panel to select Drive Mode by
touching
.
Smooth
Smooth mode offers a relaxed and range-
focused driving experience. When activated,
the steering, braking and suspension systems
will be optimized for comfort, and the
powertrain response will be smoothed.
Swift
Swift mode is designed for spirited driving.
When activated, steering, braking and
suspension systems will be optimized for
a dynamic driving experience. Powertrain
responsiveness, and available power and
torque, will be increased. Upon powering the
vehicle off and on again, the drive mode will return to Smooth.
SprintWARNING: It is recommended
that this mode is used only by
advanced and skilled drivers, in
suitable environments, and with
Lucid-specification summer tires
installed.
Sprint Mode enables the maximum power
and torque of your vehicle, designed for
short duration bursts of intense performance.
Steering, braking and suspension systems are
optimized for stability and control. To use
this mode, you must select it and agree to
a disclaimer. Upon powering the vehicle off
and on again, the drive mode will return to
Smooth, and the disclaimer requirement will
reset.
Note: This mode cannot be selected if the
vehicle is using the guest profile. Please login
to enable this mode.
Limited Power Mode
CAUTION: It is recommended that
when driving in Limited Power Mode
you should travel in the lane of slower
moving traffic and be prepared to
stop.
Limited Power Mode automatically activates
if a fault is detected by the vehicle
Page 96 of 241

Getting Maximum Range
Driving Tips to Maximize Range
-Remove any unnecessary cargo to
reduce vehicle load weight.
- Ensure your tires are maintained at
their specified inflation pressures. See
Maintaining Tire Pressures on page 177.
- Keep all windows closed when possible
to reduce drag.
- Avoid abrupt and/or frequent
acceleration. Try to maintain an even
speed.
- When it is safe to do so, use one pedal
driving techniques to gradually slow
the vehicle using regenerative braking
rather than friction braking. See Braking
Systems on page 78.
- Switch into Smooth mode. See Drive
Modes on page 70.
- Limit the use of the heating and air
conditioning controls when possible.
Using seat heaters to keep warm is a
more energy-efficient alternative than
heating the entire cabin.
Driving & Operating83
Page 103 of 241
user is encouraged to try to correct the
interference by one or more of the following
measures:
-Reorient or relocate the receiving
antenna.
- Increase the separation between the
equipment and receiver.
- Connect the equipment into an outlet on
a circuit different from that to which thereceiver is connected.
- Consult the dealer or an experienced
radio/TV technician for help.
12 Volt Power SocketWARNING: Close the cover when not
in use. If this outlet is mishandled, it
may cause an electric shock.CAUTION: The 12 Volt power socket
should not be used with a cigarette
lighter. Lighters could potentially
cause heat damage to the socket.
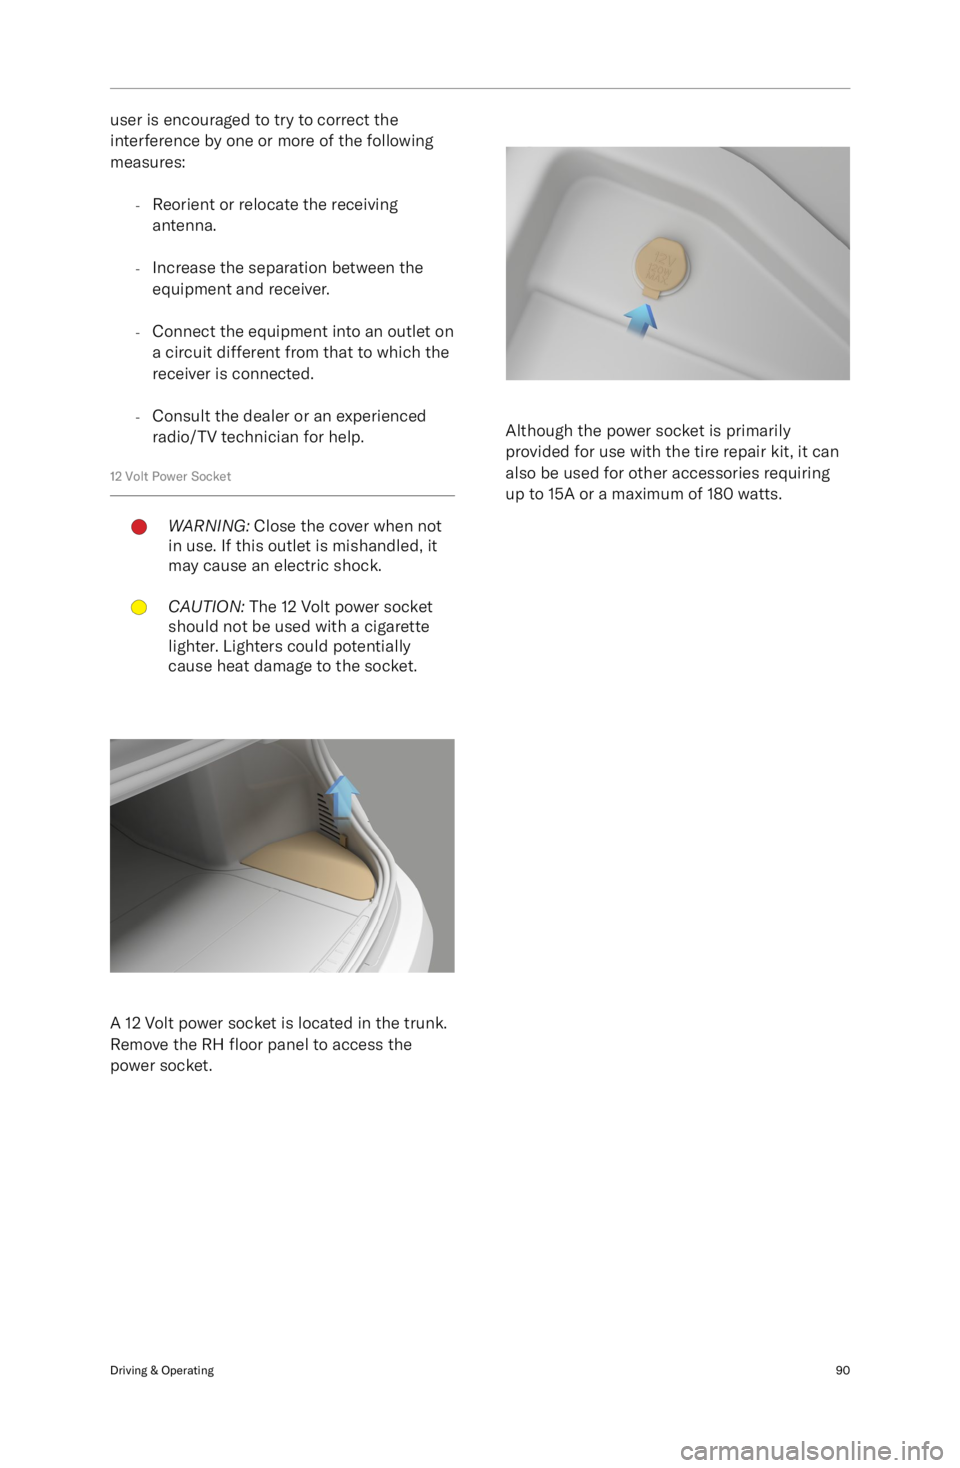
A 12 Volt power socket is located in the trunk.
Remove the RH floor panel to access the
power socket.
Although the power socket is primarily
provided for use with the tire repair kit, it can
also be used for other accessories requiring
up to 15A or a maximum of 180 watts.
Driving & Operating90
Page 169 of 241

Multi-Point Inspection
Your vehicle should be given a full multi-point
inspection service every 12 months or 12,000
miles (19300 km), whichever comes first.
Note: A message displays on the Cockpit
Panel to remind you to service your vehicle.
This service includes inspections and checks
for the following systems:
-Steering alignment
- Battery (12V) condition
- Battery pack (HV) condition
- Coolant condition
- Brake
fluid condition
- Brake rotors and pads wear
- Chassis bolts torque
- Closures (doors, hood, and trunk)
operation
- Condenser (check for debris)
- Electronic parking brake operation
- Heating, ventilation, and air conditioning
operation
- Horn
- Interior and exterior lights
- Key fob operation
- Seat belts operation
- Tire pressure and tire wear
- Visual signs of fluid leaks
- Wipers and washers
- Charging system and charging cable
- Firmware
Your vehicle will also be given a road test to inspect its current driving condition (such
as pedal operation, vehicle handling, and
steering alignment) and to check for any abnormal operational noises.WARNING: Your vehicle is equipped
with two 12V batteries. It
Page 175 of 241

Vehicle Care
Cleaning the ExteriorWARNING: Never charge your vehicle
while washing it. Unplug the charging
cable and close the charge port cover.
Liquids entering the charge port while
the cable is plugged in could result
in serious personal injury, as well
as damage to the vehicle, charging
equipment, or property.WARNING: After washing the vehicle,
wet brakes can result in longer
stopping distances. To dry the brakes,
drive the vehicle slowly while gently
pressing the brake pedal a few times
to warm up the brakes.
Your vehicle should be washed regularly to
preserve the finish and maintain its overall
appearance.
To protect the paint surfaces, wash your
vehicle as soon as possible:
-When mud, dust, soot, or dirt builds up
on the surface
- After driving on coastal roads or winter
roads treated with salt
- When corrosive contaminants such as
tree sap, bird droppings, or bugs collect
on the surface
- After a rainfall to prevent possible
damage from acid rain
Environmental: It is illegal to pollute
drains, rivers, and waterways. Some cleaning
products contain chemicals that are
hazardous to the environment. Used toxic
chemicals must be disposed of at authorized
waste disposal sites only. Always take
precautions to prevent fluids from spilling.
Hand washing
CAUTION: Avoid using rough or
tightly-napped cloths (such as
washing mitts) on the vehicle, as
these can be abrasive enough to
damage the finish.CAUTION: Avoid washing your vehicle
in direct sunlight. Water and cleansers
dry faster on a hot surface and can
leave water spots or stains.
When washing your vehicle by hand, follow
these steps:
-Rinse the entire vehicle first to remove
as much excess dirt and dust as
possible and reduce the risk of
scratches from washing.
- Wash using a clean, soft cloth or sponge
and cold or lukewarm water mixed with
a mild car soap.
- Rinse your cleaning tools often to avoid
rubbing debris into the finish, especially
if your vehicle is exceptionally dirty.
- Do not aim water hoses directly
at window, door, or hood seals, or
through wheel apertures onto brake
components.
- After washing, rinse the vehicle
thoroughly with clean, cool water until
all the soap has been removed.
- To avoid leaving water spots on the
finish, dry the vehicle thoroughly with a
chamois or cotton cloth.
Removing tar spots
CAUTION: Do not use acidic, abrasive,
or petroleum-based cleansers, as
these can damage the vehicle
Page 182 of 241

10
Tire & Wheels
Tire & Wheels169
Page 183 of 241
Tire Information
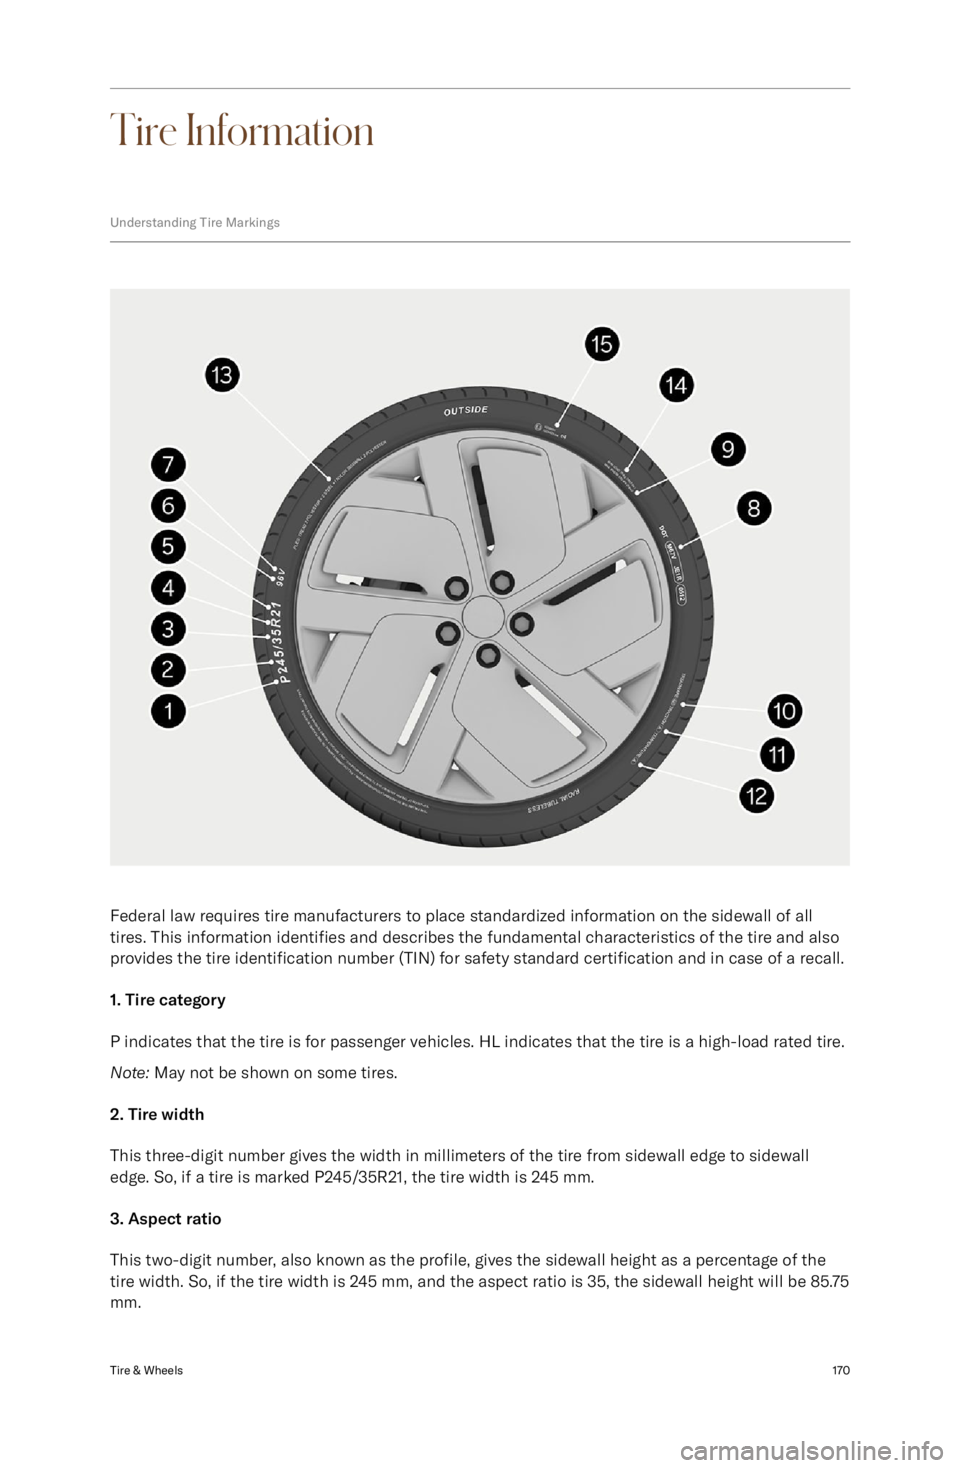
Understanding Tire Markings
Federal law requires tire manufacturers to place standardized information on the sidewall of all
tires. This information identifies and describes the fundamental characteristics of the tire and also
provides the tire identification number (TIN) for safety standard certification and in case of a recall.
1. Tire category
P indicates that the tire is for passenger vehicles. HL indicates that the tire is a high-load rated tire.
Note: May not be shown on some tires.
2. Tire width
This three-digit number gives the width in millimeters of the tire from sidewall edge to sidewall edge. So, if a tire is marked P245/35R21, the tire width is 245 mm.
3. Aspect ratio
This two-digit number, also known as the profile, gives the sidewall height as a percentage of the
tire width. So, if the tire width is 245 mm, and the aspect ratio is 35, the sidewall height will be 85.75
mm.
Tire & Wheels170