lock LUCID AIR 2023 User Guide
[x] Cancel search | Manufacturer: LUCID, Model Year: 2023, Model line: AIR, Model: LUCID AIR 2023Pages: 241, PDF Size: 5.15 MB
Page 63 of 241
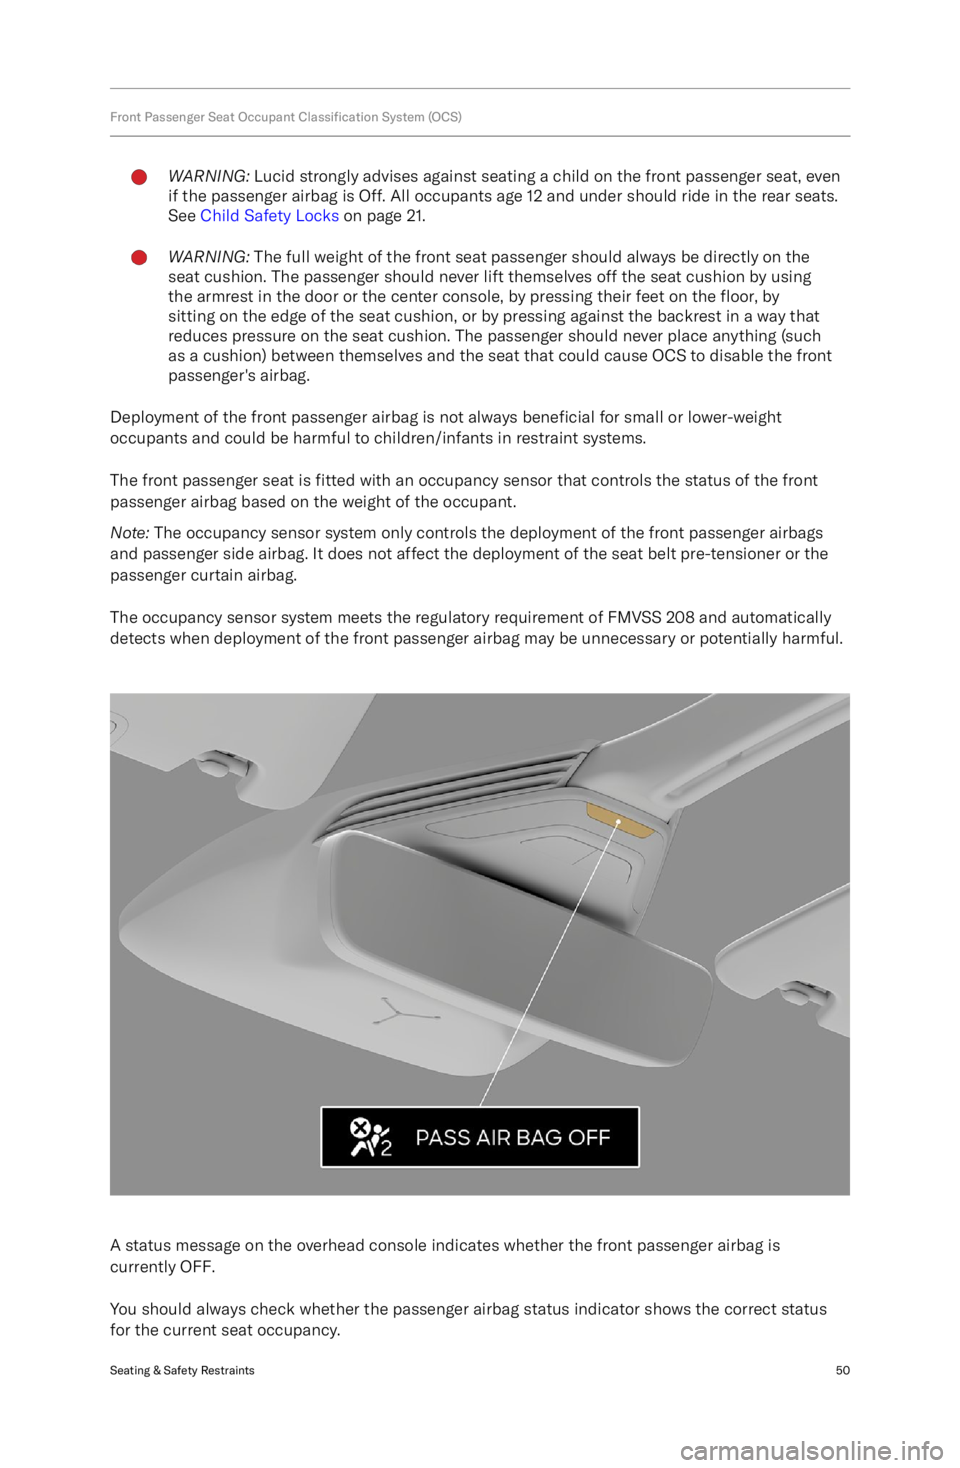
Front Passenger Seat Occupant Classification System (OCS)WARNING: Lucid strongly advises against seating a child on the front passenger seat, even
if the passenger airbag is Off. All occupants age 12 and under should ride in the rear seats.
See Child Safety Locks on page 21.WARNING: The full weight of the front seat passenger should always be directly on the
seat cushion. The passenger should never lift themselves off the seat cushion by using
the armrest in the door or the center console, by pressing their feet on the floor, by
sitting on the edge of the seat cushion, or by pressing against the backrest in a way that reduces pressure on the seat cushion. The passenger should never place anything (such
as a cushion) between themselves and the seat that could cause OCS to disable the front
passenger
Page 71 of 241

Warning Indicators
The following icons may be displayed on the Center Cockpit Panel to alert you to which features are
operating or if there are any systems with faults.
For further information, refer to the relevant section in this manual.Anti-lock Braking System (ABS) disabled or system fault detectedTire Pressure Management System (TPMS) low tire pressure (solid) or system fault
detected (
Page 83 of 241
Drive Modes
Using Neutral
1. To shift out of park unlock the car witheither the keyfob, the nfc card, a pairedphone, or the phone app with correct
credentials.
2. Once the car is unlocked and powered on, you can open the driver door and
shift to neutral by pressing the brake
pedal and operating the shift lever.
The park brake will disengage, and the
vehicle will be ready to be pushed or
pulled.
3. If the electrical system of the vehicle is dead where the vehicle does not
wake up and unlock when asked for, the operator needs to connect a 12v jump-
start battery to the jump-start terminal so that operations A and B can be
conducted.
Drive Modes
Your vehicle can be set to your preferred
driving and regenerative braking modes.
You can opt for more comfortable and
less responsive vehicle controls in order to increase energy efficiency.
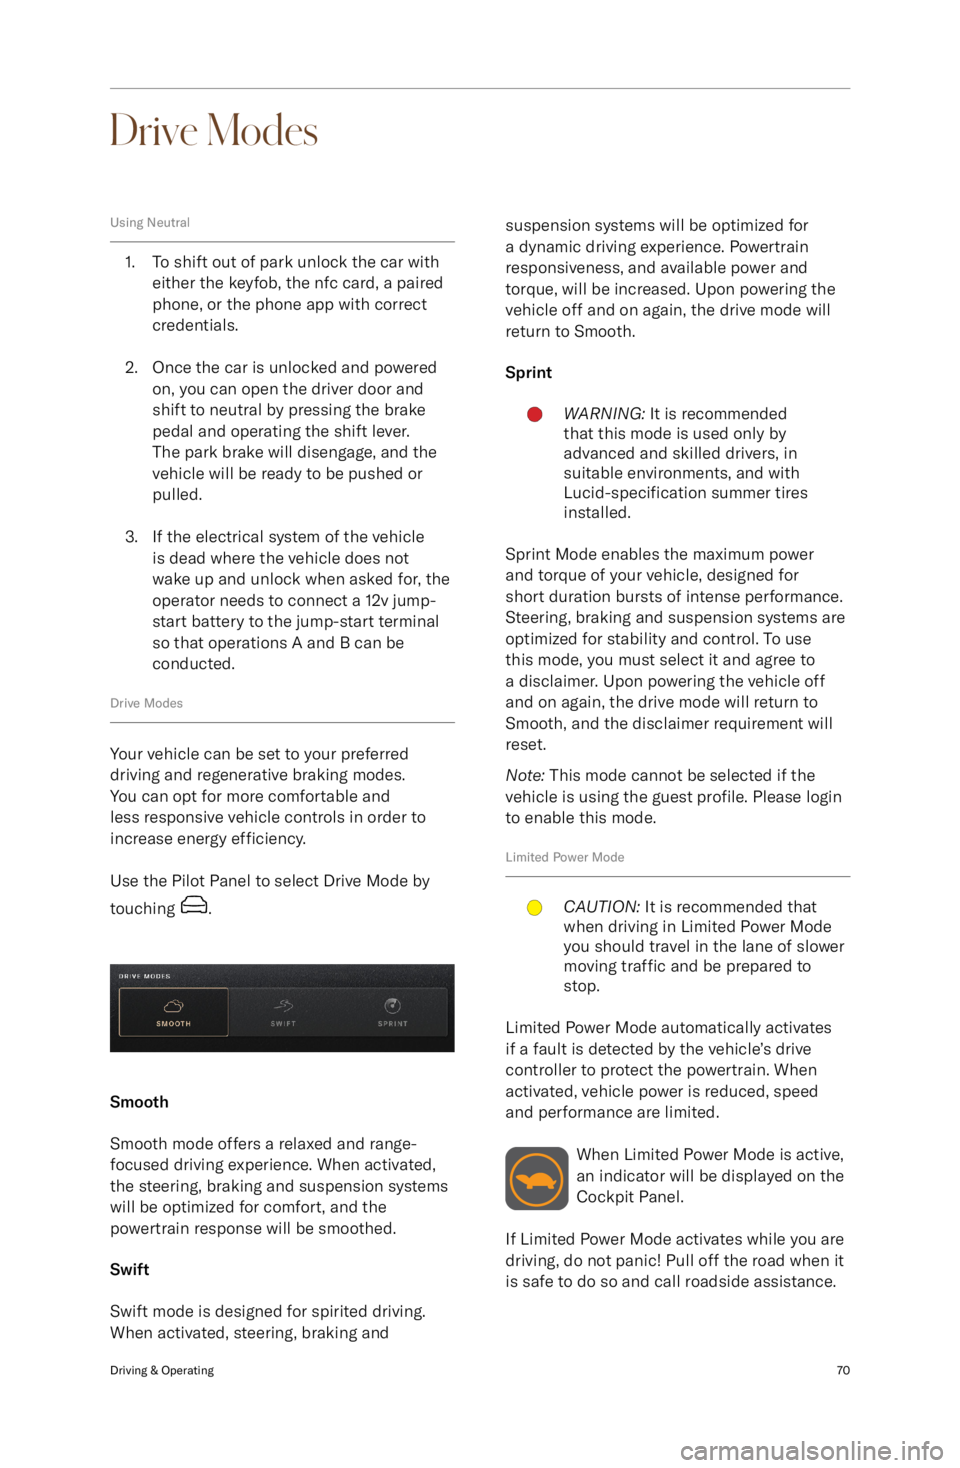
Use the Pilot Panel to select Drive Mode by
touching
.
Smooth
Smooth mode offers a relaxed and range-
focused driving experience. When activated,
the steering, braking and suspension systems
will be optimized for comfort, and the
powertrain response will be smoothed.
Swift
Swift mode is designed for spirited driving.
When activated, steering, braking and
suspension systems will be optimized for
a dynamic driving experience. Powertrain
responsiveness, and available power and
torque, will be increased. Upon powering the
vehicle off and on again, the drive mode will return to Smooth.
SprintWARNING: It is recommended
that this mode is used only by
advanced and skilled drivers, in
suitable environments, and with
Lucid-specification summer tires
installed.
Sprint Mode enables the maximum power
and torque of your vehicle, designed for
short duration bursts of intense performance.
Steering, braking and suspension systems are
optimized for stability and control. To use
this mode, you must select it and agree to
a disclaimer. Upon powering the vehicle off
and on again, the drive mode will return to
Smooth, and the disclaimer requirement will
reset.
Note: This mode cannot be selected if the
vehicle is using the guest profile. Please login
to enable this mode.
Limited Power Mode
CAUTION: It is recommended that
when driving in Limited Power Mode
you should travel in the lane of slower
moving traffic and be prepared to
stop.
Limited Power Mode automatically activates
if a fault is detected by the vehicle
Page 92 of 241
ABS warning indicatorThe ABS indicator displays on
the Cockpit Panel, along with a
notification message. If illuminated,
the ABS is disabled. Contact a Lucid
Service Center as soon as possible to have
the fault repaired.CAUTION: Even when ABS is disabled,
the pedal-operated braking system
remains operational. Be aware that
braking distances may increase and
wheels may lock under heavy braking.
Regenerative Braking
WARNING: If driving the vehicle in
reduced traction conditions (that is,
icy or snowy conditions), the use
of High regenerative braking level
may cause traction control to operate
more frequently. Lucid recommends
switching to Standard level when
driving in such conditions.
Whenever the vehicle is moving and your foot
is off the accelerator, regenerative braking
slows the vehicle and feeds energy back to
the high-voltage battery.
While you should still use the brake
pedal whenever needed to stop safely, you
can take advantage of regenerative braking
by anticipating your stops and reducing
accelerator pedal position.
Note: If regenerative braking is aggressively
slowing your vehicle (such as when your foot
is completely off the accelerator pedal at highway speeds), the brake lights turn on to
alert others that you are slowing down.
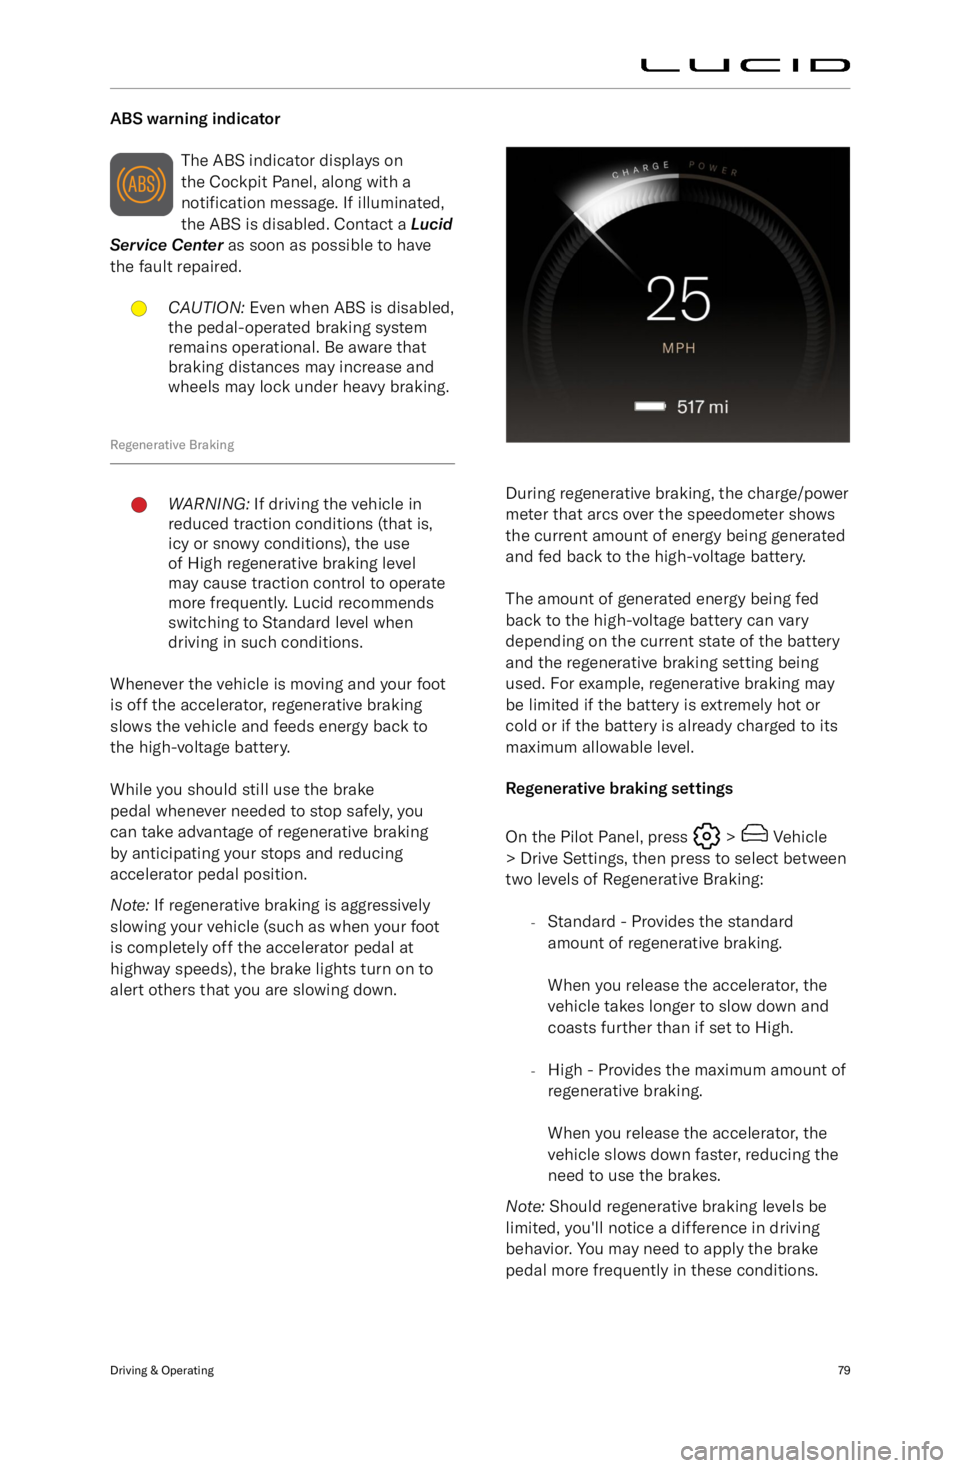
During regenerative braking, the charge/power
meter that arcs over the speedometer shows the current amount of energy being generated
and fed back to the high-voltage battery.
The amount of generated energy being fed
back to the high-voltage battery can vary
depending on the current state of the battery
and the regenerative braking setting being used. For example, regenerative braking maybe limited if the battery is extremely hot or
cold or if the battery is already charged to its
maximum allowable level.
Regenerative braking settings
On the Pilot Panel, press
> Vehicle
> Drive Settings, then press to select between
two levels of Regenerative Braking:
-Standard - Provides the standard
amount of regenerative braking.
When you release the accelerator, the
vehicle takes longer to slow down and
coasts further than if set to High.
- High - Provides the maximum amount of
regenerative braking.
When you release the accelerator, the
vehicle slows down faster, reducing the
need to use the brakes.
Note: Should regenerative braking levels be
limited, you
Page 114 of 241
Cruise Control and Highway Assist will be
unavailable until the next drive cycle.
Once an in-lane stop has completed: -The vehicle automatically shifts into P
(Park).
- Highway Assist is canceled.
- DreamDrive will be unavailable until the
next drive cycle.
- All doors unlock.
- An audible alert sounds.
Note: Warnings will be dismissed if the vehicle
is shifted out of P (Park). See Using the Drive
Selector on page 69.
Steering override
While Highway Assist is active, you can
temporarily override it by using the steering wheel. When you turn the steering wheel, the
Highway Assist indicator will gray out on the
Cockpit Panel.
Once the steering wheel returns to its neutral
position, the vehicle is centered in the lane,
and the system detects lanes again, Highway Assist should automatically resume and the
Cockpit Panel will return to displaying the
active Highway Assist mode.
Manually canceling Highway Assist To cancel Highway Assist, press the
Cancel button on the steering wheel.
The system can also be canceled by pressing
the brake pedal if it is safe to do so in the current traffic conditions.
Traffic Sign Recognition
WARNING: Traffic Sign Recognition
is an assist feature only. The driver
is responsible for paying attention
to the road signs and determining
the appropriate speed limit, road
conditions, and driving speed.WARNING: Traffic Sign Recognition is
not available in all countries.WARNING: Map data is not always
accurate. The GPS can miscalculatethe vehicle location, which may
provide an incorrect traffic sign.WARNING: If a road or a traffic
sign has recently been changed, the
Traffic Sign Recognition system may
not be fully functional or may provide
inaccurate information.WARNING: In situations where the
Traffic Sign Recognition system is
unable to determine a traffic sign, or if
it is uncertain that an acquired speed
limit is accurate, the system may not
display the information and warnings
may not take effect.
The Traffic Sign Recognition system uses the
front cameras and navigation system data to
recognize traffic signs on the road, providing
you with driving information such as speed limits and other regulations.
When a traffic sign is detected, it displays on
the Cockpit Panel next to the speedometer.
Speed Limit Alerts
When Speed Limit Alert is enabled (see Speed
Limit Alert Settings ), if the current vehicle
speed exceeds the detected speed limit, the display color of the speed limit sign willchange color and may increase in size. Thedisplay will return to the normal color and
size when the vehicle is slowed to within the
speed limit.
Wrong-way warnings
If a Wrong Way road sign is detected and the
vehicle passes the sign, the system will alert you with an audible alert and a notification on
the Cockpit Panel.
Speed Limit Alert settings To configure Speed Limit Alert settings,
use the Pilot Panel and touch
>
DreamDrive.
- Touch to enable or disable Speed Limit
Alert. Additional options to receive
VISUAL or VISUAL AND AUDIO alerts are available when this feature is
enabled.
- Touch to enable or disable Cruise Speed
Update. When enabled, this feature
DreamDrive101
Page 156 of 241

Schedule an update
On the software update screen, press
SCHEDULE TIME if you wish to start the
update later. Updates can be scheduled up to 48 hours later.
1. Read the cautionary statement and press CONFIRM to consent to the
update.
2. Select the time to start on the screen provided and press SET TIME to save.
3. Your scheduled date and time will be displayed on the main software update
screen, and can be edited by pressing
the
icon beside it. Ensure that all
update prerequisites will be met at the scheduled time.
30 minutes before a scheduled update, you
will receive a notification on the right Cockpit
Panel, with options to DELAY AN HOUR or CANCEL SCHEDULE.
Install an update now
On the software update screen, press
INSTALL NOW to proceed with the update.
1. Read the cautionary statement and press CONFIRM to consent to the
update.
2. The system will perform a series of checks to ensure all prerequisites havebeen met.
3. A 2-minute countdown will display. Exit and lock the doors at this time. See
Doors on page 20.
4. During the update, the Pilot Panel and left Cockpit Panel screens will be blank.
The Cockpit Panel indicates the update
is proceeding. The progress can be
viewed on the right Cockpit Panel and
within the Lucid mobile app.
5. When the update is complete, a notification will appear on the left Pilot
Panel and a push notification will be
sent to the Lucid mobile app.
Note: If an update fails to install, a notification
will display on the Infotainment screens and a
push notification is sent to the Lucid mobile
app.
- If a failure was due to a prerequisite
not being met (e.g., battery was at less
than 20% or vehicle was not put in Park),
resolve the issue and press TRY AGAIN.
- If a failure was due to another reason,
contact a Lucid Service Center for
assistance.
Viewing Release Notes
Lucid strongly recommends that all users read
the release notes for every software update.
They can contain important information about
your vehicle, including safety information or
new operating instructions.
Release notes can be viewed before and after
a software update:
-On the Pilot Panel, select
>
About Vehicle. The software
versions for the current installation and any available updates will be listed.
Press Learn More next to a version to
read the notes for it.
- When an update has installed
successfully, press Learn More on the
prompt that appears on the right
Cockpit Panel.
Infotainment143
Page 161 of 241
Charging Instructions
Safety ChecklistWARNING: If you have any concerns
with the condition of a wall outlet, the
charge port or the charging cable, DO NOT use them. Seek assistance from a
qualified electrician or a Lucid Service
Center. Using charging equipment
that is damaged or faulty may result
in injury, death, or property damage.
Before charging your vehicle, check the
following items:
-If using a domestic wall outlet, inspect
the outlet and do not use it if it appears
damaged or worn.
- Inspect the charging cable and
connector for damage, including frays or
cracks. If a part appears damaged, do not use it.
Note: If the Lucid Mobile Charging Cable
is damaged, contact a Lucid Service
Center .
- Ensure that the charging cable is fully
uncoiled before use.
- Check that the charging connector and
charge port are clean and unobstructed.
If you find any contamination or a
foreign object in either part, do not
use them and contact a Lucid Service
Center .
- Check that the charging cable and
charge port are dry. Ensure that your hands are dry, and there is no water
or other fluids in the surrounding area
(such as puddles on the ground).
Charge Port Door
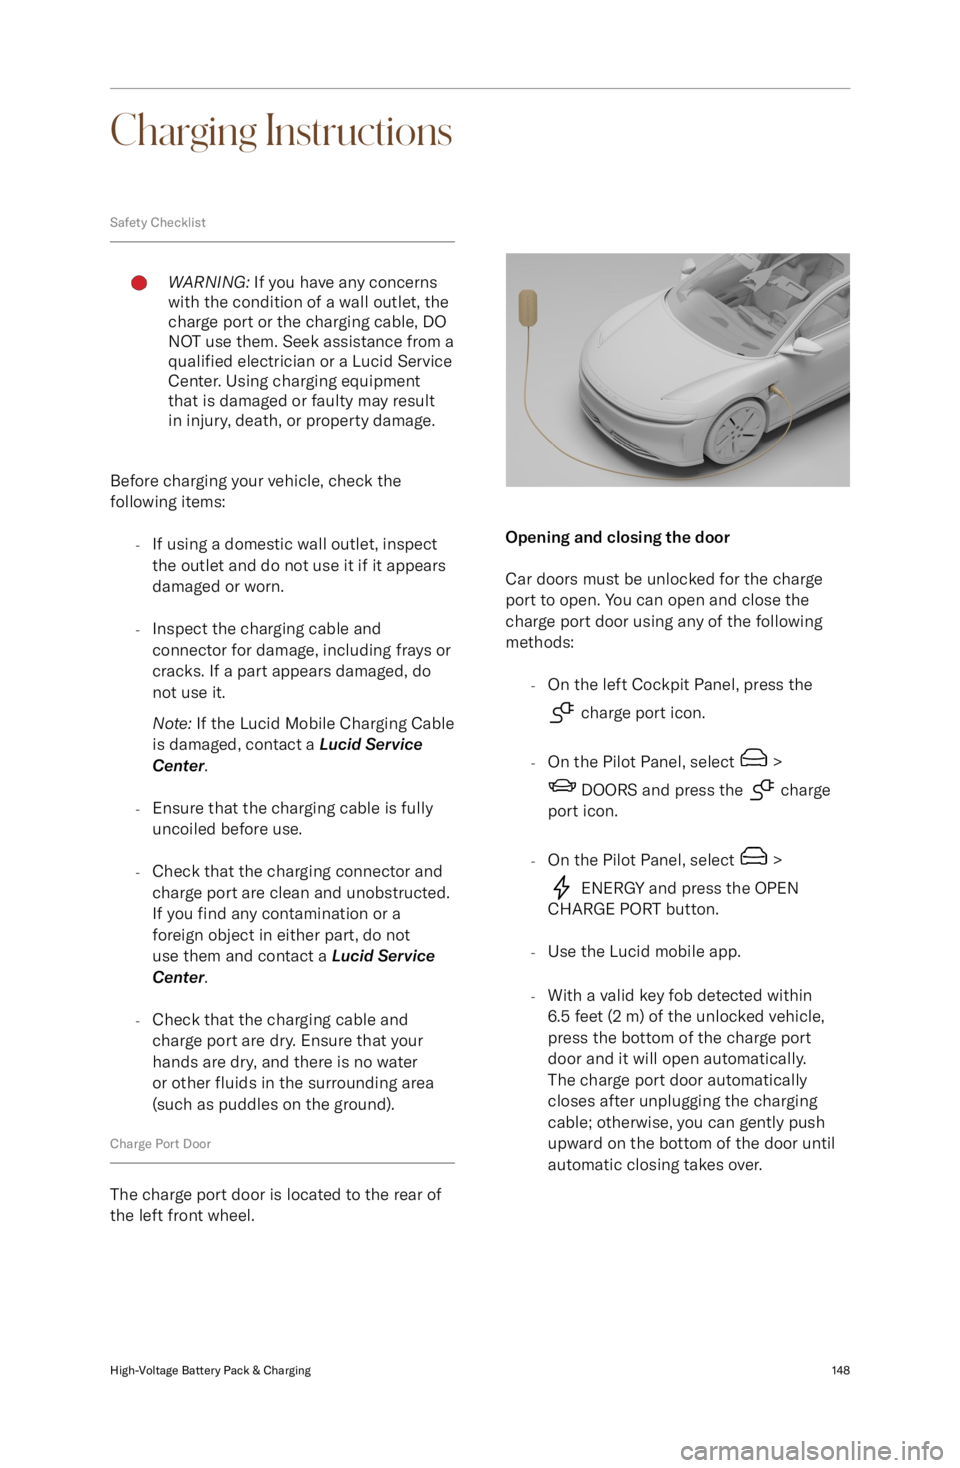
The charge port door is located to the rear of
the left front wheel.
Opening and closing the door
Car doors must be unlocked for the charge
port to open. You can open and close the
charge port door using any of the following
methods:
-On the left Cockpit Panel, press the
charge port icon.
- On the Pilot Panel, select
>
DOORS and press the charge
port icon.
- On the Pilot Panel, select
>
ENERGY and press the OPEN
CHARGE PORT button.
- Use the Lucid mobile app.
- With a valid key fob detected within
6.5 feet (2 m) of the unlocked vehicle,
press the bottom of the charge port
door and it will open automatically.
The charge port door automatically
closes after unplugging the charging
cable; otherwise, you can gently push
upward on the bottom of the door until
automatic closing takes over.
High-Voltage Battery Pack & Charging148
Page 172 of 241
Wiper Blades and Washer Jets
Checking the Wiper BladesCAUTION: Only use cleaning products
that have been approved for use
on automotive glass and rubber.
Inappropriate products may cause
damage, smearing, or increased glare
on the screen.
You should periodically check and clean the
wiping edge of the wiper blade. Clean the blade edge using a soft cloth or sponge,
and isopropyl (rubbing) alcohol or windshield
washer fluid. Also, check the blade rubber for
cracks, splits, or roughness. If any damage
is found, replace the blade immediately to
prevent damage to the glass.
Replacing Wiper Blades
Note: For optimum performance, replace the
wiper blades at least every year.
Life expectancy of wiper blades can
vary, depending on geographical area
and frequency of use. Poor wiper blade
performance can result in “chattering” (that is, skipping across the glass), or leaving behind
marks, streaks of water, or wet spots. If any of
these conditions are present, clean the wiper
blades or replace them as needed.
Replacing the front wiper blades
CAUTION: Only install wiper blades
that are the same length and identical to the original specification. Failure to
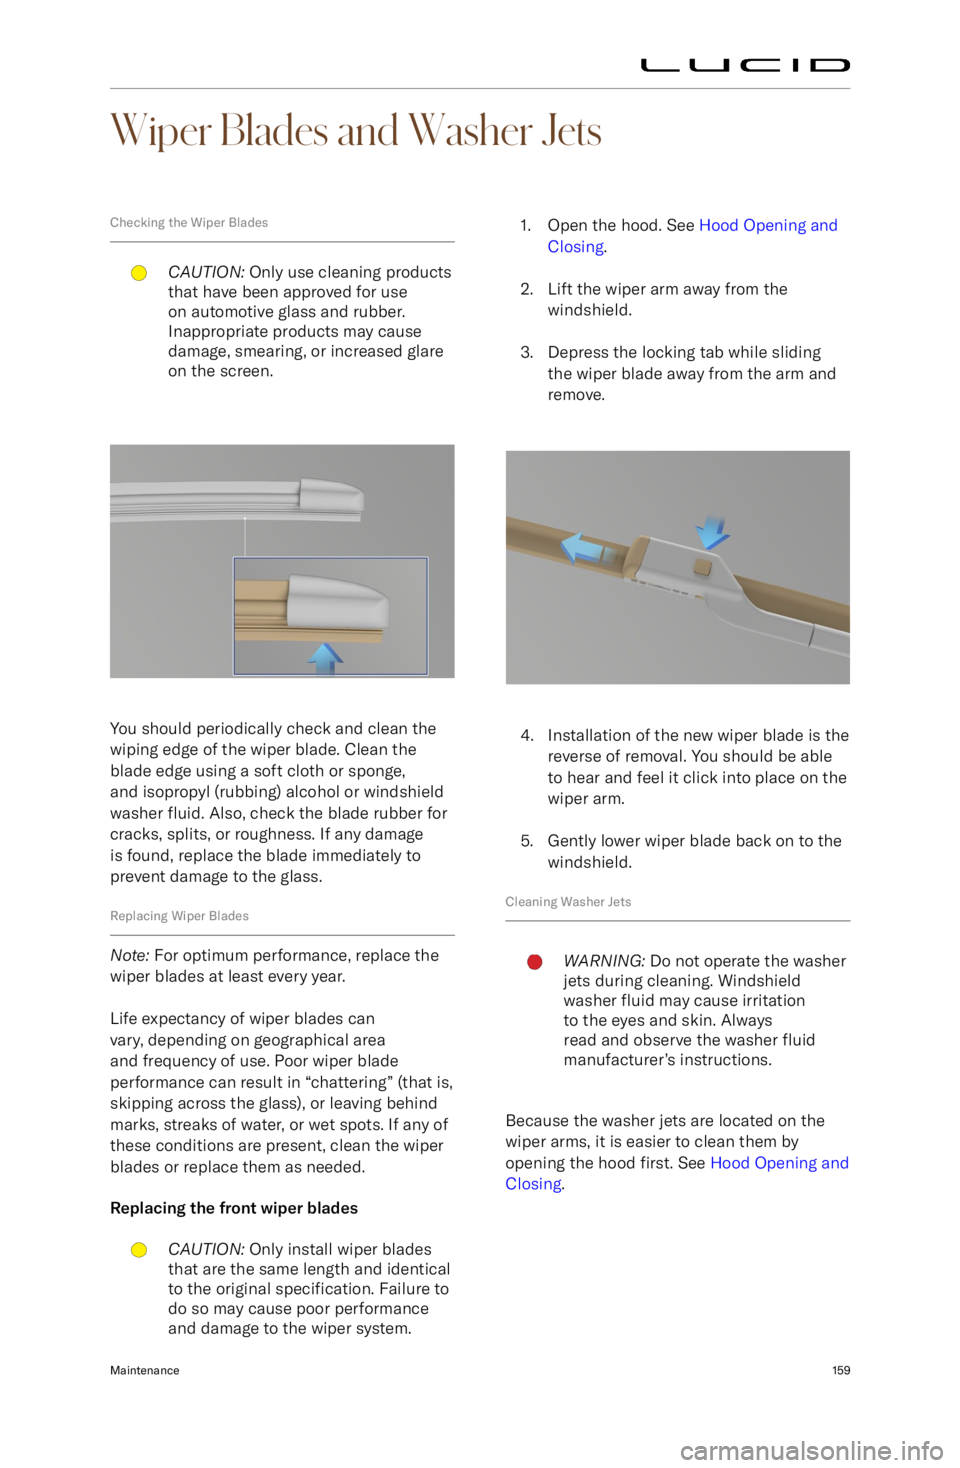
do so may cause poor performance and damage to the wiper system.1. Open the hood. See Hood Opening and
Closing .
2. Lift the wiper arm away from the windshield.
3. Depress the locking tab while sliding the wiper blade away from the arm and
remove.
4. Installation of the new wiper blade is the reverse of removal. You should be able
to hear and feel it click into place on the
wiper arm.
5. Gently lower wiper blade back on to the windshield.
Cleaning Washer Jets
WARNING: Do not operate the washer
jets during cleaning. Windshield
washer fluid may cause irritation
to the eyes and skin. Always
read and observe the washer fluid
manufacturer
Page 173 of 241

If a washer jet nozzle becomes clogged
with debris or build-up, its performance can be reduced. There are several methods forremoving any blockage:
-Dip a small, soft-bristled brush (such as
an old toothbrush) in warm water and
scrub in and around the nozzle to clear
away any dirt or debris.
- Use a can of compressed air to blow a
concentrated stream of air into the clog
to loosen it, and to blow away any debris from the nozzle.
- For more serious clogs, slide a thin piece
of wire into the nozzle to clear any
blockages.
Maintenance160
Page 181 of 241
Vehicle Lifting Points
Lifting the VehicleWARNING: Never raise the vehicle
when the charging cable is connected,
even if charging is not in progress.
Always disconnect the charging
cable before raising the vehicle. See
Disconnecting the Charging Cable on
page 149.WARNING: Do not work on an
incorrectly supported vehicle. Doing
so can cause serious damage, bodily
injury, or death.
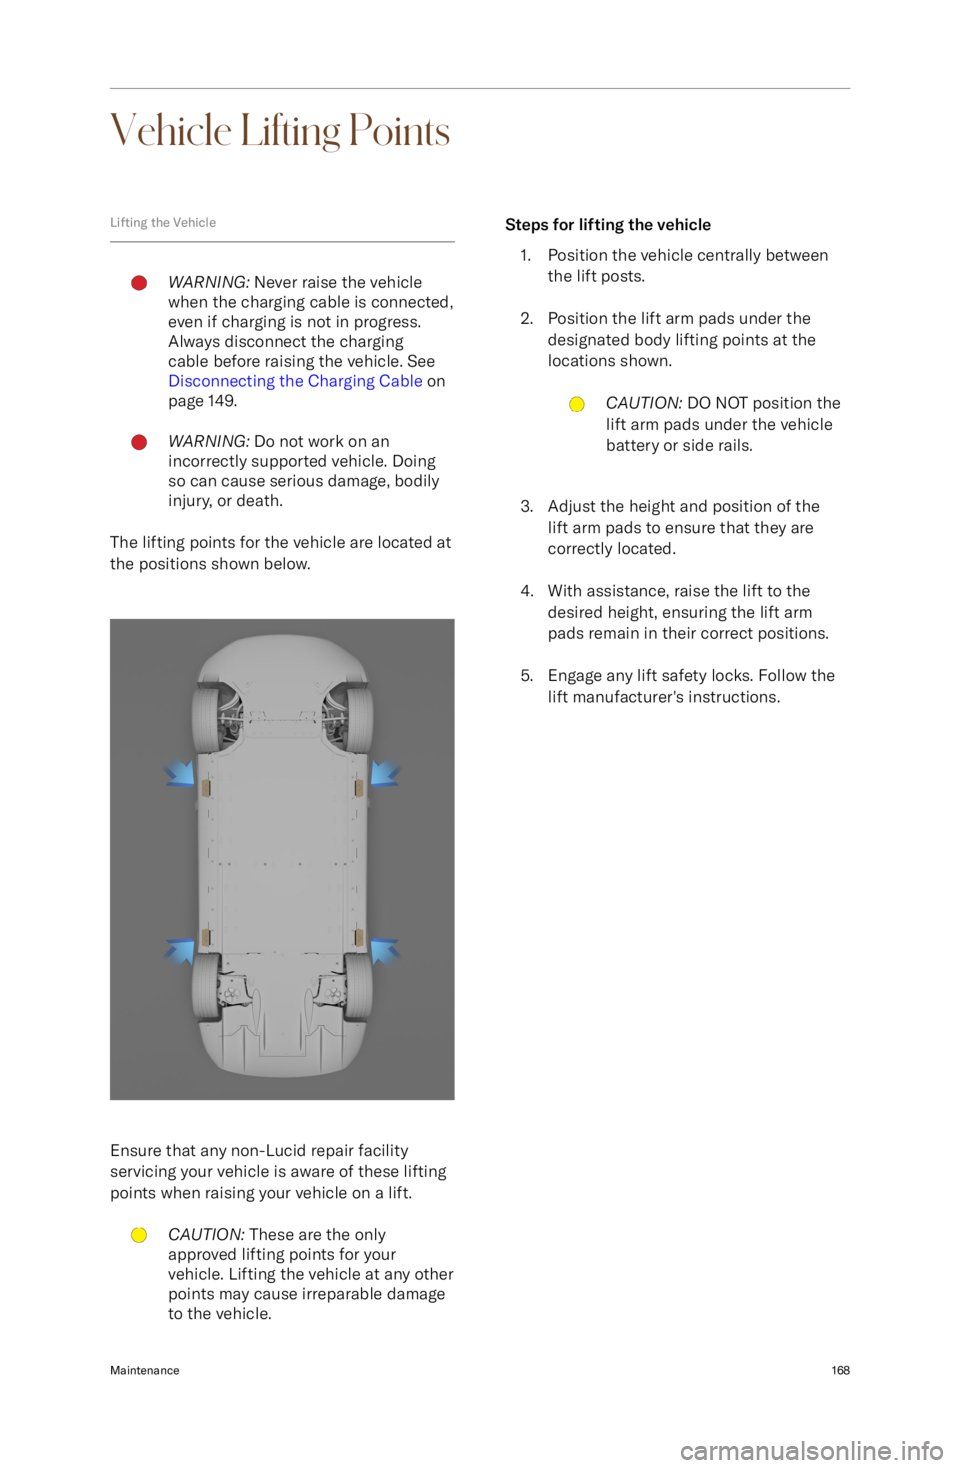
The lifting points for the vehicle are located at
the positions shown below.
Ensure that any non-Lucid repair facility servicing your vehicle is aware of these lifting
points when raising your vehicle on a lift.
CAUTION: These are the only
approved lifting points for your
vehicle. Lifting the vehicle at any other
points may cause irreparable damage
to the vehicle.Steps for lifting the vehicle
1. Position the vehicle centrally between the lift posts.
2. Position the lift arm pads under the designated body lifting points at thelocations shown.CAUTION: DO NOT position the
lift arm pads under the vehicle
battery or side rails.
3. Adjust the height and position of the lift arm pads to ensure that they are
correctly located.
4. With assistance, raise the lift to the desired height, ensuring the lift arm
pads remain in their correct positions.
5. Engage any lift safety locks. Follow the lift manufacturer