lock LUCID AIR 2023 Owner's Manual
[x] Cancel search | Manufacturer: LUCID, Model Year: 2023, Model line: AIR, Model: LUCID AIR 2023Pages: 241, PDF Size: 5.15 MB
Page 192 of 241

Replacing Tires and WheelsWARNING: For your safety, it is
recommended that only wheels
and tires that match the original
specification are used on the vehicle.
Specifications for approved winter
tires are available by contacting your
Lucid Service Center.WARNING: Operation of the Tire
Pressure Monitoring System (TPMS)
may be affected if the tires are
replaced with a different specification
from the originals.
Wheel rims and tires are matched to suit
the handling characteristics of the vehicle.
Always check that replacement tires comply
with the original specification. If tires other
than those specified are used, ensure that
the load and speed ratings (shown on the tire
side wall) equal or exceed those of the original
specification.
Ideally, tires should be replaced as sets of
four. If this is not possible, replace the tires
in pairs (front and rear). When replacng tires,
the wheels should be balanced and alignment
checked.
Asymmetric tires
WARNING: Vehicle traction and
handling will be seriously impaired if
the tires are incorrectly installed on
the wheels.
Your vehicle is equipped with Asymmetric
tires that have different tread patterns on
the outer and inner edge of the tire. On the
outside edge, the tread pattern exhibits large
tread blocks that are designed to provide
dry traction and handling thanks to a larger
contact area with the road.
On the inside edge, the tread block is smaller
to provide better wet grip. An increased
number of grooves helps disperse water on wet roads and reduce the risk of aquaplaning.
This means the tire is built to provide great
performance in both wet and dry conditions.
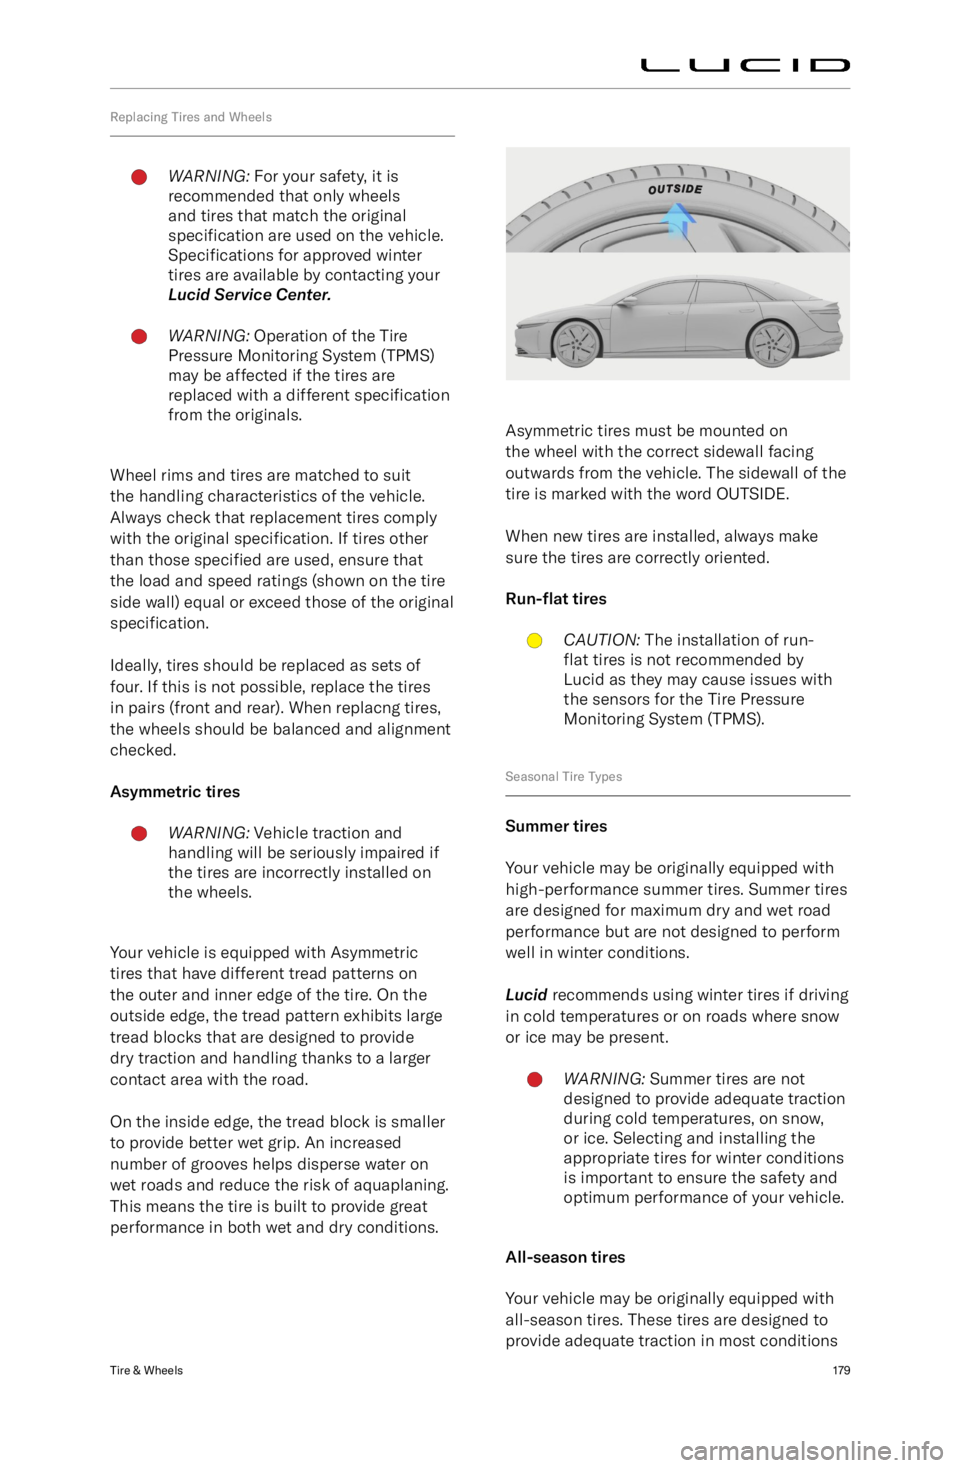
Asymmetric tires must be mounted on
the wheel with the correct sidewall facing
outwards from the vehicle. The sidewall of the
tire is marked with the word OUTSIDE.
When new tires are installed, always make
sure the tires are correctly oriented.
Run-
Page 203 of 241

Vehicle Sub-Systems
SteeringTypeRack and pinion with electronic power steering and speed sensitive assist.Number of turns lock to lock2.3 turnsTurning circle (curb to curb)39 ft (11.9 m)Technical Data190
Page 204 of 241

BrakesType4-wheel anti-lock braking system (ABS) with Electronic Brake Force Distribution,
Integrated Electronic Stability Control and electronic accelerator pedal-actuated regenerative braking system.CalipersFront: six-piston
Page 211 of 241

Tow Truck Mode
When loading and unloading the vehicle onto
a flatbed tow truck, put the vehicle in Tow
Truck Mode. This can be done on the Pilot
Panel by navigating to Settings > Vehicle and
toggling Tow Truck Mode.
Tow Truck Mode disables the emergency
parking brake, disables the alarm, and shifts
the vehicle into neutral to allow for transport
on and off the flatbed truck.
Lucid recommends that Tow Truck Mode
remain active until after transportation has been completed.
Pulling the Vehicle onto a Trailer or TransporterCAUTION: Under no circumstances
should the vehicle be towed using
the vehicle recovery eye. Doing so
can cause significant damage to your
vehicle.CAUTION: Incorrect installation of the
recovery eye can cause it to become
detached while pulling the vehicle,
resulting in significant damage.WARNING: If the recovery eye mount
is not accessible and the vehicle
is recovered by attaching to a
frame, suspension, or other means,
the vehicle may sustain damage.
Inspect the vehicle and ensure it is
safe to operate.The Towing provider
MUST document the method of
vehicle recovery, whether using the
recovery eye, attachment to the body,
suspension, or other means.Failure to
do so could result in a hazardous
situation when operating the vehicle.
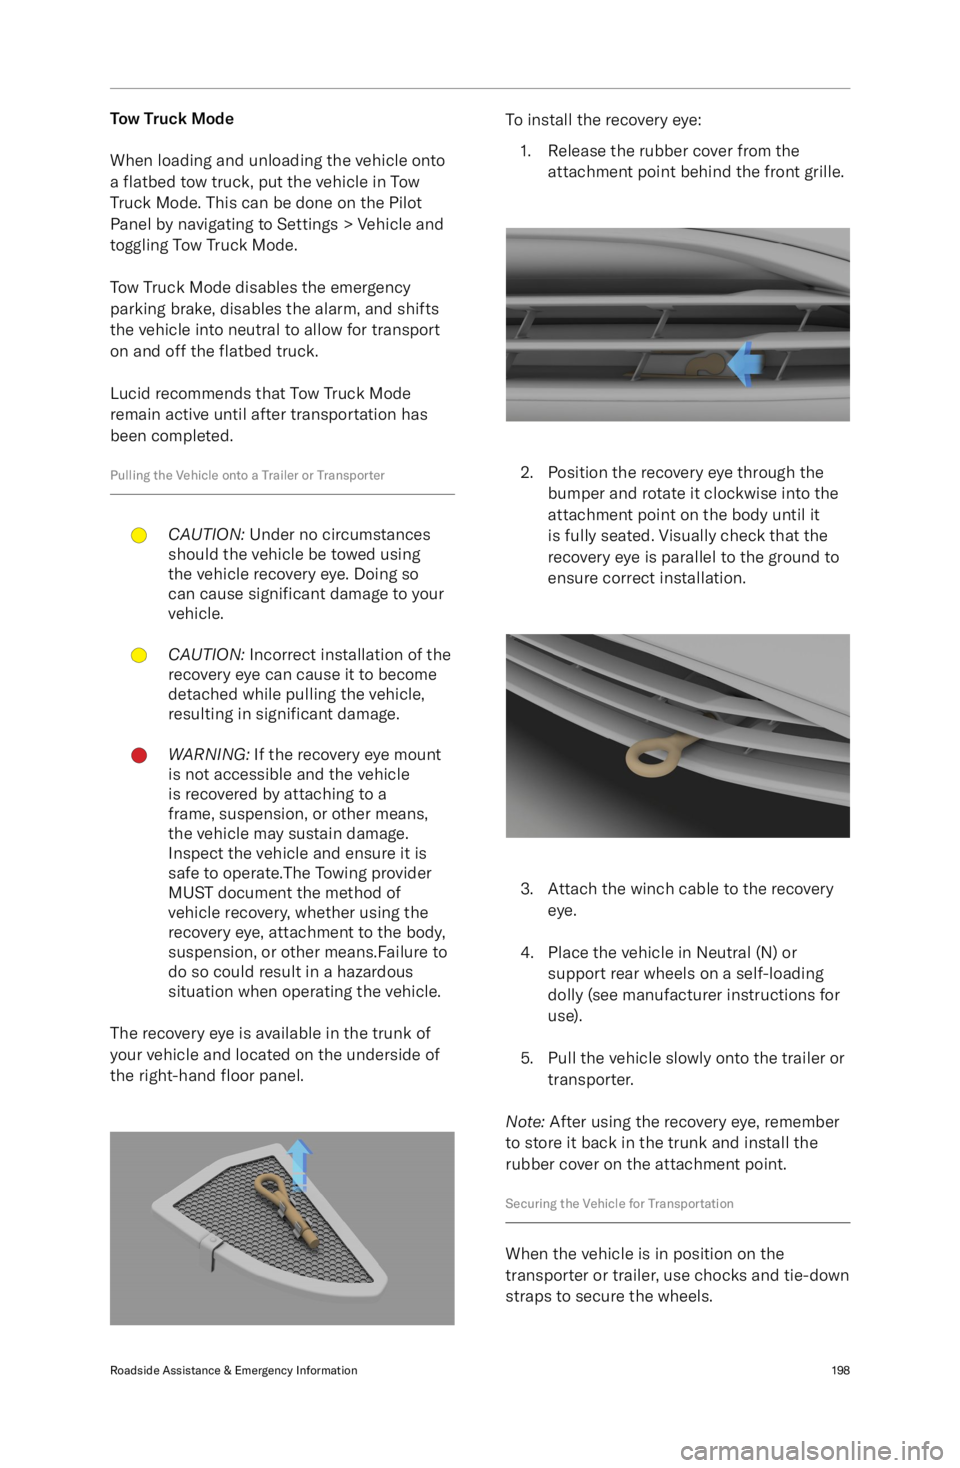
The recovery eye is available in the trunk of
your vehicle and located on the underside of
the right-hand floor panel.
To install the recovery eye:
1. Release the rubber cover from the attachment point behind the front grille.
2. Position the recovery eye through thebumper and rotate it clockwise into the
attachment point on the body until it
is fully seated. Visually check that the
recovery eye is parallel to the ground to
ensure correct installation.
3. Attach the winch cable to the recovery eye.
4. Place the vehicle in Neutral (N) or support rear wheels on a self-loading
dolly (see manufacturer instructions for use).
5. Pull the vehicle slowly onto the trailer or transporter.
Note: After using the recovery eye, remember
to store it back in the trunk and install the
rubber cover on the attachment point.
Securing the Vehicle for Transportation
When the vehicle is in position on the
transporter or trailer, use chocks and tie-down
straps to secure the wheels.
Roadside Assistance & Emergency Information198
Page 238 of 241

IndexA
Accessory mode 65
Adaptive Cruise Control 97
Air filter replacement 161Airbags 46Obstruction of 49
Warning indicator 53
Alerts and notifications 55
Anti-Lock Braking System (ABS) 78
Anti-theft system 28
AudioPhysical controls 123
Playing from devices 126
Settings 127Automatic parkingAutomatic Park In 111
Automatic Park Out 112
Distance warning 115
B
Batteries (12V)Specifications 194Battery (high-voltage) 147Charging 148
Emergency disabling 200
Health 147
Specifications 194
Temperature limits 147
Battery (key fob) 18
Blind Spot Display 109
Blind Spot Monitoring 109
Bluetooth
Page 239 of 241

Distracted Driver Alert 102DoorsAutomatic locking and unlocking 21
Child safety locks 21
Opening and closing 20
Opening with no power 21DownloadOwner
Page 240 of 241

Rear suspension specifications 193
Rear view camera 115
Regenerative braking 79
Reporting safety defects 212Rescue operationsFirefighting 201
S
Safety instructionsElectrical/high voltage safety 154
Obstruction of air bags 49Seat beltsFastening and releasing 38
In a collision 39
Reminders 38
Testing 40
Wearing correctly 37
Wearing when pregnant 39SeatsAdjustment 30
Folding (rear) 33
Heating (rear) 33
Heating and ventilation 31
Massage 31
Pass-through hatch 33ServiceData recording 213
Side airbags 48
Specifications12V battery 194
Brakes 191
Front suspension 192
High-voltage battery
194
Rear suspension 193
Steering 190
Tire pressures 189
Tires 188
Wheels 188
Steering specifications 190
Steering wheelMedia controls 123
Sunshades 22
T
Tire and loading information label 174
Tire care 176
Tire Identification Number (TIN) 171
Tire pressure checking 177
Tire Pressure Monitoring SystemMalfunction 181
Operation 181Tires 170Asymmetric 179
Chains 180
Degradation 177
Flat spots 178
Grading 173Tires (continued)Markings 170
Pressure label 174
Pressure monitoring 181
Pressures 177
Quality 173
Replacement of 179
Rotation 176
Run-flat 179
Socks 180
Specifications 188
Wear 176
Wheel alignment 176
Winter 180
TPMS 181
Traction control 82
Traffic Drive-Off Alert 102
Traffic Sign Recognition 101
Trailer towing 183
Trip information 55
Trunk 26Interior emergency release 27
U
Uniform tire quality grading 173
Unlocking your vehicle 16
User ProfileCreating 118
Loading preferences 120
Managing 120
Settings 119
Types 118
Using 16
V
VehicleAccessories and modifications 167
Certification label 10
Modifications 4
Vehicle Identification Number (VIN) 10
Vehicle lashing 198
Vehicle loading 183Determining correct load limit 183
Example load calculations 184
Vehicle weights 187
W
WashersChecking fluid level 158
Cleaning washer jets 159WheelsReplacement 179
Specifications 188
Wi-Fi 137
Window lock 22
Windows