ignition MASERATI GHIBLI 2019 User Guide
[x] Cancel search | Manufacturer: MASERATI, Model Year: 2019, Model line: GHIBLI, Model: MASERATI GHIBLI 2019Pages: 384, PDF Size: 13.33 MB
Page 44 of 384
If Power Trunk Lid/ Hands Free (if
equipped) has been left open, it will
stay open when you press lock button
, and the locking feature will only
occur after the closing of the power
trunk lid.
The doors can also be locked and
unlocked with the “Passive Entry”
system. For further information, see
“Passive Entry System” in this section.
If you press the power door lock switch
while the ignition switch is in the ACC
or RUN position, and any front door is
open, the power locks will not
operate. This prevents you from
accidentally locking the key fob RKE
transmitter in the vehicle.
Cycling the ignition to the OFF
position or closing the door will allow
the locks of the doors and fuel filler
door to operate. If a door is open with
the key fob RKE transmitter inside the
cabin and the ignition is in the ACC or
RUN position, a beep will draw the
driver’s attention.
Automatic Locking Doors
The auto door lock feature default
condition is disabled. When enabled,
the door locks will lock automatically
when the vehicle's speed exceeds
15 mph (24 km/h). The auto door lock
feature can be enabled or disabled by an Authorized Maserati Dealer only
which can also service the vehicle.
Automatic Door Unlock on Exit
The doors will unlock automatically on
vehicles with power door locks if:
• The automatic unlock doors on exit
feature is enabled.
• The transmission is in gear and the
vehicle speed is 0 (mph - km/h).
• The transmission is in N (Neutral) or P
(Park).
• The driver door is open.
• The doors were not previously
unlocked.
• The vehicle speed is 0 (mph - km/h).
Set Automatic Door Unlock on Exit
To change the current setting, see
“MTC+ Settings” in section
“Dashboard Instruments and
Controls”.
NOTE:
Use the automatic door unlock on exit
feature in accordance with local
regulations. Child-Protection Door Lock
System — Rear Doors To provide a safer environment for
small children sitting in the rear seats,
the rear doors are equipped with a
child-protection door lock system.
Engage or Disengage the
Child-Protection Door Lock
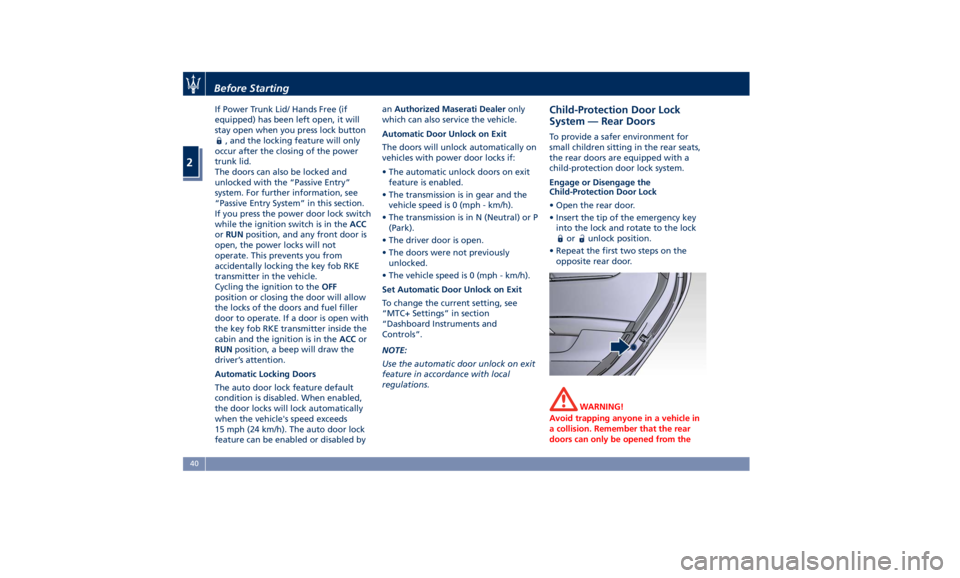
• Open the rear door.
• Insert the tip of the emergency key
into the lock and rotate to the lock
or unlock position.
• Repeat the first two steps on the
opposite rear door.
WARNING!
Avoid trapping anyone in a vehicle in
a collision. Remember that the rear
doors can only be opened from theBefore Starting
2
40
Page 47 of 384
Preventing Inadvertent Locking
of the Key fob RKE Transmitter
inside the Vehicle To minimize the possibility of
unintentionally locking a key fob RKE
transmitter inside your vehicle, the
“Passive Entry” system is equipped
with an automatic door unlock
feature which will function if the
ignition switch is in the OFF position.
If one of the vehicle doors is open and
the door panel switch
is used to
lock the vehicle, once all open doors
have been closed, the system checks
the inside and outside of the vehicle
for any valid key fobs RKE transmitter.
If one of the vehicle's key fobs RKE
transmitters is detected inside the
vehicle, and no other valid key fobs
RKE transmitters are detected outside
the vehicle, the “Passive Entry” system
automatically unlocks all vehicle doors
and chirps the horn fourteen times (on
the fifteenth attempt ALL doors will
lock and the key fob RKE transmitter
will be locked in the vehicle). This will
happen even on vehicles equipped
with Power Trunk Lid/Hand Free
pressing RH button on its right lower
part to close and lock the trunk lid. NOTE:
The vehicle unlocks the doors under
any of the following conditions:
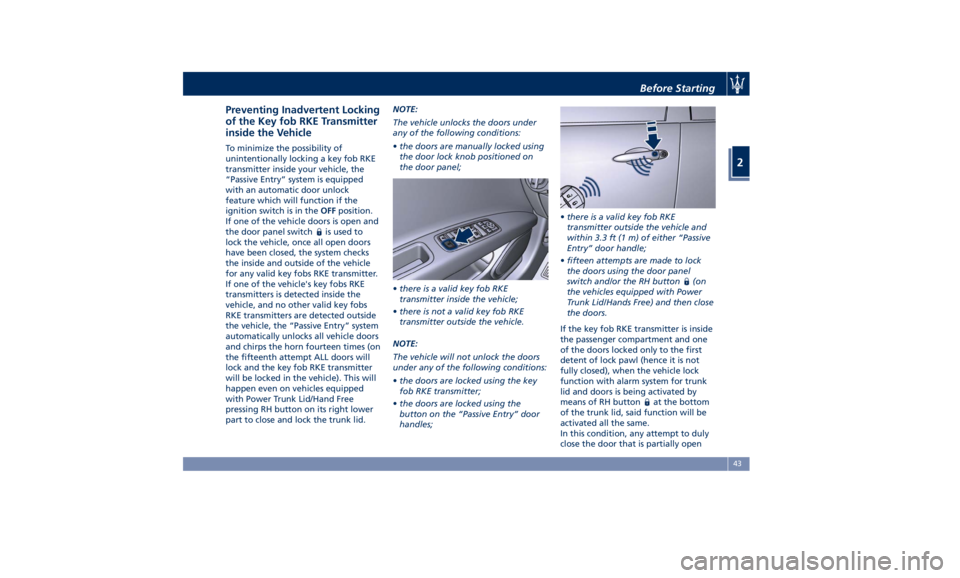
• the doors are manually locked using
the door lock knob positioned on
the door panel;
• there is a valid key fob RKE
transmitter inside the vehicle;
• there is not a valid key fob RKE
transmitter outside the vehicle.
NOTE:
The vehicle will not unlock the doors
under any of the following conditions:
• the doors are locked using the key
fob RKE transmitter;
• the doors are locked using the
button on the “Passive Entry” door
handles; • there is a valid key fob RKE
transmitter outside the vehicle and
within 3.3 ft (1 m) of either “Passive
Entry” door handle;
• fifteen attempts are made to lock
the doors using the door panel
switch and/or the RH button
(on
the vehicles equipped with Power
Trunk Lid/Hands Free) and then close
the doors.
If the key fob RKE transmitter is inside
the passenger compartment and one
of the doors locked only to the first
detent of lock pawl (hence it is not
fully closed), when the vehicle lock
function with alarm system for trunk
lid and doors is being activated by
means of RH button
at the bottom
of the trunk lid, said function will be
activated all the same.
In this condition, any attempt to duly
close the door that is partially openBefore Starting
2
43
Page 49 of 384
Radio Frequency RKE
Transmitter - Regulatory
Information The “Regulatory Information” for all
the radio and radar frequency devices
can be consulted by accessing the
"Services" section on the website
www.maserati.com.
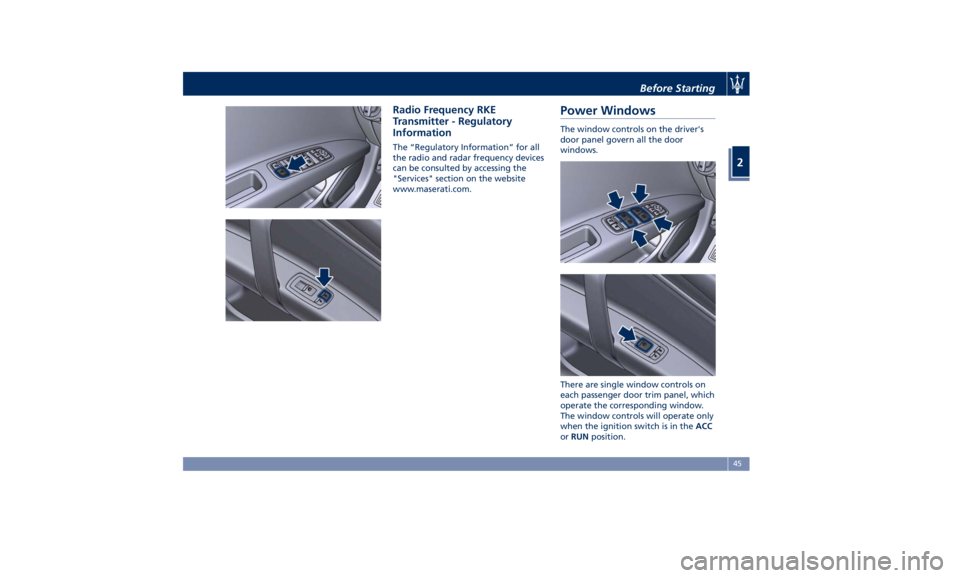
Power Windows The window controls on the driver's
door panel govern all the door
windows.
There are single window controls on
each passenger door trim panel, which
operate the corresponding window.
The window controls will operate only
when the ignition switch is in the ACC
or RUN position.Before Starting
2
45
Page 50 of 384
NOTE:
• The power window switches will
remain active for up to 10 minutes
after the ignition switch is turned to
the OFF position. Opening either
front door will cancel this feature.
The time lapse can be set. See “MTC+
Settings” in section “Dashboard
Instruments and Controls” for
further information.
• Frequent activations of the power
windows could result in a temporary
lock out of the motors. In this case,
wait a moment before a new
activation.
WARNING!
Improper use of the power windows
and the sunroof (if equipped) can
however be dangerous, even with the
anti-pinch prevention system. Before
and during activation of the power
window, always check that the
passengers are not exposed to the risk
of injury both by the moving window
and by personal objects that could be
dragged or hit by it. Do not leave
unattended children in a vehicle with
a key fob RKE transmitter inside.
When getting out the vehicle, always
remove the key fob RKE transmitter to prevent the windows being
accidentally activated, posing a risk to
passengers remaining onboard.
Auto-Down Feature The driver door power window switch
and some model passenger door
power window switches have an
auto-down feature.
Press the window switch to the second
detent, release, and the window will
go completely down automatically.
To open the window part way, press
the window switch to the first detent
and release it when you want the
window to stop.
To stop the window from going all the
way down during the auto-down
operation, pull up on the switch
briefly.
Auto-Up Feature with
Anti-Pinch Protection Lift the window switch to the second
detent, release, and the window will
go all the way up automatically.
To stop the window from going all the
way up during the auto-up operation,
push down on the switch briefly.
To close the window part way, lift the
window switch to the first detent and release it when you want the window
to stop.
NOTE:
• If the window runs into any obstacle
during auto-closure, it will reverse
direction and then go back down.
Remove the obstacle and use the
window switch again to close the
window.
• Any impact due to rough road
conditions may trigger the auto
reverse function unexpectedly during
auto-closure. If this happens, pull the
switch lightly to the first detent and
hold to close the window manually.
• Frequent activations of the
anti-pinch function could disable the
auto-down and auto-up function of
the windows. In order to re-activate
this function proceed with a reset
cycle as described in the next
paragraph.
WARNING!
There is no anti-pinch protection when
the window is almost closed. Be sure
to clear all objects from the area
before closing the window.Before Starting
2
46
Page 51 of 384
Reset Auto-Up/Down Should the auto-up/down feature stop
working, the window probably needs
to be reset.
To reset auto-up/down, pull the
window switch up to close the
window completely and push the
window switch down to open the
window completely.
Open the Windows and
Sunroof with RKE Transmitter
and Ignition Off When the ignition switch is in OFF
position, windows can be opened by
pressing the
button on the RKE
transmitter.
• Press the button and release it;
• Press a second time the
button
and keep it pressed until complete
opening of the windows, if they
were closed.
Rear Window and Sunshade
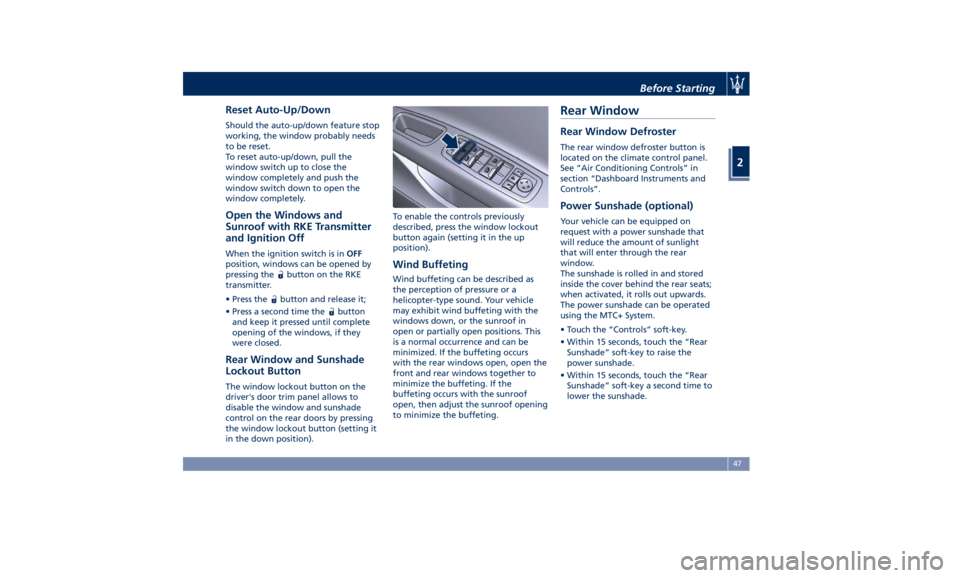
Lockout Button The window lockout button on the
driver's door trim panel allows to
disable the window and sunshade
control on the rear doors by pressing
the window lockout button (setting it
in the down position). To enable the controls previously
described, press the window lockout
button again (setting it in the up
position).
Wind Buffeting Wind buffeting can be described as
the perception of pressure or a
helicopter-type sound. Your vehicle
may exhibit wind buffeting with the
windows down, or the sunroof in
open or partially open positions. This
is a normal occurrence and can be
minimized. If the buffeting occurs
with the rear windows open, open the
front and rear windows together to
minimize the buffeting. If the
buffeting occurs with the sunroof
open, then adjust the sunroof opening
to minimize the buffeting.Rear Window Rear Window Defroster The rear window defroster button is
located on the climate control panel.
See “Air Conditioning Controls” in
section “Dashboard Instruments and
Controls”.
Power Sunshade (optional) Your vehicle can be equipped on
request with a power sunshade that
will reduce the amount of sunlight
that will enter through the rear
window.
The sunshade is rolled in and stored
inside the cover behind the rear seats;
when activated, it rolls out upwards.
The power sunshade can be operated
using the MTC+ System.
• Touch the “Controls” soft-key.
• Within 15 seconds, touch the “Rear
Sunshade” soft-key to raise the
power sunshade.
• Within 15 seconds, touch the “Rear
Sunshade” soft-key a second time to
lower the sunshade.Before Starting
2
47
Page 53 of 384
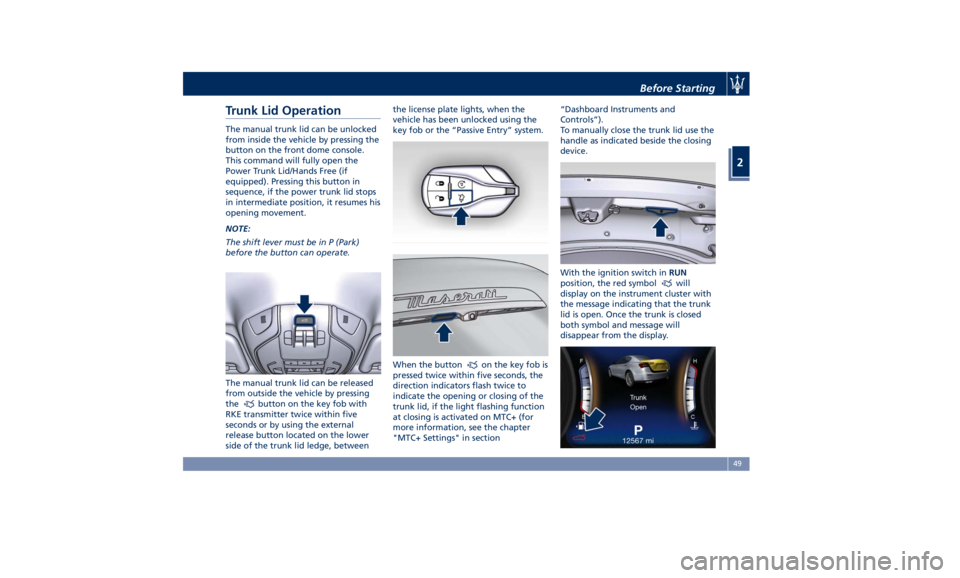
Trunk Lid Operation The manual trunk lid can be unlocked
from inside the vehicle by pressing the
button on the front dome console.
This command will fully open the
Power Trunk Lid/Hands Free (if
equipped). Pressing this button in
sequence, if the power trunk lid stops
in intermediate position, it resumes his
opening movement.
NOTE:
The shift lever must be in P (Park)
before the button can operate.
The manual trunk lid can be released
from outside the vehicle by pressing
the
button on the key fob with
RKE transmitter twice within five
seconds or by using the external
release button located on the lower
side of the trunk lid ledge, between the license plate lights, when the
vehicle has been unlocked using the
key fob or the “Passive Entry” system.
When the button
on the key fob is
pressed twice within five seconds, the
direction indicators flash twice to
indicate the opening or closing of the
trunk lid, if the light flashing function
at closing is activated on MTC+ (for
more information, see the chapter
"MTC+ Settings" in section “Dashboard Instruments and
Controls”).
To manually close the trunk lid use the
handle as indicated beside the closing
device.
With the ignition switch in RUN
position, the red symbol
will
display on the instrument cluster with
the message indicating that the trunk
lid is open. Once the trunk is closed
both symbol and message will
disappear from the display.Before Starting
2
49
Page 54 of 384
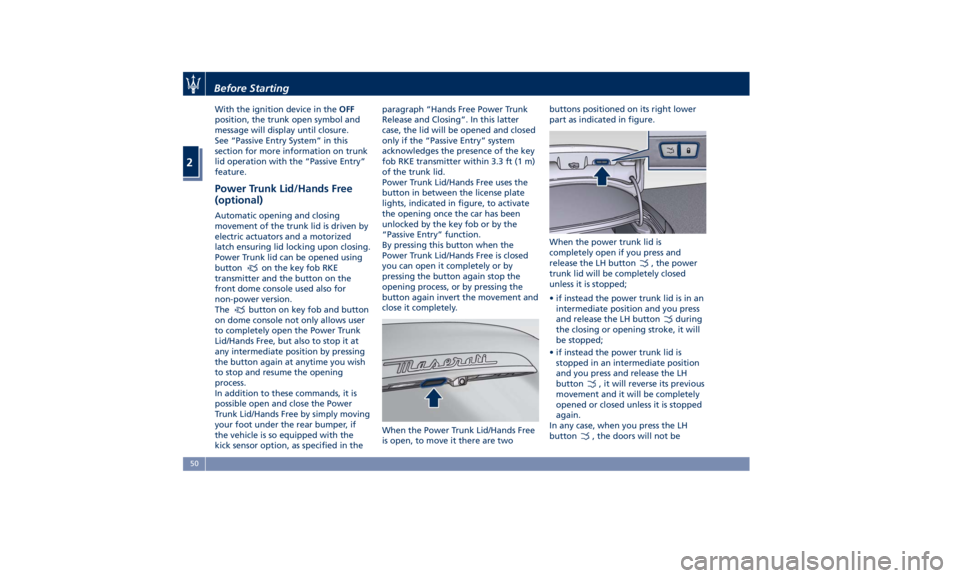
With the ignition device in the OFF
position, the trunk open symbol and
message will display until closure.
See “Passive Entry System” in this
section for more information on trunk
lid operation with the “Passive Entry”
feature.
Power Trunk Lid/Hands Free
(optional) Automatic opening and closing
movement of the trunk lid is driven by
electric actuators and a motorized
latch ensuring lid locking upon closing.
Power Trunk lid can be opened using
button
on the key fob RKE
transmitter and the button on the
front dome console used also for
non-power version.
The
button on key fob and button
on dome console not only allows user
to completely open the Power Trunk
Lid/Hands Free, but also to stop it at
any intermediate position by pressing
the button again at anytime you wish
to stop and resume the opening
process.
In addition to these commands, it is
possible open and close the Power
Trunk Lid/Hands Free by simply moving
your foot under the rear bumper, if
the vehicle is so equipped with the
kick sensor option, as specified in the paragraph “Hands Free Power Trunk
Release and Closing”. In this latter
case, the lid will be opened and closed
only if the “Passive Entry” system
acknowledges the presence of the key
fob RKE transmitter within 3.3 ft (1 m)
of the trunk lid.
Power Trunk Lid/Hands Free uses the
button in between the license plate
lights, indicated in figure, to activate
the opening once the car has been
unlocked by the key fob or by the
“Passive Entry” function.
By pressing this button when the
Power Trunk Lid/Hands Free is closed
you can open it completely or by
pressing the button again stop the
opening process, or by pressing the
button again invert the movement and
close it completely.
When the Power Trunk Lid/Hands Free
is open, to move it there are two buttons positioned on its right lower
part as indicated in figure.
When the power trunk lid is
completely open if you press and
release the LH button
, the power
trunk lid will be completely closed
unless it is stopped;
• if instead the power trunk lid is in an
intermediate position and you press
and release the LH button
during
the closing or opening stroke, it will
be stopped;
• if instead the power trunk lid is
stopped in an intermediate position
and you press and release the LH
button
, it will reverse its previous
movement and it will be completely
opened or closed unless it is stopped
again.
In any case, when you press the LH
button
, the doors will not beBefore Starting
2
50
Page 59 of 384
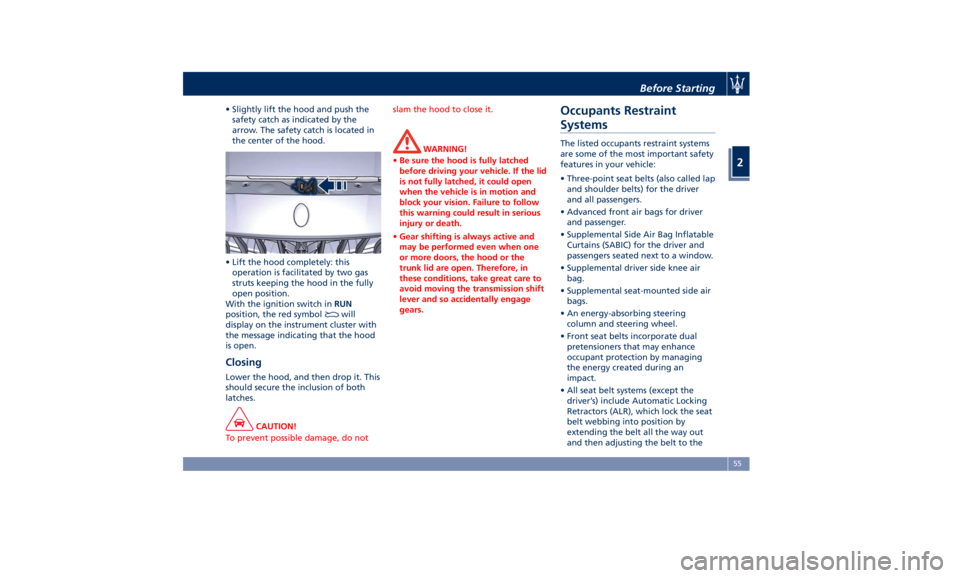
• Slightly lift the hood and push the
safety catch as indicated by the
arrow. The safety catch is located in
the center of the hood.
• Lift the hood completely: this
operation is facilitated by two gas
struts keeping the hood in the fully
open position.
With the ignition switch in RUN
position, the red symbol
will
display on the instrument cluster with
the message indicating that the hood
is open.
Closing Lower the hood, and then drop it. This
should secure the inclusion of both
latches.
CAUTION!
To prevent possible damage, do not slam the hood to close it.
WARNING!
• Be sure the hood is fully latched
before driving your vehicle. If the lid
is not fully latched, it could open
when the vehicle is in motion and
block your vision. Failure to follow
this warning could result in serious
injury or death.
• Gear shifting is always active and
may be performed even when one
or more doors, the hood or the
trunk lid are open. Therefore, in
these conditions, take great care to
avoid moving the transmission shift
lever and so accidentally engage
gears.Occupants Restraint
Systems The listed occupants restraint systems
are some of the most important safety
features in your vehicle:
• Three-point seat belts (also called lap
and shoulder belts) for the driver
and all passengers.
• Advanced front air bags for driver
and passenger.
• Supplemental Side Air Bag Inflatable
Curtains (SABIC) for the driver and
passengers seated next to a window.
• Supplemental driver side knee air
bag.
• Supplemental seat-mounted side air
bags.
• An energy-absorbing steering
column and steering wheel.
• Front seat belts incorporate dual
pretensioners that may enhance
occupant protection by managing
the energy created during an
impact.
• All seat belt systems (except the
driver’s) include Automatic Locking
Retractors (ALR), which lock the seat
belt webbing into position by
extending the belt all the way out
and then adjusting the belt to theBefore Starting
2
55
Page 71 of 384
When the air bag deploys, it opens the
seam between the front and side of
the seat's trim cover. Each air bag
deploys independently; a left side
impact deploys the left air bag only
and a right side impact deploys the
right air bag only.
Supplemental Side Air Bag Inflatable
Curtain (SABIC)
SABIC air bags are designed to protect
the head of front and rear occupants
in the event of a side impact, thanks
to the wide cushion inflation surface.
Each air bag features inflated
chambers placed adjacent to the head
of each outboard occupant that
reduce the potential for side-impact
head injuries. The SABICS deploy
downward, covering both windows on
the impact side.
WARNING!
• Side air bags also need room to
inflate. Do not rest your head, arms
or elbows on the door, windows or
the area in which the window bag is
located to avoid possible injury
during air bag inflation. Sit upright
in the center of the seat.
• Do not cover the front seatbacks
with clothes or covers. Do not use accessory seat covers or place
objects between you and the side
air bags; the performance could be
adversely affected and/or objects
could cause serious injury.
• Do not add roof racks that require
permanent attachments (bolts or
screws) for installation on the
vehicle roof. Do not drill into the
roof of the vehicle for any reason.
Supplemental Driver Side Knee Air
bag
The
supplemental driver side knee air
bag provides enhanced protection and
works together with the driver
advanced front air bag during a
frontal impact.
Air Bag Deployment Sensors
and Controls Occupant Restraint Controller (ORC)
The Occupant Restraint Controller
(ORC) determines if deployment of the
front air bags and/or side air bags in a
frontal or side collision or rollover
event is required. Based on the impact
sensor's signals, a central electronic
ORC deploys the advanced front air
bags, SABIC and SAB air bags, and
front seat belt pretensioners, as required, depending on the severity
and type of impact.
On top of what previously described,
the characteristics of the collision
registered by the sensors and sent to
the control unit of the ORC can also
cause a sudden cut of the power from
the battery, “blowing” the
pyrotechnical charge located on the
positive battery terminal.
CAUTION!
After a collision that has caused the
ignition of the pyrotechnical charge,
this must be replaced at an
Authorized Maserati Dealer .
Advanced front air bags are designed
to
provide additional protection by
supplementing the seat belts in
certain frontal collisions depending on
the severity and type of collision.
Advanced front air bags are not
expected to reduce the risk of injury in
rear, side, or rollover collisions.
The advanced front air bags will not
deploy in all frontal collisions,
including those that may produce
substantial vehicle damage, for
example, some pole collisions, truck
under rides, and corner impacts. On
the other hand, depending on the
type and location of impact, advancedBefore Starting
2
67
Page 72 of 384
front air bags may deploy in crashes
with little vehicle front-end damage
but that produce a severe initial
deceleration.
The side air bags will not deploy in all
side collisions. Side air bag deployment
will depend on the severity and type
of collision. Because air bag sensors
measure vehicle deceleration over
time, vehicle speed and damage
merely are not good indicators of
whether or not an air bag should have
deployed.
Seat belts are necessary for your
protection in all accidents, and also are
needed to help keep you in position,
away from an inflating air bag. The
ORC monitors the readiness of the
electronic parts of the air bag system
whenever the ignition switch is in the
RUN position. If the ignition switch is
in the OFF position, in the ACC
position, or not active, the air bag
system is not activated and the air
bags will not inflate.
The ORC contains a backup power
supply system that may deploy the air
bags even if the battery has low power
or it becomes disconnected prior to
deployment. When starting the
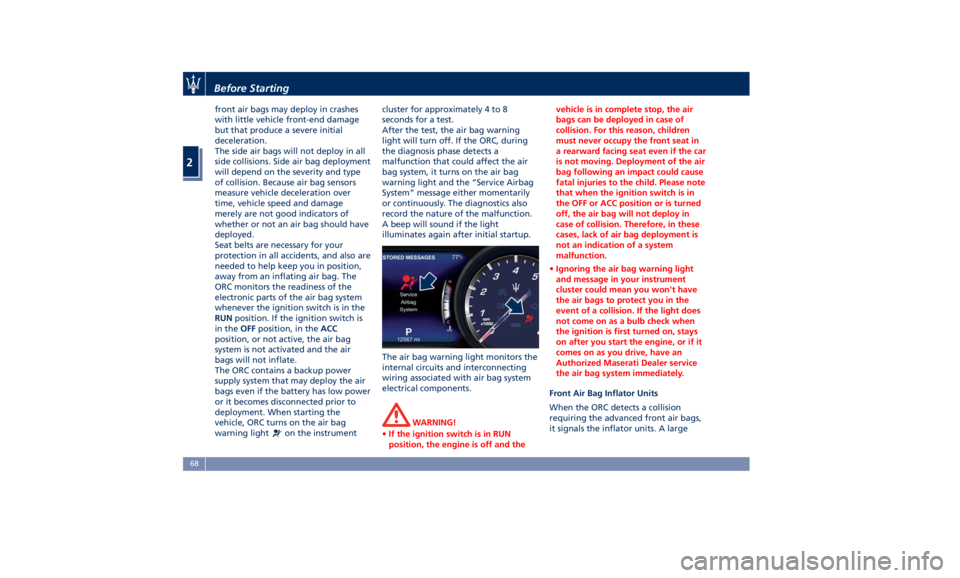
vehicle, ORC turns on the air bag
warning light
on the instrument cluster for approximately 4 to 8
seconds for a test.
After the test, the air bag warning
light will turn off. If the ORC, during
the diagnosis phase detects a
malfunction that could affect the air
bag system, it turns on the air bag
warning light and the “Service Airbag
System” message either momentarily
or continuously. The diagnostics also
record the nature of the malfunction.
A beep will sound if the light
illuminates again after initial startup.
The air bag warning light monitors the
internal circuits and interconnecting
wiring associated with air bag system
electrical components.
WARNING!
• If the ignition switch is in RUN
position, the engine is off and the vehicle is in complete stop, the air
bags can be deployed in case of
collision. For this reason, children
must never occupy the front seat in
a rearward facing seat even if the car
is not moving. Deployment of the air
bag following an impact could cause
fatal injuries to the child. Please note
that when the ignition switch is in
the OFF or ACC position or is turned
off, the air bag will not deploy in
case of collision. Therefore, in these
cases, lack of air bag deployment is
not an indication of a system
malfunction.
• Ignoring the air bag warning light
and message in your instrument
cluster could mean you won't have
the air bags to protect you in the
event of a collision. If the light does
not come on as a bulb check when
the ignition is first turned on, stays
on after you start the engine, or if it
comes on as you drive, have an
Authorized Maserati Dealer service
the air bag system immediately.
Front Air Bag Inflator Units
When
the ORC detects a collision
requiring the advanced front air bags,
it signals the inflator units. A largeBefore Starting
2
68