navigation MASERATI GHIBLI 2019 User Guide
[x] Cancel search | Manufacturer: MASERATI, Model Year: 2019, Model line: GHIBLI, Model: MASERATI GHIBLI 2019Pages: 384, PDF Size: 13.33 MB
Page 174 of 384
The vehicle is provided with a specific
add to the owner’s manual, describing
the MTC+ System features and listing
all warnings and precautions, which
are essential for a safe use of the
system. Maserati advises you to read
this add carefully and thoroughly.
The MTC+ display is positioned in the
central part of the dashboard and the
manual controls and devices for
connecting external sources are
positioned on the central console.
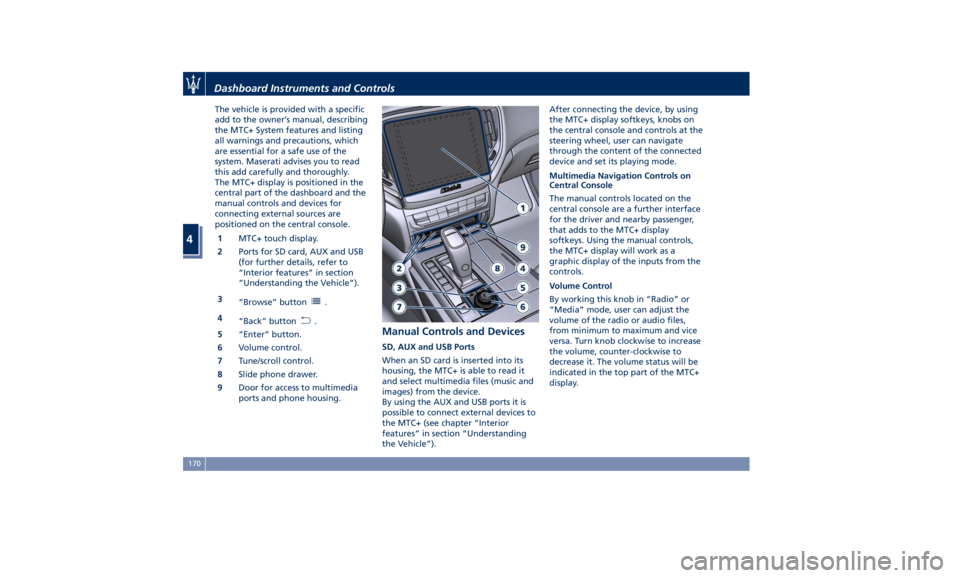
1 MTC+ touch display.
2 Ports for SD card, AUX and USB
(for further details, refer to
“Interior features” in section
“Understanding the Vehicle”).
3
“Browse” button
.
4
“Back” button
.
5 “Enter” button.
6 Volume control.
7 Tune/scroll control.
8 Slide phone drawer.
9 Door for access to multimedia
ports and phone housing. Manual Controls and Devices SD, AUX and USB Ports
When an SD card is inserted into its
housing, the MTC+ is able to read it
and select multimedia files (music and
images) from the device.
By using the AUX and USB ports it is
possible to connect external devices to
the MTC+ (see chapter “Interior
features” in section “Understanding
the Vehicle”). After connecting the device, by using
the MTC+ display softkeys, knobs on
the central console and controls at the
steering wheel, user can navigate
through the content of the connected
device and set its playing mode.
Multimedia Navigation Controls on
Central Console
The manual controls located on the
central console are a further interface
for the driver and nearby passenger,
that adds to the MTC+ display
softkeys. Using the manual controls,
the MTC+ display will work as a
graphic display of the inputs from the
controls.
Volume Control
By working this knob in “Radio” or
“Media” mode, user can adjust the
volume of the radio or audio files,
from minimum to maximum and vice
versa. Turn knob clockwise to increase
the volume, counter-clockwise to
decrease it. The volume status will be
indicated in the top part of the MTC+
display.Dashboard Instruments and Controls
4
170
Page 175 of 384
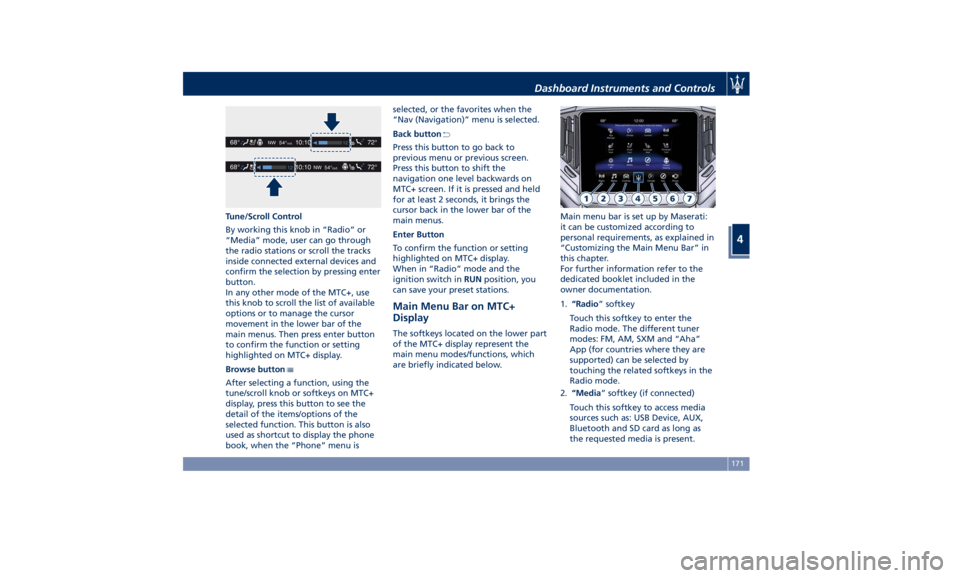
Tune/Scroll Control
By working this knob in “Radio” or
“Media” mode, user can go through
the radio stations or scroll the tracks
inside connected external devices and
confirm the selection by pressing enter
button.
In any other mode of the MTC+, use
this knob to scroll the list of available
options or to manage the cursor
movement in the lower bar of the
main menus. Then press enter button
to confirm the function or setting
highlighted on MTC+ display.
Browse button
After selecting a function, using the
tune/scroll knob or softkeys on MTC+
display, press this button to see the
detail of the items/options of the
selected function. This button is also
used as shortcut to display the phone
book, when the “Phone” menu is selected, or the favorites when the
“Nav (Navigation)” menu is selected.
Back button
Press this button to go back to
previous menu or previous screen.
Press this button to shift the
navigation one level backwards on
MTC+ screen. If it is pressed and held
for at least 2 seconds, it brings the
cursor back in the lower bar of the
main menus.
Enter Button
To confirm the function or setting
highlighted on MTC+ display.
When in “Radio” mode and the
ignition switch in RUN position, you
can save your preset stations.
Main Menu Bar on MTC+
Display The softkeys located on the lower part
of the MTC+ display represent the
main menu modes/functions, which
are briefly indicated below. Main menu bar is set up by Maserati:
it can be customized according to
personal requirements, as explained in
“Customizing the Main Menu Bar” in
this chapter.
For further information refer to the
dedicated booklet included in the
owner documentation.
1. “Radio ” softkey
Touch this softkey to enter the
Radio mode. The different tuner
modes: FM, AM, SXM and “Aha”
App (for countries where they are
supported) can be selected by
touching the related softkeys in the
Radio mode.
2. “Media ” softkey (if connected)
Touch this softkey to access media
sources such as: USB Device, AUX,
Bluetooth and SD card as long as
the requested media is present.Dashboard Instruments and Controls
4
171
Page 176 of 384
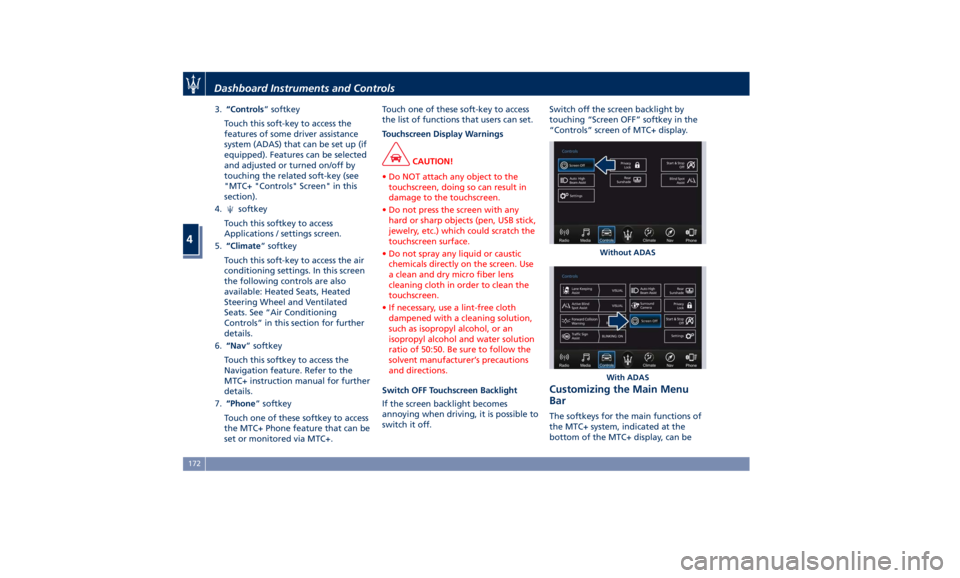
3. “Controls ” softkey
Touch this soft-key to access the
features of some driver assistance
system (ADAS) that can be set up (if
equipped). Features can be selected
and adjusted or turned on/off by
touching the related soft-key (see
"MTC+ "Controls" Screen" in this
section).
4.
softkey
Touch this softkey to access
Applications / settings screen.
5. “Climate ” softkey
Touch this soft-key to access the air
conditioning settings. In this screen
the following controls are also
available: Heated Seats, Heated
Steering Wheel and Ventilated
Seats. See “Air Conditioning
Controls” in this section for further
details.
6. “Nav ” softkey
Touch this softkey to access the
Navigation feature. Refer to the
MTC+ instruction manual for further
details.
7. “Phone ” softkey
Touch one of these softkey to access
the MTC+ Phone feature that can be
set or monitored via MTC+. Touch one of these soft-key to access
the list of functions that users can set.
Touchscreen Display Warnings
CAUTION!
• Do NOT attach any object to the
touchscreen, doing so can result in
damage to the touchscreen.
• Do not press the screen with any
hard or sharp objects (pen, USB stick,
jewelry, etc.) which could scratch the
touchscreen surface.
• Do not spray any liquid or caustic
chemicals directly on the screen. Use
a clean and dry micro fiber lens
cleaning cloth in order to clean the
touchscreen.
• If necessary, use a lint-free cloth
dampened with a cleaning solution,
such as isopropyl alcohol, or an
isopropyl alcohol and water solution
ratio of 50:50. Be sure to follow the
solvent manufacturer’s precautions
and directions.
Switch OFF Touchscreen Backlight
If
the screen backlight becomes
annoying when driving, it is possible to
switch it off. Switch off the screen backlight by
touching “Screen OFF” softkey in the
“Controls” screen of MTC+ display.
Customizing the Main Menu
Bar The softkeys for the main functions of
the MTC+ system, indicated at the
bottom of the MTC+ display, can be Without ADAS
With ADASDashboard Instruments and Controls
4
172
Page 177 of 384
easily customized to suit user's
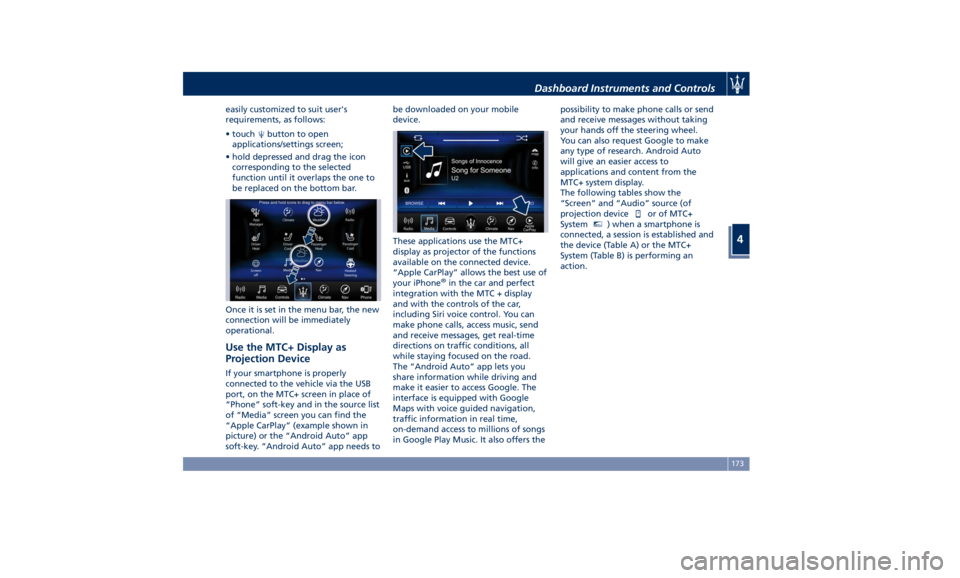
requirements, as follows:
• touch button to open
applications/settings screen;
• hold depressed and drag the icon
corresponding to the selected
function until it overlaps the one to
be replaced on the bottom bar.
Once it is set in the menu bar, the new
connection will be immediately
operational.
Use the MTC+ Display as
Projection Device If your smartphone is properly
connected to the vehicle via the USB
port, on the MTC+ screen in place of
“Phone” soft-key and in the source list
of “Media” screen you can find the
“Apple CarPlay” (example shown in
picture) or the “Android Auto” app
soft-key. “Android Auto” app needs to be downloaded on your mobile
device.
These applications use the MTC+
display as projector of the functions
available on the connected device.
“Apple CarPlay” allows the best use of
your iPhone ®
in the car and perfect
integration with the MTC + display
and with the controls of the car,
including Siri voice control. You can
make phone calls, access music, send
and receive messages, get real-time
directions on traffic conditions, all
while staying focused on the road.
The “Android Auto” app lets you
share information while driving and
make it easier to access Google. The
interface is equipped with Google
Maps with voice guided navigation,
traffic information in real time,
on-demand access to millions of songs
in Google Play Music. It also offers the possibility to make phone calls or send
and receive messages without taking
your hands off the steering wheel.
You can also request Google to make
any type of research. Android Auto
will give an easier access to
applications and content from the
MTC+ system display.
The following tables show the
“Screen” and “Audio” source (of
projection device
or of MTC+
System MTC+
) when a smartphone is
connected, a session is established and
the device (Table A) or the MTC+
System (Table B) is performing an
action.Dashboard Instruments and Controls
4
173
Page 178 of 384
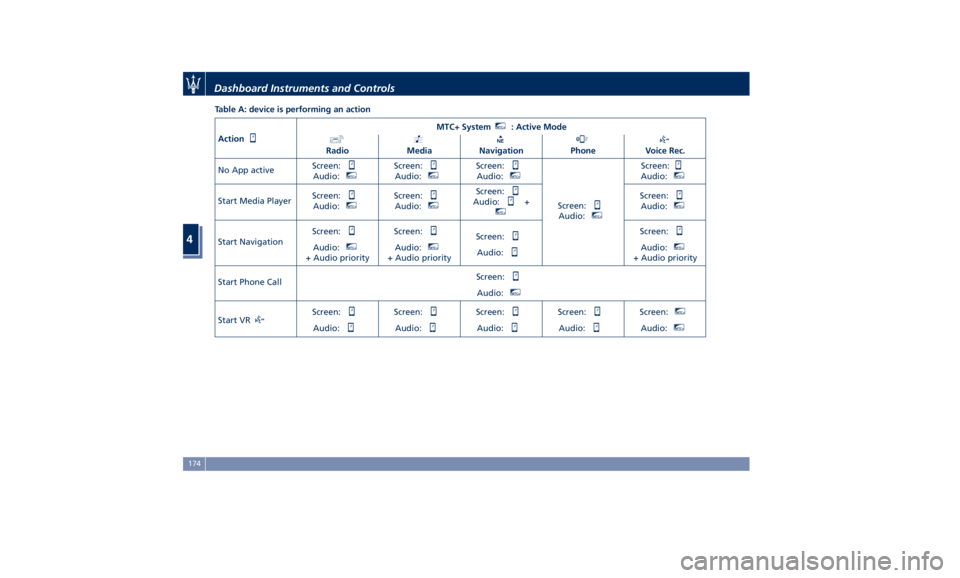
Table A: device is performing an action
Action MTC+ System MTC+
: Active Mode
Radio Media Navigation Phone Voice Rec.
No App active Screen:
Audio: MTC+
Screen:
Audio: MTC+
Screen:
Audio: MTC+
Screen:
Audio: MTC+
Screen:
Audio: MTC+
Start Media Player Screen:
Audio: MTC+
Screen:
Audio: MTC+
Screen:
Audio: + MTC+
Screen:
Audio: MTC+
Start Navigation Screen:
Audio: MTC+
+ Audio priority Screen:
Audio: MTC+
+ Audio priority Screen:
Audio: Screen:
Audio: MTC+
+ Audio priority
Start Phone Call Screen:
Audio: MTC+
Start VR Screen:
Audio: Screen:
Audio: Screen:
Audio: Screen:
Audio: Screen: MTC+
Audio: MTC+
Dashboard Instruments and Controls
4
174
Page 179 of 384
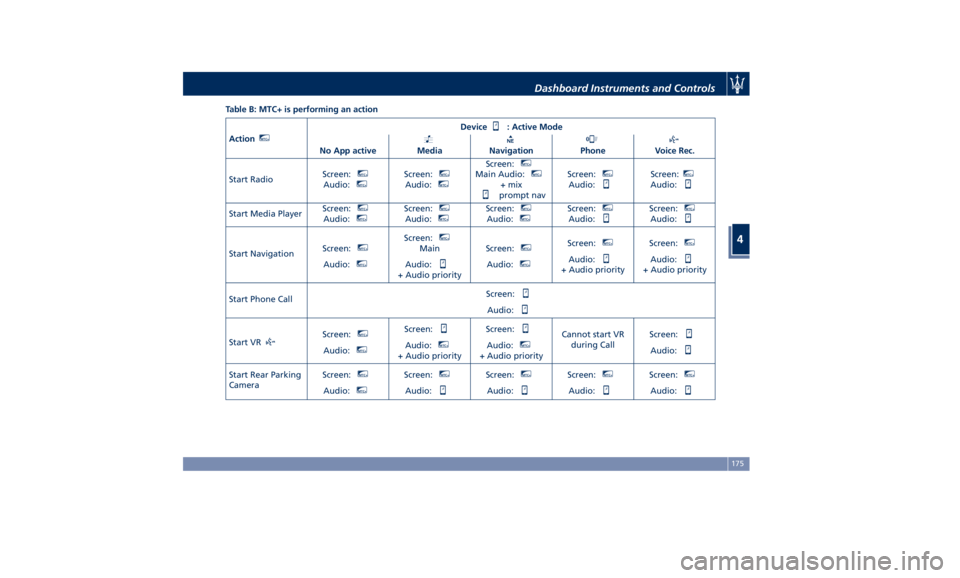
Table B: MTC+ is performing an action
Action MTC+
Device : Active Mode
No App active Media Navigation Phone Voice Rec.
Start Radio Screen: MTC+
Audio: MTC+
Screen: MTC+
Audio: MTC+
Screen: MTC+
Main Audio: MTC+
+ mix
prompt nav Screen: MTC+
Audio: Screen: MTC+
Audio:
Start Media Player Screen: MTC+
Audio: MTC+
Screen: MTC+
Audio: MTC+
Screen: MTC+
Audio: MTC+
Screen: MTC+
Audio: Screen: MTC+
Audio:
Start Navigation Screen: MTC+
Audio: MTC+
Screen: MTC+
Main
Audio:
+ Audio priority Screen: MTC+
Audio: MTC+
Screen: MTC+
Audio:
+ Audio priority Screen: MTC+
Audio:
+ Audio priority
Start Phone Call Screen:
Audio:
Start VR Screen: MTC+
Audio: MTC+
Screen:
Audio: MTC+
+ Audio priority Screen:
Audio: MTC+
+ Audio priority Cannot start VR
during Call Screen:
Audio:
Start Rear Parking
Camera Screen: MTC+
Audio: MTC+
Screen: MTC+
Audio: Screen: MTC+
Audio: Screen: MTC+
Audio: Screen: MTC+
Audio:Dashboard Instruments and Controls
4
175
Page 186 of 384
in front of you when you are farther
away. This gives you the best
reaction time, though could lead to
some more unwanted warnings.
“Medium” gives instead a little less
time for reacting compared to
“Far”, but at the same time should
lead to less not desired warning.
To change the setting for more
dynamic driving, select the “Near”
setting. This warns you of a possible
collision when you are much closer
to the vehicle or pedestrian (if the
car is equipped with Pedestrian
Emergency Braking - PEB function)in
front of you.
FCW with active braking can be set
to "On" or "Off".
• Surround View Camera
By activating this feature the system
uses four cameras to monitor the
area around the vehicle when
transmission lever is shifted to P
(Park), N (Neutral) or D (Drive)
position.
When activation occurs by pressing
the “Surround Camera” button in
the “Controls” screen or moving the
shift lever in R (Reverse) position,
the initial view will be the default
view (associated with current gear
state). Image will be displayed with active guidelines while in that gear
as long as vehicle speed remains
lower than 8 mph (12 km/h).
When vehicle is shifted into a
different gear, the image will
remain displayed for 10 seconds, or
vehicle is shifted in P (Park), or until
vehicle speed exceeds 8 mph
(12 km/h), at which point it will
immediately cancel and return to
the last-viewed screen.
The feature can be set to “On” or
“Off”. See “Surround View Camera
System (optional)” in section
“Understanding the Vehicle” for
further details.
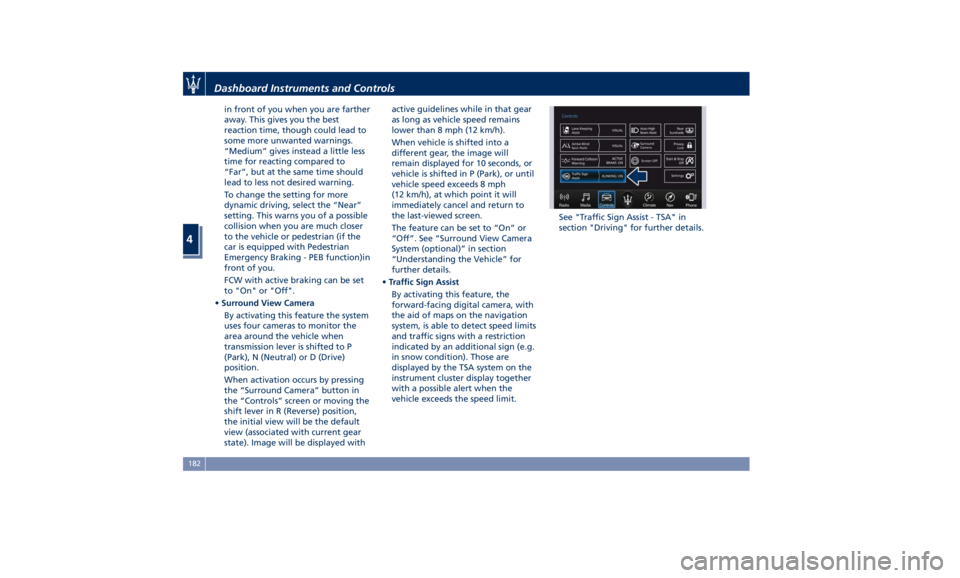
• Traffic Sign Assist
By activating this feature, the
forward-facing digital camera, with
the aid of maps on the navigation
system, is able to detect speed limits
and traffic signs with a restriction
indicated by an additional sign (e.g.
in snow condition). Those are
displayed by the TSA system on the
instrument cluster display together
with a possible alert when the
vehicle exceeds the speed limit. See "Traffic Sign Assist - TSA" in
section "Driving" for further details.Dashboard Instruments and Controls
4
182
Page 187 of 384
MTC+ Settings Customer Programmable
Features The MTC+ System uses a combination
of keys able to access and change the
customer programmable features
present in the “Settings” and
“Controls” page (see also “MTC+
“Controls” Screen” in this section).
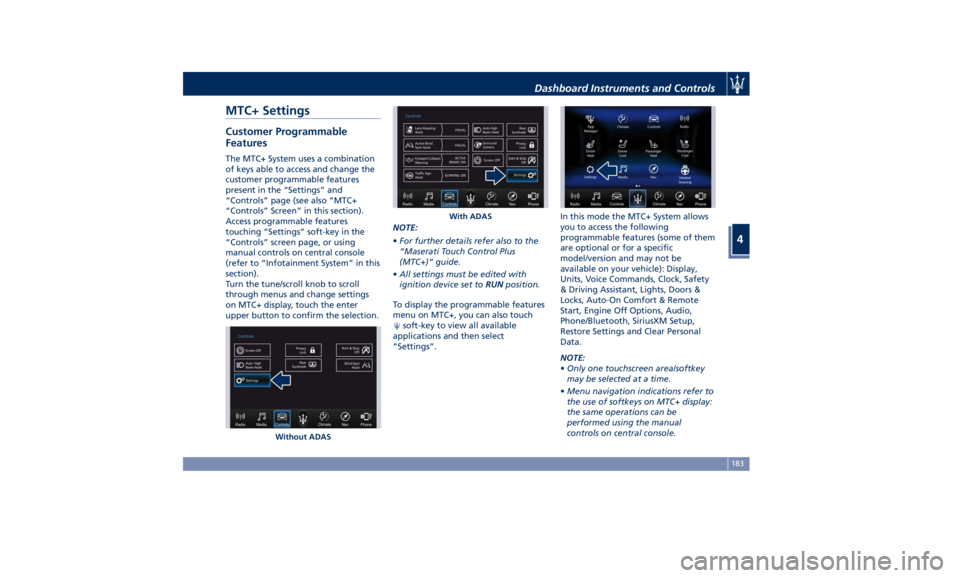
Access programmable features
touching “Settings” soft-key in the
“Controls” screen page, or using
manual controls on central console
(refer to “Infotainment System” in this
section).
Turn the tune/scroll knob to scroll
through menus and change settings
on MTC+ display, touch the enter
upper button to confirm the selection. NOTE:
• For further details refer also to the
“Maserati Touch Control Plus
(MTC+)” guide.
• All settings must be edited with
ignition device set to RUN position.
To display the programmable features
menu on MTC+, you can also touch
soft-key to view all available
applications and then select
“Settings”. In this mode the MTC+ System allows
you to access the following
programmable features (some of them
are optional or for a specific
model/version and may not be
available on your vehicle): Display,
Units, Voice Commands, Clock, Safety
& Driving Assistant, Lights, Doors &
Locks, Auto-On Comfort & Remote
Start, Engine Off Options, Audio,
Phone/Bluetooth, SiriusXM Setup,
Restore Settings and Clear Personal
Data.
NOTE:
• Only one touchscreen area/softkey
may be selected at a time.
• Menu navigation indications refer to
the use of softkeys on MTC+ display:
the same operations can be
performed using the manual
controls on central console.Without ADAS With ADASDashboard Instruments and Controls
4
183
Page 188 of 384
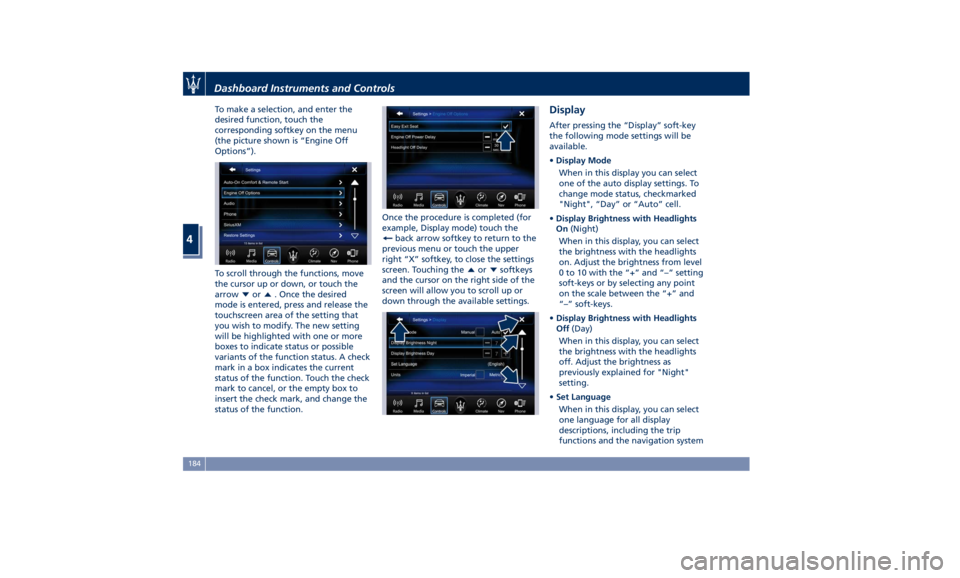
To make a selection, and enter the
desired function, touch the
corresponding softkey on the menu
(the picture shown is “Engine Off
Options”).
To scroll through the functions, move
the cursor up or down, or touch the
arrow
or . Once the desired
mode is entered, press and release the
touchscreen area of the setting that
you wish to modify. The new setting
will be highlighted with one or more
boxes to indicate status or possible
variants of the function status. A check
mark in a box indicates the current
status of the function. Touch the check
mark to cancel, or the empty box to
insert the check mark, and change the
status of the function. Once the procedure is completed (for
example, Display mode) touch the
back arrow softkey to return to the
previous menu or touch the upper
right “X” softkey, to close the settings
screen. Touching the
or softkeys
and the cursor on the right side of the
screen will allow you to scroll up or
down through the available settings. Display After pressing the “Display” soft-key
the following mode settings will be
available.
• Display Mode
When in this display you can select
one of the auto display settings. To
change mode status, checkmarked
"Night", “Day” or “Auto” cell.
• Display Brightness with Headlights
On (Night)
When in this display, you can select
the brightness with the headlights
on. Adjust the brightness from level
0 to 10 with the “+” and “–” setting
soft-keys or by selecting any point
on the scale between the “+” and
“–” soft-keys.
• Display Brightness with Headlights
Off (Day)
When in this display, you can select
the brightness with the headlights
off. Adjust the brightness as
previously explained for "Night"
setting.
• Set Language
When in this display, you can select
one language for all display
descriptions, including the trip
functions and the navigation systemDashboard Instruments and Controls
4
184
Page 189 of 384
(if equipped). The available
languages are specific to the target
markets.
• Touchscreen Beep
When in this display, you can turn
on or shut off the sound activated
by pressure of a touchscreen
soft-key.
• Controls Screen Time-Out
When this mode is selected, the
“Controls” screen will remain
displayed for 5 seconds. If this mode
is not selected, the screen will
remain displayed until closed
manually.
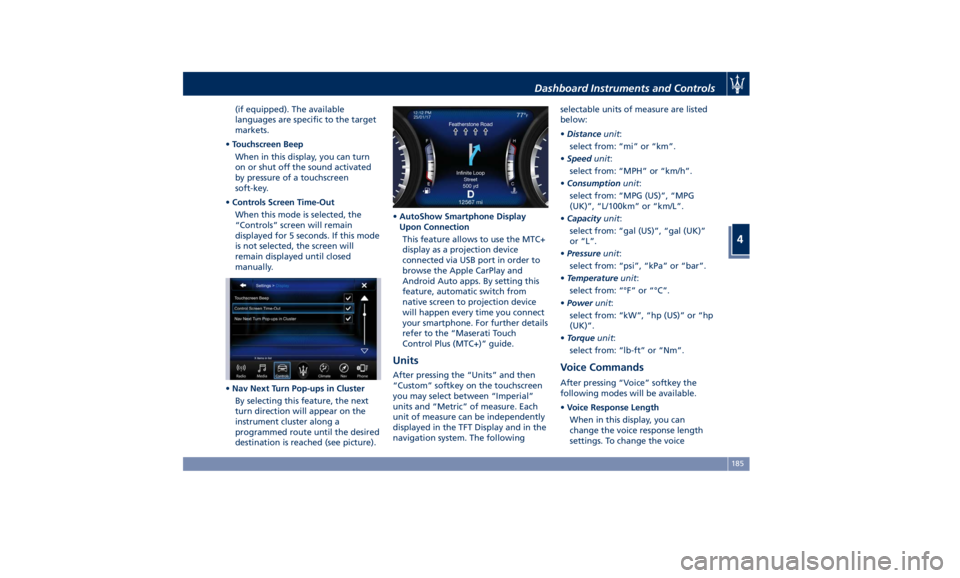
• Nav Next Turn Pop-ups in Cluster
By selecting this feature, the next
turn direction will appear on the
instrument cluster along a
programmed route until the desired
destination is reached (see picture). • AutoShow Smartphone Display
Upon Connection
This feature allows to use the MTC+
display as a projection device
connected via USB port in order to
browse the Apple CarPlay and
Android Auto apps. By setting this
feature, automatic switch from
native screen to projection device
will happen every time you connect
your smartphone. For further details
refer to the “Maserati Touch
Control Plus (MTC+)” guide.
Units After pressing the “Units” and then
“Custom” softkey on the touchscreen
you may select between “Imperial”
units and “Metric” of measure. Each
unit of measure can be independently
displayed in the TFT Display and in the
navigation system. The following selectable units of measure are listed
below:
• Distance unit :
select from: “mi” or “km”.
• Speed unit :
select from: “MPH” or “km/h”.
• Consumption unit :
select from: “MPG (US)”, “MPG
(UK)”, “L/100km” or “km/L”.
• Capacity unit :
select from: “gal (US)”, “gal (UK)”
or “L”.
• Pressure unit :
select from: “psi”, “kPa” or “bar”.
• Temperature unit :
select from: “°F” or “°C”.
• Power unit :
select from: “kW”, “hp (US)” or “hp
(UK)”.
• Torque unit :
select from: “lb-ft” or “Nm”.
Voice Commands After pressing “Voice” softkey the
following modes will be available.
• Voice Response Length
When in this display, you can
change the voice response length
settings. To change the voiceDashboard Instruments and Controls
4
185