High beams MASERATI GHIBLI 2019 Owners Manual
[x] Cancel search | Manufacturer: MASERATI, Model Year: 2019, Model line: GHIBLI, Model: MASERATI GHIBLI 2019Pages: 384, PDF Size: 13.33 MB
Page 115 of 384

Lighting Up External Lights according to the Position of the Lights Switch and Ignition Device, and according to the
Engine Status and Twilight Sensor Mode
Ignition
Device
Position Engine
Status Twilight
Sensor
Mode Lights Switch Position
AUTO
0
OFF –– All lights off. All lights off. Position lights (1),
side marker and
license plate lights on
(3). Low beams, position
(1), side marker and
license plate lights
on.
ACC Off – All lights off. All lights off. Position lights (1),
side marker and
license plate lights on
(2). Low beams, position
(1), side marker and
license plate lights on
(2).
RUN Off – All lights off. All lights off. Position lights (1),
side marker and
license plate lights on
(2). Low beams, position
(1), side marker and
license plate lights on
(2).
RUN On DAY DRL (1) on. DRL (1) on. DRL (1), rear position
lights, side marker
and license plate
lights on. Low beams, position
(1), side marker and
license plate lights
on.
RUN On NIGHT Low beams, position
(1), side marker and
license plate lights
on. DRL (1) on. DRL (1), rear position
lights, side marker
and license plate
lights on. Low beams, position
(1), side marker and
license plate lights
on.
(1) The lighting system uses the same LED for DRL and front position lights with two different levels of intensity: high for
DRL and low for position lights.
(2) The lights are powered up for 30 minutes to preserve the charge of the battery.
(3) The lights are powered up for 8 minutes to preserve the charge of the battery. Understanding the Vehicle
3
111
Page 118 of 384

Automatic High Beam (for
versions/markets, where
provided) The Automatic High Beam headlight
control system provides increased
forward lighting at night by
automating high beam control
through the use of the forward-facing
digital camera located behind the
rear-view mirror, which is the same
one used for example by the Lane
Keeping Assist - LKA system on vehicles
with ADAS systems.
This camera detects the environmental
luminosity, the headlamps of
oncoming vehicles and the tail lamps
of proceding vehicles in the front area.
In these cases, the system
automatically switches from high
beams to low beams until the
approaching vehicle is out of view.
Futhermore, the digital camera is able
to detect the urban areas and the
inhabited centers and to turn off the
high beams when driving near of one
of them.
The properly working for this feature
(if all the other conditions are met) is
ensured between 21.7 mph (35 km/h)
and 155 mph (250 km/h). Activation Mode
To activate Automatic High Beam
feature:
• Shift the multifunction lever onward
.
• Put the light switch in “AUTO”
position.
• Touch the “Controls” soft-key in the
lower part of the MTC+ display.
• Within 15 seconds, touch the "Auto
High Beam Assist" soft-key to turn
on the feature. • Within 15 seconds, touch the "Auto
High Beam Assist" soft-key a second
time to turn it off.
After these steps, the green indicator
on the upper right side of the TFT
display comes on.
Without ADAS With ADASUnderstanding the Vehicle
3
114
Page 120 of 384

Turn Signals
Move the multifunction lever all the
way up or down until the stop
triggers.
The left or right arrow on the
speedometer and tachometer
instrument cluster respectively, flashes
to show proper operation of the front
and rear turn signal lights. To activate lane change function, tap
the lever up or down once, without
moving beyond the detent. The turn
signals (right or left) will flash three
times then automatically turn off.
This function is useful when
overtaking or changing lanes.
NOTE:
• If either light remains on and does
not flash, or flashes at a fast rate,
check for a defective outside light. If
an indicator on the instrument
cluster fails while moving the lever,
then the turn indicator could be
defective.
• The message that a turn signal is on
will appear in the instrument cluster
and a continuous chime will sound if
the vehicle is driven more than 1 mile
(1.6 km) with either turn signal on. High Beams and Flashing
To switch on the high beams with the
light switch in headlamp
or
“AUTO” position, shift the
multifunction lever onward.
The blue telltale
will illuminate on
the tachometer.
By pulling the lever backward (toward
the steering wheel) you switch off the
high beams and switch on the low
beams.Understanding the Vehicle
3
116
Page 121 of 384

You can signal another vehicle with
your headlights by lightly pulling the
multifunction lever toward you. This
will turn on the high beams headlights
until the lever is released.
Flashing occurs also with lights off
(lights switch in position “0”) if the
ignition switch is RUN position.
CAUTION!
The high beams can only be switched
on manually by pushing the
multifunction lever forward.
WARNING!
If the high beams are activated, they
will turn on automatically every time
the low beams are switched on either
manually or automatically. We
recommend therefore that you switch them off when they are no longer
necessary and every time the twilight
sensor deactivates the external lights.
Automatic High Beams (if equipped)
The
Automatic High Beam headlight
control system provides increased
forward lighting at night by
automating high beam control
through the use of the forward digital
camera mounted behind the rearview
mirror, which is the same one used
also by the Lane Departure Warning
(LDW) system. This camera detects
vehicle specific light and automatically
switches from high beams to low
beams until the approaching vehicle is
out of view. Furthermore, the digital
camera is able to detect the urban
areas and the inhabited centers and to
turn off the high beams when driving
near of one of them.
The high beam can be turned back on
if there are all the necessary
conditions and if the vehicle speed
exceed 21.7 mph (35 km/h).
The “Auto High Beam Assist” feature
can be turned on or off using the
MTC+ System. Refer to “MTC+
Settings” in section "Dashboard
Instruments and Controls" for further
information. The function is enabled only if the
brightness sensor detects the right
lighting conditions.
To activate this function:
• Shift the multifunction lever onward
.
• Put the headlight switch in “AUTO”
position.
• Enable the “Auto High Beam Assist”
function on MTC+.
After these steps, the green indicator
on the upper right side of the TFT
display comes on.Understanding the Vehicle
3
117
Page 153 of 384

When the engine starts again, the
telltale will switch off.
If the telltale during an automatic
engine shutdown (AutoStop) phase
starts flashing, it will be necessary to
restart the engine normally with the
ignition device while holding down
the brake pedal.
See chapter “Normal Starting of the
Engine” in section “Driving” for
further information.
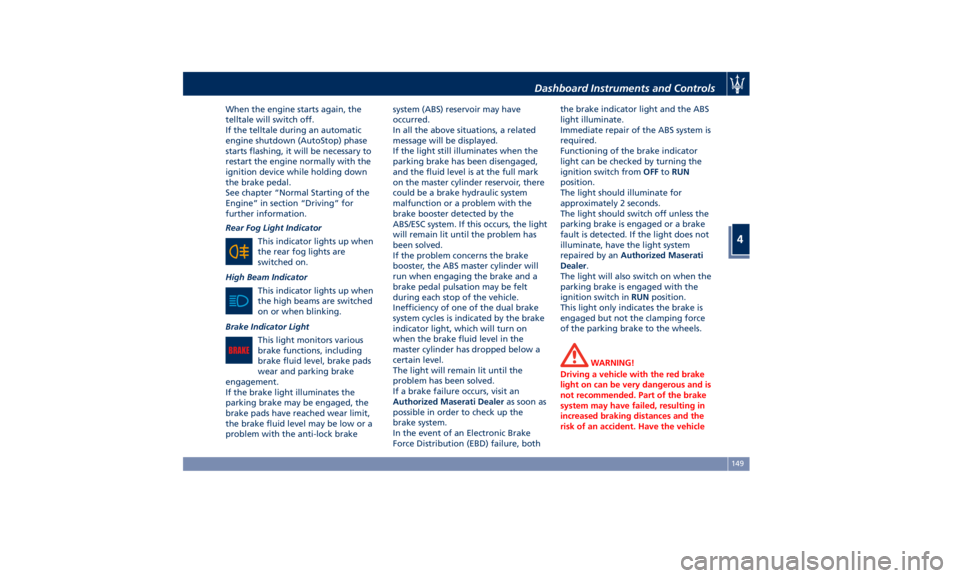
Rear Fog Light Indicator
This indicator lights up when
the rear fog lights are
switched on.
High Beam Indicator
This indicator lights up when
the high beams are switched
on or when blinking.
Brake Indicator Light
This light monitors various
brake functions, including
brake fluid level, brake pads
wear and parking brake
engagement.
If the brake light illuminates the
parking brake may be engaged, the
brake pads have reached wear limit,
the brake fluid level may be low or a
problem with the anti-lock brake system (ABS) reservoir may have
occurred.
In all the above situations, a related
message will be displayed.
If the light still illuminates when the
parking brake has been disengaged,
and the fluid level is at the full mark
on the master cylinder reservoir, there
could be a brake hydraulic system
malfunction or a problem with the
brake booster detected by the
ABS/ESC system. If this occurs, the light
will remain lit until the problem has
been solved.
If the problem concerns the brake
booster, the ABS master cylinder will
run when engaging the brake and a
brake pedal pulsation may be felt
during each stop of the vehicle.
Inefficiency of one of the dual brake
system cycles is indicated by the brake
indicator light, which will turn on
when the brake fluid level in the
master cylinder has dropped below a
certain level.
The light will remain lit until the
problem has been solved.
If a brake failure occurs, visit an
Authorized Maserati Dealer as soon as
possible in order to check up the
brake system.
In the event of an Electronic Brake
Force Distribution (EBD) failure, both the brake indicator light and the ABS
light illuminate.
Immediate repair of the ABS system is
required.
Functioning of the brake indicator
light can be checked by turning the
ignition switch from OFF to RUN
position.
The light should illuminate for
approximately 2 seconds.
The light should switch off unless the
parking brake is engaged or a brake
fault is detected. If the light does not
illuminate, have the light system
repaired by an Authorized Maserati
Dealer .
The light will also switch on when the
parking brake is engaged with the
ignition switch in RUN position.
This light only indicates the brake is
engaged but not the clamping force
of the parking brake to the wheels.
WARNING!
Driving a vehicle with the red brake
light on can be very dangerous and is
not recommended. Part of the brake
system may have failed, resulting in
increased braking distances and the
risk of an accident. Have the vehicleDashboard Instruments and Controls
4
149
Page 192 of 384

• Rain Sensing Auto Wipers
By selecting this feature, the system
will automatically activate the
windshield wipers if it senses
moisture on the windshield. The
feature can be set to “On” or “Off”.
• Hill Start Assist
This feature allows you to disable
the HSA system. The feature can be
set to “On” or “Off”. See “Brake
and Stability Control System” in
section “Driving” for further details.
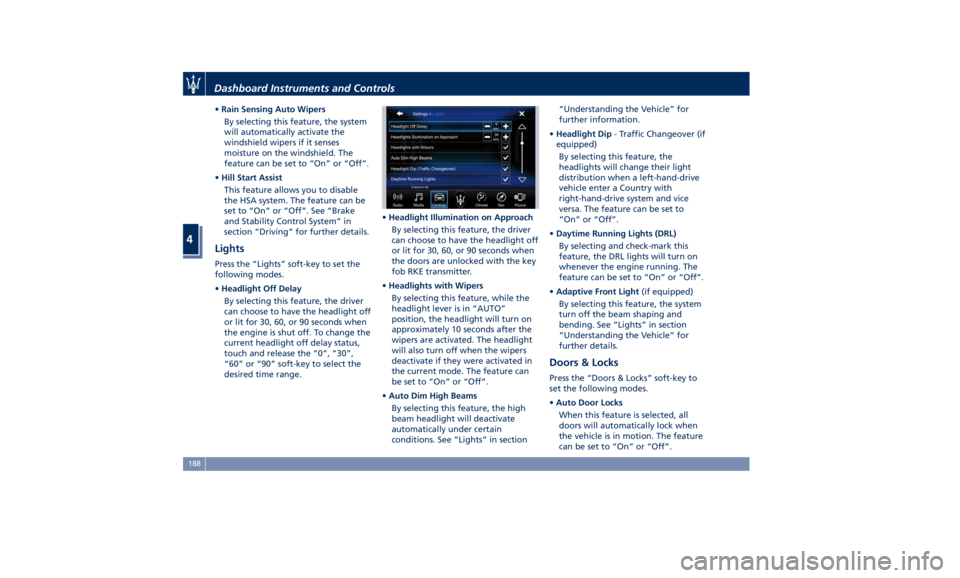
Lights Press the “Lights” soft-key to set the
following modes.
• Headlight Off Delay
By selecting this feature, the driver
can choose to have the headlight off
or lit for 30, 60, or 90 seconds when
the engine is shut off. To change the
current headlight off delay status,
touch and release the “0”, “30”,
“60” or “90” soft-key to select the
desired time range. • Headlight Illumination on Approach
By selecting this feature, the driver
can choose to have the headlight off
or lit for 30, 60, or 90 seconds when
the doors are unlocked with the key
fob RKE transmitter.
• Headlights with Wipers
By selecting this feature, while the
headlight lever is in “AUTO”
position, the headlight will turn on
approximately 10 seconds after the
wipers are activated. The headlight
will also turn off when the wipers
deactivate if they were activated in
the current mode. The feature can
be set to “On” or “Off”.
• Auto Dim High Beams
By selecting this feature, the high
beam headlight will deactivate
automatically under certain
conditions. See “Lights” in section “Understanding the Vehicle” for
further information.
• Headlight Dip - Traffic Changeover (if
equipped)
By selecting this feature, the
headlights will change their light
distribution when a left-hand-drive
vehicle enter a Country with
right-hand-drive system and vice
versa. The feature can be set to
“On” or “Off”.
• Daytime Running Lights (DRL)
By selecting and check-mark this
feature, the DRL lights will turn on
whenever the engine running. The
feature can be set to “On” or “Off”.
• Adaptive Front Light (if equipped)
By selecting this feature, the system
turn off the beam shaping and
bending. See “Lights” in section
“Understanding the Vehicle” for
further details.
Doors & Locks Press the “Doors & Locks” soft-key to
set the following modes.
• Auto Door Locks
When this feature is selected, all
doors will automatically lock when
the vehicle is in motion. The feature
can be set to “On” or “Off”.Dashboard Instruments and Controls
4
188
Page 265 of 384

providing limited autonomous braking
or additional brake support if the
driver is not braking adequately in the
event of a potential frontal collision.
In this state the system disables the
brake jerk.
Limited Operation and Service
Warning The messages indicating on display the
limited functionality or service at an
Authorized Maserati Dealer required
are the same as for the ACC system.
For further details, refer to “Adaptive
Cruise Control – ACC” in this section.
NOTE:
• The adjustment of the sensor could
be affected by strong shocks or light
collisions. This could affect the
system by reducing the systems
performance or could increase the
false positive rate. The adjustment of
the radar system has to be proved or
a new adjustment has to be
performed by an Authorized
Maserati Dealer .
• The radar system requires specific
feature to detect objects. The
detection could be disturbed/
reduced by environment influences,
for example by electrical field or the
object itself. Object with small radar reflection properties could not be
detected or detected late.
Radar Device - Regulatory
Information The “Regulatory Information” for all
the radio frequency and radar devices
can be consulted by accessing the
“Services” section on the website
www.maserati.com.
Lane Keeping Assist - LKA
(optional, with ACC only) This system was designed especially
for highway or freeway driving, to
reduce the risk that the vehicle, under
particular circumstances, accidentally
departs from the lane in use. When
this happens, graphic instructions on
instrument cluster display together
with steering torque application and
steering wheel vibration (depending
on the distance to the line) warn the
driver that the vehicle is going out of
the lane initiates a steering maneuver
to try to prevent the lane exit.
To detect lane lines, the system uses
the forward-facing camera behind the
rear-view mirror, which is the same
one used also by the lighting system
to manage the automatic high beams.
The logic core is in the front radar.
LKA system remembers the condition
it was in before turning off the
vehicle.
Refer to “MTC+ "Controls" Screen” in
section “Dashboard Instruments and
Controls” for further information.Driving
5
261
Page 303 of 384

• Reduce your speed, especially on
roads with no streetlights.
• Stop at early signs of drowsiness.
Continuing to drive would be a risk
for yourself and for others. Have a
rest before continuing your trip.
• Keep the vehicle at a greater
distance from vehicles in front of
you than you would during the day:
it is difficult to assess the speed of
other vehicles when you only see the
lights.
• Use the high beams only outside of
densely-populated areas and when
you are sure that they will not
disturb other drivers.
• When another vehicle is
approaching, switch from high
beams (if on) to low beams.
• Keep lights and headlights clean.
• Outside of densely-populated areas,
beware of animals crossing the road.
Driving in the Rain
Rain and wet roads are dangerous. On
a wet road all maneuvers are more
difficult since wheel grip on the road
is significantly reduced. This means
that braking distances increase
considerably and road grip decreases.
Some advices for driving in the rain
are listed below. • Reduce your speed and keep a
greater safety distance from the
vehicles in front of you. High speed
may result in a loss of vehicle
control.
• When driving on wet or slushy roads,
it is possible for a wedge of water to
build up between the tire and road
surface. This is known as
aquaplaning and may cause partial
or complete loss of vehicle control
and stopping ability. To reduce this
possibility: slow down if the road has
standing water or puddles.
• Heavy rain substantially reduces
visibility. In these circumstances, even
during the day, turn on the low
beams, to be more visible to other
drivers.
• Set the air conditioning and heating
system controls on the defogging
function, in order to avoid any
visibility problem.
• Periodically check the conditions of
the windshield wiper blades.
• In low grip conditions use “I.C.E.”
driving mode (see chapters “Drive
Mode” in this section).
• Avoid driving with ESC OFF as this
will likely cause a loss of control of
the vehicle. Driving in Fog
If the fog is dense, avoid traveling if
possible.
When driving in mist, blanket fog or
when there is the possibility of banks
of fog, please consider some advices
listed below.
• Keep a moderate speed.
• Even in daytime, turn on the low
beams and rear fog lights. Do not
use the high beams.
• Remember that fog creates
dampness on the asphalt and thus
any type of maneuver is more
difficult and braking distances are
extended.
• Keep a safe distance from the
vehicle in front of you.
• Avoid sudden changes in speed as
much as possible.
• Whenever possible, avoid
overtaking.
• If you are forced to stop the vehicle
(breakdowns, impossibility of
proceeding due to poor visibility,
etc.), first of all, try to stop off of the
travel lane. Then turn on the hazard
warning flashers and, if possible, the
low beams.Driving
5
299
Page 304 of 384

CAUTION!
Be aware that rear fog lights can
bother the drivers following your
vehicle: when visibility is back to
normal, turn off these lights.
Driving in the Mountains
Mountain
roads usually
have many
narrow turns and curves, tunnels and
steep uphill or downhill slopes: please
consider some advices listed below.
• Drive at a moderate speed, avoid
“cutting” corners.
• When driving inside a tunnel in
daylight turn on the low beams in
advance; avoid high beams and be
aware of the rapid brightness
change. Avoid abrupt maneuvers
that could be dangerous for the
following vehicle.
• Never coast downhill with the engine
off or in neutral.
• Remember that passing other
vehicles when driving uphill is slower
and thus requires more free distance
on the road. If you are being
overtaken on a hill, slow down and
allow the other vehicle to pass. Driving on Snow or Ice
Please consider some general advice
for driving in these conditions, listed
below.
• Maintain a very moderate speed.
• Fit snow chains or specific tires if the
road is covered with snow: see the
paragraphs “Tires – General
Information” in this section.
• We recommend you to activate the
“I.C.E.” mode (see chapters “Drive
Mode” in this section).
• During the winter season, even
apparently dry roads can have icy
sections. Be careful when crossing
bridges, viaducts and roads that have
little exposure to the sun and are
bordered by trees and rocks. They
may be icy.
• Keep an ample safe distance from
the vehicles in front of you.
WARNING!
• Rapid acceleration on slippery
surfaces is dangerous. Unequal
traction can cause sudden pulling of
the driving wheels. You could lose
control of the vehicle and possibly
have a collision. Accelerate slowly
and carefully whenever there is likely to be poor traction (ice, snow,
wet mud, loose sand, etc.).
• Do not drive on or across a road or
path where water is flowing and/or
rising (as in storm run-off). Flowing
water can wear away the road or
path surface and cause your vehicle
to sink into deeper water.
Furthermore, flowing and/or rising
water can carry your vehicle away
swiftly. Failure to follow this
warning may result in injuries that
are serious or fatal to you, your
passengers, and others around you.
Although your vehicle is capable of
driving
through shallow standing
water, consider the following Cautions
and Warnings before doing so.
CAUTION!
• Always check the depth of the
standing water before driving
through it. Never drive through
standing water that is deeper than
47 in (150 mm).
• Determine the condition of the road
or the path that is under water and if
there are any obstacles in the way
before driving through the standing
water.Driving
5
300