MASERATI GRANTURISMO 2019 Owners Manual
Manufacturer: MASERATI, Model Year: 2019, Model line: GRANTURISMO, Model: MASERATI GRANTURISMO 2019Pages: 286, PDF Size: 8.08 MB
Page 91 of 286
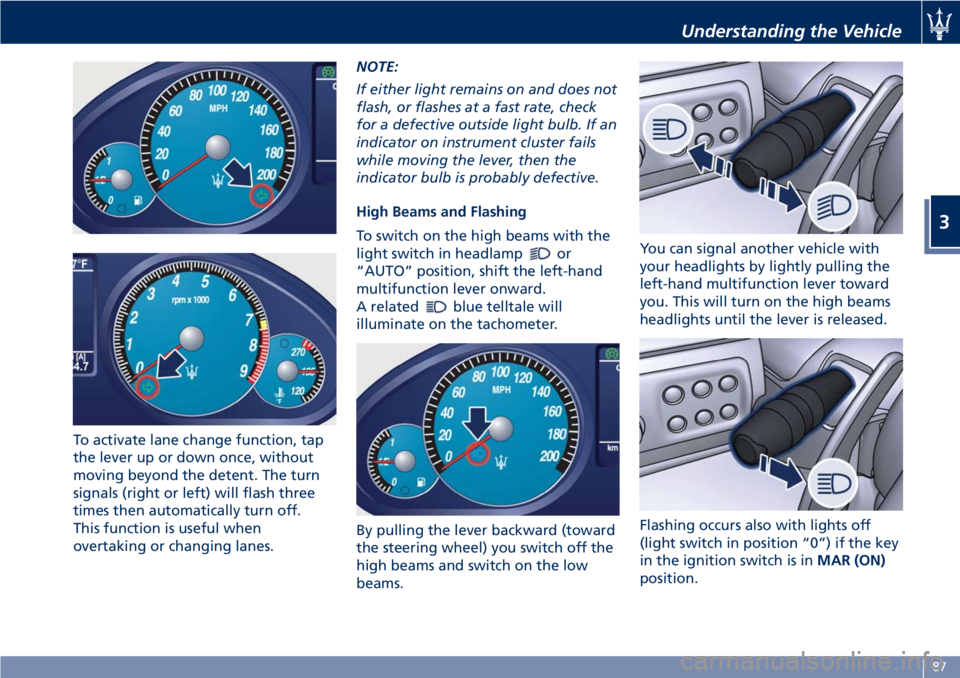
To activate lane change function, tap
the lever up or down once, without
moving beyond the detent. The turn
signals (right or left) will flash three
times then automatically turn off.
This function is useful when
overtaking or changing lanes. NOTE:
If either light remains on and does not
flash, or flashes at a fast rate, check
for a defective outside light bulb. If an
indicator on instrument cluster fails
while moving the lever, then the
indicator bulb is probably defective.
High Beams and Flashing
To switch on the high beams with the
light switch in headlamp
or
“AUTO” position, shift the left-hand
multifunction lever onward.
A related
blue telltale will
illuminate on the tachometer.
By pulling the lever backward (toward
the steering wheel) you switch off the
high beams and switch on the low
beams. You can signal another vehicle with
your headlights by lightly pulling the
left-hand multifunction lever toward
you. This will turn on the high beams
headlights until the lever is released.
Flashing occurs also with lights off
(light switch in position “0”) if the key
in the ignition switch is in MAR (ON)
position.Understanding the Vehicle
3
87
Page 92 of 286
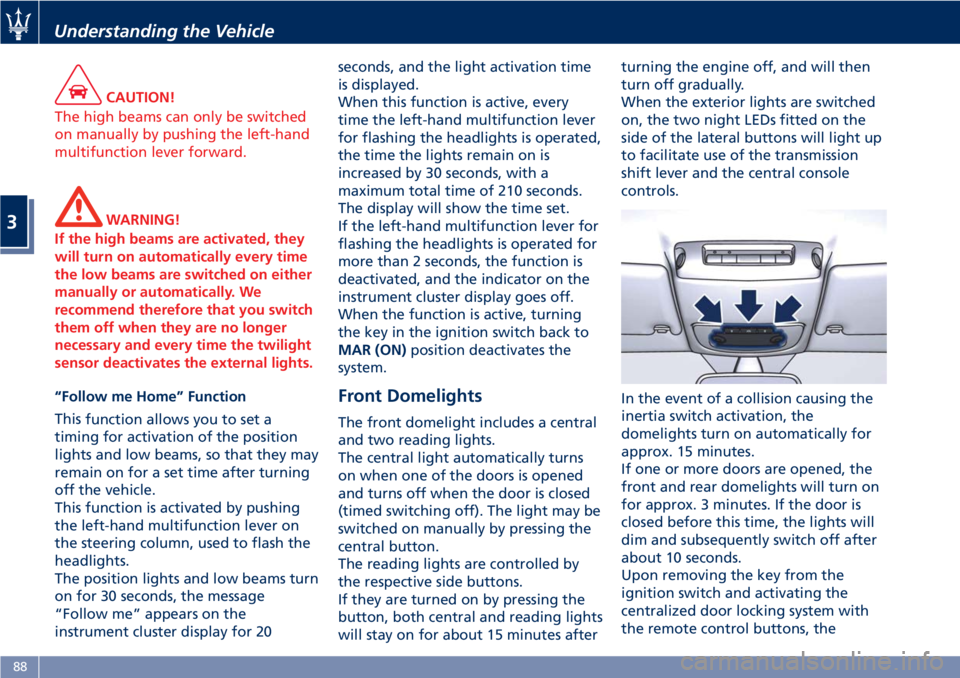
CAUTION!
The high beams can only be switched
on manually by pushing the left-hand
multifunction lever forward.
WARNING!
If the high beams are activated, they
will turn on automatically every time
the low beams are switched on either
manually or automatically. We
recommend therefore that you switch
them off when they are no longer
necessary and every time the twilight
sensor deactivates the external lights.
“Follow me Home” Function
This
function allows you to set a
timing for activation of the position
lights and low beams, so that they may
remain on for a set time after turning
off the vehicle.
This function is activated by pushing
the left-hand multifunction lever on
the steering column, used to flash the
headlights.
The position lights and low beams turn
on for 30 seconds, the message
“Follow me” appears on the
instrument cluster display for 20 seconds, and the light activation time
is displayed.
When this function is active, every
time the left-hand multifunction lever
for flashing the headlights is operated,
the time the lights remain on is
increased by 30 seconds, with a
maximum total time of 210 seconds.
The display will show the time set.
If the left-hand multifunction lever for
flashing the headlights is operated for
more than 2 seconds, the function is
deactivated, and the indicator on the
instrument cluster display goes off.
When the function is active, turning
the key in the ignition switch back to
MAR (ON) position deactivates the
system.
Front Domelights The front domelight includes a central
and two reading lights.
The central light automatically turns
on when one of the doors is opened
and turns off when the door is closed
(timed switching off). The light may be
switched on manually by pressing the
central button.
The reading lights are controlled by
the respective side buttons.
If they are turned on by pressing the
button, both central and reading lights
will stay on for about 15 minutes after turning the engine off, and will then
turn off gradually.
When the exterior lights are switched
on, the two night LEDs fitted on the
side of the lateral buttons will light up
to facilitate use of the transmission
shift lever and the central console
controls.
In the event of a collision causing the
inertia switch activation, the
domelights turn on automatically for
approx. 15 minutes.
If one or more doors are opened, the
front and rear domelights will turn on
for approx. 3 minutes. If the door is
closed before this time, the lights will
dim and subsequently switch off after
about 10 seconds.
Upon removing the key from the
ignition switch and activating the
centralized door locking system with
the remote control buttons, theUnderstanding the Vehicle
3
88
Page 93 of 286
domelights turn on for about 10
seconds.
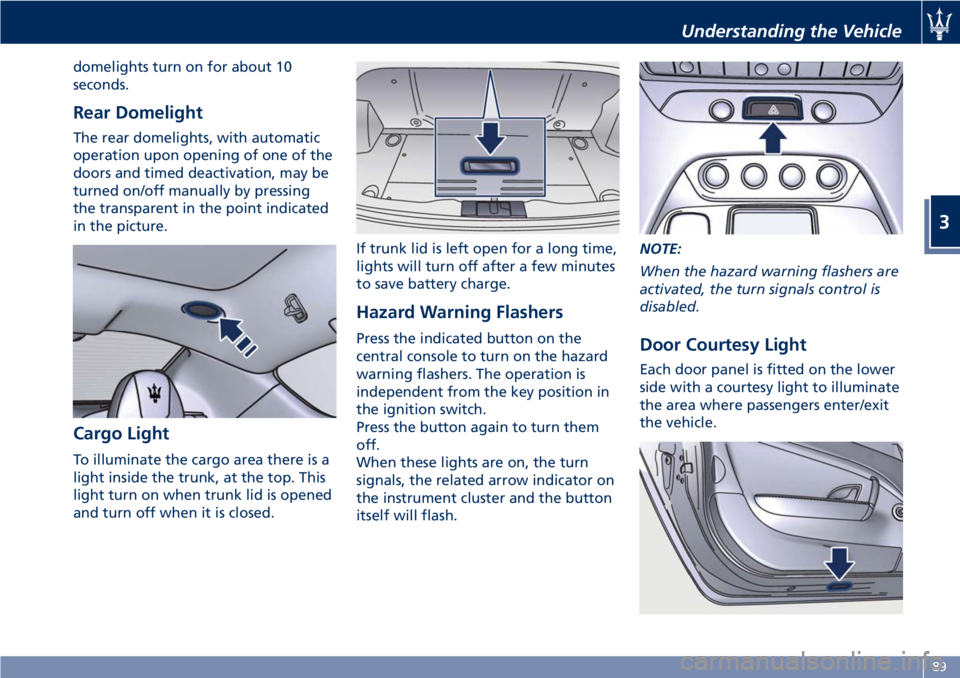
Rear Domelight The rear domelights, with automatic
operation upon opening of one of the
doors and timed deactivation, may be
turned on/off manually by pressing
the transparent in the point indicated
in the picture.
Cargo Light To illuminate the cargo area there is a
light inside the trunk, at the top. This
light turn on when trunk lid is opened
and turn off when it is closed. If trunk lid is left open for a long time,
lights will turn off after a few minutes
to save battery charge.
Hazard Warning Flashers Press the indicated button on the
central console to turn on the hazard
warning flashers. The operation is
independent from the key position in
the ignition switch.
Press the button again to turn them
off.
When these lights are on, the turn
signals, the related arrow indicator on
the instrument cluster and the button
itself will flash. NOTE:
When the hazard warning flashers are
activated, the turn signals control is
disabled.
Door Courtesy Light Each door panel is fitted on the lower
side with a courtesy light to illuminate
the area where passengers enter/exit
the vehicle.Understanding the Vehicle
3
89
Page 94 of 286
Windshield Wipers and
Washers The multifunction lever on the
right-hand side of the steering column
operates the windshield wipers and
washer when the key in the ignition
switch is turned in MAR (ON) position.
The windshield washer and headlight
washer share the same fluid reservoir,
and a low fluid level is indicated by the
same warning light and by the
message on the instrument cluster.
To refill the fluid, see “Maintenance
Procedures” in section “Maintenance
and Care”.
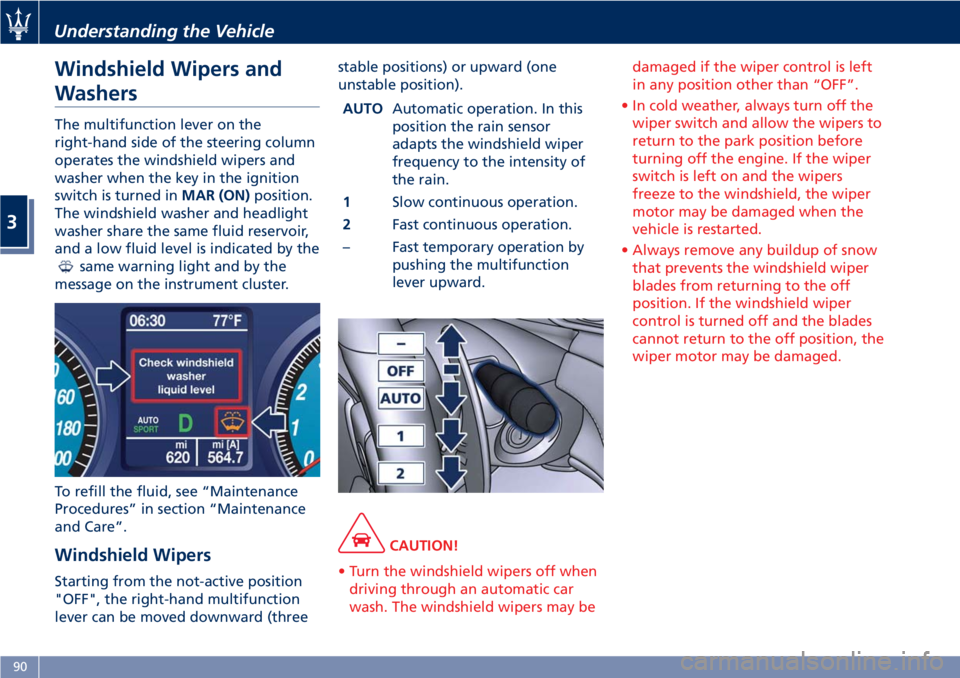
Windshield Wipers
Starting from the not-active position
"OFF", the right-hand multifunction
lever can be moved downward (three stable positions) or upward (one
unstable position).
AUTO Automatic operation. In this
position the rain sensor
adapts the windshield wiper
frequency to the intensity of
the rain.
1 Slow continuous operation.
2 Fast continuous operation.
– Fast temporary operation by
pushing the multifunction
lever upward.
CAUTION!
• Turn the windshield wipers off when
driving through an automatic car
wash. The windshield wipers may be damaged if the wiper control is left
in any position other than “OFF”.
• In cold weather, always turn off the
wiper switch and allow the wipers to
return to the park position before
turning off the engine. If the wiper
switch is left on and the wipers
freeze to the windshield, the wiper
motor may be damaged when the
vehicle is restarted.
• Always remove any buildup of snow
that prevents the windshield wiper
blades from returning to the off
position. If the windshield wiper
control is turned off and the blades
cannot return to the off position, the
wiper motor may be damaged.Understanding the Vehicle
3
90
Page 95 of 286
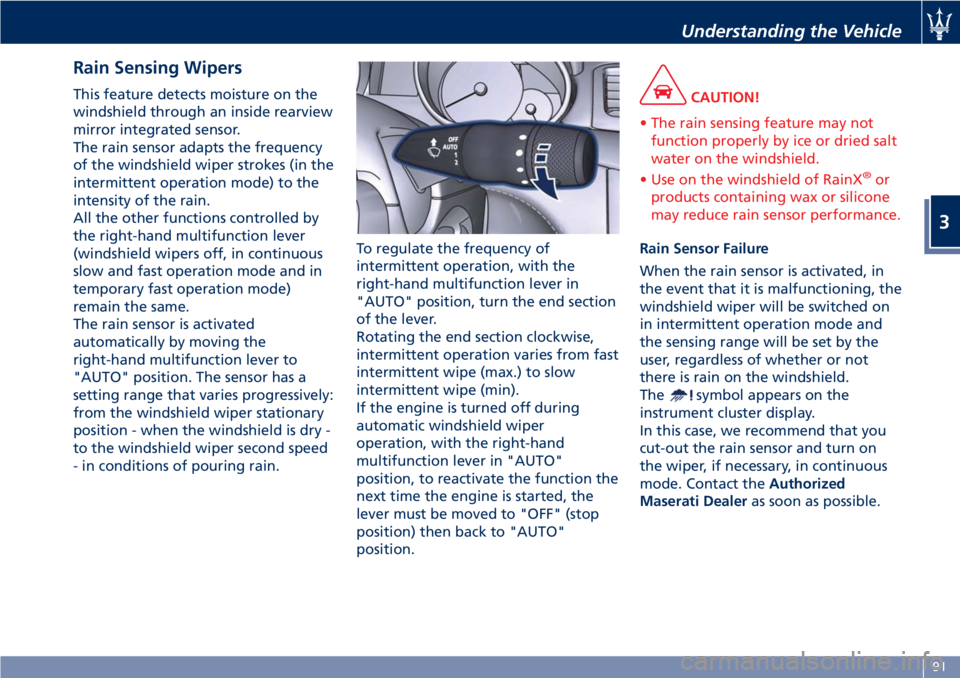
Rain Sensing Wipers This feature detects moisture on the
windshield through an inside rearview
mirror integrated sensor.
The rain sensor adapts the frequency
of the windshield wiper strokes (in the
intermittent operation mode) to the
intensity of the rain.
All the other functions controlled by
the right-hand multifunction lever
(windshield wipers off, in continuous
slow and fast operation mode and in
temporary fast operation mode)
remain the same.
The rain sensor is activated
automatically by moving the
right-hand multifunction lever to
"AUTO" position. The sensor has a
setting range that varies progressively:
from the windshield wiper stationary
position - when the windshield is dry -
to the windshield wiper second speed
- in conditions of pouring rain. To regulate the frequency of
intermittent operation, with the
right-hand multifunction lever in
"AUTO" position, turn the end section
of the lever.
Rotating the end section clockwise,
intermittent operation varies from fast
intermittent wipe (max.) to slow
intermittent wipe (min).
If the engine is turned off during
automatic windshield wiper
operation, with the right-hand
multifunction lever in "AUTO"
position, to reactivate the function the
next time the engine is started, the
lever must be moved to "OFF" (stop
position) then back to "AUTO"
position. CAUTION!
• The rain sensing feature may not
function properly by ice or dried salt
water on the windshield.
• Use on the windshield of RainX ®
or
products containing wax or silicone
may reduce rain sensor performance.
Rain Sensor Failure
When
the rain sensor is activated, in
the event that it is malfunctioning, the
windshield wiper will be switched on
in intermittent operation mode and
the sensing range will be set by the
user, regardless of whether or not
there is rain on the windshield.
The
symbol appears on the
instrument cluster display.
In this case, we recommend that you
cut-out the rain sensor and turn on
the wiper, if necessary, in continuous
mode. Contact the Authorized
Maserati Dealer as soon as possible.Understanding the Vehicle
3
91
Page 96 of 286
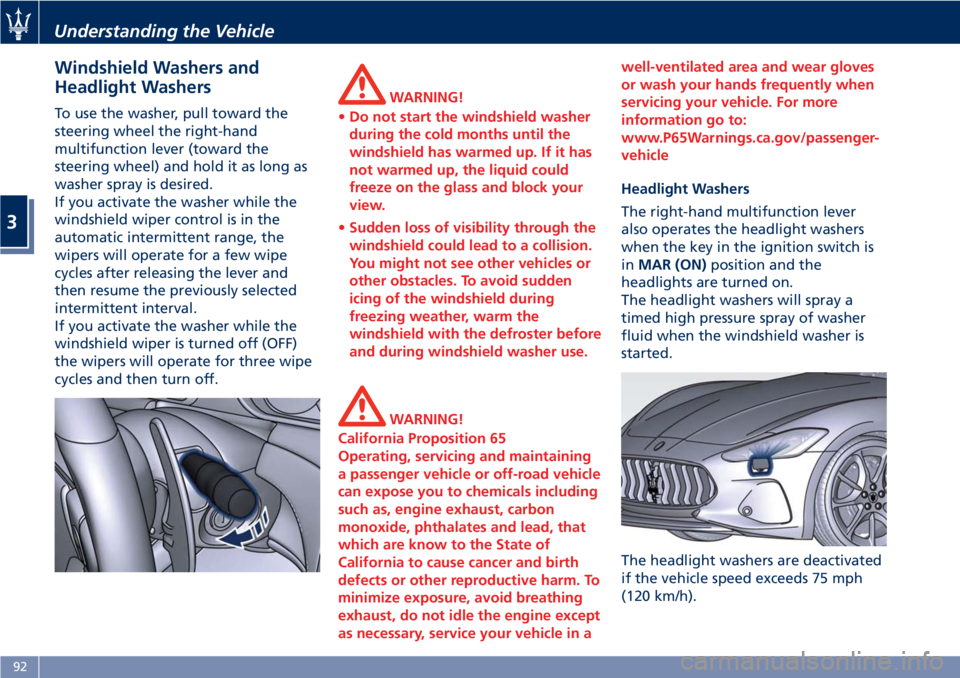
Windshield Washers and
Headlight Washers To use the washer, pull toward the
steering wheel the right-hand
multifunction lever (toward the
steering wheel) and hold it as long as
washer spray is desired.
If you activate the washer while the
windshield wiper control is in the
automatic intermittent range, the
wipers will operate for a few wipe
cycles after releasing the lever and
then resume the previously selected
intermittent interval.
If you activate the washer while the
windshield wiper is turned off (OFF)
the wipers will operate for three wipe
cycles and then turn off. WARNING!
• Do not start the windshield washer
during the cold months until the
windshield has warmed up. If it has
not warmed up, the liquid could
freeze on the glass and block your
view.
• Sudden loss of visibility through the
windshield could lead to a collision.
You might not see other vehicles or
other obstacles. To avoid sudden
icing of the windshield during
freezing weather, warm the
windshield with the defroster before
and during windshield washer use.
WARNING!
California Proposition 65
Operating, servicing and maintaining
a passenger vehicle or off-road vehicle
can expose you to chemicals including
such as, engine exhaust, carbon
monoxide, phthalates and lead, that
which are know to the State of
California to cause cancer and birth
defects or other reproductive harm. To
minimize exposure, avoid breathing
exhaust, do not idle the engine except
as necessary, service your vehicle in a well-ventilated area and wear gloves
or wash your hands frequently when
servicing your vehicle. For more
information go to:
www.P65Warnings.ca.gov/passenger-
vehicle
Headlight Washers
The
right-hand multifunction lever
also operates the headlight washers
when the key in the ignition switch is
in MAR (ON) position and the
headlights are turned on.
The headlight washers will spray a
timed high pressure spray of washer
fluid when the windshield washer is
started.
The headlight washers are deactivated
if the vehicle speed exceeds 75 mph
(120 km/h).Understanding the Vehicle
3
92
Page 97 of 286
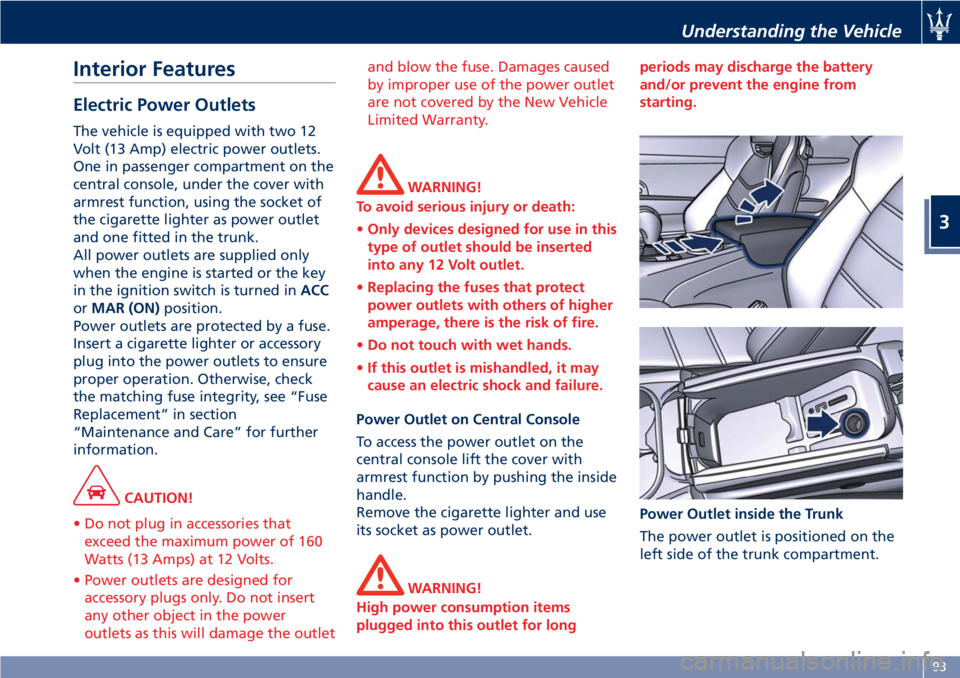
Interior Features Electric Power Outlets The vehicle is equipped with two 12
Volt (13 Amp) electric power outlets.
One in passenger compartment on the
central console, under the cover with
armrest function, using the socket of
the cigarette lighter as power outlet
and one fitted in the trunk.
All power outlets are supplied only
when the engine is started or the key
in the ignition switch is turned in ACC
or MAR (ON) position.
Power outlets are protected by a fuse.
Insert a cigarette lighter or accessory
plug into the power outlets to ensure
proper operation. Otherwise, check
the matching fuse integrity, see “Fuse
Replacement” in section
“Maintenance and Care” for further
information.
CAUTION!
• Do not plug in accessories that
exceed the maximum power of 160
Watts (13 Amps) at 12 Volts.
• Power outlets are designed for
accessory plugs only. Do not insert
any other object in the power
outlets as this will damage the outlet and blow the fuse. Damages caused
by improper use of the power outlet
are not covered by the New Vehicle
Limited Warranty.
WARNING!
To avoid serious injury or death:
• Only devices designed for use in this
type of outlet should be inserted
into any 12 Volt outlet.
• Replacing the fuses that protect
power outlets with others of higher
amperage, there is the risk of fire.
• Do not touch with wet hands.
• If this outlet is mishandled, it may
cause an electric shock and failure.
Power Outlet on Central Console
T o access the power outlet on the
central console lift the cover with
armrest function by pushing the inside
handle.
Remove the cigarette lighter and use
its socket as power outlet.
WARNING!
High power consumption items
plugged into this outlet for long periods may discharge the battery
and/or prevent the engine from
starting.
Power Outlet inside the Trunk
The
power outlet is positioned on the
left side of the trunk compartment.Understanding the Vehicle
3
93
Page 98 of 286
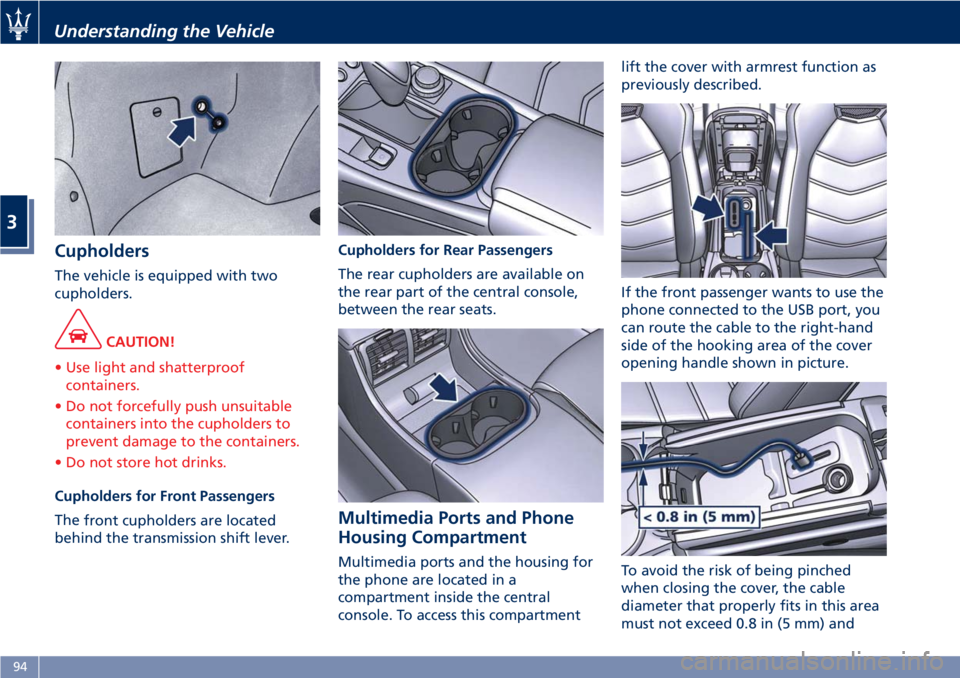
Cupholders The vehicle is equipped with two
cupholders.
CAUTION!
• Use light and shatterproof
containers.
• Do not forcefully push unsuitable
containers into the cupholders to
prevent damage to the containers.
• Do not store hot drinks.
Cupholders for Front Passengers
The
front cupholders are located
behind the transmission shift lever. Cupholders for Rear Passengers
The rear cupholders are available on
the rear part of the central console,
between the rear seats.
Multimedia Ports and Phone
Housing Compartment Multimedia ports and the housing for
the phone are located in a
compartment inside the central
console. To access this compartment lift the cover with armrest function as
previously described.
If the front passenger wants to use the
phone connected to the USB port, you
can route the cable to the right-hand
side of the hooking area of the cover
opening handle shown in picture.
To avoid the risk of being pinched
when closing the cover, the cable
diameter that properly fits in this area
must not exceed 0.8 in (5 mm) andUnderstanding the Vehicle
3
94
Page 99 of 286
must pass as close as possible to the
side walls of the containment
compartment, avoiding the hooking
area of the handle.
The AUX auxiliary port features:
• typical port impedance between
AUX-IN and AUX_REF: 13 Kohm;
• max. applicable voltage: 0.75 Vrms at
1 kHz;
• port compatible only with 3.5 mm
jack connectors (not included).
Any player with these characteristics
and analog audio output (headset
output type) can be served by the
MTC+ System. The system can
recognize the connection to a player
outlet autonomously, by enabling
access to the audio functions
connected to this source.
This
USB port can be used for
data exchange and charge of the
connected source (refer to the MTC+
guide for further details).
Through this USB input is possible to
recharge the connected device for
about an hour from when the key in
the ignition switch is turned in STOP
(OFF) position (“Active Charging”
feature). When this feature is enabled,
the USB port will be backlit.
In this compartment there is also an
SD memory card input. Once inserted into the slot, to extract it press lightly
on the card.
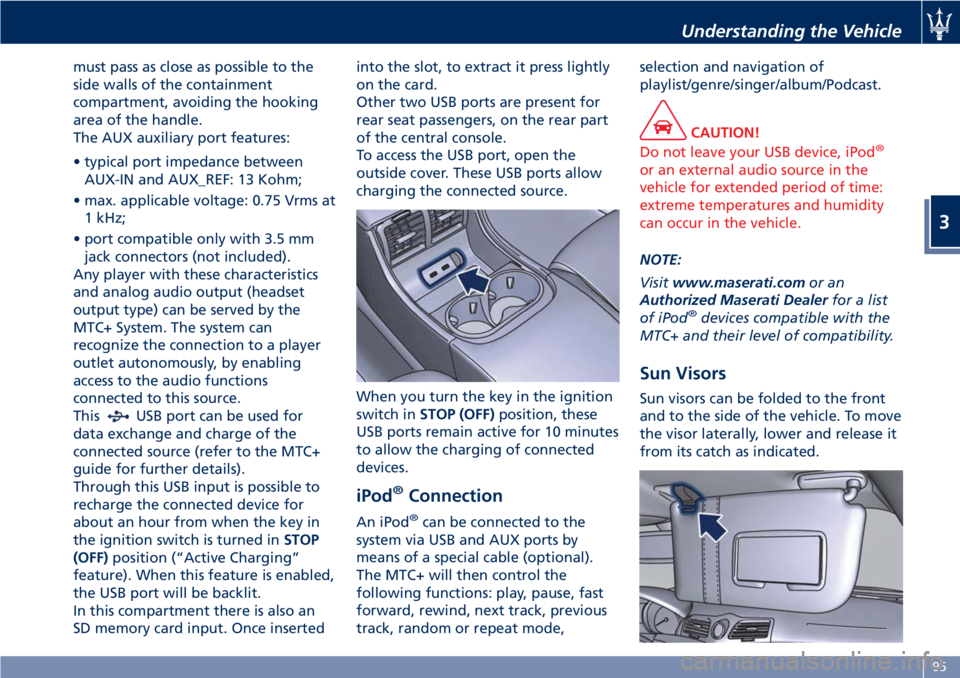
Other two USB ports are present for
rear seat passengers, on the rear part
of the central console.
To access the USB port, open the
outside cover. These USB ports allow
charging the connected source.
When you turn the key in the ignition
switch in STOP (OFF) position, these
USB ports remain active for 10 minutes
to allow the charging of connected
devices.
iPod ®
Connection An iPod ®
can be connected to the
system via USB and AUX ports by
means of a special cable (optional).
The MTC+ will then control the
following functions: play, pause, fast
forward, rewind, next track, previous
track, random or repeat mode, selection and navigation of
playlist/genre/singer/album/Podcast.
CAUTION!
Do not leave your USB device, iPod ®
or an external audio source in the
vehicle for extended period of time:
extreme temperatures and humidity
can occur in the vehicle.
NOTE:
V
isit www.maserati.com or an
Authorized Maserati Dealer for a list
of iPod ®
devices compatible with the
MTC+ and their level of compatibility.
Sun Visors Sun visors can be folded to the front
and to the side of the vehicle. To move
the visor laterally, lower and release it
from its catch as indicated.Understanding the Vehicle
3
95
Page 100 of 286
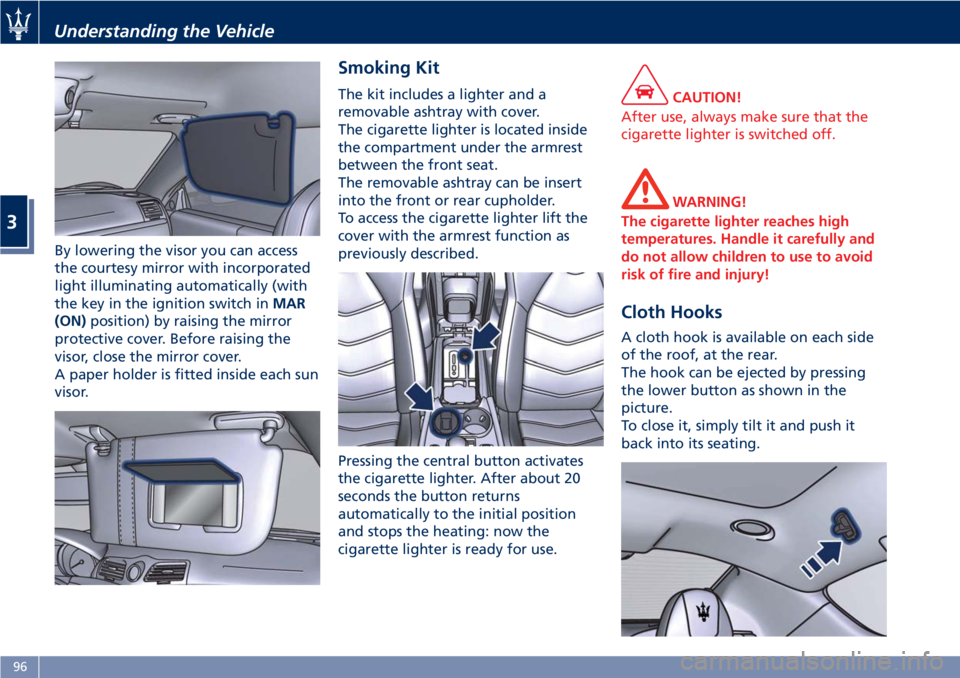
By lowering the visor you can access
the courtesy mirror with incorporated
light illuminating automatically (with
the key in the ignition switch in MAR
(ON) position) by raising the mirror
protective cover. Before raising the
visor, close the mirror cover.
A paper holder is fitted inside each sun
visor. Smoking Kit The kit includes a lighter and a
removable ashtray with cover.
The cigarette lighter is located inside
the compartment under the armrest
between the front seat.
The removable ashtray can be insert
into the front or rear cupholder.
To access the cigarette lighter lift the
cover with the armrest function as
previously described.
Pressing the central button activates
the cigarette lighter. After about 20
seconds the button returns
automatically to the initial position
and stops the heating: now the
cigarette lighter is ready for use. CAUTION!
After use, always make sure that the
cigarette lighter is switched off.
WARNING!
The cigarette lighter reaches high
temperatures. Handle it carefully and
do not allow children to use to avoid
risk of fire and injury!
Cloth Hooks A cloth hook is available on each side
of the roof, at the rear.
The hook can be ejected by pressing
the lower button as shown in the
picture.
To close it, simply tilt it and push it
back into its seating.Understanding the Vehicle
3
96