sensor MASERATI GRANTURISMO CONVERTIBLE 2019 User Guide
[x] Cancel search | Manufacturer: MASERATI, Model Year: 2019, Model line: GRANTURISMO CONVERTIBLE, Model: MASERATI GRANTURISMO CONVERTIBLE 2019Pages: 296, PDF Size: 9.01 MB
Page 75 of 296
1 Adjustable side air vents.
2 Hood lid opening lever.
3 Headlight and fog light switch.
4 "Mode" and adjust "+" and
"–" buttons.
5 Front parking sensors
disabling/enabling.
6 Trunk lid opening button.
7 Fuel tank door opening button
(see "Refueling" in section
"Driving" for operation).
8 Multifunction lever (Cruise
Control, turn signals, headlight
washer and headlight
selection).
9 Lower gearshift paddle
"DOWN".
10 Instrument cluster.
11 Steering wheel height and
depth adjustment lever.
12 Upper air vent.
13 Sun radiation sensor.
14 Horn control.
15 Multimedia controls repeated
on the steering wheel.
16 Windshield/headlight
wiper/washer control lever. 17 Upper gearshift paddle "UP".
18 Ignition switch.
19 Clock.
20 Central adjustable air vents.
21 MTC+ display.
22 Glove compartment.
23 Side window vents.
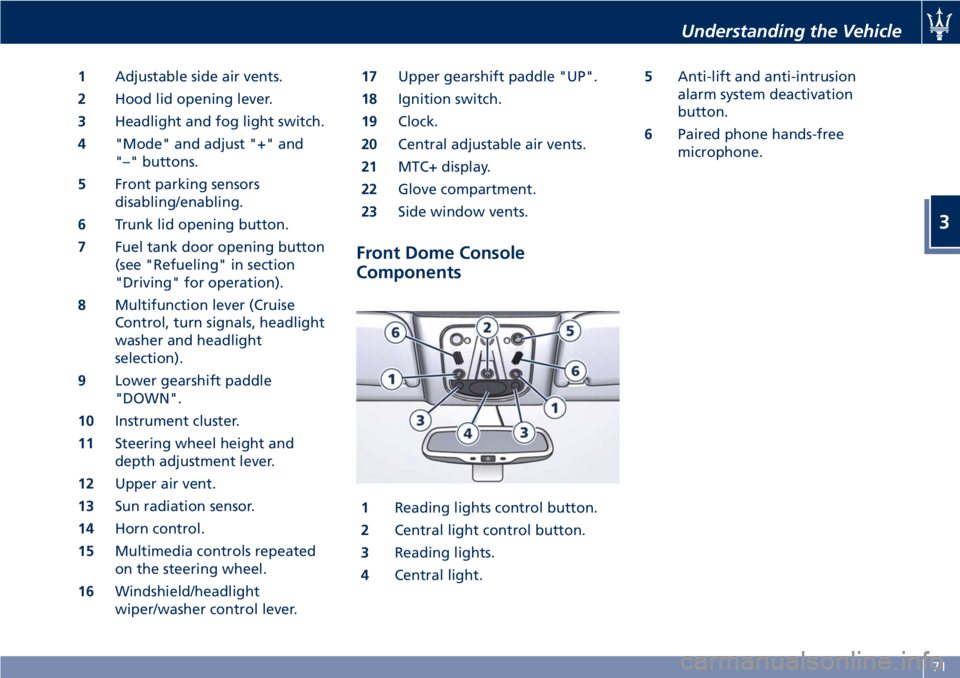
Front Dome Console
Components
1 Reading lights control button.
2 Central light control button.
3 Reading lights.
4 Central light. 5 Anti-lift and anti-intrusion
alarm system deactivation
button.
6 Paired phone hands-free
microphone.Understanding the Vehicle
3
71
Page 89 of 296
sensor deactivates the external
lights.
• In case of fog during the day,
position lights and low beam lights
are not turned on automatically. The
driver must always be ready to turn
the lights on manually, including
rear fog lights, if necessary.
• The driver is always responsible for
turning on the external lights,
depending on the light outside and
in compliance with the applicable
legislation in the country of use. The
automatic system for activating/
deactivating the external lights must
be considered an aid for the driver.
If necessary, turn the lights on and
off manually.
NOTE:
After
external lights turn on
automatically, driver can always
manually turn on rear fog lights.
When external lights turn off
automatically, rear fog lights will turn
off automatically too, if on. Upon the
following automatic switch-on driver
must manually turn on rear fog lights,
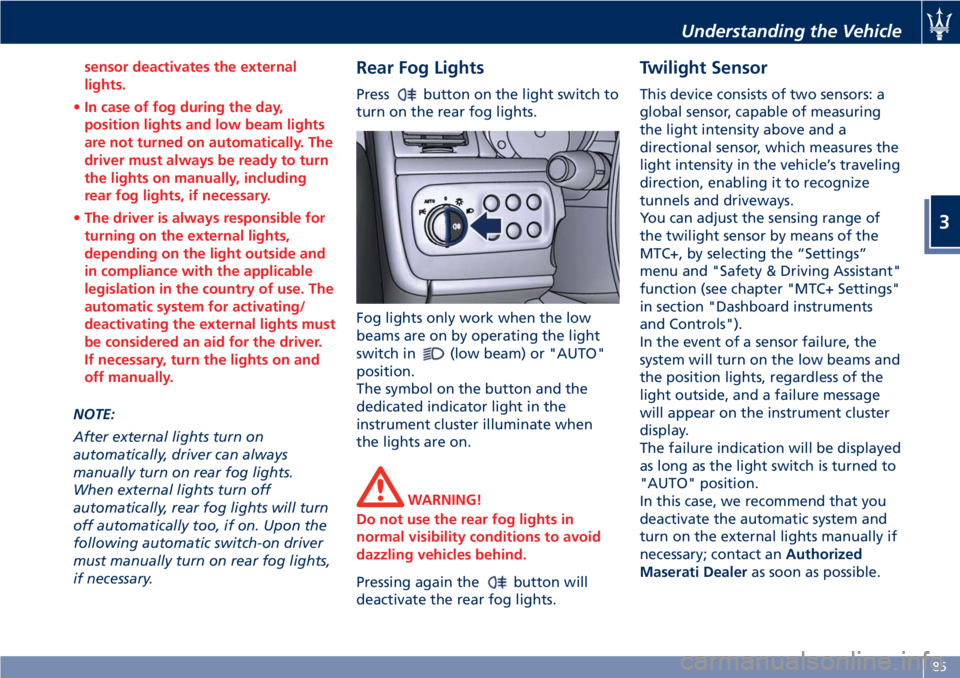
if necessary. Rear Fog Lights Press button on the light switch to
turn on the rear fog lights.
Fog lights only work when the low
beams are on by operating the light
switch in
(low beam) or "AUTO"
position.
The symbol on the button and the
dedicated indicator light in the
instrument cluster illuminate when
the lights are on.
WARNING!
Do not use the rear fog lights in
normal visibility conditions to avoid
dazzling vehicles behind.
Pressing again the
button will
deactivate the rear fog lights. Twilight Sensor This device consists of two sensors: a
global sensor, capable of measuring
the light intensity above and a
directional sensor, which measures the
light intensity in the vehicle’s traveling
direction, enabling it to recognize
tunnels and driveways.
You can adjust the sensing range of
the twilight sensor by means of the
MTC+, by selecting the “Settings”
menu and "Safety & Driving Assistant"
function (see chapter "MTC+ Settings"
in section "Dashboard instruments
and Controls").
In the event of a sensor failure, the
system will turn on the low beams and
the position lights, regardless of the
light outside, and a failure message
will appear on the instrument cluster
display.
The failure indication will be displayed
as long as the light switch is turned to
"AUTO" position.
In this case, we recommend that you
deactivate the automatic system and
turn on the external lights manually if
necessary; contact an Authorized
Maserati Dealer as soon as possible.Understanding the Vehicle
3
85
Page 91 of 296
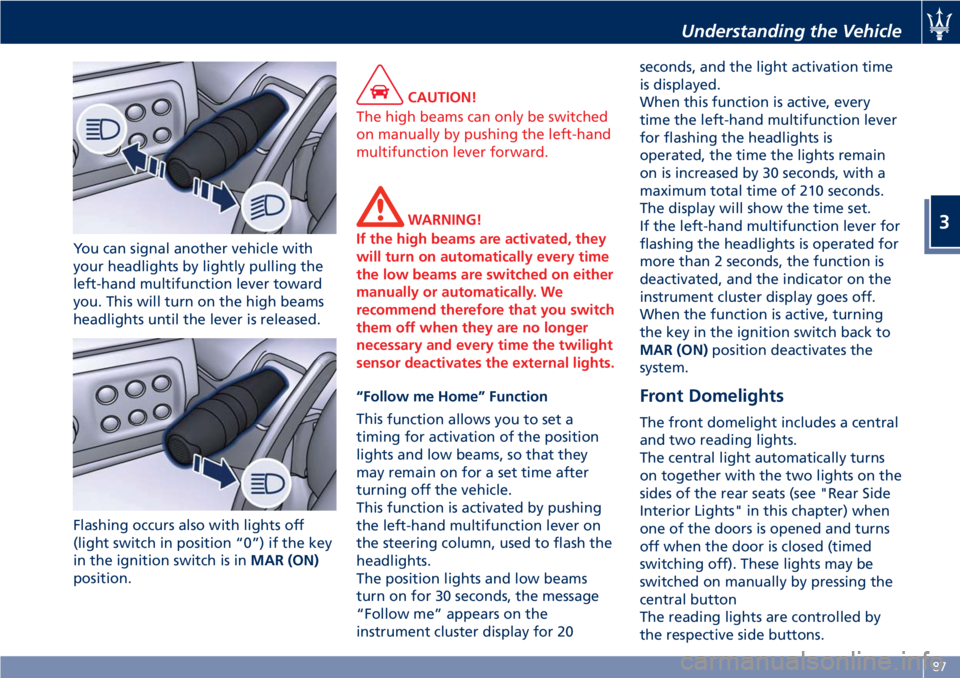
You can signal another vehicle with
your headlights by lightly pulling the
left-hand multifunction lever toward
you. This will turn on the high beams
headlights until the lever is released.
Flashing occurs also with lights off
(light switch in position “0”) if the key
in the ignition switch is in MAR (ON)
position. CAUTION!
The high beams can only be switched
on manually by pushing the left-hand
multifunction lever forward.
WARNING!
If the high beams are activated, they
will turn on automatically every time
the low beams are switched on either
manually or automatically. We
recommend therefore that you switch
them off when they are no longer
necessary and every time the twilight
sensor deactivates the external lights.
“Follow me Home” Function
This
function allows you to set a
timing for activation of the position
lights and low beams, so that they
may remain on for a set time after
turning off the vehicle.
This function is activated by pushing
the left-hand multifunction lever on
the steering column, used to flash the
headlights.
The position lights and low beams
turn on for 30 seconds, the message
“Follow me” appears on the
instrument cluster display for 20 seconds, and the light activation time
is displayed.
When this function is active, every
time the left-hand multifunction lever
for flashing the headlights is
operated, the time the lights remain
on is increased by 30 seconds, with a
maximum total time of 210 seconds.
The display will show the time set.
If the left-hand multifunction lever for
flashing the headlights is operated for
more than 2 seconds, the function is
deactivated, and the indicator on the
instrument cluster display goes off.
When the function is active, turning
the key in the ignition switch back to
MAR (ON) position deactivates the
system.
Front Domelights The front domelight includes a central
and two reading lights.
The central light automatically turns
on together with the two lights on the
sides of the rear seats (see "Rear Side
Interior Lights" in this chapter) when
one of the doors is opened and turns
off when the door is closed (timed
switching off). These lights may be
switched on manually by pressing the
central button
The reading lights are controlled by
the respective side buttons.Understanding the Vehicle
3
87
Page 93 of 296
the area where passengers enter/exit
the vehicle.
Windshield Wipers and
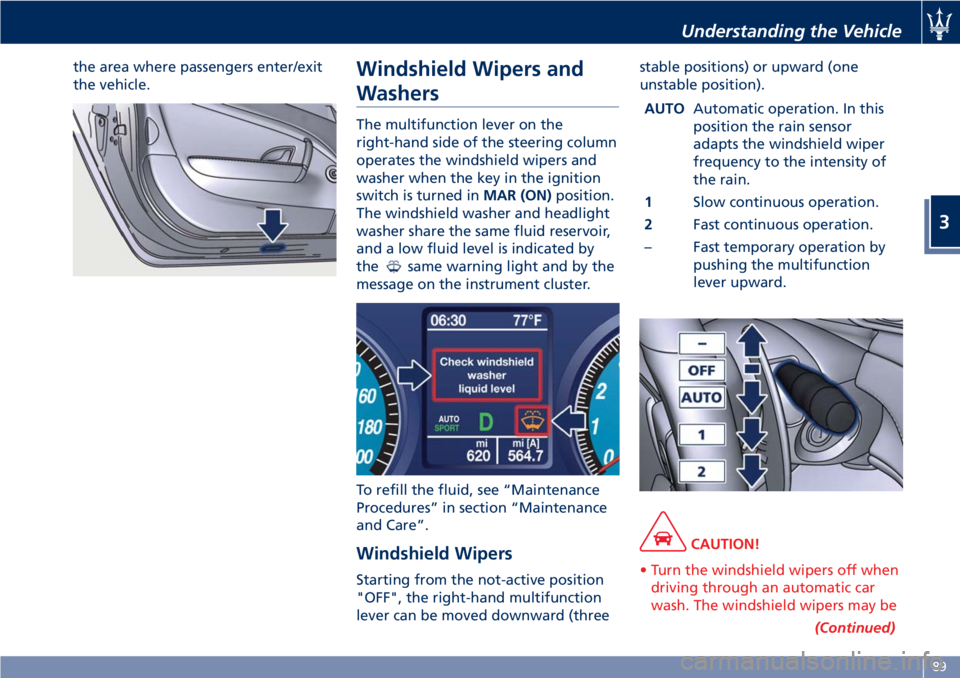
Washers The multifunction lever on the
right-hand side of the steering column
operates the windshield wipers and
washer when the key in the ignition
switch is turned in MAR (ON) position.
The windshield washer and headlight
washer share the same fluid reservoir,
and a low fluid level is indicated by
the
same warning light and by the
message on the instrument cluster.
To refill the fluid, see “Maintenance
Procedures” in section “Maintenance
and Care”.
Windshield Wipers
Starting from the not-active position
"OFF", the right-hand multifunction
lever can be moved downward (three stable positions) or upward (one
unstable position).
AUTO Automatic operation. In this
position the rain sensor
adapts the windshield wiper
frequency to the intensity of
the rain.
1 Slow continuous operation.
2 Fast continuous operation.
– Fast temporary operation by
pushing the multifunction
lever upward.
CAUTION!
• Turn the windshield wipers off when
driving through an automatic car
wash. The windshield wipers may be
(Continued)Understanding the Vehicle
3
89
Page 94 of 296
(Continued)
damaged if the wiper control is left
in any position other than “OFF”.
• In cold weather, always turn off the
wiper switch and allow the wipers to
return to the park position before
turning off the engine. If the wiper
switch is left on and the wipers
freeze to the windshield, the wiper
motor may be damaged when the
vehicle is restarted.
• Always remove any buildup of snow
that prevents the windshield wiper
blades from returning to the off
position. If the windshield wiper
control is turned off and the blades
cannot return to the off position, the
wiper motor may be damaged.
Rain Sensing Wipers This feature detects moisture on the
windshield through an inside rearview
mirror integrated sensor.
The rain sensor adapts the frequency
of the windshield wiper strokes (in the
intermittent operation mode) to the
intensity of the rain.
All the other functions controlled by
the right-hand multifunction lever
(windshield wipers off, in continuous
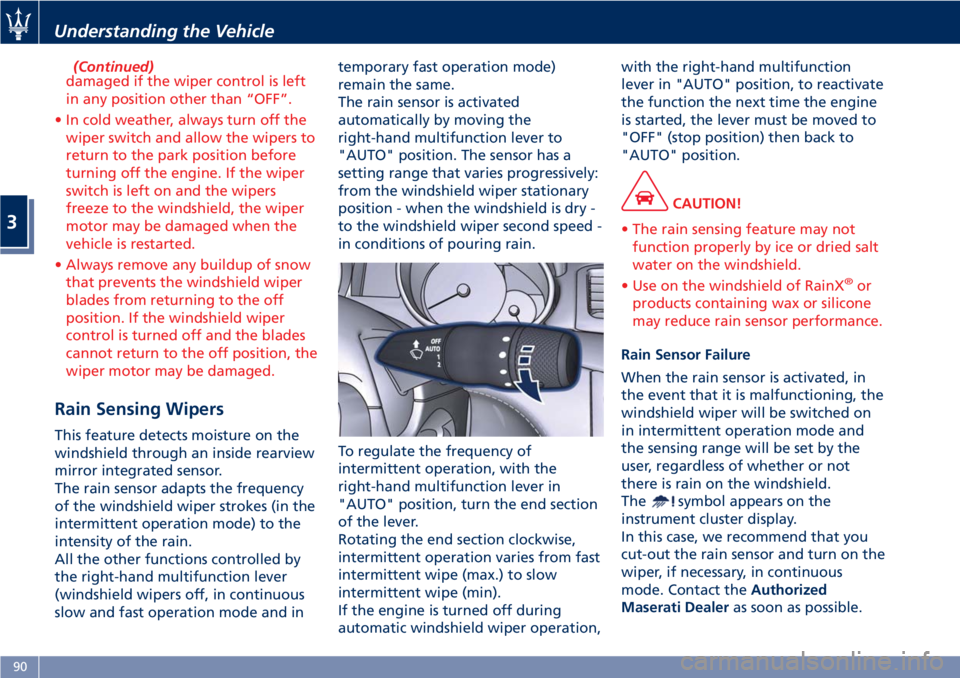
slow and fast operation mode and in temporary fast operation mode)
remain the same.
The rain sensor is activated
automatically by moving the
right-hand multifunction lever to
"AUTO" position. The sensor has a
setting range that varies progressively:
from the windshield wiper stationary
position - when the windshield is dry -
to the windshield wiper second speed -
in conditions of pouring rain.
To regulate the frequency of
intermittent operation, with the
right-hand multifunction lever in
"AUTO" position, turn the end section
of the lever.
Rotating the end section clockwise,
intermittent operation varies from fast
intermittent wipe (max.) to slow
intermittent wipe (min).
If the engine is turned off during
automatic windshield wiper operation, with the right-hand multifunction
lever in "AUTO" position, to reactivate
the function the next time the engine
is started, the lever must be moved to
"OFF" (stop position) then back to
"AUTO" position.
CAUTION!
• The rain sensing feature may not
function properly by ice or dried salt
water on the windshield.
• Use on the windshield of RainX ®
or
products containing wax or silicone
may reduce rain sensor performance.
Rain Sensor Failure
When
the rain sensor is activated, in
the event that it is malfunctioning, the
windshield wiper will be switched on
in intermittent operation mode and
the sensing range will be set by the
user, regardless of whether or not
there is rain on the windshield.
The
symbol appears on the
instrument cluster display.
In this case, we recommend that you
cut-out the rain sensor and turn on the
wiper, if necessary, in continuous
mode. Contact the Authorized
Maserati Dealer as soon as possible.Understanding the Vehicle
3
90
Page 118 of 296
Sport Skyhook Suspension
(for versions/markets,
where provided) The electronic system controlling the
vehicle suspension uses the
sophisticated on board sensors and is
aimed at optimizing vehicle
performance.
The system is capable of constantly
monitoring suspension damping by
means of the actuator fitted on each
shock absorber (Skyhook type). This
way, the shock absorber setting is
suited to the road surface conditions
and vehicle dynamics, thus improving
passenger comfort and road-holding.
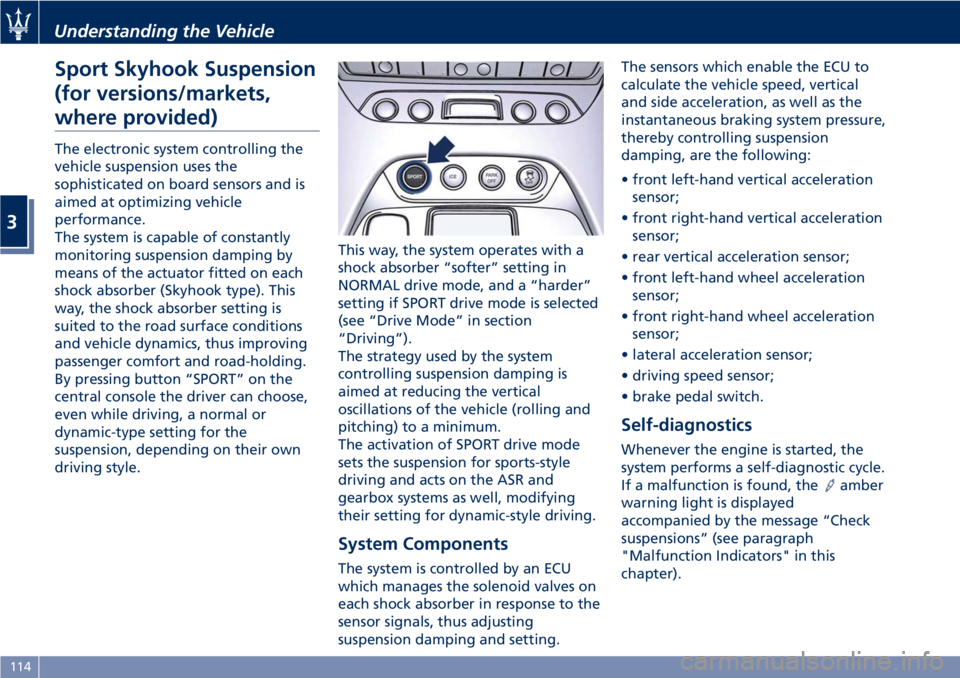
By pressing button “SPORT” on the
central console the driver can choose,
even while driving, a normal or
dynamic-type setting for the
suspension, depending on their own
driving style. This way, the system operates with a
shock absorber “softer” setting in
NORMAL drive mode, and a “harder”
setting if SPORT drive mode is selected
(see “Drive Mode” in section
“Driving”).
The strategy used by the system
controlling suspension damping is
aimed at reducing the vertical
oscillations of the vehicle (rolling and
pitching) to a minimum.
The activation of SPORT drive mode
sets the suspension for sports-style
driving and acts on the ASR and
gearbox systems as well, modifying
their setting for dynamic-style driving.
System Components
The system is controlled by an ECU
which manages the solenoid valves on
each shock absorber in response to the
sensor signals, thus adjusting
suspension damping and setting. The sensors which enable the ECU to
calculate the vehicle speed, vertical
and side acceleration, as well as the
instantaneous braking system pressure,
thereby controlling suspension
damping, are the following:
• front left-hand vertical acceleration
sensor;
• front right-hand vertical acceleration
sensor;
• rear vertical acceleration sensor;
• front left-hand wheel acceleration
sensor;
• front right-hand wheel acceleration
sensor;
• lateral acceleration sensor;
• driving speed sensor;
• brake pedal switch.
Self-diagnostics Whenever the engine is started, the
system performs a self-diagnostic cycle.
If a malfunction is found, the
amber
warning light is displayed
accompanied by the message “Check
suspensions” (see paragraph
"Malfunction Indicators" in this
chapter).Understanding the Vehicle
3
114
Page 132 of 296
Engine Temperature Warning Light
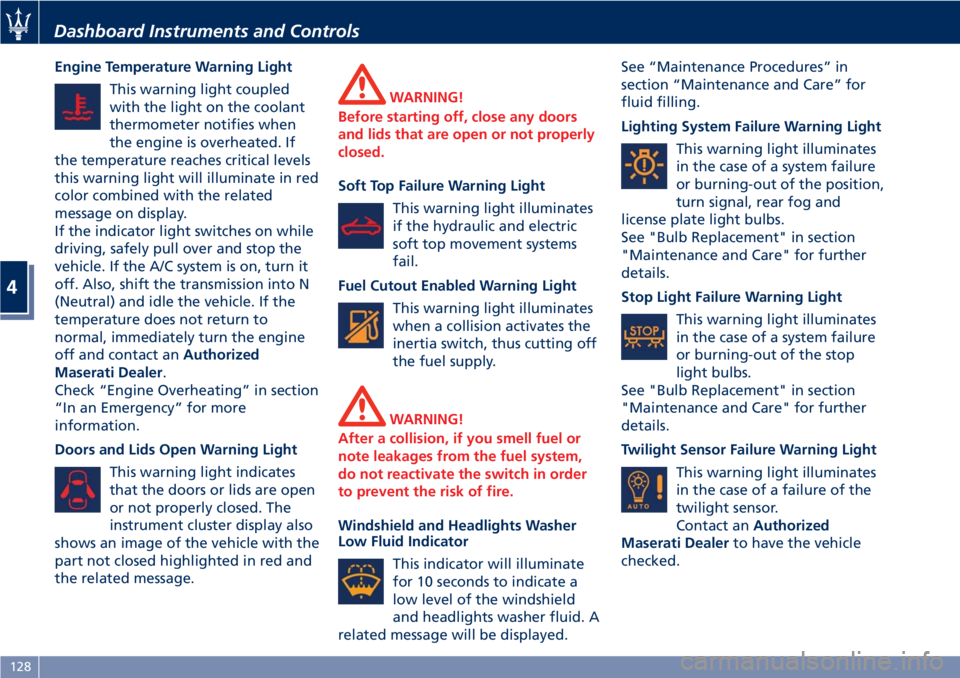
This warning light coupled
with the light on the coolant
thermometer notifies when
the engine is overheated. If
the temperature reaches critical levels
this warning light will illuminate in red
color combined with the related
message on display.
If the indicator light switches on while
driving, safely pull over and stop the
vehicle. If the A/C system is on, turn it
off. Also, shift the transmission into N
(Neutral) and idle the vehicle. If the
temperature does not return to
normal, immediately turn the engine
off and contact an Authorized
Maserati Dealer .
Check “Engine Overheating” in section
“In an Emergency” for more
information.
Doors and Lids Open Warning Light
This warning light indicates
that the doors or lids are open
or not properly closed. The
instrument cluster display also
shows an image of the vehicle with the
part not closed highlighted in red and
the related message. WARNING!
Before starting off, close any doors
and lids that are open or not properly
closed.
Soft Top Failure Warning Light
This
warning light illuminates
if the hydraulic and electric
soft top movement systems
fail.
Fuel Cutout Enabled Warning Light
This warning light illuminates
when a collision activates the
inertia switch, thus cutting off
the fuel supply.
WARNING!
After a collision, if you smell fuel or
note leakages from the fuel system,
do not reactivate the switch in order
to prevent the risk of fire.
Windshield and Headlights Washer
Low
Fluid Indicator
This indicator will illuminate
for 10 seconds to indicate a
low level of the windshield
and headlights washer fluid. A
related message will be displayed. See “Maintenance Procedures” in
section “Maintenance and Care” for
fluid filling.
Lighting System Failure Warning Light
This warning light illuminates
in the case of a system failure
or burning-out of the position,
turn signal, rear fog and
license plate light bulbs.
See "Bulb Replacement" in section
"Maintenance and Care" for further
details.
Stop Light Failure Warning Light
This warning light illuminates
in the case of a system failure
or burning-out of the stop
light bulbs.
See "Bulb Replacement" in section
"Maintenance and Care" for further
details.
Twilight Sensor Failure Warning Light
This warning light illuminates
in the case of a failure of the
twilight sensor.
Contact an Authorized
Maserati Dealer to have the vehicle
checked.Dashboard Instruments and Controls
4
128
Page 133 of 296
Adaptive Light Control System Failure
Warning Light
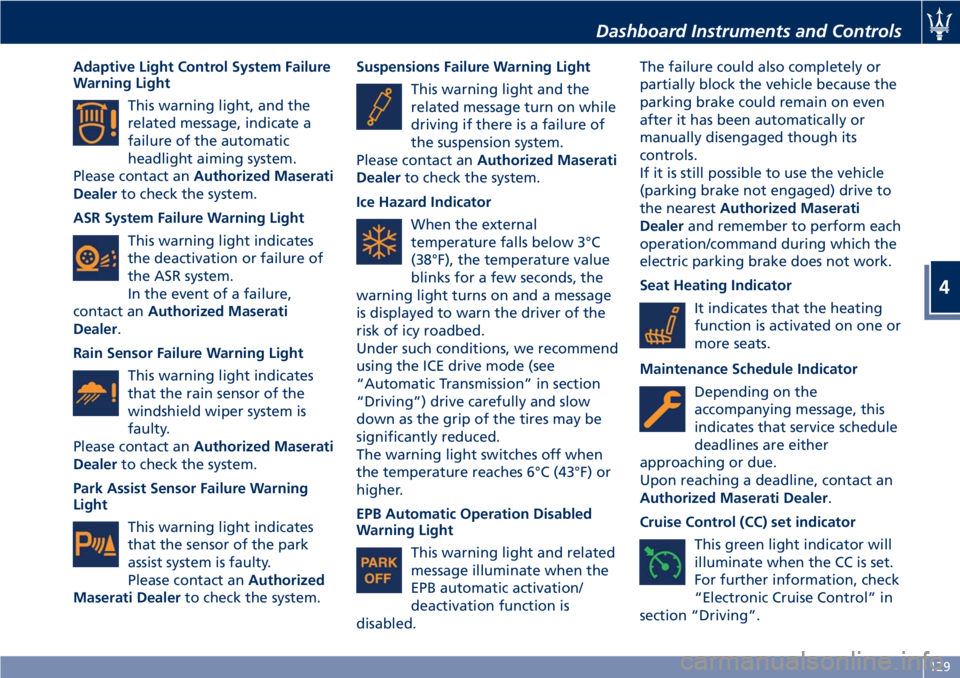
This warning light, and the
related message, indicate a
failure of the automatic
headlight aiming system.
Please contact an Authorized Maserati
Dealer to check the system.
ASR System Failure Warning Light
This warning light indicates
the deactivation or failure of
the ASR system.
In the event of a failure,
contact an Authorized Maserati
Dealer .
Rain Sensor Failure Warning Light
This warning light indicates
that the rain sensor of the
windshield wiper system is
faulty.
Please contact an Authorized Maserati
Dealer to check the system.
Park Assist Sensor Failure Warning
Light
This warning light indicates
that the sensor of the park
assist system is faulty.
Please contact an Authorized
Maserati Dealer to check the system. Suspensions Failure Warning Light
This warning light and the
related message turn on while
driving if there is a failure of
the suspension system.
Please contact an Authorized Maserati
Dealer to check the system.
Ice Hazard Indicator
When the external
temperature falls below 3°C
(38°F), the temperature value
blinks for a few seconds, the
warning light turns on and a message
is displayed to warn the driver of the
risk of icy roadbed.
Under such conditions, we recommend
using the ICE drive mode (see
“Automatic Transmission” in section
“Driving”) drive carefully and slow
down as the grip of the tires may be
significantly reduced.
The warning light switches off when
the temperature reaches 6°C (43°F) or
higher.
EPB Automatic Operation Disabled
Warning Light
This warning light and related
message illuminate when the
EPB automatic activation/
deactivation function is
disabled. The failure could also completely or
partially block the vehicle because the
parking brake could remain on even
after it has been automatically or
manually disengaged though its
controls.
If it is still possible to use the vehicle
(parking brake not engaged) drive to
the nearest Authorized Maserati
Dealer and remember to perform each
operation/command during which the
electric parking brake does not work.
Seat Heating Indicator
It indicates that the heating
function is activated on one or
more seats.
Maintenance Schedule Indicator
Depending on the
accompanying message, this
indicates that service schedule
deadlines are either
approaching or due.
Upon reaching a deadline, contact an
Authorized Maserati Dealer .
Cruise Control (CC) set indicator
This green light indicator will
illuminate when the CC is set.
For further information, check
“Electronic Cruise Control” in
section “Driving”.Dashboard Instruments and Controls
4
129
Page 149 of 296
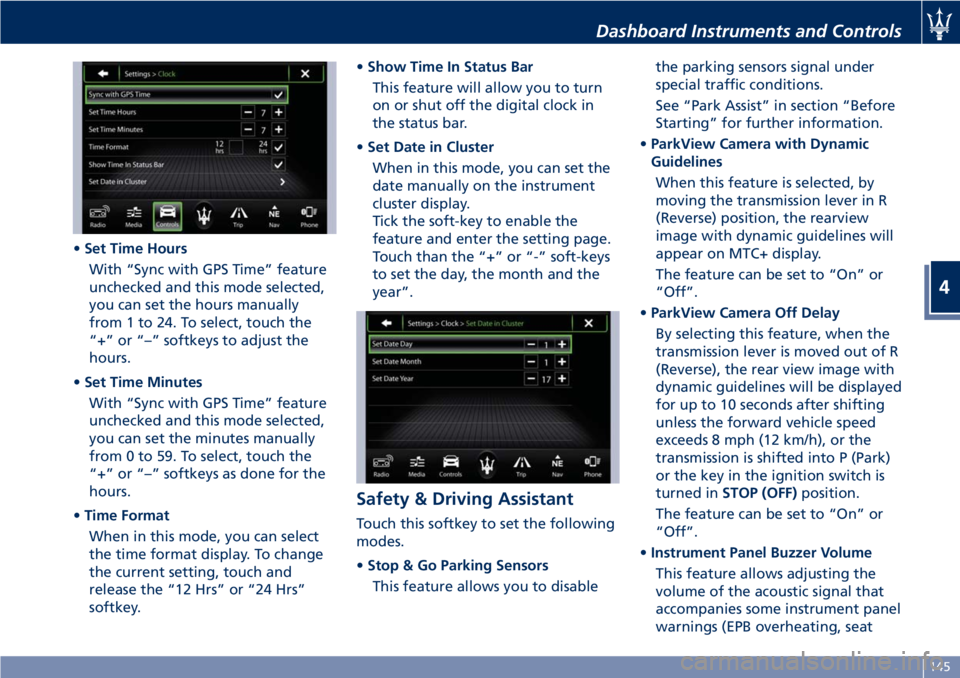
• Set Time Hours
With “Sync with GPS Time” feature
unchecked and this mode selected,
you can set the hours manually
from 1 to 24. To select, touch the
“+” or “–” softkeys to adjust the
hours.
• Set Time Minutes
With “Sync with GPS Time” feature
unchecked and this mode selected,
you can set the minutes manually
from 0 to 59. To select, touch the
“+” or “–” softkeys as done for the
hours.
• Time Format
When in this mode, you can select
the time format display. To change
the current setting, touch and
release the “12 Hrs” or “24 Hrs”
softkey. • Show Time In Status Bar
This feature will allow you to turn
on or shut off the digital clock in
the status bar.
• Set Date in Cluster
When in this mode, you can set the
date manually on the instrument
cluster display.
Tick the soft-key to enable the
feature and enter the setting page.
Touch than the “+” or “-” soft-keys
to set the day, the month and the
year”.
Safety & Driving Assistant Touch this softkey to set the following
modes.
• Stop & Go Parking Sensors
This feature allows you to disable the parking sensors signal under
special traffic conditions.
See “Park Assist” in section “Before
Starting” for further information.
• ParkView Camera with Dynamic
Guidelines
When this feature is selected, by
moving the transmission lever in R
(Reverse) position, the rearview
image with dynamic guidelines will
appear on MTC+ display.
The feature can be set to “On” or
“Off”.
• ParkView Camera Off Delay
By selecting this feature, when the
transmission lever is moved out of R
(Reverse), the rear view image with
dynamic guidelines will be displayed
for up to 10 seconds after shifting
unless the forward vehicle speed
exceeds 8 mph (12 km/h), or the
transmission is shifted into P (Park)
or the key in the ignition switch is
turned in STOP (OFF) position.
The feature can be set to “On” or
“Off”.
• Instrument Panel Buzzer Volume
This feature allows adjusting the
volume of the acoustic signal that
accompanies some instrument panel
warnings (EPB overheating, seatDashboard Instruments and Controls
4
145
Page 150 of 296
and rearview mirror position
storage).
The volume can be set to 7 levels
identified by numbers from "1" to
"7" by pressing the "+" or "–"
softkey.
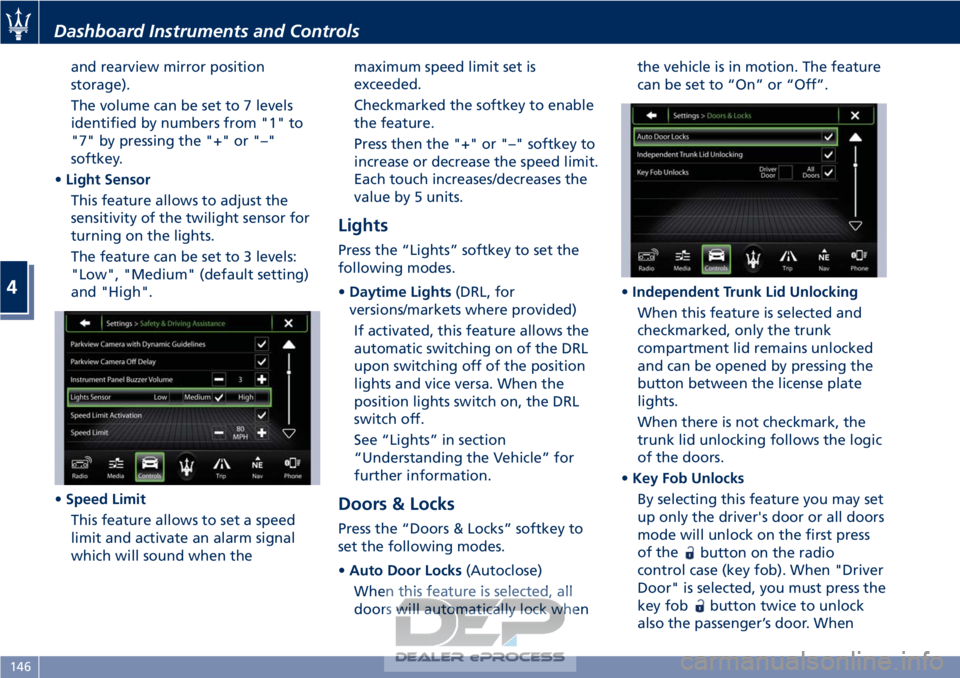
• Light Sensor
This feature allows to adjust the
sensitivity of the twilight sensor for
turning on the lights.
The feature can be set to 3 levels:
"Low", "Medium" (default setting)
and "High".
• Speed Limit
This feature allows to set a speed
limit and activate an alarm signal
which will sound when the maximum speed limit set is
exceeded.
Checkmarked the softkey to enable
the feature.
Press then the "+" or "–" softkey to
increase or decrease the speed limit.
Each touch increases/decreases the
value by 5 units.
Lights
Press the “Lights” softkey to set the
following modes.
•
Daytime Lights (DRL, for
versions/markets where provided)
If activated, this feature allows the
automatic switching on of the DRL
upon switching off of the position
lights and vice versa. When the
position lights switch on, the DRL
switch off.
See “Lights” in section
“Understanding the Vehicle” for
further information.
Doors & Locks
Press the “Doors & Locks” softkey to
set the following modes.
• Auto Door Locks (Autoclose)
When this feature is selected, all
doors will automatically lock when the vehicle is in motion. The feature
can be set to “On” or “Off”.
• Independent Trunk Lid Unlocking
When this feature is selected and
checkmarked, only the trunk
compartment lid remains unlocked
and can be opened by pressing the
button between the license plate
lights.
When there is not checkmark, the
trunk lid unlocking follows the logic
of the doors.
• Key Fob Unlocks
By selecting this feature you may set
up only the driver's door or all doors
mode will unlock on the first press
of the
button on the radio
control case (key fob). When "Driver
Door" is selected, you must press the
key fob
button twice to unlock
also the passenger’s door. When
Dashboard Instruments and Controls
4
146