headrest MASERATI LEVANTE 2019 Owners Manual
[x] Cancel search | Manufacturer: MASERATI, Model Year: 2019, Model line: LEVANTE, Model: MASERATI LEVANTE 2019Pages: 436, PDF Size: 15.24 MB
Page 82 of 436

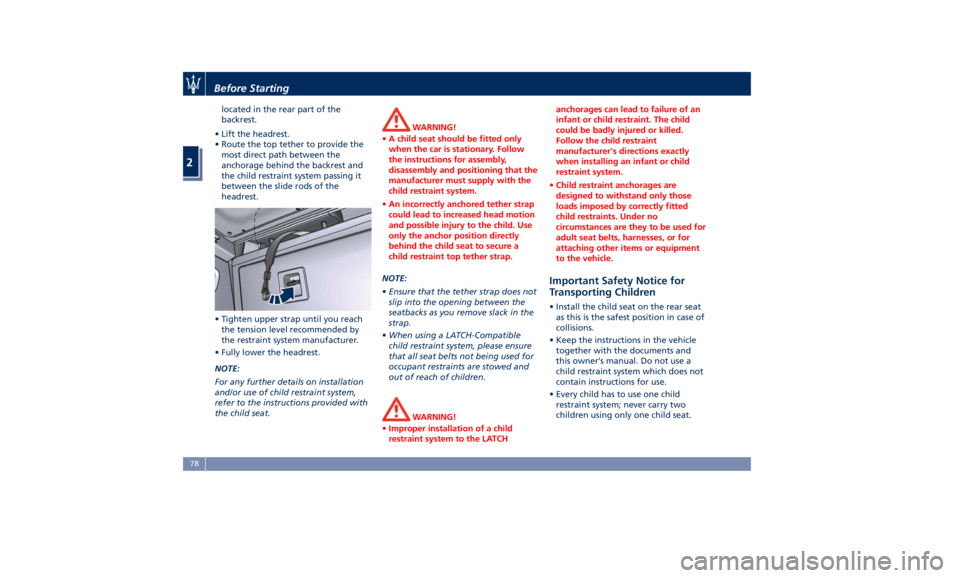
located in the rear part of the
backrest.
• Lift the headrest.
• Route the top tether to provide the
most direct path between the
anchorage behind the backrest and
the child restraint system passing it
between the slide rods of the
headrest.
• Tighten upper strap until you reach
the tension level recommended by
the restraint system manufacturer.
• Fully lower the headrest.
NOTE:
For any further details on installation
and/or use of child restraint system,
refer to the instructions provided with
the child seat. WARNING!
• A child seat should be fitted only
when the car is stationary. Follow
the instructions for assembly,
disassembly and positioning that the
manufacturer must supply with the
child restraint system.
• An incorrectly anchored tether strap
could lead to increased head motion
and possible injury to the child. Use
only the anchor position directly
behind the child seat to secure a
child restraint top tether strap.
NOTE:
• Ensure
that the tether strap does not
slip into the opening between the
seatbacks as you remove slack in the
strap.
• When using a LATCH-Compatible
child restraint system, please ensure
that all seat belts not being used for
occupant restraints are stowed and
out of reach of children.
WARNING!
• Improper installation of a child
restraint system to the LATCH anchorages can lead to failure of an
infant or child restraint. The child
could be badly injured or killed.
Follow the child restraint
manufacturer's directions exactly
when installing an infant or child
restraint system.
• Child restraint anchorages are
designed to withstand only those
loads imposed by correctly fitted
child restraints. Under no
circumstances are they to be used for
adult seat belts, harnesses, or for
attaching other items or equipment
to the vehicle.
Important Safety Notice for
Transporting Children • Install the child seat on the rear seat
as this is the safest position in case of
collisions.
• Keep the instructions in the vehicle
together with the documents and
this owner’s manual. Do not use a
child restraint system which does not
contain instructions for use.
• Every child has to use one child
restraint system; never carry two
children using only one child seat.Before Starting
2
78
Page 147 of 436

cover inner part out of their guides
on trunk panel;
• remove trunk cover from the vehicle.
The two parts of trunk cover can be
folded one onto the other for a more
compact unit.
WARNING!
Driving with no trunk cover could be
dangerous. Any unfastened luggage
or objects could move into the
passenger compartment in case of
sudden stop or collision and seriously
injure the occupants. You can try to
prevent this by using the Cargo Net in
the trunk compartment.
When refitting the trunk cover,
perform
the same operations in
reverse order. WARNING!
After refitting the trunk cover, make
sure that the lower ends of the inner
part have properly engaged in their
guides. If cover is not properly
positioned and fastened, in case of
unexpected stop or collision it could
move and seriously injure the
passengers in the rear seats.
Cargo Area Extension The following procedure is aimed at
obtaining the maximum possible
extension of the cargo area, and it can
be only a partial extension if you carry
out only a few of the listed
operations.
• Remove the trunk cover as indicated
under “Trunk Compartment Cover”
in this chapter.
• Completely lower the headrests of
rear seats.
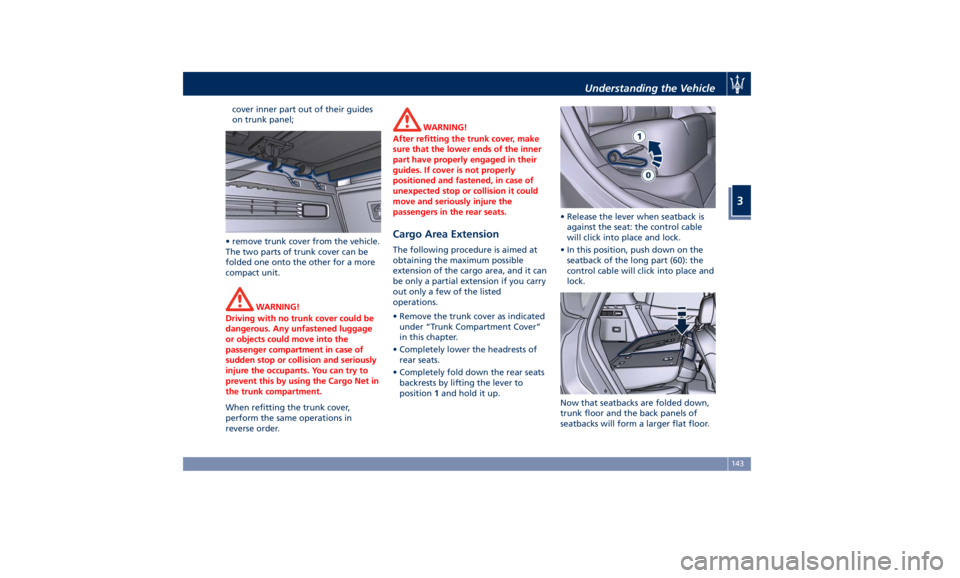
• Completely fold down the rear seats
backrests by lifting the lever to
position 1 and hold it up. • Release the lever when seatback is
against the seat: the control cable
will click into place and lock.
• In this position, push down on the
seatback of the long part (60): the
control cable will click into place and
lock.
Now that seatbacks are folded down,
trunk floor and the back panels of
seatbacks will form a larger flat floor.Understanding the Vehicle
3
143