USB MASERATI QUATTROPORTE 2019 User Guide
[x] Cancel search | Manufacturer: MASERATI, Model Year: 2019, Model line: QUATTROPORTE, Model: MASERATI QUATTROPORTE 2019Pages: 396, PDF Size: 13.9 MB
Page 183 of 396
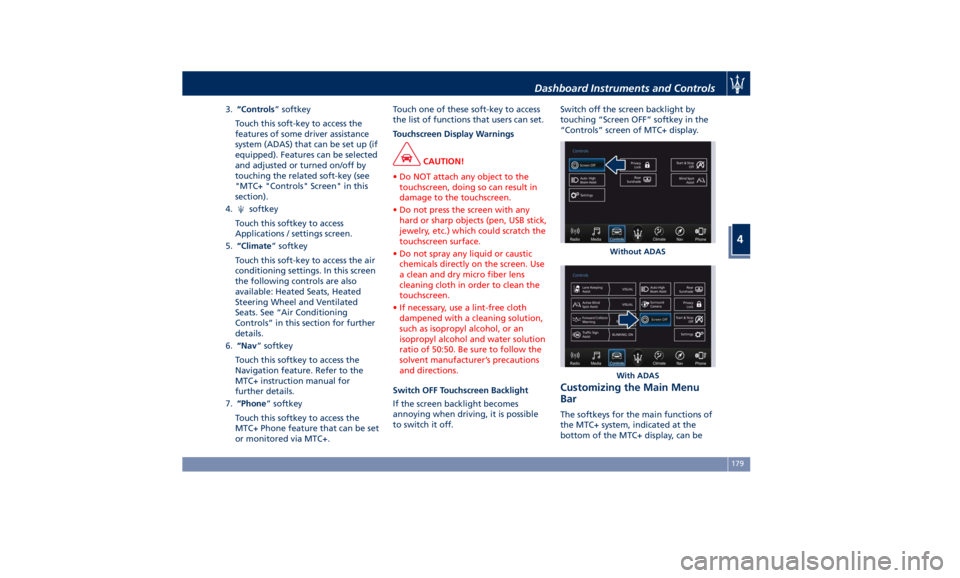
3. “Controls ” softkey
Touch this soft-key to access the
features of some driver assistance
system (ADAS) that can be set up (if
equipped). Features can be selected
and adjusted or turned on/off by
touching the related soft-key (see
"MTC+ "Controls" Screen" in this
section).
4.
softkey
Touch this softkey to access
Applications / settings screen.
5. “Climate ” softkey
Touch this soft-key to access the air
conditioning settings. In this screen
the following controls are also
available: Heated Seats, Heated
Steering Wheel and Ventilated
Seats. See “Air Conditioning
Controls” in this section for further
details.
6. “Nav ” softkey
Touch this softkey to access the
Navigation feature. Refer to the
MTC+ instruction manual for
further details.
7. “Phone ” softkey
Touch this softkey to access the
MTC+ Phone feature that can be set
or monitored via MTC+. Touch one of these soft-key to access
the list of functions that users can set.
Touchscreen Display Warnings
CAUTION!
• Do NOT attach any object to the
touchscreen, doing so can result in
damage to the touchscreen.
• Do not press the screen with any
hard or sharp objects (pen, USB stick,
jewelry, etc.) which could scratch the
touchscreen surface.
• Do not spray any liquid or caustic
chemicals directly on the screen. Use
a clean and dry micro fiber lens
cleaning cloth in order to clean the
touchscreen.
• If necessary, use a lint-free cloth
dampened with a cleaning solution,
such as isopropyl alcohol, or an
isopropyl alcohol and water solution
ratio of 50:50. Be sure to follow the
solvent manufacturer’s precautions
and directions.
Switch OFF Touchscreen Backlight
If
the screen backlight becomes
annoying when driving, it is possible
to switch it off. Switch off the screen backlight by
touching “Screen OFF” softkey in the
“Controls” screen of MTC+ display.
Customizing the Main Menu
Bar The softkeys for the main functions of
the MTC+ system, indicated at the
bottom of the MTC+ display, can be Without ADAS
With ADASDashboard Instruments and Controls
4
179
Page 184 of 396
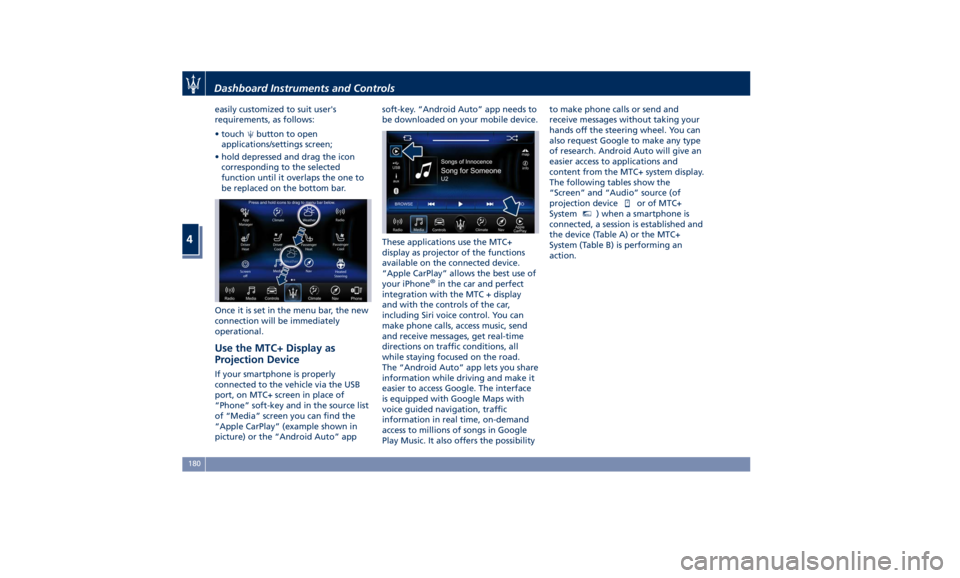
easily customized to suit user's
requirements, as follows:
• touch button to open
applications/settings screen;
• hold depressed and drag the icon
corresponding to the selected
function until it overlaps the one to
be replaced on the bottom bar.
Once it is set in the menu bar, the new
connection will be immediately
operational.
Use the MTC+ Display as
Projection Device If your smartphone is properly
connected to the vehicle via the USB
port, on MTC+ screen in place of
“Phone” soft-key and in the source list
of “Media” screen you can find the
“Apple CarPlay” (example shown in
picture) or the “Android Auto” app soft-key. “Android Auto” app needs to
be downloaded on your mobile device.
These applications use the MTC+
display as projector of the functions
available on the connected device.
“Apple CarPlay” allows the best use of
your iPhone ®
in the car and perfect
integration with the MTC + display
and with the controls of the car,
including Siri voice control. You can
make phone calls, access music, send
and receive messages, get real-time
directions on traffic conditions, all
while staying focused on the road.
The “Android Auto” app lets you share
information while driving and make it
easier to access Google. The interface
is equipped with Google Maps with
voice guided navigation, traffic
information in real time, on-demand
access to millions of songs in Google
Play Music. It also offers the possibility to make phone calls or send and
receive messages without taking your
hands off the steering wheel. You can
also request Google to make any type
of research. Android Auto will give an
easier access to applications and
content from the MTC+ system display.
The following tables show the
“Screen” and “Audio” source (of
projection device
or of MTC+
System MTC+
) when a smartphone is
connected, a session is established and
the device (Table A) or the MTC+
System (Table B) is performing an
action.Dashboard Instruments and Controls
4
180
Page 187 of 396
Audio Controls The vehicle is equipped with audio
controls that allow both driver and
front passenger to operate the audio
system. These controls can be used to
adjust audio volume, change radio
station or mode (FM, AM, USB, etc).
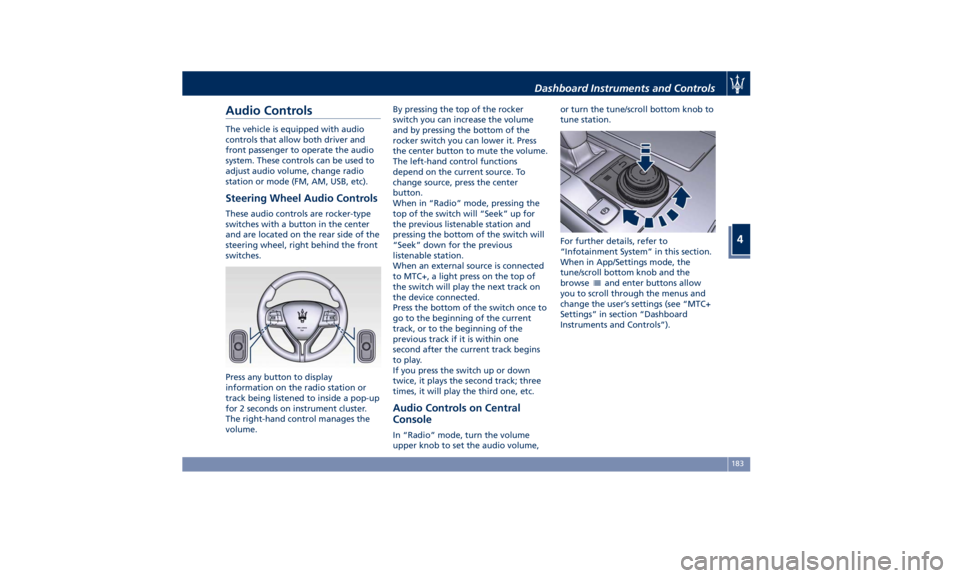
Steering Wheel Audio Controls These audio controls are rocker-type
switches with a button in the center
and are located on the rear side of the
steering wheel, right behind the front
switches.
Press any button to display
information on the radio station or
track being listened to inside a pop-up
for 2 seconds on instrument cluster.
The right-hand control manages the
volume. By pressing the top of the rocker
switch you can increase the volume
and by pressing the bottom of the
rocker switch you can lower it. Press
the center button to mute the volume.
The left-hand control functions
depend on the current source. To
change source, press the center
button.
When in “Radio” mode, pressing the
top of the switch will “Seek” up for
the previous listenable station and
pressing the bottom of the switch will
“Seek” down for the previous
listenable station.
When an external source is connected
to MTC+, a light press on the top of
the switch will play the next track on
the device connected.
Press the bottom of the switch once to
go to the beginning of the current
track, or to the beginning of the
previous track if it is within one
second after the current track begins
to play.
If you press the switch up or down
twice, it plays the second track; three
times, it will play the third one, etc.
Audio Controls on Central
Console In “Radio” mode, turn the volume
upper knob to set the audio volume, or turn the tune/scroll bottom knob to
tune station.
For further details, refer to
“Infotainment System” in this section.
When in App/Settings mode, the
tune/scroll bottom knob and the
browse
and enter buttons allow
you to scroll through the menus and
change the user’s settings (see “MTC+
Settings” in section “Dashboard
Instruments and Controls”).Dashboard Instruments and Controls
4
183
Page 195 of 396
(if equipped). The available
languages are specific to the target
markets.
• Touchscreen Beep
When in this display, you can turn
on or shut off the sound activated
by pressure of a touchscreen
soft-key.
• Controls Screen Time-Out
When this mode is selected, the
“Controls” screen will remain
displayed for 5 seconds. If this mode
is not selected, the screen will
remain displayed until closed
manually.
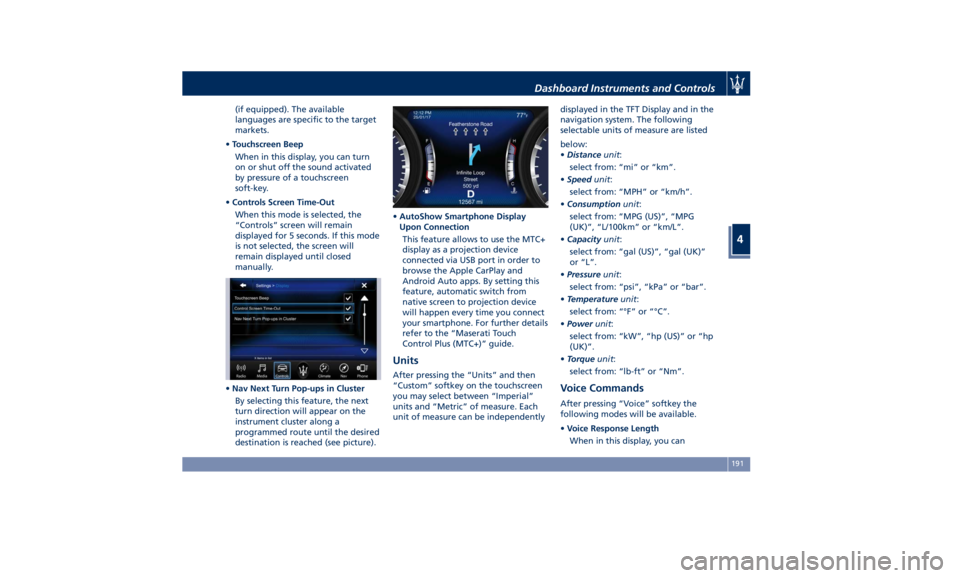
• Nav Next Turn Pop-ups in Cluster
By selecting this feature, the next
turn direction will appear on the
instrument cluster along a
programmed route until the desired
destination is reached (see picture). • AutoShow Smartphone Display
Upon Connection
This feature allows to use the MTC+
display as a projection device
connected via USB port in order to
browse the Apple CarPlay and
Android Auto apps. By setting this
feature, automatic switch from
native screen to projection device
will happen every time you connect
your smartphone. For further details
refer to the “Maserati Touch
Control Plus (MTC+)” guide.
Units After pressing the “Units” and then
“Custom” softkey on the touchscreen
you may select between “Imperial”
units and “Metric” of measure. Each
unit of measure can be independently displayed in the TFT Display and in the
navigation system. The following
selectable units of measure are listed
below:
• Distance unit :
select from: “mi” or “km”.
• Speed unit :
select from: “MPH” or “km/h”.
• Consumption unit :
select from: “MPG (US)”, “MPG
(UK)”, “L/100km” or “km/L”.
• Capacity unit :
select from: “gal (US)”, “gal (UK)”
or “L”.
• Pressure unit :
select from: “psi”, “kPa” or “bar”.
• Temperature unit :
select from: “°F” or “°C”.
• Power unit :
select from: “kW”, “hp (US)” or “hp
(UK)”.
• Torque unit :
select from: “lb-ft” or “Nm”.
Voice Commands After pressing “Voice” softkey the
following modes will be available.
• Voice Response Length
When in this display, you canDashboard Instruments and Controls
4
191
Page 201 of 396
cancelled (0 seconds) or reduced to
60 or 30 seconds.
Audio This feature enables to view and set
the available audio modes depending
on the type of audio system supplied
on the car.
The following modes refer to the
“High Premium” audio system.
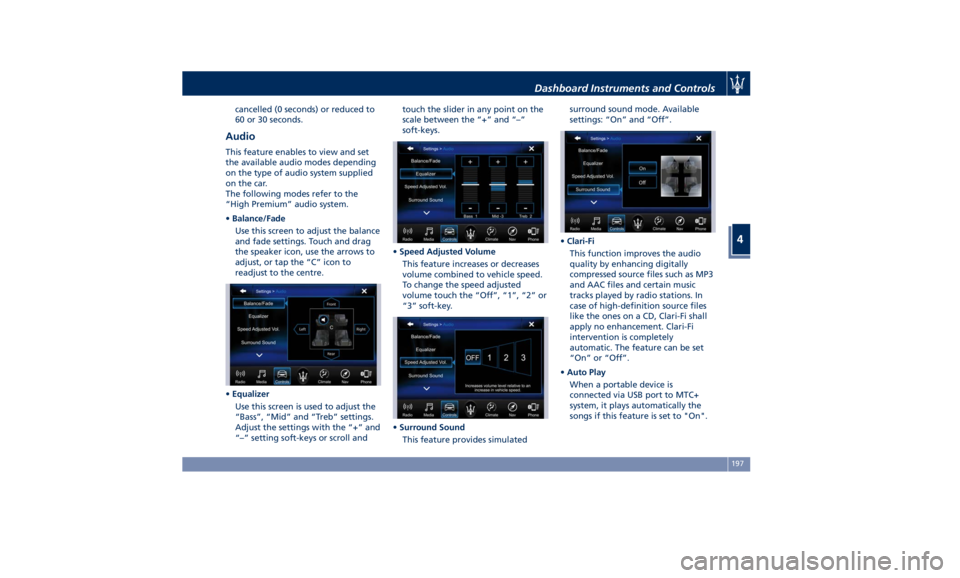
• Balance/Fade
Use this screen to adjust the balance
and fade settings. Touch and drag
the speaker icon, use the arrows to
adjust, or tap the “C” icon to
readjust to the centre.
• Equalizer
Use this screen is used to adjust the
“Bass”, “Mid” and “Treb” settings.
Adjust the settings with the “+” and
“–” setting soft-keys or scroll and touch the slider in any point on the
scale between the “+” and “–”
soft-keys.
• Speed Adjusted Volume
This feature increases or decreases
volume combined to vehicle speed.
To change the speed adjusted
volume touch the “Off”, “1”, “2” or
“3” soft-key.
• Surround Sound
This feature provides simulated surround sound mode. Available
settings: “On” and “Off”.
• Clari-Fi
This function improves the audio
quality by enhancing digitally
compressed source files such as MP3
and AAC files and certain music
tracks played by radio stations. In
case of high-definition source files
like the ones on a CD, Clari-Fi shall
apply no enhancement. Clari-Fi
intervention is completely
automatic. The feature can be set
“On” or “Off”.
• Auto Play
When a portable device is
connected via USB port to MTC+
system, it plays automatically the
songs if this feature is set to "On".Dashboard Instruments and Controls
4
197
Page 218 of 396
WARNING!
Any voice-controlled system should be
used only in safe driving conditions
following all applicable regulations.
Full attention should be kept on
driving.
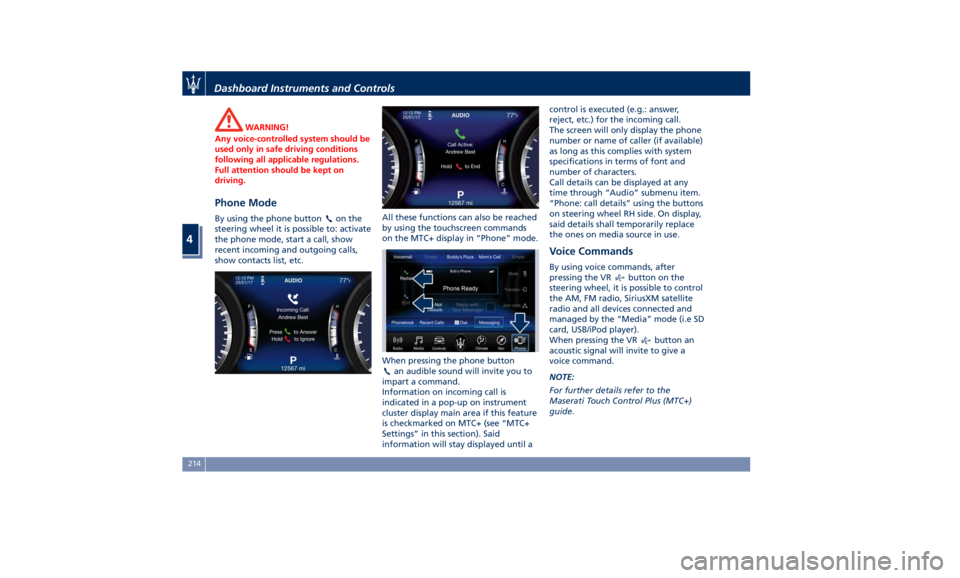
Phone Mode By using the phone button on the
steering wheel it is possible to: activate
the phone mode, start a call, show
recent incoming and outgoing calls,
show contacts list, etc. All these functions can also be reached
by using the touchscreen commands
on the MTC+ display in “Phone” mode.
When pressing the phone button
an audible sound will invite you to
impart a command.
Information on incoming call is
indicated in a pop-up on instrument
cluster display main area if this feature
is checkmarked on MTC+ (see “MTC+
Settings” in this section). Said
information will stay displayed until a control is executed (e.g.: answer,
reject, etc.) for the incoming call.
The screen will only display the phone
number or name of caller (if available)
as long as this complies with system
specifications in terms of font and
number of characters.
Call details can be displayed at any
time through “Audio” submenu item.
“Phone: call details” using the buttons
on steering wheel RH side. On display,
said details shall temporarily replace
the ones on media source in use.
Voice Commands By using voice commands, after
pressing the VR
button on the
steering wheel, it is possible to control
the AM, FM radio, SiriusXM satellite
radio and all devices connected and
managed by the “Media” mode (i.e SD
card, USB/iPod player).
When pressing the VR
button an
acoustic signal will invite to give a
voice command.
NOTE:
For further details refer to the
Maserati Touch Control Plus (MTC+)
guide.Dashboard Instruments and Controls
4
214
Page 358 of 396
Ref. Type Function
49 Mini – 10A Internal
temperature
sensor, internal
mirror and HALF
50 – –
51 Mini – 25A Rear seat and
steering wheel
heater module
52 – –
53 Mini – 25A Rear seat vented
module
54 Mini – 7,5A Blind Spot
module
55 – –
56 Mini – 7,5A Blower front
HVAC coil relay
57 Mini – 7,5A Blower rear
HVAC coil relay
58 – –
59 Mini – 10A SDC module,
transmission
lever, ASBM, rear
tunnel stack
switch
60 Mini – 10A SDC module Ref. Type Function
61 Mini – 25A Front console
power outlet and
cigar lighter
62 Mini – 7,5A Front HVAC
module
63 Mini – 20A Blower rear
HVAC
64 Mini – 10A Wi-fi, rear HVAC
module
65 Mini – 10A Intelligent
battery sensor
66 Mini – 10A Wi-fi, RSE
67 Mini – 7,5A USB charge
outlet, sunroof
68 Mini – 20A Rear sunshade
module
69 Mini – 25A Rear console
power outlet and
cigar lighter
70 Mini – 10A Front HVAC
module and
Parking Aid
Module (PAM)Fuse Box under the Dashboard This box is located in an internal area
that can be accessed only by removing
the glove compartment on the
dashboard left side. Considering the
complexity of this operation, we
recommend having the fuses replaced
by an Authorized Maserati Dealer .
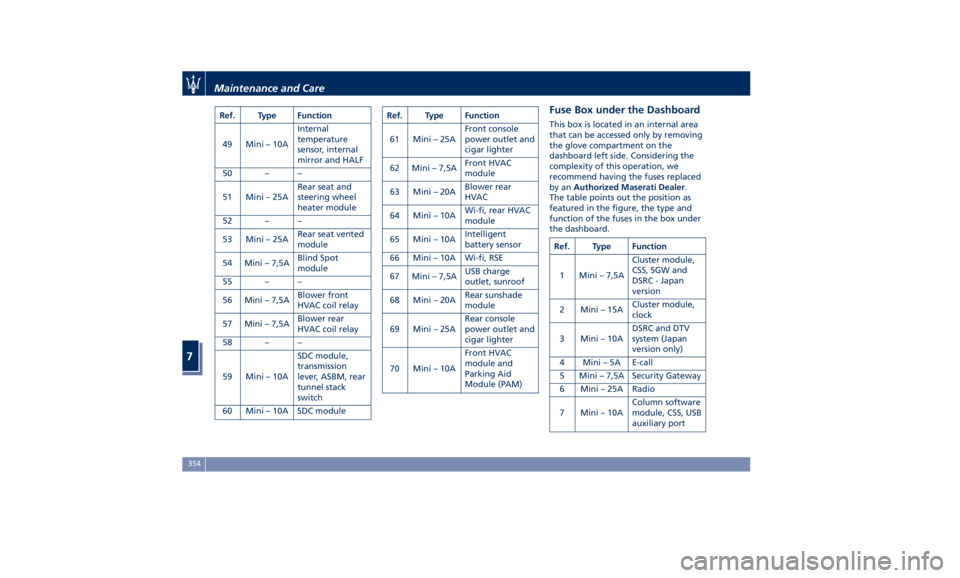
The table points out the position as
featured in the figure, the type and
function of the fuses in the box under
the dashboard.
Ref. Type Function
1 Mini – 7,5A Cluster module,
CSS, SGW and
DSRC - Japan
version
2 Mini – 15A Cluster module,
clock
3 Mini – 10A DSRC and DTV
system (Japan
version only)
4 Mini – 5A E-call
5 Mini – 7,5A Security Gateway
6 Mini – 25A Radio
7 Mini – 10A Column software
module, CSS, USB
auxiliary portMaintenance and Care
7
354
Page 368 of 396
(Continued)
monoxide, phthalates and lead, that
which are known to the State of
California to cause cancer and birth
defects or other reproductive harm. To
minimize exposure, avoid breathing
exhaust, do not idle the engine except
as necessary, service your vehicle in a
well-ventilated area and wear gloves
or wash your hands frequently when
servicing your vehicle. For more
information go to:
www.P65Warnings.ca.gov/passenger-
vehicle
MTC+ Touch Screen • Do NOT attach any object to the
touch screen, doing so can result in
damage to the touch screen.
• Do not touch the screen with any
hard or sharp objects (pen, USB stick,
jewelry, etc.) which could scratch the
touch screen surface.
• Do not spray any liquid or caustic
chemicals directly on the screen! Use
a clean and dry micro fiber lens
cleaning cloth in order to clean the
touch screen. If necessary, use a
lint-free cloth dampened with a
cleaning solution, such as isopropyl
alcohol, or an isopropyl alcohol and
water solution ratio of 50:50. Be sure to follow the solvent manufacturer’s
precautions and directions.
Vehicle Stored for Long
Periods If the vehicle is going to be stored for
long periods of time, follow the below
precautions:
• Wash and dry the vehicle thoroughly.
• Store the vehicle on a level surface in
a covered, dry and, if possible,
ventilated area.
• Select P (Park) and turn off the
engine.
• Disconnect the battery (refer
“Maintenance-Free Battery” in this
section) or connect a battery charger
(refer to paragraph “Maintaining
Battery Charge” of chapter “Battery
Statement” in this section).
• Check the battery charge status.
During parking, this check must be
carried out every three weeks.
Recharge the battery if the open
circuit voltage is lower than 12.2 V.
• Check that the parking brake is NOT
engaged.
• Do not empty the engine cooling
system.
• Clean and protect the painted parts
applying protective wax.Maintenance and Care
7
364
Page 388 of 396
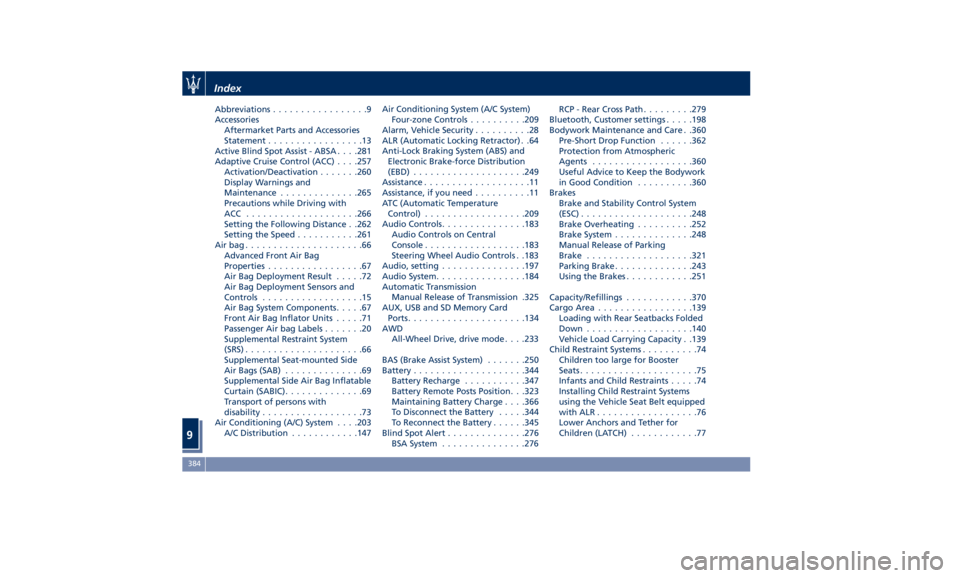
Abbreviations .................9
Accessories
Aftermarket Parts and Accessories
Statement .................13
Active Blind Spot Assist - ABSA . . . .281
Adaptive Cruise Control (ACC) . . . .257
Activation/Deactivation ...... .260
Display Warnings and
Maintenance ............. .265
Precautions while Driving with
ACC ................... .266
Setting the Following Distance . .262
Setting the Speed .......... .261
Airbag.....................66
Advanced Front Air Bag
Properties .................67
Air Bag Deployment Result .....72
Air Bag Deployment Sensors and
Controls ..................15
Air Bag System Components .....67
Front Air Bag Inflator Units .....71
Passenger Air bag Labels .......20
Supplemental Restraint System
(SRS) .....................66
Supplemental Seat-mounted Side
Air Bags (SAB) ..............69
Supplemental Side Air Bag Inflatable
Curtain (SABIC) ..............69
Transport of persons with
disability ..................73
Air Conditioning (A/C) System . . . .203
A/C Distribution ........... .147 Air Conditioning System (A/C System)
Four-zone Controls ......... .209
Alarm, Vehicle Security ..........28
ALR (Automatic Locking Retractor) . .64
Anti-Lock Braking System (ABS) and
Electronic Brake-force Distribution
(EBD) ................... .249
Assistance ...................11
Assistance, if you need ..........11
ATC (Automatic Temperature
Control) ................. .209
Audio Controls .............. .183
Audio Controls on Central
Console ................. .183
Steering Wheel Audio Controls . .183
Audio, setting .............. .197
Audio System ............... .184
Automatic Transmission
Manual Release of Transmission .325
AUX, USB and SD Memory Card
Ports .................... .134
AWD
All-Wheel Drive, drive mode . . . .233
BAS (Brake Assist System) ...... .250
Battery ................... .344
Battery Recharge .......... .347
Battery Remote Posts Position. . .323
Maintaining Battery Charge . . . .366
To Disconnect the Battery .... .344
To Reconnect the Battery
..... .345
Blind
Spot Alert .............
.276
BSA System .............. .276 RCP - Rear Cross Path ........ .279
Bluetooth, Customer settings .... .198
Bodywork Maintenance and Care . .360
Pre-Short Drop Function ..... .362
Protection from Atmospheric
Agents ................. .360
Useful Advice to Keep the Bodywork
in Good Condition ......... .360
Brakes
Brake and Stability Control System
(ESC) ................... .248
Brake Overheating ......... .252
Brake System ............. .248
Manual Release of Parking
Brake .................. .321
Parking Brake ............. .243
Using the Brakes ........... .251
Capacity/Refillings ........... .370
Cargo Area ................ .139
Loading with Rear Seatbacks Folded
Down .................. .140
Vehicle Load Carrying Capacity . .139
Child Restraint Systems ..........74
Children too large for Booster
Seats .....................75
Infants and Child Restraints .....74
Installing Child Restraint Systems
using the Vehicle Seat Belt equipped
with ALR ..................76
Lower Anchors and Tether for
Children (LATCH) ............77Index
9 384