engine MASERATI QUATTROPORTE 2019 Repair Manual
[x] Cancel search | Manufacturer: MASERATI, Model Year: 2019, Model line: QUATTROPORTE, Model: MASERATI QUATTROPORTE 2019Pages: 396, PDF Size: 13.9 MB
Page 198 of 396
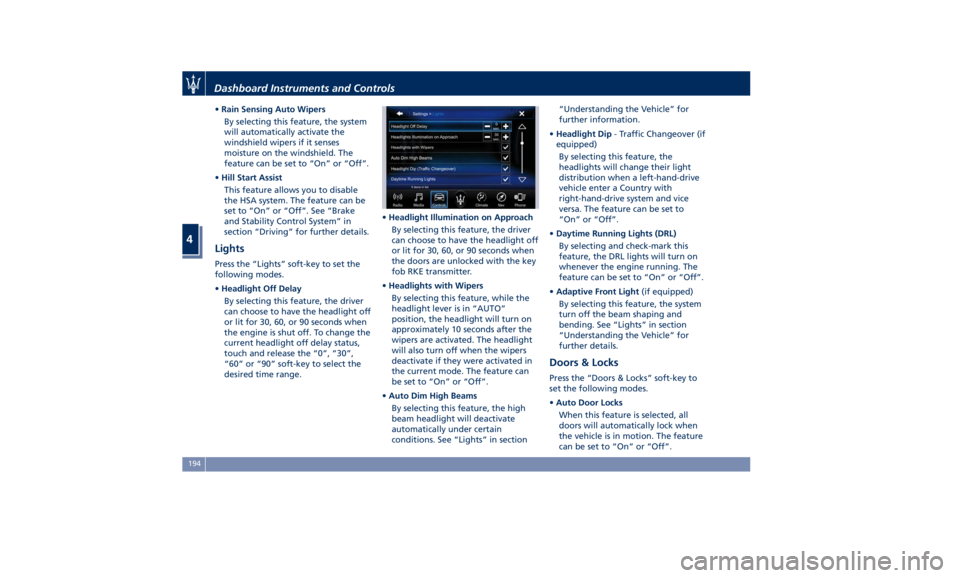
• Rain Sensing Auto Wipers
By selecting this feature, the system
will automatically activate the
windshield wipers if it senses
moisture on the windshield. The
feature can be set to “On” or “Off”.
• Hill Start Assist
This feature allows you to disable
the HSA system. The feature can be
set to “On” or “Off”. See “Brake
and Stability Control System” in
section “Driving” for further details.
Lights Press the “Lights” soft-key to set the
following modes.
• Headlight Off Delay
By selecting this feature, the driver
can choose to have the headlight off
or lit for 30, 60, or 90 seconds when
the engine is shut off. To change the
current headlight off delay status,
touch and release the “0”, “30”,
“60” or “90” soft-key to select the
desired time range. • Headlight Illumination on Approach
By selecting this feature, the driver
can choose to have the headlight off
or lit for 30, 60, or 90 seconds when
the doors are unlocked with the key
fob RKE transmitter.
• Headlights with Wipers
By selecting this feature, while the
headlight lever is in “AUTO”
position, the headlight will turn on
approximately 10 seconds after the
wipers are activated. The headlight
will also turn off when the wipers
deactivate if they were activated in
the current mode. The feature can
be set to “On” or “Off”.
• Auto Dim High Beams
By selecting this feature, the high
beam headlight will deactivate
automatically under certain
conditions. See “Lights” in section “Understanding the Vehicle” for
further information.
• Headlight Dip - Traffic Changeover (if
equipped)
By selecting this feature, the
headlights will change their light
distribution when a left-hand-drive
vehicle enter a Country with
right-hand-drive system and vice
versa. The feature can be set to
“On” or “Off”.
• Daytime Running Lights (DRL)
By selecting and check-mark this
feature, the DRL lights will turn on
whenever the engine running. The
feature can be set to “On” or “Off”.
• Adaptive Front Light (if equipped)
By selecting this feature, the system
turn off the beam shaping and
bending. See “Lights” in section
“Understanding the Vehicle” for
further details.
Doors & Locks Press the “Doors & Locks” soft-key to
set the following modes.
• Auto Door Locks
When this feature is selected, all
doors will automatically lock when
the vehicle is in motion. The feature
can be set to “On” or “Off”.Dashboard Instruments and Controls
4
194
Page 199 of 396
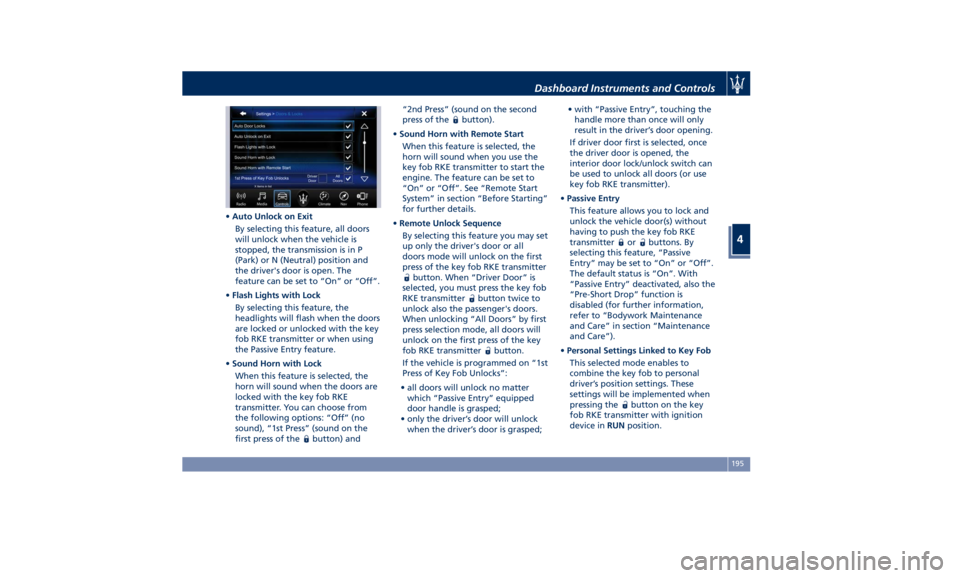
• Auto Unlock on Exit
By selecting this feature, all doors
will unlock when the vehicle is
stopped, the transmission is in P
(Park) or N (Neutral) position and
the driver's door is open. The
feature can be set to “On” or “Off”.
• Flash Lights with Lock
By selecting this feature, the
headlights will flash when the doors
are locked or unlocked with the key
fob RKE transmitter or when using
the Passive Entry feature.
• Sound Horn with Lock
When this feature is selected, the
horn will sound when the doors are
locked with the key fob RKE
transmitter. You can choose from
the following options: “Off” (no
sound), “1st Press” (sound on the
first press of the
button) and “2nd Press” (sound on the second
press of the
button).
• Sound Horn with Remote Start
When this feature is selected, the
horn will sound when you use the
key fob RKE transmitter to start the
engine. The feature can be set to
“On” or “Off”. See “Remote Start
System” in section “Before Starting”
for further details.
• Remote Unlock Sequence
By selecting this feature you may set
up only the driver's door or all
doors mode will unlock on the first
press of the key fob RKE transmitter
button. When “Driver Door” is
selected, you must press the key fob
RKE transmitter
button twice to
unlock also the passenger's doors.
When unlocking “All Doors” by first
press selection mode, all doors will
unlock on the first press of the key
fob RKE transmitter
button.
If the vehicle is programmed on “1st
Press of Key Fob Unlocks”:
• all doors will unlock no matter
which “Passive Entry” equipped
door handle is grasped;
• only the driver’s door will unlock
when the driver’s door is grasped; • with “Passive Entry”, touching the
handle more than once will only
result in the driver’s door opening.
If driver door first is selected, once
the driver door is opened, the
interior door lock/unlock switch can
be used to unlock all doors (or use
key fob RKE transmitter).
• Passive Entry
This feature allows you to lock and
unlock the vehicle door(s) without
having to push the key fob RKE
transmitter
or buttons. By
selecting this feature, “Passive
Entry” may be set to “On” or “Off”.
The default status is “On”. With
“Passive Entry” deactivated, also the
“Pre-Short Drop” function is
disabled (for further information,
refer to “Bodywork Maintenance
and Care” in section “Maintenance
and Care”).
• Personal Settings Linked to Key Fob
This selected mode enables to
combine the key fob to personal
driver’s position settings. These
settings will be implemented when
pressing the
button on the key
fob RKE transmitter with ignition
device in RUN position.Dashboard Instruments and Controls
4
195
Page 200 of 396
• Power Liftgate Alert
When this feature is selected,
further to turn indicators flashing,
an acoustic warning will also be
triggered when opening and closing
the liftgate/trunk lid. The feature
can be set to “On” or “Off”.
• Hands Free Power Liftgate
To prevent the accidental opening
of the Power Trunk Lid/Hands Free
(optional) with the movement of
the foot, it is possible to disable the
“Hands Free” function. The feature
can be set to “On” or “Off”. This
operation is recommended when
you have to wash the car (for
further information, refer to “Power
Trunk Lid Operation” in section
“Before Starting”).
Auto-On Comfort & Remote
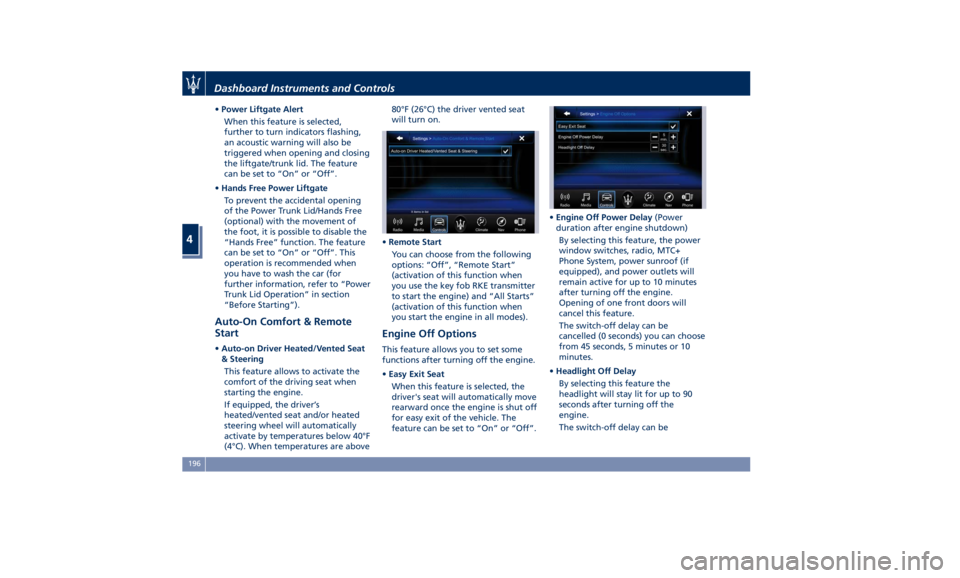
Start • Auto-on Driver Heated/Vented Seat
& Steering
This feature allows to activate the
comfort of the driving seat when
starting the engine.
If equipped, the driver’s
heated/vented seat and/or heated
steering wheel will automatically
activate by temperatures below 40°F
(4°C). When temperatures are above 80°F (26°C) the driver vented seat
will turn on.
• Remote Start
You can choose from the following
options: “Off”, “Remote Start”
(activation of this function when
you use the key fob RKE transmitter
to start the engine) and “All Starts”
(activation of this function when
you start the engine in all modes).
Engine Off Options This feature allows you to set some
functions after turning off the engine.
• Easy Exit Seat
When this feature is selected, the
driver's seat will automatically move
rearward once the engine is shut off
for easy exit of the vehicle. The
feature can be set to “On” or “Off”. • Engine Off Power Delay (Power
duration after engine shutdown)
By selecting this feature, the power
window switches, radio, MTC+
Phone System, power sunroof (if
equipped), and power outlets will
remain active for up to 10 minutes
after turning off the engine.
Opening of one front doors will
cancel this feature.
The switch-off delay can be
cancelled (0 seconds) you can choose
from 45 seconds, 5 minutes or 10
minutes.
• Headlight Off Delay
By selecting this feature the
headlight will stay lit for up to 90
seconds after turning off the
engine.
The switch-off delay can beDashboard Instruments and Controls
4
196
Page 210 of 396
the air flow rate and the air
distribution respectively on the driver
and on the passenger zone. Press
“AUTO” to switch the ATC between
manual and automatic mode. The LED
on the button and the “AUTO”
soft-key illuminates when the “AUTO”
function is activated. See “Automatic
Temperature Control (ATC)” in this
chapter for more information.
9. MAX defrosting/demisting
Press the
button or the MTC+
soft-key to switch the airflow setting
to the windshield and the front side
windows to get quick defrosting/
defogging. The LED on the button and
the MTC+ soft-key illuminates when
this feature is activated. Operating this
function will cause the ATC to switch
into manual mode: so the “AUTO” LED
on the button and the MTC+ soft-key
will turn off. With engine off, the
blower will run at minimum speed (1)
and can be increased manually: with
engine on, the blower speed will
gradually increase to the higher speed
(8). MAX defrosting/demisting shall
also involve REAR defrosting/demisting
function. If this function is turned off
the climate system will return to the
previous setting, switching on the A/C
(“A/C” LED on the button and the
MTC+ soft-key illuminated). 10. REAR defrosting/demisting
Press the
button or the MTC+
soft-key to turn on the rear window
defroster and the heated outside
mirrors. The LED on the button and
the MTC+ soft-key will illuminate
when the rear window defroster and
the heated external mirrors are on.
The rear window defroster and the
heated external mirrors automatically
turn off after 10 minutes.
CAUTION!
Failure to observe the following
cautions may cause damage to the rear
windows defroster:
• Use care when washing the inside of
the rear window. Do not use abrasive
window cleaners on the interior
surface of the window. Use a soft
cloth and a mild washing solution,
wiping parallel to the heating
elements. Labels can be peeled off
after soaking with warm water.
• Do not use scrapers, sharp
instruments, or abrasive window
cleaners on the interior surface of
the window.
• Keep all objects inside the vehicle at
a safe distance from the window. 11. MAX A/C
By
pressing the “MAX A/C” button or
the MTC+ soft-key, the system
automatically switches to get the
maximum cold air flow in both zones.
12 - 13. Air flow distribution modes
The airflow distribution mode,
respectively on the driver and on the
passenger zone, can be adjusted so air
comes from the dashboard vents, vents
under the dashboard in direction of
the floor, vents under the front seats
and demist/defrost vents.
The MTC+ display contains the
relevant soft-keys used to set these
modes for each zone. The climate
control panel features a single button
for each zone: press it several times to
select and set the required airflow
distribution mode.
Available settings are as follows:
• “Floor” mode
Air for each zone comes from the
front vents, located under the
dashboard and under the front
seats. A small portion of the airflow
is directed through the
defrost/demist vents to prevent
windows fogging.
• “Dashboard” mode
Air flows for each zone from four
adjustable vents of the dashboard,Dashboard Instruments and Controls
4
206
Page 213 of 396
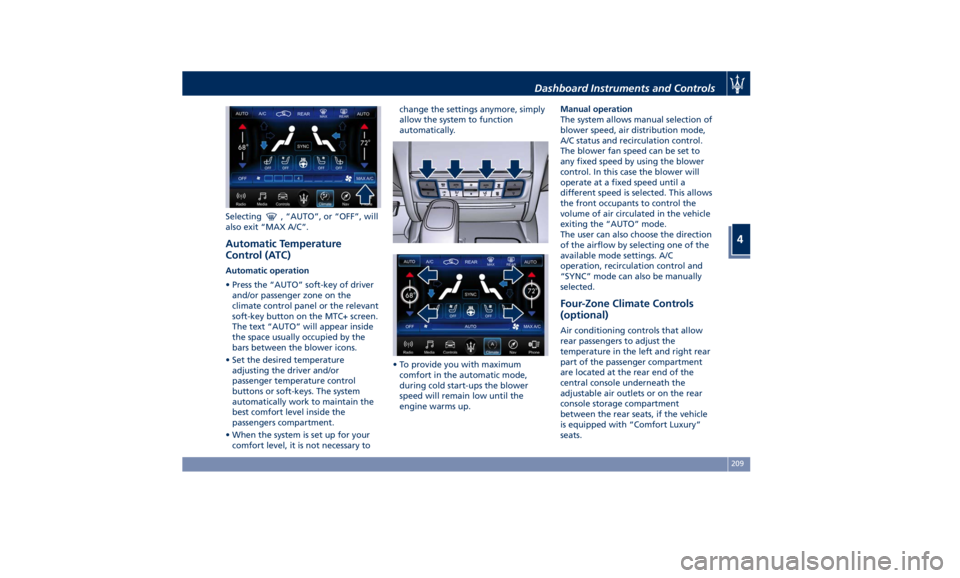
Selecting , “AUTO”, or “OFF”, will
also exit “MAX A/C”.
Automatic Temperature
Control (ATC) Automatic operation
• Press the “AUTO” soft-key of driver
and/or passenger zone on the
climate control panel or the relevant
soft-key button on the MTC+ screen.
The text “AUTO” will appear inside
the space usually occupied by the
bars between the blower icons.
• Set the desired temperature
adjusting the driver and/or
passenger temperature control
buttons or soft-keys. The system
automatically work to maintain the
best comfort level inside the
passengers compartment.
• When the system is set up for your
comfort level, it is not necessary to change the settings anymore, simply
allow the system to function
automatically.
• To provide you with maximum
comfort in the automatic mode,
during cold start-ups the blower
speed will remain low until the
engine warms up. Manual operation
The system allows manual selection of
blower speed, air distribution mode,
A/C status and recirculation control.
The blower fan speed can be set to
any fixed speed by using the blower
control. In this case the blower will
operate at a fixed speed until a
different speed is selected. This allows
the front occupants to control the
volume of air circulated in the vehicle
exiting the “AUTO” mode.
The user can also choose the direction
of the airflow by selecting one of the
available mode settings. A/C
operation, recirculation control and
“SYNC” mode can also be manually
selected.
Four-Zone Climate Controls
(optional) Air conditioning controls that allow
rear passengers to adjust the
temperature in the left and right rear
part of the passenger compartment
are located at the rear end of the
central console underneath the
adjustable air outlets or on the rear
console storage compartment
between the rear seats, if the vehicle
is equipped with “Comfort Luxury”
seats.Dashboard Instruments and Controls
4
209
Page 215 of 396
NOTE:
The Bi-Level mode is designed to
provide comfort by sending cooler air
out of the central console and side
pillars vents and warmer air from the
floor vents.
7. “Floor” mode
Air comes from the floor vents under
the front seats.
8. “Torso” mode
Air comes from the adjustable vents
on the central console and the ones
on the pillars between the doors. Each
of these vents can be singly adjusted.
The air grids of the vents can be
moved up/down and right/left to
adjust the airflow direction. A setting
wheel, placed near each vent, allows
to regulate the airflow or to close the
vent.
9. AUTO
This function automatically controls
the interior temperature by adjusting
the air flow rate and the air
distribution.
• Press the AUTO button: the
automatic rear climate control
switches from manual to automatic
mode and vice-versa. The AUTO
symbol on the button illuminates
when this function is activated. • Adjust then the temperature you
wish to maintain by regulating the
left and/or right side temperature
control buttons. Once the desired
temperature is set, the system will
achieve and automatically maintain
that comfort level.
• When the system is set up for your
comfort level, it is not necessary to
change the settings anymore: simply
allow the system to function
automatically.
To provide you with maximum
comfort in the automatic mode,
during cold start-ups the blower speed
will remain low until the engine
warms up.
Four-Zone Climate Control by the
Driver
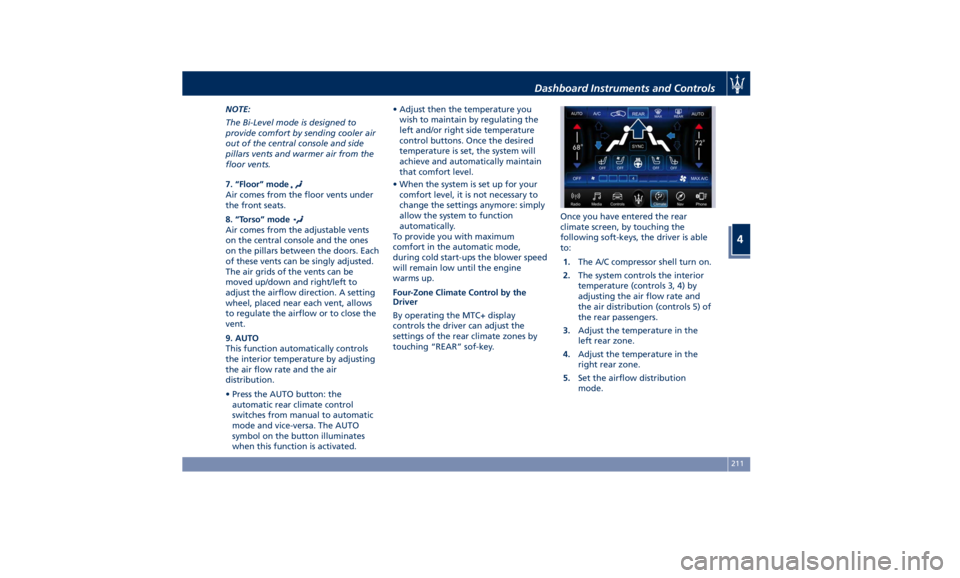
By operating the MTC+ display
controls the driver can adjust the
settings of the rear climate zones by
touching “REAR” sof-key. Once you have entered the rear
climate screen, by touching the
following soft-keys, the driver is able
to:
1. The A/C compressor shell turn on.
2. The system controls the interior
temperature (controls 3, 4) by
adjusting the air flow rate and
the air distribution (controls 5) of
the rear passengers.
3. Adjust the temperature in the
left rear zone.
4. Adjust the temperature in the
right rear zone.
5. Set the airflow distribution
mode.Dashboard Instruments and Controls
4
211
Page 221 of 396
5 – Driving Normal Starting of the Engine ............................. 218
Automatic Start&Stop System ............................. 220
Automatic Transmission .................................. 224
All-Wheel Drive (AWD version only) ......................... 233
Drive Mode ........................................... 234
Active Alternator ....................................... 243
Parking Brake ......................................... 243
Parking .............................................. 246
Brake and Stability Control System ......................... 248
Using the Brakes ....................................... 251
Use of the Engine ...................................... 252
Electronic Cruise Control ................................. 254
Adaptive Cruise Control – ACC (optional) ..................... 257
Forward Collision Warning – FCW .......................... 268
Lane Keeping Assist - LKA (optional, with ACC only) ............ 271
Blind Spot Assist (without ACC) ............................ 276
Active Blind Spot Assist - ABSA (optional, with ACC only) ........ 281
Highway Assist – HAS (optional, with ACC only) ................ 284
Traffic Sign Assist – TSA (optional) .......................... 290
Tires - General Information ............................... 292
Tire Pressure Monitoring System (TPMS) ..................... 300
Fuel Requirements ...................................... 304
Refueling ............................................. 307
Driving Conditions ...................................... 309
217
Page 222 of 396
Normal Starting of the
Engine WARNING!
It is dangerous to run the engine in an
enclosed area. The engine consumes
oxygen and discharges carbon
dioxide, carbon monoxide and other
toxic gases in the atmosphere.
WARNING!
California Proposition 65
Operating, servicing and maintaining
a passenger vehicle or off-road vehicle
can expose you to chemicals including
such as, engine exhaust, carbon
monoxide, phthalates and lead, that
which are known to the State of
California to cause cancer and birth
defects or other reproductive harm. To
minimize exposure, avoid breathing
exhaust, do not idle the engine except
as necessary, service your vehicle in a
well-ventilated area and wear gloves
or wash your hands frequently when
servicing your vehicle. For more
information go to: www.P65Warnings.ca.gov/passenger-
vehicle
When doors are opened, the
instrument
cluster displays
the
Maserati Logo in the center and the
complete odometer plus the open
doors indicator
in the lower part of
the cluster.
Before starting the engine, close the
doors, adjust your seat, the inside and
outside mirrors, fasten your seat belt
and instruct all other occupants to
buckle their seat belts.
The shift lever must be in P (Park) or N
(Neutral) position before you can start
the engine. Apply the brakes before
shifting into any driving gear (see
“Automatic Transmission” in this
section). CAUTION!
• Before starting the engine, switch off
the electrical devices with a high
power consumption (air-conditioning
and heating system, heated rear
window, headlights, etc.).
• Do not start the engine if the fuel
level in the tank is low.
The keyless ignition allows the driver
to
operate the
ignition switch by
pushing the center button, as long as
the key fob RKE transmitter is within
the passenger compartment (check
“Keys” in section “Before Starting” for
further information).
By pressing the brake pedal and
pushing the START/STOP button the
engine starts. Instrument cluster
displays the initial sequence with
indicator light and analog instruments
test routine and switch-on of the
engine temperature indicators and
fuel level. This happens if option “On”
was set in screen settings for display
switch-on (see chapter “Instrument
cluster” in section “Dashboard
Instruments and Controls”).Driving
5
218
Page 223 of 396
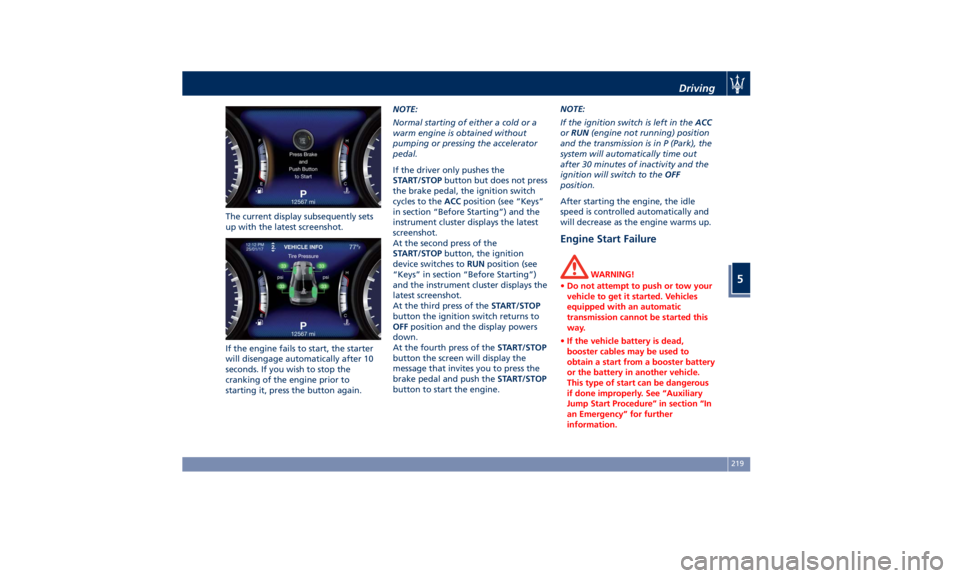
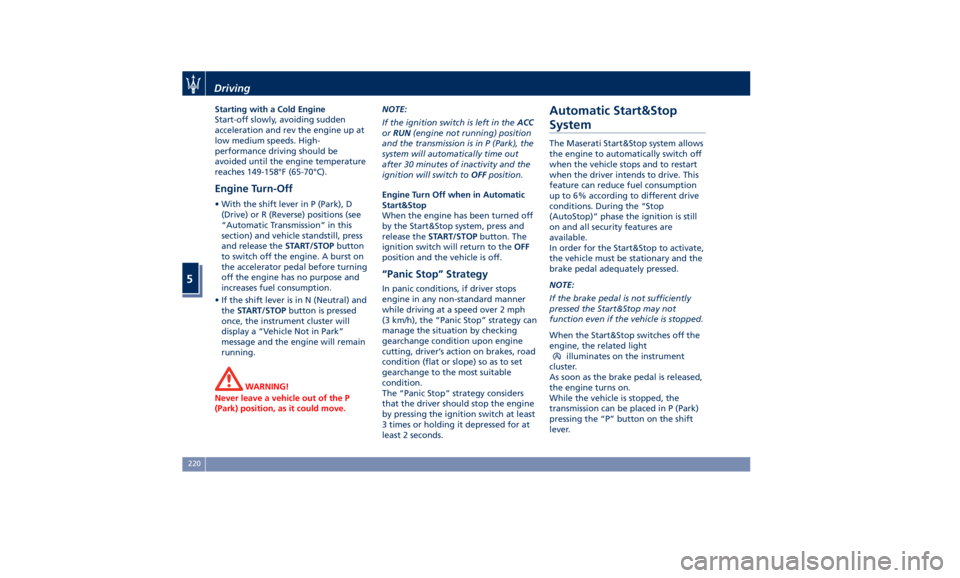
The current display subsequently sets
up with the latest screenshot.
If the engine fails to start, the starter
will disengage automatically after 10
seconds. If you wish to stop the
cranking of the engine prior to
starting it, press the button again. NOTE:
Normal starting of either a cold or a
warm engine is obtained without
pumping or pressing the accelerator
pedal.
If the driver only pushes the
START/STOP button but does not press
the brake pedal, the ignition switch
cycles to the ACC position (see “Keys”
in section “Before Starting”) and the
instrument cluster displays the latest
screenshot.
At the second press of the
START/STOP button, the ignition
device switches to RUN position (see
“Keys” in section “Before Starting”)
and the instrument cluster displays the
latest screenshot.
At the third press of the START/STOP
button the ignition switch returns to
OFF position and the display powers
down.
At the fourth press of the START/STOP
button the screen will display the
message that invites you to press the
brake pedal and push the START/STOP
button to start the engine. NOTE:
If the ignition switch is left in the ACC
or RUN (engine not running) position
and the transmission is in P (Park), the
system will automatically time out
after 30 minutes of inactivity and the
ignition will switch to the OFF
position.
After starting the engine, the idle
speed is controlled automatically and
will decrease as the engine warms up.
Engine Start Failure WARNING!
• Do not attempt to push or tow your
vehicle to get it started. Vehicles
equipped with an automatic
transmission cannot be started this
way.
• If the vehicle battery is dead,
booster cables may be used to
obtain a start from a booster battery
or the battery in another vehicle.
This type of start can be dangerous
if done improperly. See “Auxiliary
Jump Start Procedure” in section “In
an Emergency” for further
information.Driving
5
219
Page 224 of 396
Starting with a Cold Engine
Start-off slowly, avoiding sudden
acceleration and rev the engine up at
low medium speeds. High-
performance driving should be
avoided until the engine temperature
reaches 149-158°F (65-70°C).
Engine Turn-Off • With the shift lever in P (Park), D
(Drive) or R (Reverse) positions (see
“Automatic Transmission” in this
section) and vehicle standstill, press
and release the START/STOP button
to switch off the engine. A burst on
the accelerator pedal before turning
off the engine has no purpose and
increases fuel consumption.
• If the shift lever is in N (Neutral) and
the START/STOP button is pressed
once, the instrument cluster will
display a “Vehicle Not in Park”
message and the engine will remain
running.
WARNING!
Never leave a vehicle out of the P
(Park) position, as it could move. NOTE:
If
the ignition switch is left in the ACC
or RUN (engine not running) position
and the transmission is in P (Park), the
system will automatically time out
after 30 minutes of inactivity and the
ignition will switch to OFF position.
Engine Turn Off when in Automatic
Start&Stop
When the engine has been turned off
by the Start&Stop system, press and
release the START/STOP button. The
ignition switch will return to the OFF
position and the vehicle is off.
“Panic Stop” Strategy In panic conditions, if driver stops
engine in any non-standard manner
while driving at a speed over 2 mph
(3 km/h), the “Panic Stop” strategy can
manage the situation by checking
gearchange condition upon engine
cutting, driver’s action on brakes, road
condition (flat or slope) so as to set
gearchange to the most suitable
condition.
The “Panic Stop” strategy considers
that the driver should stop the engine
by pressing the ignition switch at least
3 times or holding it depressed for at
least 2 seconds.Automatic Start&Stop
System The Maserati Start&Stop system allows
the engine to automatically switch off
when the vehicle stops and to restart
when the driver intends to drive. This
feature can reduce fuel consumption
up to 6% according to different drive
conditions. During the “Stop
(AutoStop)” phase the ignition is still
on and all security features are
available.
In order for the Start&Stop to activate,
the vehicle must be stationary and the
brake pedal adequately pressed.
NOTE:
If the brake pedal is not sufficiently
pressed the Start&Stop may not
function even if the vehicle is stopped.
When the Start&Stop switches off the
engine, the related light
illuminates on the instrument
cluster.
As soon as the brake pedal is released,
the engine turns on.
While the vehicle is stopped, the
transmission can be placed in P (Park)
pressing the “P” button on the shift
lever.Driving
5
220