radiator MAZDA MIATA 1991 Factory Service Manual
[x] Cancel search | Manufacturer: MAZDA, Model Year: 1991, Model line: MIATA, Model: MAZDA MIATA 1991Pages: 392, PDF Size: 29.45 MB
Page 320 of 392

Any modification to the exhaust system on turbo models, which reduces exhaust backpressure, will lead to lean
fuel mixtures and excessive spark advance. This could cause serious engine damage.
ELECTROSTATIC DISCHARGE SENSITIVE (ESD) PARTS
ENGINE OIL
FUEL SYSTEM SERVICE
HALOGEN BULBS
Halogen bulbs contain pressurized gas which may explode if overheated. DO NOT touch glass portion of bulb
with bare hands. Eye protection should be worn when handling or working around halogen bulbs.
HEADLIGHT RETRACTOR
RADIATOR CAP
RADIATOR FAN WARNING:Many solid state electrical components can be damaged by static
electricity (ESD). Some will display a warning label, but many will not.
Discharge personal static electricity by touching a metal ground point on
the vehicle prior to servicing any ESD sensitive component.
CAUTION: Never use non-detergent or straight mineral oil.
WARNING:Relieve fuel system pressure prior to servicing any fuel system
component (fuel injection models).
CAUTION: If headlight retractor freezes during cold weather operation, DO NOT
attempt to force mechanism. Headlights should be kept raised at all times
in cold weather. To raise them, use only headlight retractor switch. DO
NOT use headlight switch.
CAUTION: Always disconnect the fan motor when working near the radiator fan. The
fan is temperature controlled and could start at any time even when the
ignition key is in the OFF position. DO NOT loosen or remove radiator cap
when cooling system is hot.
WARNING:Keep hands away from radiator fan. Fan is controlled by a thermostatic
switch which may come on or run for up to 15 minutes even after engine
is turned off.
1991 Mazda MX-5 Miata
FUSES & CIRCUIT BREAKERS Fuses & Circuit Breakers 1990-95 Mazda
Microsoft
Sunday, July 05, 2009 2:15:54 PMPage 7 © 2005 Mitchell Repair Information Company, LLC.
Page 342 of 392

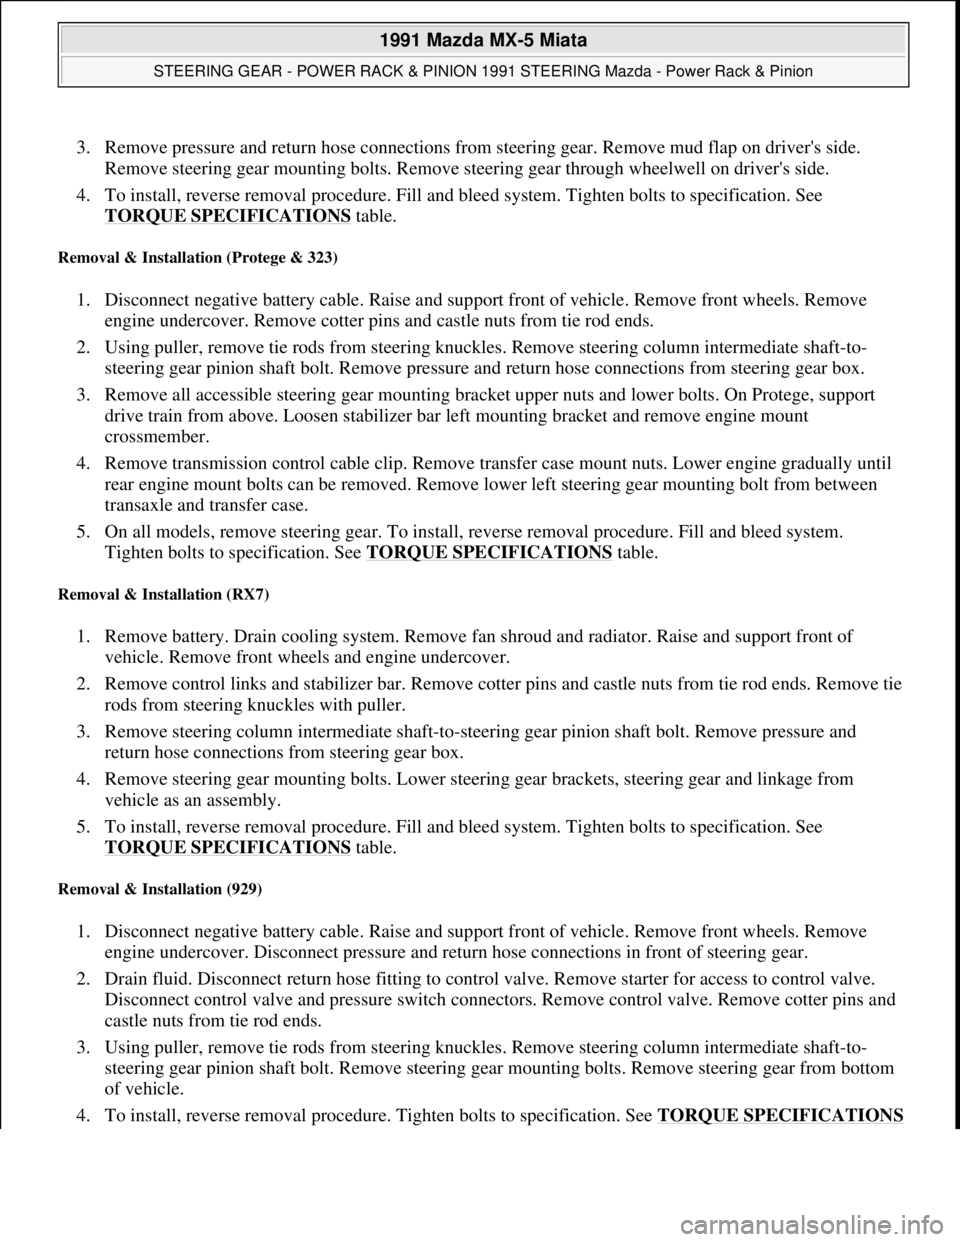
3. Remove pressure and return hose connections from steering gear. Remove mud flap on driver's side.
Remove steering gear mounting bolts. Remove steering gear through wheelwell on driver's side.
4. To install, reverse removal procedure. Fill and bleed system. Tighten bolts to specification. See
TORQUE SPECIFICATIONS
table.
Removal & Installation (Protege & 323)
1. Disconnect negative battery cable. Raise and support front of vehicle. Remove front wheels. Remove
engine undercover. Remove cotter pins and castle nuts from tie rod ends.
2. Using puller, remove tie rods from steering knuckles. Remove steering column intermediate shaft-to-
steering gear pinion shaft bolt. Remove pressure and return hose connections from steering gear box.
3. Remove all accessible steering gear mounting bracket upper nuts and lower bolts. On Protege, support
drive train from above. Loosen stabilizer bar left mounting bracket and remove engine mount
crossmember.
4. Remove transmission control cable clip. Remove transfer case mount nuts. Lower engine gradually until
rear engine mount bolts can be removed. Remove lower left steering gear mounting bolt from between
transaxle and transfer case.
5. On all models, remove steering gear. To install, reverse removal procedure. Fill and bleed system.
Tighten bolts to specification. See TORQUE SPECIFICATIONS
table.
Removal & Installation (RX7)
1. Remove battery. Drain cooling system. Remove fan shroud and radiator. Raise and support front of
vehicle. Remove front wheels and engine undercover.
2. Remove control links and stabilizer bar. Remove cotter pins and castle nuts from tie rod ends. Remove tie
rods from steering knuckles with puller.
3. Remove steering column intermediate shaft-to-steering gear pinion shaft bolt. Remove pressure and
return hose connections from steering gear box.
4. Remove steering gear mounting bolts. Lower steering gear brackets, steering gear and linkage from
vehicle as an assembly.
5. To install, reverse removal procedure. Fill and bleed system. Tighten bolts to specification. See
TORQUE SPECIFICATIONS
table.
Removal & Installation (929)
1. Disconnect negative battery cable. Raise and support front of vehicle. Remove front wheels. Remove
engine undercover. Disconnect pressure and return hose connections in front of steering gear.
2. Drain fluid. Disconnect return hose fitting to control valve. Remove starter for access to control valve.
Disconnect control valve and pressure switch connectors. Remove control valve. Remove cotter pins and
castle nuts from tie rod ends.
3. Using puller, remove tie rods from steering knuckles. Remove steering column intermediate shaft-to-
steering gear pinion shaft bolt. Remove steering gear mounting bolts. Remove steering gear from bottom
of vehicle.
4. To install, reverse removal procedure. Tighten bolts to specification. See TORQUE SPECIFICATIONS
1991 Mazda MX-5 Miata
STEERING GEAR - POWER RACK & PINION 1991 STEERING Mazda - Power Rack & Pinion
Microsoft
Sunday, July 05, 2009 2:10:15 PMPage 5 © 2005 Mitchell Repair Information Company, LLC.
Page 387 of 392

Fig. 5: Aligning Camshaft Timing Marks (DOHC 1.8L Engines)
Courtesy of MAZDA MOTORS CORP.
Removal (MX-5 Miata - DOHC)
1. Disconnect negative battery cable. Drain cooling system. Remove radiator hose and by-pass hoses from
thermostat housing. Remove air cleaner intake duct assembly from throttle body to air cleaner filter
housing. Remove splash shield.
2. Remove drive belt(s) and water pump pulley. See Fig. 6
. Align crankshaft pulley timing mark with
cylinder No. 1 at TDC of compression stroke. Hold crankshaft pulley stationary. Remove crankshaft
pulley bolts. Remove pulley. Remove crankshaft pulley hub bolt and hub.
3. Remove cylinder head cover. Remove upper, center and lower timing belt cover. If timing belt is to be
reused, mark timing belt rotation direction. Ensure timing marks on camshaft sprockets are aligned. See
Fig. 7
. Loosen timing belt tensioner lock bolt, and move tensioner away from belt with spring fully
expanded. Remove timin
g belt.
1991 Mazda MX-5 Miata
MAZDA 1.6L & 1.8L 4-Cylinder - 1986-95
Microsoft
Sunday, July 05, 2009 2:12:44 PMPage 6 © 2005 Mitchell Repair Information Company, LLC.