engine oil MAZDA MIATA 1997 Factory Owner's Guide
[x] Cancel search | Manufacturer: MAZDA, Model Year: 1997, Model line: MIATA, Model: MAZDA MIATA 1997Pages: 514, PDF Size: 17.89 MB
Page 316 of 514
COMPRESSOR
Removal & Installation
1. Before disconnecting negative battery cable, obtain radio anti-theft code from vehicle owner. Disconnect
negative battery cable.
2. Raise and support front of vehicle with safety stands. Discharge A/C system using approved refrigerant
recovery/recycling equipment. Remove splash shield and air guide.
3. Disconnect compressor clutch connector. Disconnect refrigerant lines from compressor, and plug open
fittings. Remove compressor drive belt. Remove compressor bolts and compressor. To install, reverse
removal procedure. Adjust drive belt deflection. Apply clean compressor oil to "O" ring before
connecting fittings. DO NOT apply compressor oil to fitting nuts. Evacuate and charge A/C system.
Check for leaks.
CONDENSER & RECEIVER-DRIER
Removal
Raise and support front of vehicle with safety stands. Discharge A/C system using approved refrigerant
recovery/recycling equipment. Remove splash shield and air guide. Remove condenser. Remove receiver-drier.
Plug open fittings.
Installation
To install, reverse removal procedure. Apply clean compressor oil to "O" rings before connecting fittings. DO
NOT apply compressor oil to fitting nuts. If installing new condenser, add 1.0 ounce of compressor oil to A/C
compressor. If installing new receiver-drier, add .3 ounce of compressor oil to A/C compressor. Evacuate and
charge A/C system. Check for leaks.
EVAPORATOR UNIT
Removal
1. Discharge A/C system using approved refrigerant recovery/recycling equipment. Disconnect refrigerant
pipes from evaporator tubes at engine compartment firewall and plug open fittings. Remove passenger-
side instrument panel undercover. Remove glove box.
2. Disconnect electrical connectors. Loosen seal plates between evaporator unit, heater unit and blower unit.
Remove evaporator unit. Disassemble evaporator unit to remove evaporator core and thermo-switch. See WARNING:To avoid injury from accidental air bag deployment, read and follow all
SERVICE PRECAUTIONS and DISABLING & ACTIVATING AIR BAG
SYSTEM procedures in AIR BAG RESTRAINT SYSTEM article in the
ACCESSORIES/SAFETY EQUIPMENT section.
NOTE: For removal and installation procedures not covered in this article, see HEATER
SYSTEM article.
1997 Mazda MX-5 Miata
A/C-HEATER SYSTEM - MANUAL 1997 Manual A/C-Heater System
Microsoft
Sunday, July 05, 2009 1:41:48 PMPage 7 © 2005 Mitchell Repair Information Company, LLC.
Page 323 of 514
Cracks Or Tears In Belt Surface
Missing, Damaged, Cracked Or Rounded Teeth
Oil Contamination
Damaged Or Faulty Tensioners
Incorrect Tension Adjustment
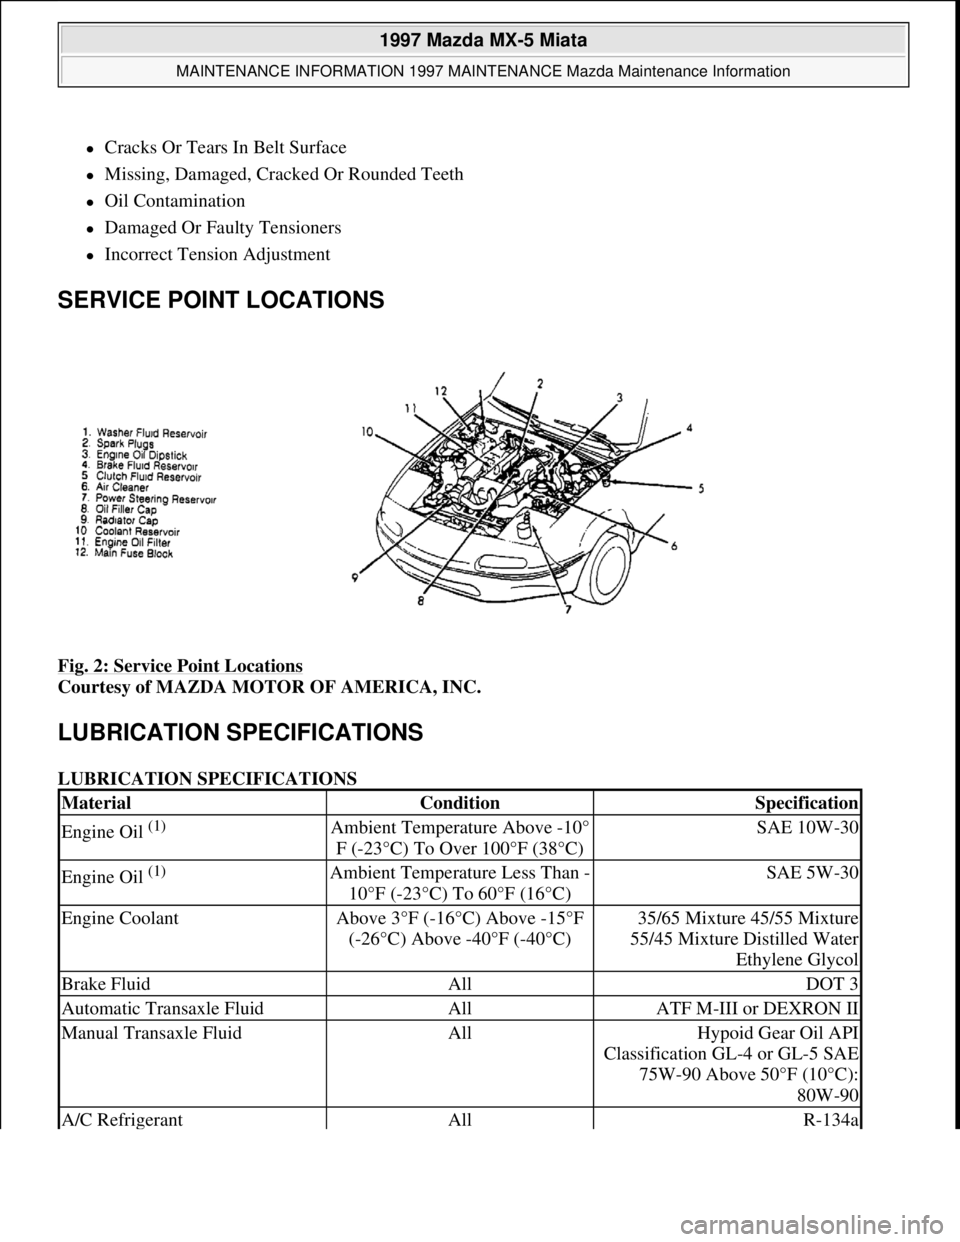
SERVICE POINT LOCATIONS
Fig. 2: Service Point Locations
Courtesy of MAZDA MOTOR OF AMERICA, INC.
LUBRICATION SPECIFICATIONS
LUBRICATION SPECIFICATIONS
MaterialConditionSpecification
Engine Oil (1) Ambient Temperature Above -10°
F (-23°C) To Over 100°F (38°C)SAE 10W-30
Engine Oil (1) Ambient Temperature Less Than -
10°F (-23°C) To 60°F (16°C)SAE 5W-30
Engine CoolantAbove 3°F (-16°C) Above -15°F
(-26°C) Above -40°F (-40°C)35/65 Mixture 45/55 Mixture
55/45 Mixture Distilled Water
Ethylene Glycol
Brake FluidAllDOT 3
Automatic Transaxle FluidAllATF M-III or DEXRON II
Manual Transaxle FluidAllHypoid Gear Oil API
Classification GL-4 or GL-5 SAE
75W-90 Above 50°F (10°C):
80W-90
A/C RefrigerantAllR-134a
1997 Mazda MX-5 Miata
MAINTENANCE INFORMATION 1997 MAINTENANCE Mazda Maintenance Information
Microsoft
Sunday, July 05, 2009 1:41:19 PMPage 3 © 2005 Mitchell Repair Information Company, LLC.
Page 324 of 514
FLUID CAPACITIES
FLUID CAPACITIES
WHEEL & TIRE SPECIFICATIONS
WHEEL TIGHTENING
Tighten wheel lug nuts to 65-87 ft. lbs. (88-118 N.m).
BATTERY SPECIFICATIONS
Vehicle is equipped with a special 9 9/16" x 4 3/4" x 7 3/8" 12-volt battery that is vented to outside of vehicle.
CAUTIONS & WARNINGS
SUPPLEMENTAL RESTRAINT SYSTEM (AIR BAG)
Modifications or improper maintenance, including incorrect removal and installation of the Supplemental
Restraint System (SRS), can adversely affect system performance. DO NOT cover, obstruct or change the
steerin
g wheel horn pad in any way, as such action could cause improper function of the system. Use only plain
(1)Energy conserving oils are recommended, API classification SG", "SH".
ItemConditionSpecification (1)
Engine OilDrained, With Filter4.0 Qts. (3.8L)
Engine OilDrained3.8 Qts. (3.6L)
Engine CoolantDrained6.3 Qts. (6.0L)
Automatic Transaxle FluidCapacity7.1 Qts. (6.7L)
Manual Transaxle FluidCapacity2.1 Qts. (2.0L)
Rear Axle OilCapacity1.1 Qts. (l.0L)
A/C RefrigerantEvacuated1 lb. 3.4 oz. (0.6kg)
Fuel TankCapacity12.6 Gal. (48.0L)
(1)Capacities are recommended or calculated levels. Always use dipstick (if available) to measure level.
CAUTION: When battery is disconnected, vehicles equipped with computers may
lose memory data. When battery power is restored, driveability problems
may exist on some vehicles. These vehicles may require a relearn
procedure. See COMPUTER RELEARN PROCEDURES article in the
GENERAL INFORMATION Section.
NOTE: See the AIR BAG RESTRAINT SYSTEM article in the ACCESSORIES/SAFETY
EQUIPMENT Section.
1997 Mazda MX-5 Miata
MAINTENANCE INFORMATION 1997 MAINTENANCE Mazda Maintenance Information
Microsoft
Sunday, July 05, 2009 1:41:19 PMPage 4 © 2005 Mitchell Repair Information Company, LLC.
Page 326 of 514
REPLACING BLOWN FUSES
BRAKE PAD WEAR INDICATOR
CATALYTIC CONVERTER
ELECTROSTATIC DISCHARGE SENSITIVE (ESD) PARTS
ENGINE OIL
FUEL SYSTEM SERVICE WARNING:When battery is disconnected, vehicles equipped with computers may
lose memory data. When battery power is restored, driveability problems
may exist on some vehicles. These vehicles may require a relearn
procedure. See COMPUTER RELEARN PROCEDURES article in GENERAL
INFORMATION section.
CAUTION: Before replacing a blown fuse, remove ignition key, turn off all lights and
accessories to avoid damaging the electrical system. Be sure to use fuse
with the correct indicated amperage rating. The use of an incorrect
amperage rating fuse may result in a dangerous electrical system
overload.
CAUTION: Indicator will cause a squealing or scraping noise, warning that brake
pads need replacement.
CAUTION: Continued operation of vehicle with a severe malfunction could cause
converter to overheat, resulting in possible damage to converter and
vehicle.
CAUTION: Any modification to the exhaust system on turbo models, which reduces
exhaust backpressure, will lead to lean fuel mixtures and excessive spark
advance. This could cause serious engine damage.
WARNING:Many solid state electrical components can be damaged by static
electricity (ESD). Some will display a warning label, but many will not.
Discharge personal static electricity by touching a metal ground point on
the vehicle prior to servicing any ESD sensitive component.
CAUTION: Never use non-detergent or straight mineral oil.
1997 Mazda MX-5 Miata
MAINTENANCE INFORMATION 1997 MAINTENANCE Mazda Maintenance Information
Microsoft
Sunday, July 05, 2009 1:41:19 PMPage 6 © 2005 Mitchell Repair Information Company, LLC.
Page 336 of 514
STEERING SYSTEM - POWER RACK & PINION
1997 STEERING Mazda Power Rack & Pinion
DESCRIPTION
Steering system is a power-assisted rack and pinion. The system consists of a rack and pinion steering gear and
power-assist pump/reservoir. The steering gear and pump/reservoir are connected by flexible lines.
TESTING
HYDRAULIC SYSTEM PRESSURE TEST
Pump Fluid Pressure Test
1. Disconnect pressure line from steering gear and steering pump. Connect pressure gauge/valve between
steering pump and steering gear. See Fig. 1
. Bleed air from system.
2. Completely open valve. Start engine and operate at idle. Turn steering wheel from lock to lock to increase
fluid temperature to 122-140°F (50-60°C). To measure pump fluid pressure, close gauge valve
completely.
3. Increase engine speed to 1000-1500 RPM. Measure oil pump fluid pressure. Ensure pump pressure is
within specification. See HYDRAULIC SYSTEM FLUID PRESSURE SPECIFICATIONS
table. If
pressure is not within specification, replace pump.
CAUTION: DO NOT leave gauge valve closed for more than 15 seconds, or pump may
be damaged.
1997 Mazda MX-5 Miata
STEERING SYSTEM - POWER RACK & PINION 1997 STEERING Mazda Power Rack & Pinion
1997 Mazda MX-5 Miata
STEERING SYSTEM - POWER RACK & PINION 1997 STEERING Mazda Power Rack & Pinion
Microsoft
Sunday, July 05, 2009 1:39:26 PMPage 1 © 2005 Mitchell Repair Information Company, LLC.
Microsoft
Sunday, July 05, 2009 1:39:30 PMPage 1 © 2005 Mitchell Repair Information Company, LLC.
Page 338 of 514
LUBRICATION
FLUID CAPACITY
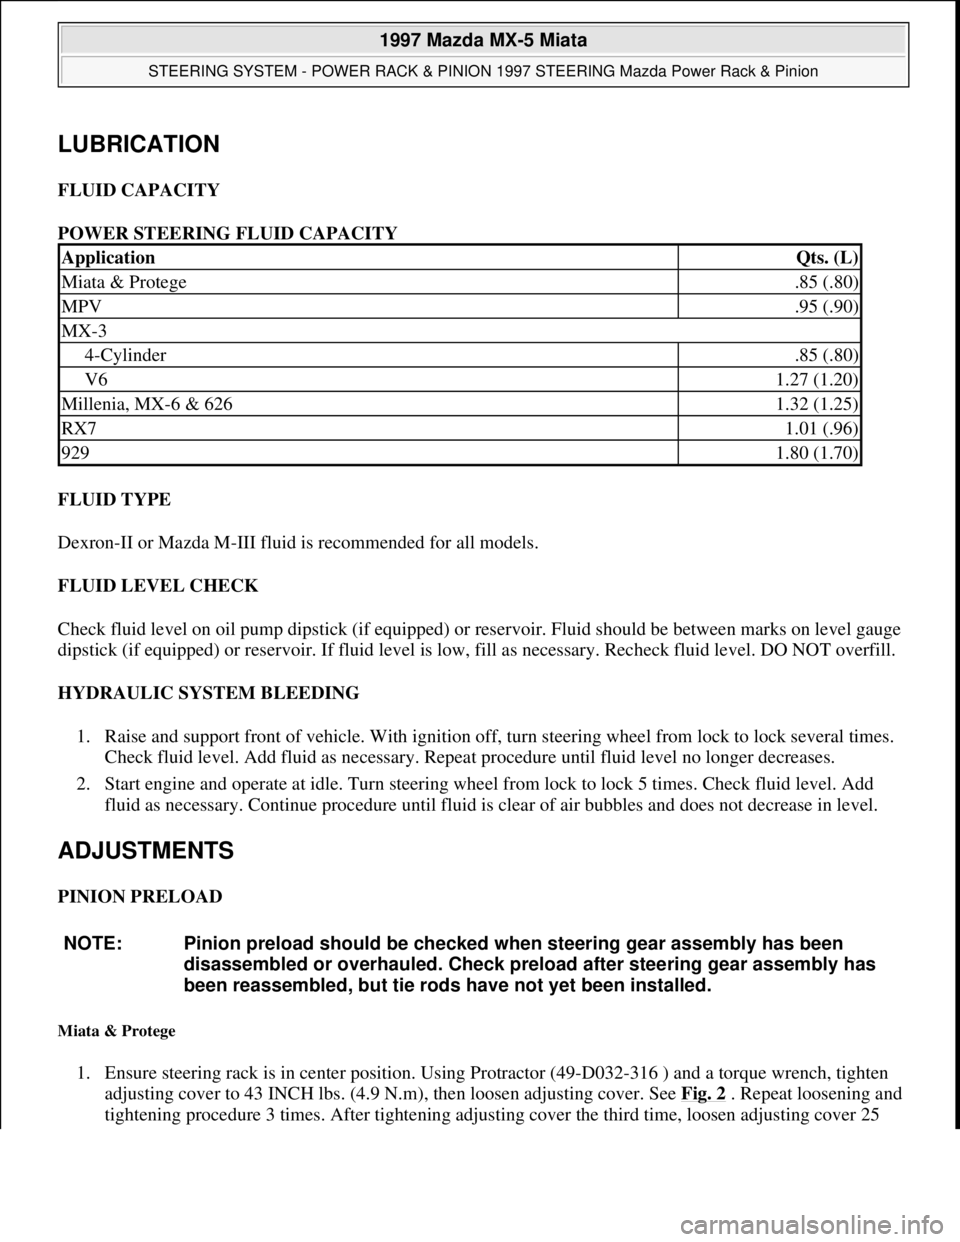
POWER STEERING FLUID CAPACITY
FLUID TYPE
Dexron-II or Mazda M-III fluid is recommended for all models.
FLUID LEVEL CHECK
Check fluid level on oil pump dipstick (if equipped) or reservoir. Fluid should be between marks on level gauge
dipstick (if equipped) or reservoir. If fluid level is low, fill as necessary. Recheck fluid level. DO NOT overfill.
HYDRAULIC SYSTEM BLEEDING
1. Raise and support front of vehicle. With ignition off, turn steering wheel from lock to lock several times.
Check fluid level. Add fluid as necessary. Repeat procedure until fluid level no longer decreases.
2. Start engine and operate at idle. Turn steering wheel from lock to lock 5 times. Check fluid level. Add
fluid as necessary. Continue procedure until fluid is clear of air bubbles and does not decrease in level.
ADJUSTMENTS
PINION PRELOAD
Miata & Protege
1. Ensure steering rack is in center position. Using Protractor (49-D032-316 ) and a torque wrench, tighten
adjusting cover to 43 INCH lbs. (4.9 N.m), then loosen adjusting cover. See Fig. 2
. Repeat loosening and
ti
ghtening procedure 3 times. After tightening adjusting cover the third time, loosen adjusting cover 25
ApplicationQts. (L)
Miata & Protege.85 (.80)
MPV.95 (.90)
MX-3
4-Cylinder.85 (.80)
V61.27 (1.20)
Millenia, MX-6 & 6261.32 (1.25)
RX71.01 (.96)
9291.80 (1.70)
NOTE: Pinion preload should be checked when steering gear assembly has been
disassembled or overhauled. Check preload after steering gear assembly has
been reassembled, but tie rods have not yet been installed.
1997 Mazda MX-5 Miata
STEERING SYSTEM - POWER RACK & PINION 1997 STEERING Mazda Power Rack & Pinion
Microsoft
Sunday, July 05, 2009 1:39:26 PMPage 3 © 2005 Mitchell Repair Information Company, LLC.
Page 383 of 514
FIELD WINDING TEST
1. Connect one ohmmeter lead to field coil lead ("M" terminal wire). Connect other lead of ohmmeter to
soldered portion of brush lead. If continuity does not exist, repair or replace field coil.
2. Check field coil for short to ground by connecting one ohmmeter lead to field coil lead ("M" terminal
wire) and other ohmmeter lead to field coil housing. If continuity exists, repair or replace field coil.
OVERRUNNING CLUTCH PINION DRIVE
Hold overrunning clutch housing and turn pinion gear by hand. If pinion turns in both directions or does not
turn at all, clutch is faulty. Replace clutch. DO NOT clean overrunning clutch with solvent, as it is packed with
grease and sealed by manufacturer.
REMOVAL & INSTALLATION
Removal & Installation
Disconnect negative battery cable. Raise vehicle on hoist. Remove engine undercover (if equipped). Disconnect
wiring from starter. Remove starter mounting bolts and starter. To install, reverse removal procedure. Tighten
starter mounting bolts to specification. See TORQUE SPECIFICATIONS
.
OVERHAUL
(1)Information is not available at time of publication.
NOTE: On models with anti-theft system, obtain code number and deactivate audio
anti-theft system before disconnecting battery.
NOTE: Overhaul procedures are not available at time of publication. See illustration for
exploded view of starter. See Fig. 4
.
1997 Mazda MX-5 Miata
STARTER - DIRECT DRIVE 1997 STARTING & CHARGING SYSTEMS Mazda - Starters - Direct Drive
Microsoft
Sunday, July 05, 2009 1:56:16 PMPage 8 © 2005 Mitchell Repair Information Company, LLC.
Page 395 of 514
FIELD WINDING TEST
1. Connect one ohmmeter lead to field coil lead ("M" terminal wire). Connect other lead of ohmmeter to
soldered portion of brush lead. If continuity does not exist, repair or replace field coil.
2. Check field coil for short to ground by connecting one ohmmeter lead to field coil lead ("M" terminal
wire) and other ohmmeter lead to field coil housing. If continuity exists, repair or replace field coil.
OVERRUNNING CLUTCH PINION DRIVE
Hold overrunning clutch housing and turn pinion gear by hand. If pinion turns in both directions or does not
turn at all, clutch is faulty. Replace clutch. DO NOT clean overrunning clutch with solvent, as it is packed with
grease and sealed by manufacturer.
REMOVAL & INSTALLATION
Removal & Installation
Disconnect negative battery cable. Raise vehicle on hoist. Remove engine undercover (if equipped). Disconnect
wiring from starter. Remove starter mounting bolts and starter. To install, reverse removal procedure. Tighten
starter mounting bolts to specification. See TORQUE SPECIFICATIONS
.
OVERHAUL
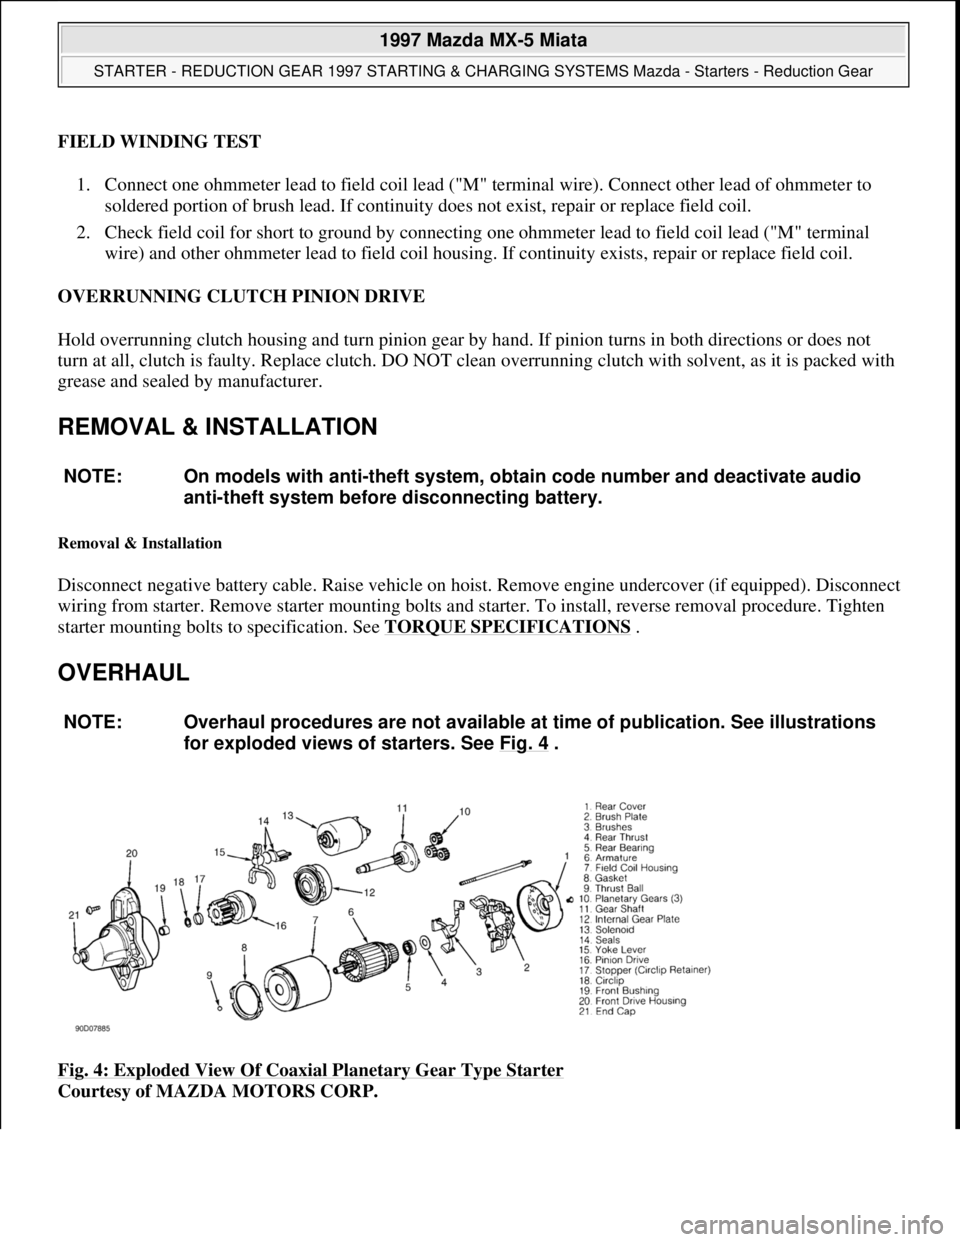
Fig. 4: Exploded View Of Coaxial Planetary Gear Type Starter
Courtesy of MAZDA MOTORS CORP. NOTE: On models with anti-theft system, obtain code number and deactivate audio
anti-theft system before disconnecting battery.
NOTE: Overhaul procedures are not available at time of publication. See illustrations
for exploded views of starters. See Fig. 4
.
1997 Mazda MX-5 Miata
STARTER - REDUCTION GEAR 1997 STARTING & CHARGING SYSTEMS Mazda - Starters - Reduction Gear
Microsoft
Sunday, July 05, 2009 1:56:43 PMPage 9 © 2005 Mitchell Repair Information Company, LLC.