lumbar support MAZDA MODEL 3 HATCHBACK 2020 Owners Manual (in English)
[x] Cancel search | Manufacturer: MAZDA, Model Year: 2020, Model line: MODEL 3 HATCHBACK, Model: MAZDA MODEL 3 HATCHBACK 2020Pages: 598, PDF Size: 89.37 MB
Page 22 of 598

4.Seat Recline
To change the seatback angle, lean
forward slightly while raising the lever.
Then lean back to the desired position
and release the lever.
Make sure the lever returns to its
original position and the seatback is
locked in place by attempting to push
it forward and backward.
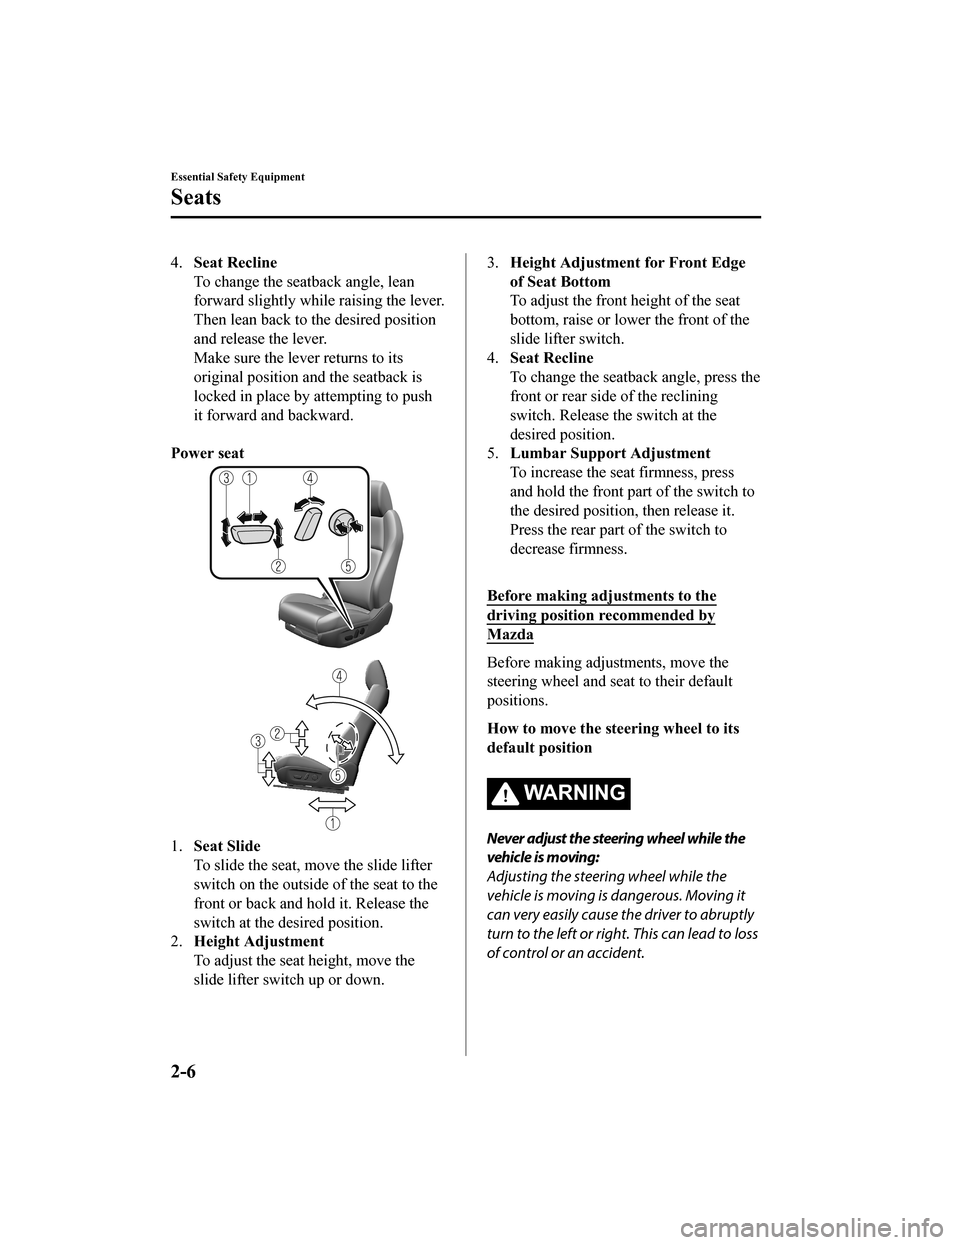
Power seat
1. Seat Slide
To slide the seat, m ove the slide lifter
switch on the outside of the seat to the
front or back and hold it. Release the
switch at the desired position.
2. Height Adjustment
To adjust the seat height, move the
slide lifter switch up or down.
3.Height Adjustment for Front Edge
of Seat Bottom
To adjust the front height of the seat
bottom, raise or lower the front of the
slide lifter switch.
4. Seat Recline
To change the seatback angle, press the
front or rear side of the reclining
switch. Release the switch at the
desired position.
5. Lumbar Support Adjustment
To increase the seat firmness, press
and hold the front part of the switch to
the desired position, then release it.
Press the rear part of the switch to
decrease firmness.
Before making adjustments to the
driving position recommended by
Mazda
Before making adjustments, move the
steering wheel and s eat to their default
positions.
How to move the steering wheel to its
default position
WA R N I N G
Never adjust the steering wheel while the
vehicle is moving:
Adjusting the steering wheel while the
vehicle is moving is dangerous. Moving it
can very easily cause the driver to abruptly
turn to the left or righ t. This can lead to loss
of control or an accident.
Essential Safety Equipment
Seats
2-6
Mazda3_8HZ1-EA-19G_Edition1_old 2019-5-17 13:49:03
Page 27 of 598

Driver’s seat position (seat slide, height
adjustment, front edge of seat bottom,
seat recline)
Refer to Adjusting the Driver's Seat on
page 2-5.
Active driving display (display position,
brightness level, display information)
Refer to Active Driving Display on page
4-29.
Outside mirror angle
Refer to Outside Mirrors on page 3-30.
A driving position can be programmed to
the following parts.
Position memory button
Transmitter used for vehicle
NOTE
Lumbar support adjustment cannot be
programmed.
Programming
1. Make sure the parking brake is on.
2. (Automatic transmission)
Make sure the selector lever is in the P
position.
3. Switch the ignition ON.
4. Adjust the follo wing parts to the
desired conditions.
Driver's seat
Active driving display
Outside mirrors
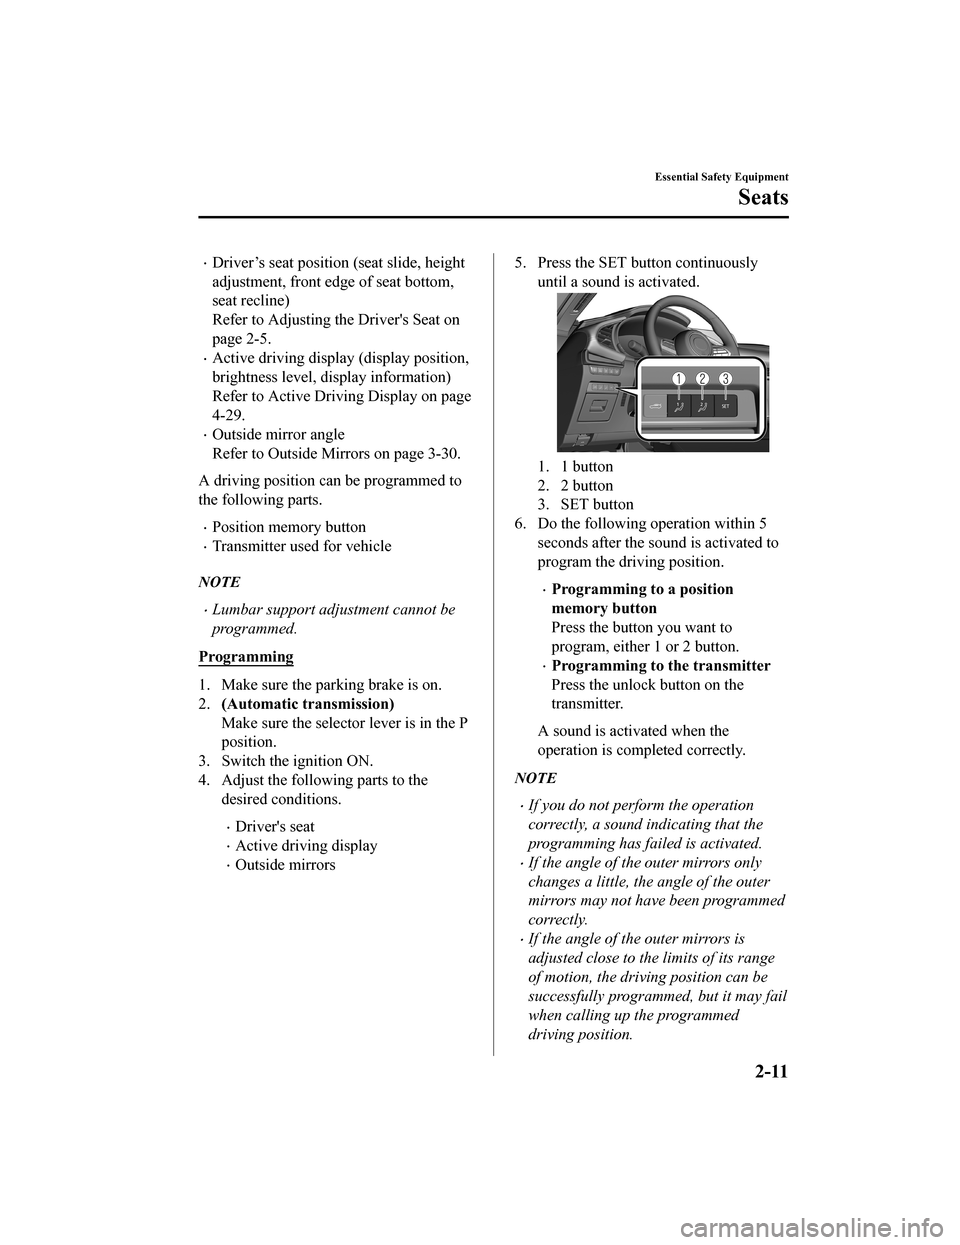
5. Press the SET button continuously until a sound is activated.
1. 1 button
2. 2 button
3. SET button
6. Do the following operation within 5 seconds after the sound is activated to
program the driving position.
Programming to a position
memory button
Press the button you want to
program, either 1 or 2 button.
Programming to the transmitter
Press the unlock button on the
transmitter.
A sound is activated when the
operation is completed correctly.
NOTE
If you do not perform the operation
correctly, a sound indicating that the
programming has failed is activated.
If the angle of the outer mirrors only
changes a little, the angle of the outer
mirrors may not have been programmed
correctly.
If the angle of the outer mirrors is
adjusted close to the limits of its range
of motion, the driving position can be
successfully programmed, but it may fail
when calling up the programmed
driving position.
Essential Safety Equipment
Seats
2-11
Mazda3_8HZ1-EA-19G_Edition1_old 2019-5-17 13:49:03