steering wheel MAZDA MODEL B-SERIES 2003 (in English) User Guide
[x] Cancel search | Manufacturer: MAZDA, Model Year: 2003, Model line: MODEL B-SERIES, Model: MAZDA MODEL B-SERIES 2003Pages: 245, PDF Size: 2.33 MB
Page 180 of 245

If the wiper still does not wipe properly, this could be caused by
substances on the windshield or rear window such as tree sap and some
hot wax treatments used by commercial car washes. Clean the outside of
the windshield or rear window with a non-abrasive cleaner.Do notuse
abrasive cleansers on glass as they may cause scratches. The windshield
or rear window is clean if beads do not form when you rinse it with
water. The windshield, rear window and wiper blades should be cleaned
on a regular basis, and blades or rubber elements replaced when worn.
CLEANING THE INSTRUMENT PANEL
Clean the instrument panel with a damp cloth, then dry with a dry cloth.
Avoid cleaners or polish that increase the gloss of the upper portion of
the instrument panel. The dull finish in this area helps protect the driver
from undesirable windshield reflection.
Your vehicle is designed with painted controls and features which
are particularly sensitive to certain products such as insect
repellent and suntan lotion. When operating the various features
on your vehicle, be certain to wash or wipe your hands clean if
you have been in contact with any of these types of products in
order to avoid possible damage to the painted surfaces.
WARNING: Do not use chemical solvents or strong detergents
when cleaning the steering wheel or instrument panel to avoid
contamination of the air bag system.
CLEANING THE INSTRUMENT CLUSTER LENS
Clean with a damp cloth, then dry with a dry cloth.
Do not use household or glass cleaners as these may damage the lens.
INTERIOR
For fabric, carpets, cloth seats, and safety belts:
²Remove dust and loose dirt with a vacuum cleaner.
²Remove light stains and soil with Extra Strength Upholstery Cleaner,
available at your authorized Mazda dealer.
²If grease or tar is present on the material, spot-clean the area first
with Spot and Stain Remover, available at your authorized Mazda
dealer.
²Never saturate the seat covers with cleaning solution.
Cleaning
180
Page 184 of 245

Maintenance ItemMaintenance Interval (Number of months or km (miles),
whichever comes first)
Months 4 8 12 16 20 24 28 32 36 40 44 48
x 1000 Miles 5 10 15 20 25 30 35 40 45 50 55 60
(x 1000 km) (8) (16) (24) (32) (40) (48) (56) (64) (72) (80) (88) (96)
Caliper slide rails L L L L
Drum brake system, lines and hoses I I I I
Exhaust system for leaks, damage,
loosenessII
Manual transmission fluid R
Automatic
transmission fluid*2 I I
Exhaust system shielding (for
trapped material)II
Propeller shaft U-joints (if equipped
with grease fittings)LLLLLL
Parking brake system (for damage
and operation)III I
Ball joints (4x2) I/L I/L I/L I/L
Transfer case fluid (4x4) Replace every 150,000 miles (240,000 km)
Rear axle lubricant Does not require replacement unless rear axle
submerged in water
Accessory drive belts
Fuel filter *5 R R
Steering linkage, ball joints,
suspension and driveshaftIII I
Remarks:For * marked items in this maintenance chart, please pay
attention to the following points:
1. The wheel lug nuts must be retightened to the proper specifications
at 800 km (500 miles) of new vehicle operation, at any wheel
change, or at any other time the wheel lug nuts have been loosened.
2. Replace every 150,000 miles (240,000 km) unless submerged in
water.
3. At 60,000 miles (96,000 km), the dealer will replace the PCV valve at
no cost, except Canada and California vehicles.
4. Refer to vehicle emission control information label for spark plug and
gap specifications.
Maintenance and Specifications
184
Page 186 of 245

Maintenance ItemMaintenance Interval (Number of months or Miles (km),
whichever comes first)
Months 52 56 60 64 68 72 76 80 84 88 92 96
x 1000 Miles 65 70 75 80 85 90 95 100 105 110 115 120
(x 1000 km) (104) (112) (121) (128) (136) (144) (152) (160) (168)(176)(184) (192)
Drum brake system, lines and
hosesIIII
Exhaust system for leaks,
damage, loosenessII
Manual transmission fluid R
Automatic
transmission fluid*2 I I
Exhaust system shielding (for
trapped material)II
Propeller shaft U-joints (if
equipped with grease fittings)L LLLLL
Parking brake system (for
damage and operation)IIII
Ball joints (4x2) I/L I/L I/L I/L
Transfer case fluid (4x4) Replace every 150,000 miles (240,000 km)
Rear axle lubricant Does not require replacement unless rear axle
submerged in water
Accessory drive belts I
Fuel filter *5 R R
Steering linkage, ball joints,
suspension and driveshaftIIII
Remarks:For * marked items in this maintenance chart, please pay
attention to the following points:
1. The wheel lug nuts must be retightened to the proper specifications
at 800 km (500 miles) of new vehicle operation, at any wheel
change, or at any other time the wheel lug nuts have been loosened.
2. Replace every 150,000 miles (240,000 km) unless submerged in
water.
3. At 60,000 miles (96,000 km), the dealer will replace the PCV valve at
no cost, except Canada and California vehicles.
Maintenance and Specifications
186
Page 189 of 245

While operating your vehicle
²Note any changes in the sound of the exhaust or any smell or exhaust
fumes in the vehicle.
²Check for vibrations in the steering wheel. Notice any increased
steering effort or looseness in the steering wheel, or change in this
straight ahead position.
²Notice if your vehicle constantly turns slightly or ªpullsº to one side
when traveling on a smooth, level road.
²When stopping, listen and check for strange sounds, pulling to one
side, increased brake pedal travel or ªhard to pushº brake pedal.
²If any slipping or changes in the operation of your transmission occur,
check the transmission fluid level.
²Check automatic transmission Park function.
²Check parking brake.
At least monthly
²Check function of all interior and exterior lights.
²Check tires for wear and proper air pressure.
²Check engine oil level.
²Check coolant level in the coolant reservoir.
²Check washer fluid level.
At least twice a year (for example, every spring and fall)
²Check power steering fluid level.
²Check clutch fluid level (if equipped).
²Check and clean body and door drain holes.
²Check and lubricate all hinges, latches, and outside locks.
²Check and lubricate door rubber weather strips.
²Check parking brake for proper operation.
²Check lap/shoulder belts and seat latches for wear and function.
²Check air pressure in spare tire.
²Check windshield washer spray and wiper operation. Clean wiper
blades with clean cloth dampened with washer fluid.
²Check safety warning lamps (brake, ABS, air bag, safety belt) for
operation.
Maintenance and Specifications
189
Page 191 of 245

Working with the engine on
²Automatic transmission:
1. Set the parking brake and shift to P (Park).
2. Block the wheels.
²Manual transmission:
1. Set the parking brake, depress the clutch and place the gearshift in
N (Neutral).
2. Block the wheels.
Note:Do not start your engine with the air cleaner removed and do not
remove it while the engine is running.
OPENING THE HOOD
1. Inside the vehicle, pull the hood
release handle located under
the bottom of the instrument
panel near the steering column.
2. Go to the front of the vehicle
and release the auxiliary latch
that is located under the front
center of the hood.
3. Lift the hood and support it
with the prop rod.
Maintenance and Specifications
191
Page 221 of 245

Check the power steering fluid. Refer to the service maintenance section
for the service interval schedules. If adding fluid is necessary, use only
MERCONtAT F.
1. Start the engine and let it run until it reaches normal operating
temperature (the engine coolant temperature gauge indicator will be
near the center of the normal area between H and C).
2. While the engine idles, turn the steering wheel left and right several
times.
3. Turn the engine off.
4.If your vehicle is equipped with a 3.0L V6 engine,check the
fluid level on the dipstick. It should be within the FULL HOT range.
Do not add fluid if the level is within this range.
5.If your vehicle is equipped with a 4.0L SOHC V6 or 2.3L I4
engine,check the fluid level in the reservoir. It should be between
the MIN and MAX lines. Do not add fluid if the level is within this
range.
6. If the fluid is low, add fluid in small amounts, continuously checking
the level until it reaches the FULL HOT range. Be sure to put the
dipstick back in the reservoir.
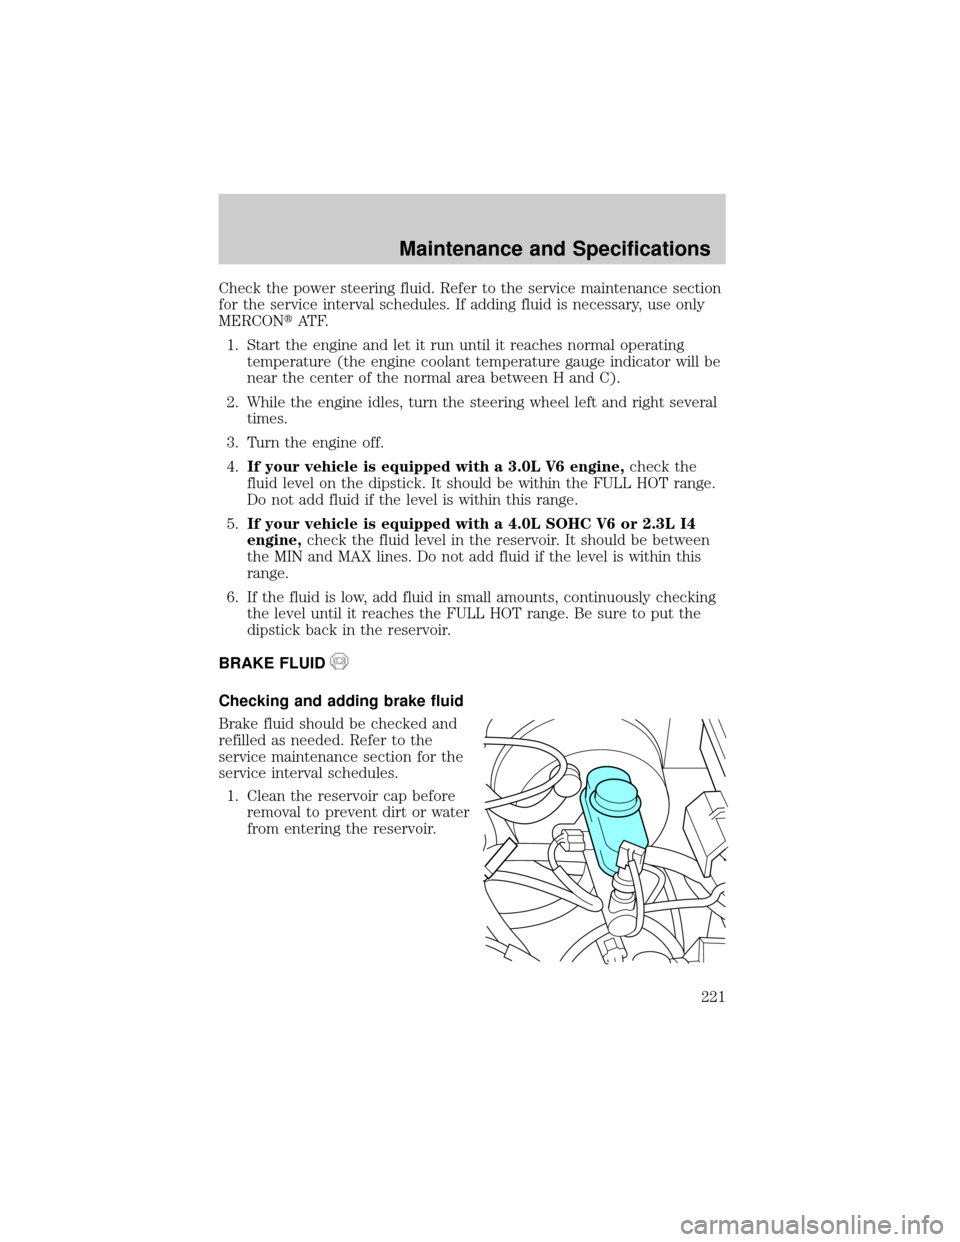
BRAKE FLUID
Checking and adding brake fluid
Brake fluid should be checked and
refilled as needed. Refer to the
service maintenance section for the
service interval schedules.
1. Clean the reservoir cap before
removal to prevent dirt or water
from entering the reservoir.
Maintenance and Specifications
221
Page 244 of 245

S
Safety belts
(see Safety restraints) .........69±73
Safety defects, reporting ..........175
Safety restraints ....................69±73
belt minder ...............................77
cleaning the safety belts ..........80
extension assembly ..................76
for adults .............................70±72
for children .........................93±94
lap belt ......................................74
warning light and chime ..........76
Safety restraints - LATCH
anchors ......................................106
Safety restraints - tether
anchors ......................................102
Safety seats for children ............97
Seat belts
(see Safety restraints) ...............69
Seats ............................................67
child safety seats ......................97
Servicing your vehicle ..............190
Snowplowing .................................7
Spare tire
(see Changing the Tire) ...........152
Spark plugs, specifications .......236
Special notice
ambulance conversions ..............7
utility-type vehicles ....................7
Specification chart,
lubricants ...........................235±236
Speed control ..............................53
Starting a flex fuel vehicle .......113
Starting your
vehicle ........................110±111, 113
jump starting ..........................158Steering wheel
tilting .........................................48
T
Tether anchors ..........................102
Tires ...........................152, 227±228
changing ..........................152, 155
checking the pressure ............228
replacing ..................................230
rotating ....................................229
snow tires and chains ............231
tire grades ...............................228
treadwear ................................227
Towing .......................................131
recreational towing .................138
trailer towing ..........................131
wrecker ....................................164
Traction-lok rear axle ...............118
Transfer case
fluid checking .........................226
Transmission
automatic operation ...............119
fluid, checking and adding
(automatic) .............................223
fluid, checking and adding
(manual) .................................225
fluid, refill capacities ..............232
lubricant specifications ..235±236
manual operation ....................122
Turn signal ..................................40
V
Vehicle dimensions ...................236
Vehicle Identification Number
(VIN) ..........................................238
Vehicle loading ..........................129
camper bodies ........................139
Ventilating your vehicle ...........115
Index
244