ignition MAZDA MODEL B-SERIES 2003 Owners Manual (in English)
[x] Cancel search | Manufacturer: MAZDA, Model Year: 2003, Model line: MODEL B-SERIES, Model: MAZDA MODEL B-SERIES 2003Pages: 245, PDF Size: 2.33 MB
Page 13 of 245

If the light remains on, have your vehicle serviced at the first available
opportunity.
NOTE:The
CHECK
ENGINElight will illuminate if vehicle refueling is conducted
with the engine running.
WARNING: Never refuel vehicle with the engine running.
Light is blinking:
Engine misfire is occurring which could damage your catalytic converter.
You should drive in a moderate fashion (avoid heavy acceleration and
deceleration) and have your vehicle serviced at the first available
opportunity.
WARNING: Under engine misfire conditions, excessive exhaust
temperatures could damage the catalytic converter, the fuel
system, interior floor coverings or other vehicle components,
possibly causing a fire.
Check Fuel Cap:Illuminates when
the fuel cap is not installed
correctly. Check the fuel cap for
proper installation. When the fuel
filler cap is properly re-installed, the
light(s) will turn off after a period of normal driving. Continuing to
operate the vehicle with the check fuel cap light on, or a mis-installed
fuel cap can activate theCheck Enginewarning light.
It may take a long period of time for the system to detect an
improperly installed fuel filler cap.
For more information, refer toFuel filler capin theMaintenance and
specificationschapter.
Brake system warning light:To
confirm the brake system warning
light is functional, it will
momentarily illuminate when the
ignition is turned to the ON position
when the engine is not running, or in a position between ON and START,
or by applying the parking brake when the ignition is turned to the ON
position. If the brake system warning light does not illuminate at this
time, seek service immediately from your dealership. Illumination after
releasing the parking brake indicates low brake fluid level and the brake
system should be inspected immediately by your servicing dealership.
CHECK
FUEL
CAP
!
BRAKE
Instrument Cluster
13
Page 14 of 245

WARNING: Driving a vehicle with the brake system warning
light on is dangerous. A significant decrease in braking
performance may occur. It will take you longer to stop the
vehicle. Have the vehicle checked by your dealer immediately.
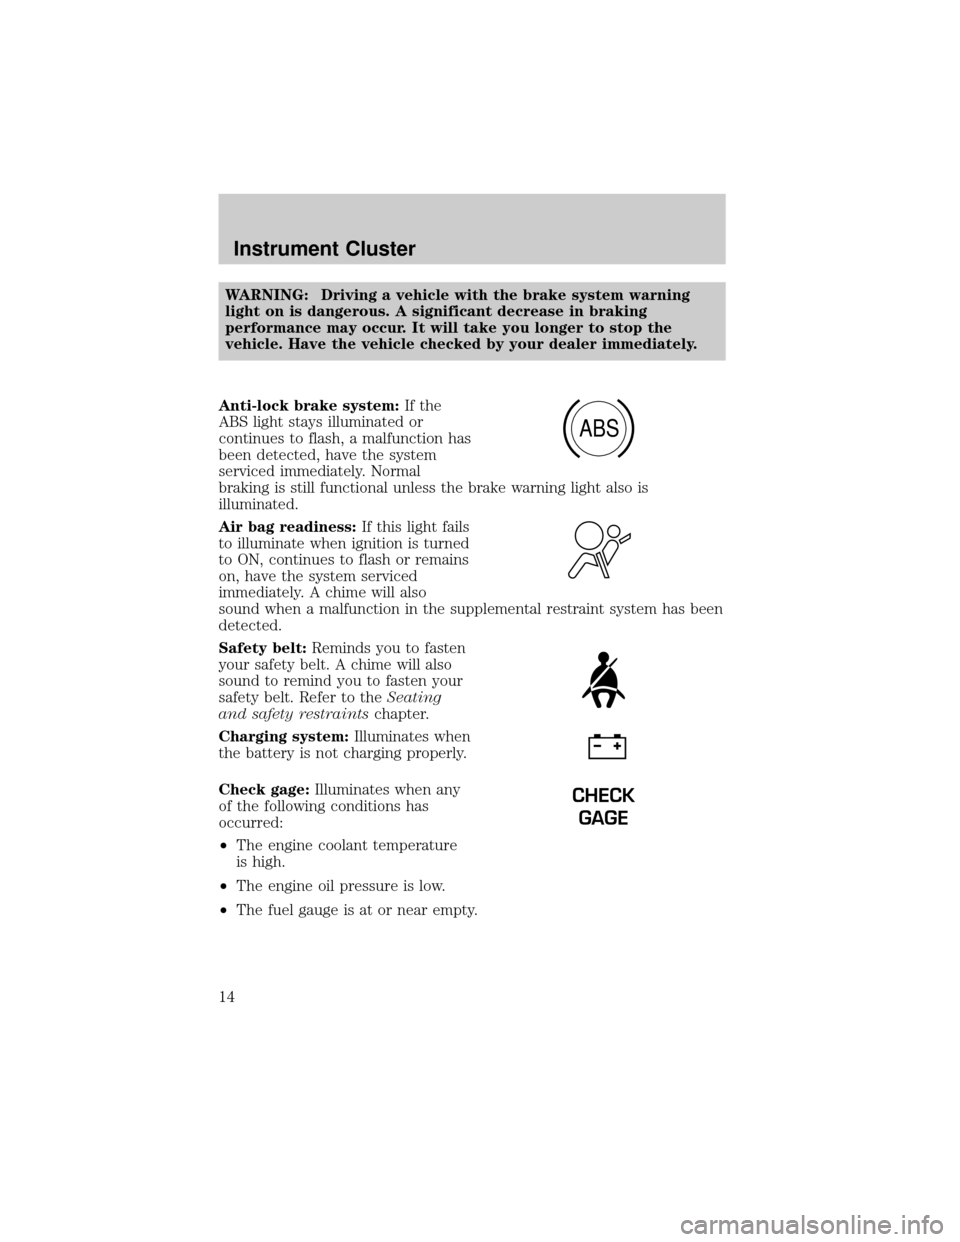
Anti-lock brake system:If the
ABS light stays illuminated or
continues to flash, a malfunction has
been detected, have the system
serviced immediately. Normal
braking is still functional unless the brake warning light also is
illuminated.
Air bag readiness:If this light fails
to illuminate when ignition is turned
to ON, continues to flash or remains
on, have the system serviced
immediately. A chime will also
sound when a malfunction in the supplemental restraint system has been
detected.
Safety belt:Reminds you to fasten
your safety belt. A chime will also
sound to remind you to fasten your
safety belt. Refer to theSeating
and safety restraintschapter.
Charging system:Illuminates when
the battery is not charging properly.
Check gage:Illuminates when any
of the following conditions has
occurred:
²The engine coolant temperature
is high.
²The engine oil pressure is low.
²The fuel gauge is at or near empty.
ABS
CHECK
GAGE
Instrument Cluster
14
Page 15 of 245

Door ajar:Illuminates when the
ignition is in the ON position and
any door is open.
Overdrive off (if equipped):
Illuminates when the overdrive
function has been turned OFF using
the transmission control switch
(TCS).
If the light does not come on or the light flashes steadily, have
your vehicle serviced as soon as possible, damage to the
transmission could occur.
Four wheel drive low (if
equipped):Illuminates when
four-wheel drive low is engaged.
NOTE:If the light continues to
flash have the system serviced.
Four wheel drive high (if
equipped):Illuminates when
four-wheel drive high is engaged.
NOTE:If the light continues to
flash have the system serviced.
Anti-theft system:Flashes when
the SecurilockyPassive Anti-theft
System has been activated.
Speed control:Illuminates when
the speed control is engaged. Turns
off when the speed control system
is disengaged.
Turn signal:Illuminates when the
left or right turn signal or the
hazard lights are turned on. If the
indicators stay on or flash faster, check for a burned out bulb.
High beams:Illuminates when the
high beam headlamps are turned on.
DOOR
AJAR
O/D
OFF
4WD
LOW
SPEED
CONT
Instrument Cluster
15
Page 16 of 245

Key-in-ignition warning chime:Sounds when the key is left in the
ignition in the OFF/LOCK or ACC position and the driver's door is
opened.
Headlamps on warning chime:Sounds when the headlamps or parking
lamps are on, the ignition is off (and the key is not in the ignition) and
the driver's door is opened.
GAUGES
Speedometer:Indicates the
current vehicle speed.
Engine coolant temperature
gauge:Indicates engine coolant
temperature. At normal operating
temperature, the needle will be in
the normal range (between ªHº and
ªCº).If it enters the red section,
the engine is overheating. Stop
the vehicle as soon as safely
possible, switch off the engine
and let the engine cool.
Refer toEngine coolantin theMaintenance and specifications
chapter.
C
H
Instrument Cluster
16
Page 17 of 245

WARNING: Never remove the coolant reservoir cap and/or the
radiator cap while the engine is running or hot, this may result
in serious burns.
Odometer:Registers the total
kilometers (miles) of the vehicle.
Trip odometer:Registers the
kilometers (miles) of individual
journeys. To reset, depress the
control button.
Tachometer:Indicates the engine
speed in revolutions per minute.
Driving with your tachometer
pointer continuously at the top of
the scale may damage the engine.
Battery voltage gauge:Indicates
the battery voltage when the
ignition is in the ON position. If the
pointer moves and stays outside the
normal operating range (as
indicated by arrows), have the
vehicle's electrical system checked
as soon as possible.
10MPH 205060
70
304080
90
km/h
0 0 0
10 100
1
20
1
0 0 0 0 0 0406080100
120
140
160
180
20
L
H
Instrument Cluster
17
Page 38 of 245

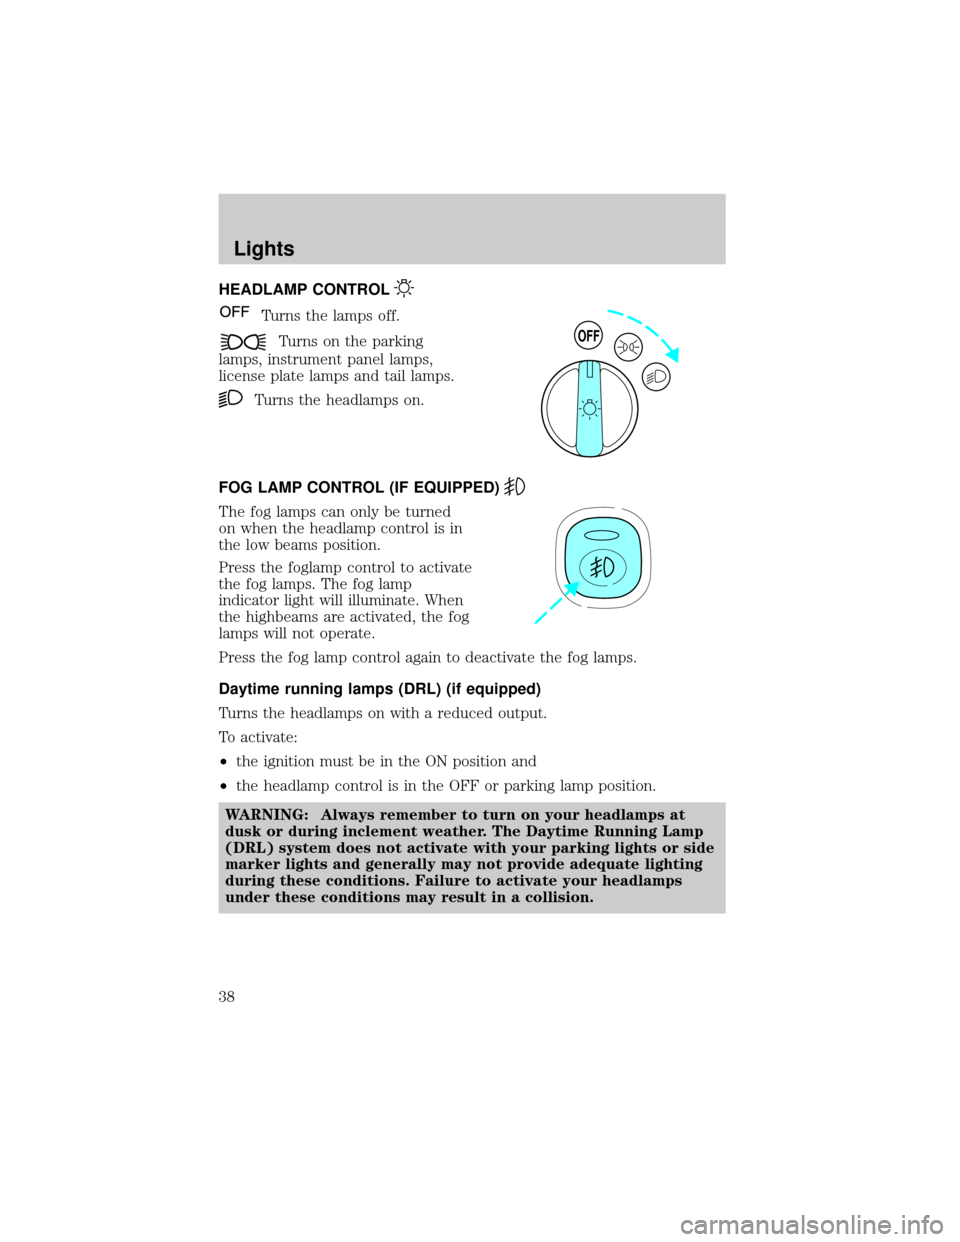
HEADLAMP CONTROL
Turns the lamps off.
Turns on the parking
lamps, instrument panel lamps,
license plate lamps and tail lamps.
Turns the headlamps on.
FOG LAMP CONTROL (IF EQUIPPED)
The fog lamps can only be turned
on when the headlamp control is in
the low beams position.
Press the foglamp control to activate
the fog lamps. The fog lamp
indicator light will illuminate. When
the highbeams are activated, the fog
lamps will not operate.
Press the fog lamp control again to deactivate the fog lamps.
Daytime running lamps (DRL) (if equipped)
Turns the headlamps on with a reduced output.
To activate:
²the ignition must be in the ON position and
²the headlamp control is in the OFF or parking lamp position.
WARNING: Always remember to turn on your headlamps at
dusk or during inclement weather. The Daytime Running Lamp
(DRL) system does not activate with your parking lights or side
marker lights and generally may not provide adequate lighting
during these conditions. Failure to activate your headlamps
under these conditions may result in a collision.
OFF
Lights
38
Page 40 of 245

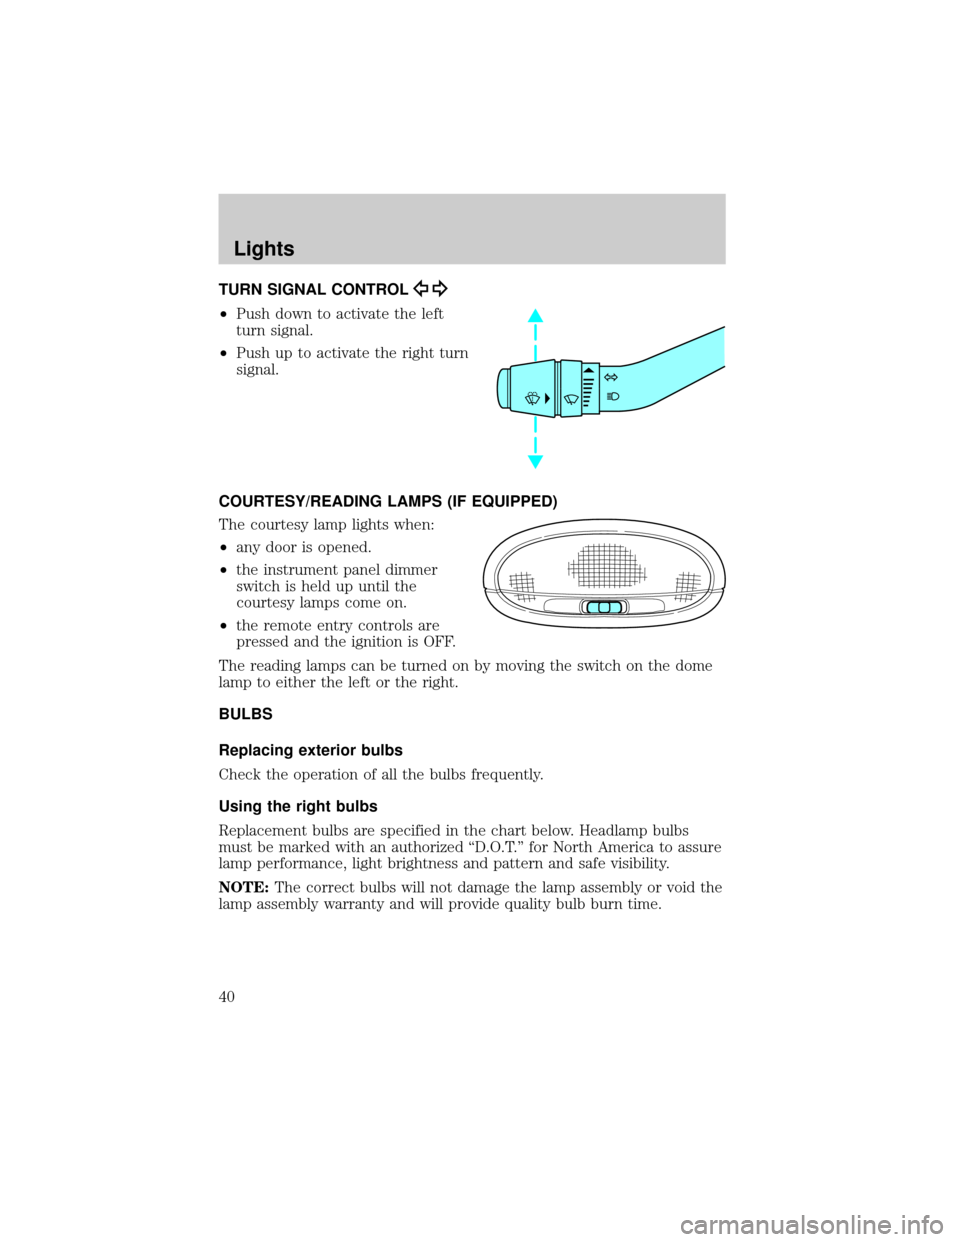
TURN SIGNAL CONTROL
²Push down to activate the left
turn signal.
²Push up to activate the right turn
signal.
COURTESY/READING LAMPS (IF EQUIPPED)
The courtesy lamp lights when:
²any door is opened.
²the instrument panel dimmer
switch is held up until the
courtesy lamps come on.
²the remote entry controls are
pressed and the ignition is OFF.
The reading lamps can be turned on by moving the switch on the dome
lamp to either the left or the right.
BULBS
Replacing exterior bulbs
Check the operation of all the bulbs frequently.
Using the right bulbs
Replacement bulbs are specified in the chart below. Headlamp bulbs
must be marked with an authorized ªD.O.T.º for North America to assure
lamp performance, light brightness and pattern and safe visibility.
NOTE:The correct bulbs will not damage the lamp assembly or void the
lamp assembly warranty and will provide quality bulb burn time.
Lights
40
Page 51 of 245

Outside air temperature
Display operation of the mirror with
the compass feature:
²Press the right button to toggle
the display between the compass
direction and no display.
Display operation of mirror with
temperature and compass feature:
²Press the right button once to
display temperature ÉF and
compass.
²Press the right button twice to display temperature ÉC and compass.
²Press the right button three times to turn the display OFF.
WARNING: The outside temperature indicator is not designed
to serve as an ICE warning device and is therefore unsuitable
for that purpose. Indicated temperatures just above the
freezing point do not guarantee that the road surface is free of
ice.
Compass zone adjustment
1. Determine which compass zone
you are in by referring to the
zone map.
2. Turn ignition to the ON
position.
1 2 3
4
5
6 7 8 9 101112 13 14 15
Driver Controls
51
Page 56 of 245

²Press the speed control OFF
control.
Note:When you turn off the speed
control or the ignition, your speed
control set speed memory is erased.
OVERDRIVE CONTROL (IF EQUIPPED)
Activating overdrive
(Overdrive) is the normal drive position for the best fuel economy.
The overdrive function allows automatic upshifts and downshifts through
all available gears.
Deactivating overdrive
Press the Transmission Control
Switch (TCS) located on the end of
the gearshift lever. The O/D Off
indicator light will illuminate on the
instrument cluster. The transmission
will operate in all gears except overdrive.
To return to normal overdrive mode,
press the Transmission Control
Switch again. The O/D Off indicator
light will no longer be illuminated.
When you shut off and re-start your
vehicle, the transmission will automatically return to normal
(Overdrive) mode.
For additional information about the gearshift lever and the transmission
control switch operation refer to theAutomatic Transmission
Operationsection of theDrivingchapter.
O/D
ON/OFF
O/D
ON/OFF
Driver Controls
56
Page 59 of 245

KEYS
The key operates all locks on your vehicle. In case of loss, replacement
keys are available from your dealer.
You should always carry a second key with you in a safe place in case
you require it in an emergency.
Refer toSecuriLockyPassive Anti-Theft Systemfor more information.
POWER DOOR LOCKS (IF EQUIPPED)
Press the top of the control to
unlock all doors and the bottom to
lock all doors.
REMOTE ENTRY SYSTEM (IF EQUIPPED)
The remote entry system allows you to lock or unlock all vehicle doors
without a key.
The remote entry features only operate with the ignition in the LOCK
position.
If there is any potential remote keyless entry problem with your vehicle,
ensureALL remote entry transmittersare brought to the dealership,
to aid in troubleshooting.
GENERAL INFORMATION: This device complies with part 15 of the FCC
rules and with RS-210 of Industry Canada. Operation is subject to the
following two conditions: (1) This device may not cause harmful
interference, and (2) This device must accept any interference received,
including interference that may cause undesired operation. Changes or
modifications not expressly approved by the party responsible for
compliance could void the user's authority to operate the equipment.
This device complies with part 15 of the FCC rules and with RS-210 of
Industry Canada. Operation is subject to the following two conditions:
(1) This device may not cause harmful interference, and (2) This device
must accept any interference received, including interference that may
cause undesired operation.
UNLOCK
LOCK
Locks and Security
59