jack MAZDA MODEL B-SERIES 2008 Owners Manual (in English)
[x] Cancel search | Manufacturer: MAZDA, Model Year: 2008, Model line: MODEL B-SERIES, Model: MAZDA MODEL B-SERIES 2008Pages: 272, PDF Size: 2.11 MB
Page 1 of 272

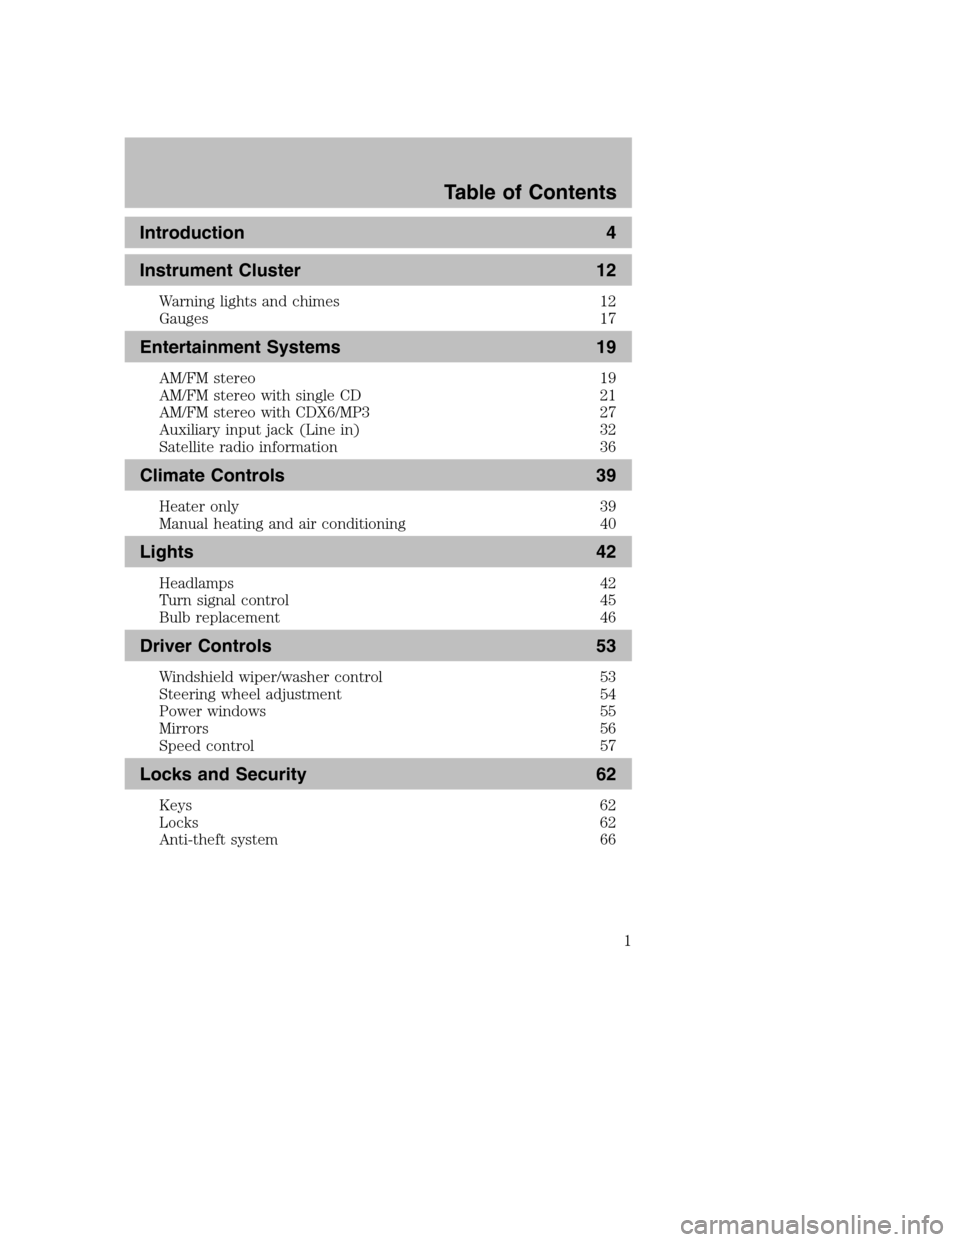
Introduction 4
Instrument Cluster 12
Warning lights and chimes 12
Gauges 17
Entertainment Systems 19
AM/FM stereo 19
AM/FM stereo with single CD 21
AM/FM stereo with CDX6/MP3 27
Auxiliary input jack (Line in) 32
Satellite radio information 36
Climate Controls 39
Heater only 39
Manual heating and air conditioning 40
Lights 42
Headlamps 42
Turn signal control 45
Bulb replacement 46
Driver Controls 53
Windshield wiper/washer control 53
Steering wheel adjustment 54
Power windows 55
Mirrors 56
Speed control 57
Locks and Security 62
Keys 62
Locks 62
Anti-theft system 66
Table of Contents
1
2008 B-Series(mbs)
Owners Guide (post-2002-fmt)
USA(fus)
Page 9 of 272

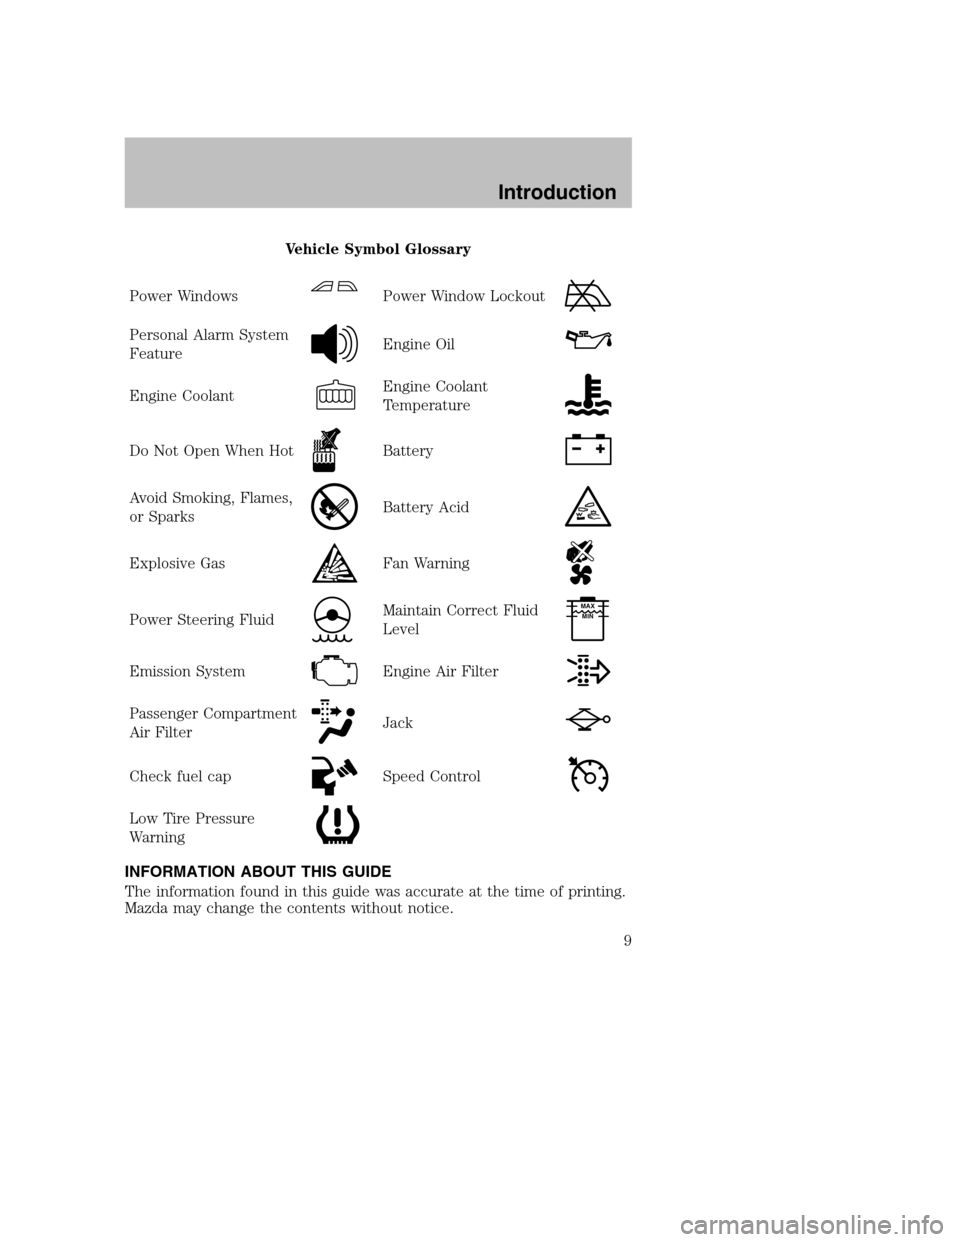
Vehicle Symbol Glossary
Power Windows
Power Window Lockout
Personal Alarm System
FeatureEngine Oil
Engine CoolantEngine Coolant
Temperature
Do Not Open When HotBattery
Avoid Smoking, Flames,
or SparksBattery Acid
Explosive GasFan Warning
Power Steering FluidMaintain Correct Fluid
LevelMAX
MIN
Emission SystemEngine Air Filter
Passenger Compartment
Air FilterJack
Check fuel capSpeed Control
Low Tire Pressure
Warning
INFORMATION ABOUT THIS GUIDE
The information found in this guide was accurate at the time of printing.
Mazda may change the contents without notice.
2008 B-Series(mbs)
Owners Guide (post-2002-fmt)
USA(fus)
Introduction
9
Page 11 of 272

4wd control*
(pg. 162)Audio system
(pg. 19)
Passenger airbag
indicator
(pg. 91)
Auxiliary power point*
(pg. 54)
Climate control system
(pg. 39) Cigar lighter*
(pg. 55)
Auxiliary input
jack*
(pg. 32)
* if equipped
2008 B-Series(mbs)
Owners Guide (post-2002-fmt)
USA(fus)
Instrument Cluster
11
Page 32 of 272

In MP3 directory mode, press and hold to hear a brief sampling of all
tracks in the current directory. Press again to stop.
In satellite radio mode (if equipped),press and release to view the
Satellite text message.
Press and hold to hear a brief sampling of the next channels. Press and
hold again to stop.
Satellite radio is available only with a valid SIRIUS subscription.
Check with your authorized dealer for availability.
17.ON/OFF/Volume:Press to turn
ON/OFF. Turn to
increase/decrease volume.
If the volume is set above a
certain level and the ignition is
turned off, the volume will come
back on at a “nominal” listening level when the ignition switch is
turned back on.
18.LOAD:Press to load a CD/MP3.
To load a CD/MP3 disc to a
specific slot, press LOAD and
select the slot number by pressing the memory preset buttons. Press
and hold LOAD to autoload up to six discs.
19.CD slot:Insert a CD/MP3, label
side up.
Auxiliary input jack (Line in)
Your vehicle may be equipped with
an Auxiliary Input Jack (AIJ). The
Auxiliary Input Jack provides a way
to connect your portable music
player to the in-vehicle audio
system. This allows the audio from a
portable music player to be played
through the vehicle speakers with
high fidelity. To achieve optimal
performance, please observe the
following instructions when
attaching your portable music device to the audio system.
Required equipment:
1. Any portable music player designed to be used with headphones
2008 B-Series(mbs)
Owners Guide (post-2002-fmt)
USA(fus)
Entertainment Systems
32
Page 33 of 272

2. An audio extension cable with stereo male 1/8 in. (3.5 mm)
connectors at each end
To play your portable music player using the auxiliary input jack:
1. Begin with the vehicle parked and the radio turned off.
2. Ensure that the battery in your portable music player is new or fully
charged and that the device is turned off.
3. Attach one end of the audio extension cable to the headphone
output of your player and the other end of the audio extension cable
to the AIJ in your vehicle.
4. Turn the radio on, using either a tuned FM station or a CD loaded
into the system. Adjust the volume to a comfortable listening level.
5. Turn the portable music player on and adjust the volume to 1/2 the
volume.
6. Press AUX on the vehicle radio repeatedly until LINE IN appears in
the display.
You should hear audio from your portable music player although it
may be low.
7. Adjust the sound on your portable music player until it reaches the
level of the FM station or CD by switching back and forth between
the AUX and FM or CD controls.
Troubleshooting:
1. Do not connect the audio input jack to a line level output. Line level
outputs are intended for connection to a home stereo and are not
compatible with the AIJ. The AIJ will only work correctly with
devices that have a headphone output with a volume control.
2. Do not set the portable music player’s volume level higher than is
necessary to match the volume of the CD or FM radio in your audio
system as this will cause distortion and will reduce sound quality.
Many portable music players have different output levels, so not all
players should be set at the same levels. Some players will sound
best at full volume and others will need to be set at a lower volume.
3. If the music sounds distorted at lower listening levels, turn the
portable music player volume down. If the problems persists, replace
or recharge the batteries in the portable music player.
4. The portable music player must be controlled in the same manner
when it is used with headphones as the AIJ does not provide control
(play, pause, etc.) over the attached portable music player.
5. For safety reasons, connecting or adjusting the settings on your
portable music player should not be attempted while the vehicle is
2008 B-Series(mbs)
Owners Guide (post-2002-fmt)
USA(fus)
Entertainment Systems
33
Page 182 of 272

Stopping and securing the vehicle
1. Park on a level surface, activate
hazard flashers and place
gearshift lever in P (Park)
(automatic transmission) or 1
(First) (manual transmission).
2. Set the parking brake and turn
engine OFF.
Location of the spare tire and tools
Note:The tire pressure monitoring system (TPMS) indicator light will
illuminate when the spare is in use. To restore the full functionality of
the TPMS system, all road wheels equipped with the tire pressure
monitoring sensors must be mounted on the vehicle.
Have a flat tire serviced by an authorized dealer in order to prevent
damage to the TPMS sensor, refer toTire Pressure Monitoring System
(TPMS)in theTires, Wheel and Loadingchapter. Replace the spare
tire with a road tire as soon as possible.
The spare tire and tools for your vehicle are stowed in the following
locations:
Tool Location
Spare tire Under the vehicle, just forward of
the rear bumper
Jack, jack handle, wheel nut
wrenchRegular Cab: behind seats and
underneath the jack and tools
cover
Cab Plus 4–Door: stowed behind
the front seats, between jump
seats and underneath jack and
tools cover. The lug wrench is held
in place with a wingnut.
Key, spare tire lock (if equipped) In the glove box
2008 B-Series(mbs)
Owners Guide (post-2002-fmt)
USA(fus)
Roadside Emergencies
182
Page 183 of 272

Removing the spare tire
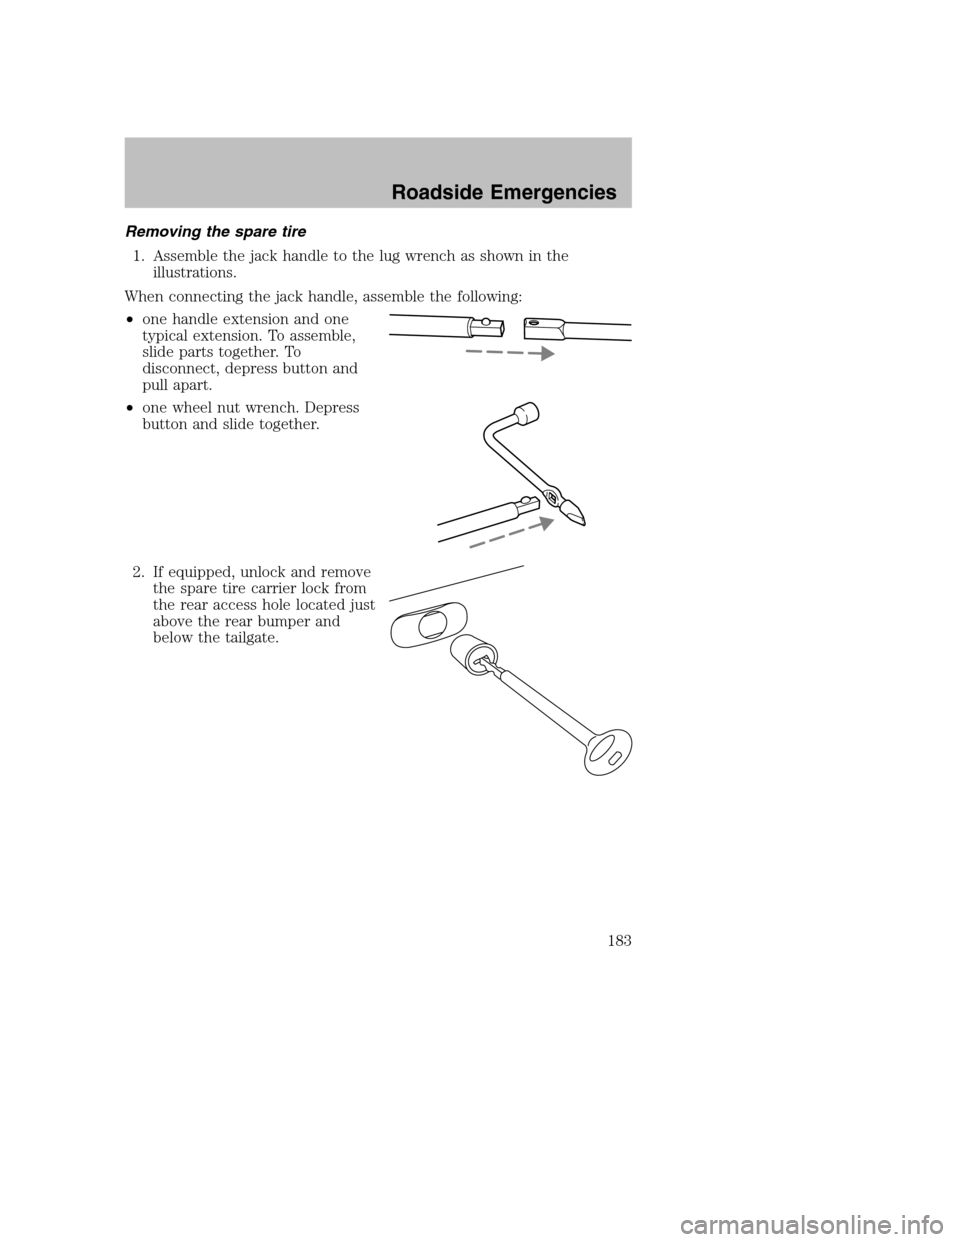
1. Assemble the jack handle to the lug wrench as shown in the
illustrations.
When connecting the jack handle, assemble the following:
•one handle extension and one
typical extension. To assemble,
slide parts together. To
disconnect, depress button and
pull apart.
•one wheel nut wrench. Depress
button and slide together.
2. If equipped, unlock and remove
the spare tire carrier lock from
the rear access hole located just
above the rear bumper and
below the tailgate.
2008 B-Series(mbs)
Owners Guide (post-2002-fmt)
USA(fus)
Roadside Emergencies
183
Page 184 of 272

3. Insert the square end of the
jack handle into the rear access
hole located just above the rear
bumper and below the tailgate.
Forward motion will stop and
resistance to turning will be felt
when properly engaged.
4. Turn the handle
counterclockwise until tire is
lowered to the ground and the
cable is slightly slack.
5. Remove the retainer from the
spare tire.
Tire change procedure
WARNING:
When one of the front wheels is off the ground, the
transmission alone will not prevent the vehicle from moving or
slipping off the jack, even if the vehicle is in P (Park) (automatic
transmission) or R (Reverse) (manual transmission).
WARNING: To help prevent the vehicle from moving when you
change a tire, be sure the parking brake is set, then block (in
both directions) the wheel that is diagonally opposite (other
side and end of the vehicle) to the tire being changed.
WARNING: If the vehicle slips off the jack, you or someone
else could be seriously injured.
WARNING: Do not attempt to change a tire on the side of the
vehicle close to moving traffic. Pull far enough off the road to
avoid the danger of being hit when operating the jack or
changing the wheel.
2008 B-Series(mbs)
Owners Guide (post-2002-fmt)
USA(fus)
Roadside Emergencies
184
Page 185 of 272

1. Block the diagonally opposite
wheel.
2. Insert tapered end of the lug
wrench behind hub caps and
twist them off.
3. Loosen each wheel lug nut
one-half turn counterclockwise
but do not remove them until
the wheel is raised off the
ground.
4. Position the jack according to
the following guides and turn
the jack handle clockwise until the tire is a maximum of 1 inch
(25 mm) off the ground.
WARNING: To lessen the risk of personal injury, do not put any
part of your body under the vehicle while changing a tire. Do
not start the engine when your vehicle is on the jack. The jack
is only meant for changing the tire.
WARNING: Do not let anyone stay in the vehicle when you are
using the jack; have them stand in a safe place out of traffic
lanes.
•Front
2008 B-Series(mbs)
Owners Guide (post-2002-fmt)
USA(fus)
Roadside Emergencies
185
Page 186 of 272

•Rear
Never use the differential as a
jacking point. It is too easy for
the vehicle to tilt or fall and you
can be injured.
5. Remove the wheel lug nuts with
the lug wrench.
6. Replace the flat tire with the
spare tire, making sure the valve
stem is facing outward. Reinstall
the lug nuts until the wheel is
snug against the hub. Do not fully tighten the lug nuts until the
wheel has been lowered.
7. Lower the wheel by turning the jack handle counterclockwise.
8. Remove the jack and fully
tighten the lug nuts, in the
order shown. Refer toWheel
lug nut torque specifications
later in this chapter for the
proper lug nut torque
specification.
9. Stow the flat tire. Refer to
Stowing the spare tire.
10. Stow the jack and lug wrench.
Make sure the jack is fastened so it does not rattle when you drive.
11. Unblock the wheels.
1
4 3
2 5
2008 B-Series(mbs)
Owners Guide (post-2002-fmt)
USA(fus)
Roadside Emergencies
186