ignition MAZDA MODEL B2300 2002 (in English) User Guide
[x] Cancel search | Manufacturer: MAZDA, Model Year: 2002, Model line: MODEL B2300, Model: MAZDA MODEL B2300 2002Pages: 288, PDF Size: 2.94 MB
Page 73 of 288

HEADLAMP CONTROL
Rotate the headlamp control to the
first position to turn on the parking
lamps.
Rotate to the second position to
turn on the headlamps.
FOG LAMP CONTROL (IF EQUIPPED)
The fog lamps can only be turned
on when the headlamp control is in
the low beams position.
Press the foglamp control to activate
the fog lamps. The fog lamp
indicator light will illuminate. When
the highbeams are activated, the fog
lamps will not operate.
Press the fog lamp control again to deactivate the fog lamps.
Daytime running lamps (DRL) (if equipped)
Turns the headlamps on with a reduced output.
To activate:
²the ignition must be in the ON position and
²the headlamp control is in the OFF or Parking lamps position.
WARNING: Always remember to turn on your headlamps at
dusk or during inclement weather. The Daytime Running Lamp
(DRL) system does not activate with your tail lamps and
generally may not provide adequate lighting during these
conditions. Failure to activate your headlamps under these
conditions may result in a collision.
OFF
Lights
73
Page 75 of 288

TURN SIGNAL CONTROL
²Push down to activate the left
turn signal.
²Push up to activate the right turn
signal.
²In vehicles equipped with daytime
running lights, use of the turn
signals will shut off the
highbeams in daytime driving.
COURTESY/READING LAMPS (IF EQUIPPED)
The courtesy lamp lights when:
²any door is opened.
²the instrument panel dimmer
switch is held up until the
courtesy lamps come on.
²the remote entry controls are
pressed and the ignition is OFF.
The reading lamps can be turned on by moving the switch on the dome
lamp to either the left or the right.
BULBS
Replacing exterior bulbs
Check the operation of the following lamps frequently:
²Headlamps
²Fog lamps (if equipped)
²High-mount brake lamp
²Brake lamps
²Turn signal lamps
²License plate lamp
²Tail lamps
²Back-up lamps
Do not remove lamp bulbs unless they can be replaced immediately with
new ones. If a bulb is removed for an extended period of time,
contaminants may enter the lamp housings and affect lamp performance.
Lights
75
Page 87 of 288

OUTSIDE AIR TEMPERATURE
Display operation of the mirror with
the compass feature:
²Press the right button to toggle
the display between the compass
direction and no display.
Display operation of mirror with
temperature and compass feature:
²Press the right button once to
display temperature ÉF and
compass.
²Press the right button twice to display temperature ÉC and compass.
²Press the right button three times to turn the display OFF.
WARNING: The outside temperature indicator is not designed
to serve as an ICE warning device and is therefore unsuitable
for that purpose. Indicated temperatures just above the
freezing point do not guarantee that the road surface is free of
ice.
COMPASS ZONE ADJUSTMENT
1. Determine which compass zone
you are in by referring to the
zone map.
2. Turn ignition to the ON
position.
1 2 3
4
5
6 7 8 9 101112 13 14 15
Driver Controls
87
Page 90 of 288

To turn speed control off
²Press OFF.
NOTE:Once speed control is
turned off or the ignition is switched
off, the previously programmed set
speed will be erased.
To set a speed
²Press SET ACC.
NOTE:For speed control to
operate, the speed control must be
ON and the vehicle speed must be
greater than 48 km/h (30 mph).
If you drive up or down a steep hill, your vehicle speed may vary
momentarily slower or faster than the set speed. This is normal.
Speed control cannot reduce the vehicle speed if it increases above the
set speed on a downhill. If your vehicle speed is faster than the set
speed while driving on a downhill, you may want to shift to the next
lower gear or apply the brakes to reduce your vehicle speed.
If your vehicle slows down more than 16 km/h (10 mph) below your set
speed on an uphill, your speed control will disengage. This is normal.
Pressing RSM will re-engage it.
WARNING: Do not use the speed control in heavy traffic or on
roads that are winding, slippery, mountainous, hilly, or unpaved.
This may cause an accident.
OFF ON
RSM
SET
ACC
COAST
Driver Controls
90
Page 93 of 288

To return to a previously set speed
²Press RSM. For RSM to operate,
the vehicle speed must be faster
than 48 km/h (30 mph).
Indicator light
This light comes on when either the
SET ACCEL or RES controls are
pressed. It turns off when the speed
control OFF control is pressed, the
brake or clutch is applied or the ignition is turned to the OFF position.
OVERDRIVE CONTROL (IF EQUIPPED)
Activating overdrive
(Overdrive) is the normal drive position for the best fuel economy.
The overdrive function allows automatic upshifts and downshifts through
all available gears.
Deactivating overdrive
Press the Transmission Control
Switch (TCS) located on the end of
the gearshift lever. The O/D Off
indicator light will illuminate on the
instrument cluster. The transmission
will operate in all gears except overdrive.
RSM
SET
ACC
COAST
SPEED
CONT
O/D
ON/OFF
Driver Controls
93
Page 97 of 288

KEYS
The key operates all locks on your vehicle. In case of loss, replacement
keys are available from your dealer.
You should always carry a second key with you in a safe place in case
you require it in an emergency.
Refer toSecuriLockyPassive Anti-Theft Systemfor more information.
POWER DOOR LOCKS (IF EQUIPPED)
Press the top of the control to
unlock all doors and the bottom to
lock all doors.
REMOTE ENTRY SYSTEM (IF EQUIPPED)
The remote entry system allows you to lock or unlock all vehicle doors
without a key.
The remote entry features only operate with the ignition in the LOCK
position.
If there is any potential remote keyless entry problem with your vehicle,
ensureALL remote entry transmittersare brought to the dealership,
to aid in troubleshooting.
GENERAL INFORMATION: This device complies with part 15 of the FCC
rules and with RS-210 of Industry Canada. Operation is subject to the
following two conditions: (1) This device may not cause harmful
interference, and (2) This device must accept any interference received,
including interference that may cause undesired operation. Changes or
modifications not expressly approved by the party responsible for
compliance could void the user's authority to operate the equipment.
UNLOCK
LOCK
Locks and Security
97
Page 98 of 288

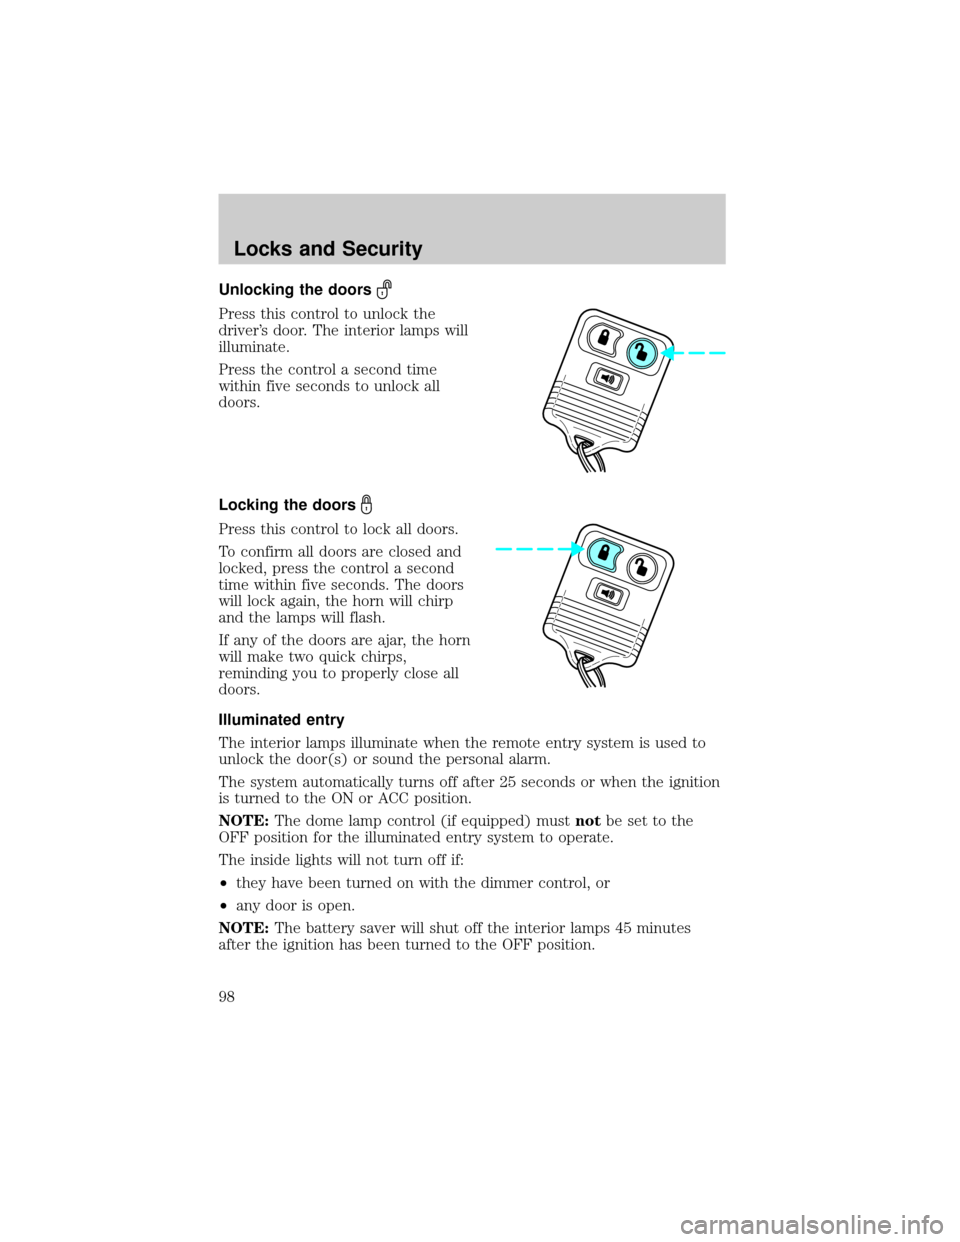
Unlocking the doors
Press this control to unlock the
driver's door. The interior lamps will
illuminate.
Press the control a second time
within five seconds to unlock all
doors.
Locking the doors
Press this control to lock all doors.
To confirm all doors are closed and
locked, press the control a second
time within five seconds. The doors
will lock again, the horn will chirp
and the lamps will flash.
If any of the doors are ajar, the horn
will make two quick chirps,
reminding you to properly close all
doors.
Illuminated entry
The interior lamps illuminate when the remote entry system is used to
unlock the door(s) or sound the personal alarm.
The system automatically turns off after 25 seconds or when the ignition
is turned to the ON or ACC position.
NOTE:The dome lamp control (if equipped) mustnotbe set to the
OFF position for the illuminated entry system to operate.
The inside lights will not turn off if:
²they have been turned on with the dimmer control, or
²any door is open.
NOTE:The battery saver will shut off the interior lamps 45 minutes
after the ignition has been turned to the OFF position.
Locks and Security
98
Page 99 of 288

Power door lock disable feature
This feature will help protect your vehicle from unauthorized entry.
The UNLOCK function on the power door control will not operate with
the ignition OFF and twenty seconds after the doors are closed and
electronically locked by the remote entry transmitter, key pad, or power
door control (if pressed while the door was open).
The UNLOCK function will operate again after you unlock the vehicle
using the remote entry transmitter or key pad, turn the ignition to ON,
or open the door from inside of the vehicle.
Deactivating/activating power door lock disable feature
1. Turn the ignition key to ON,
then press the UNLOCK button
3 times.
2. Turn the ignition key to OFF,
then press the UNLOCK button
3 times.
3. Turn the ignition key to ON,
within five seconds press the
UNLOCK button 2 times then
LOCK once.
The user should receive 2 horn chirps to indicate the system has been
disabled or 2 chirps followed by a honk to indicate the system has been
enabled.
Pressing the power door LOCK button two times again will turn the
feature ON if it was previously OFF, or OFF if it was previously ON.
Every two consecutive presses of the LOCK button after successfully
entering the configuration mode will change the enable/disable condition
of the feature.
Turn ignition to OFF to exit programming.
UL
Locks and Security
99
Page 100 of 288

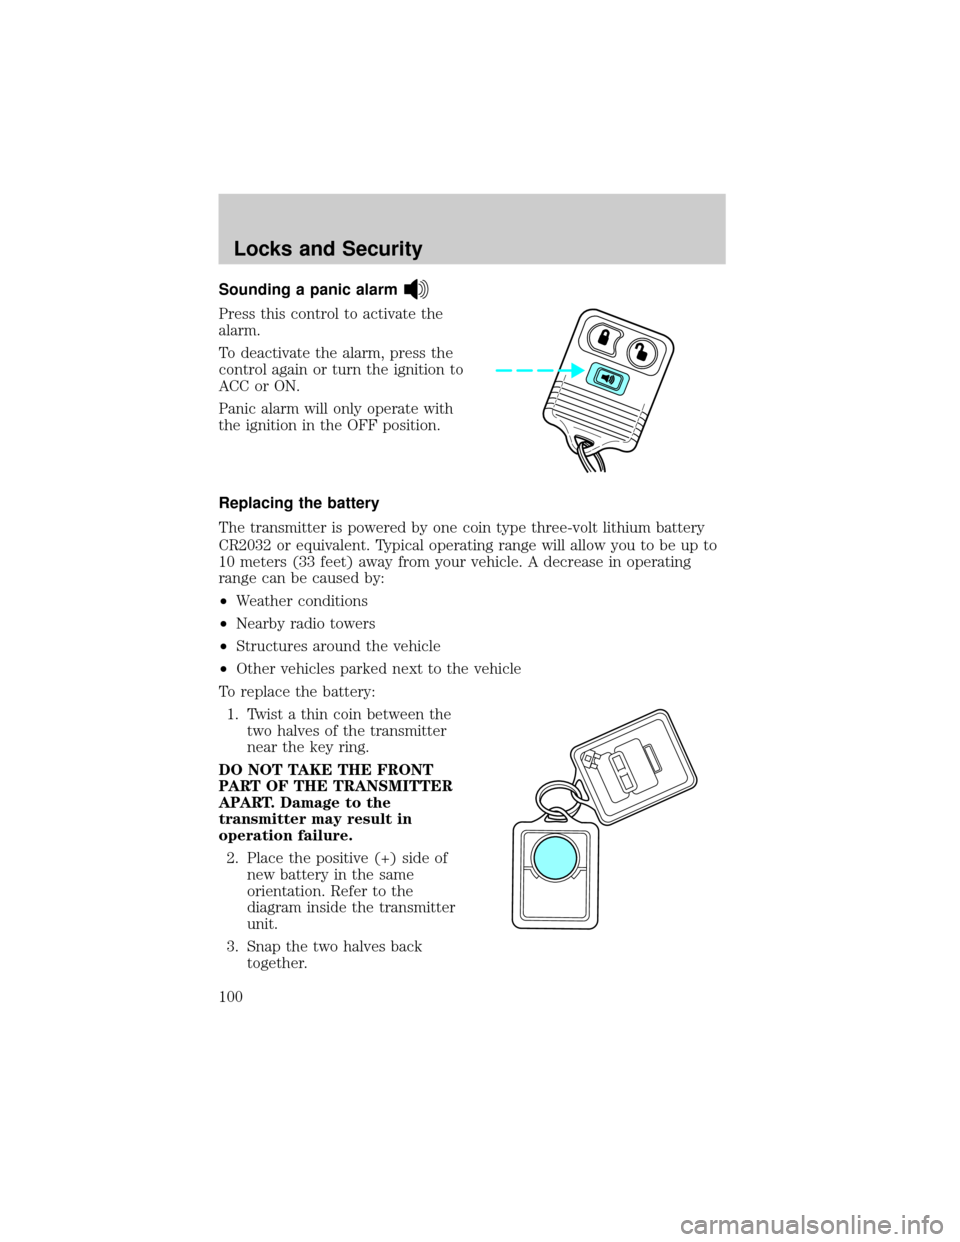
Sounding a panic alarm
Press this control to activate the
alarm.
To deactivate the alarm, press the
control again or turn the ignition to
ACC or ON.
Panic alarm will only operate with
the ignition in the OFF position.
Replacing the battery
The transmitter is powered by one coin type three-volt lithium battery
CR2032 or equivalent. Typical operating range will allow you to be up to
10 meters (33 feet) away from your vehicle. A decrease in operating
range can be caused by:
²Weather conditions
²Nearby radio towers
²Structures around the vehicle
²Other vehicles parked next to the vehicle
To replace the battery:
1. Twist a thin coin between the
two halves of the transmitter
near the key ring.
DO NOT TAKE THE FRONT
PART OF THE TRANSMITTER
APART. Damage to the
transmitter may result in
operation failure.
2. Place the positive (+) side of
new battery in the same
orientation. Refer to the
diagram inside the transmitter
unit.
3. Snap the two halves back
together.
Locks and Security
100
Page 101 of 288

Replacing lost transmitters
If a remote transmitter has been lost
and you would like to remove it
from the vehicle's memory, or you
would like to purchase additional
remote transmitters and have them
programmed to your vehicle:
²Takeallyour vehicle's
transmitters to your dealer for
programming, or
²Perform the programming
procedure yourself.
Programming remote transmitters
It is necessary to haveall(maximum of four Ð original and/or new) of
your remote transmitters available prior to beginning this procedure.
NOTE:This procedure must be completed within the specified times. If
not completed within the specified time period, reprogramming
procedures must be restarted from the beginning.
To program the transmitters yourself:
²Place the key in the ignition and
turn from 2 (LOCK) to 3 (OFF)
and cycle between 3 (OFF) and
4(ON) eight times in rapid
succession (within 10 seconds)
with the eighth turn ending in the
4 (ON) position. The doors will
lock/unlock to confirm that
programming mode has been
entered.
²Within 20 seconds, program a
remote transmitter by pressing any button on a transmitter. The doors
will lock/unlock to confirm that the remote transmitter has been
programmed. (If more than 20 seconds pass before pressing a remote
transmitter button, the programming mode will exit and the procedure
will have to be repeated.)
²Repeat the previous step to program additional remote transmitters.
The doors will lock/unlock to confirm that each remote transmitter has
been programmed.
3
2
1
5
4
Locks and Security
101