ESP MAZDA MODEL B3000 TRUCK 2006 Owners Manual
[x] Cancel search | Manufacturer: MAZDA, Model Year: 2006, Model line: MODEL B3000 TRUCK, Model: MAZDA MODEL B3000 TRUCK 2006Pages: 266, PDF Size: 2.11 MB
Page 5 of 266
JOBNAME: No Job Name PAGE: 5 SESS: 1 OUTPUT: Thu Sep 15 08:22:27 2005
/ford_pdm/ford/own2002/mbs/og
SAFETY AND ENVIRONMENT PROTECTION
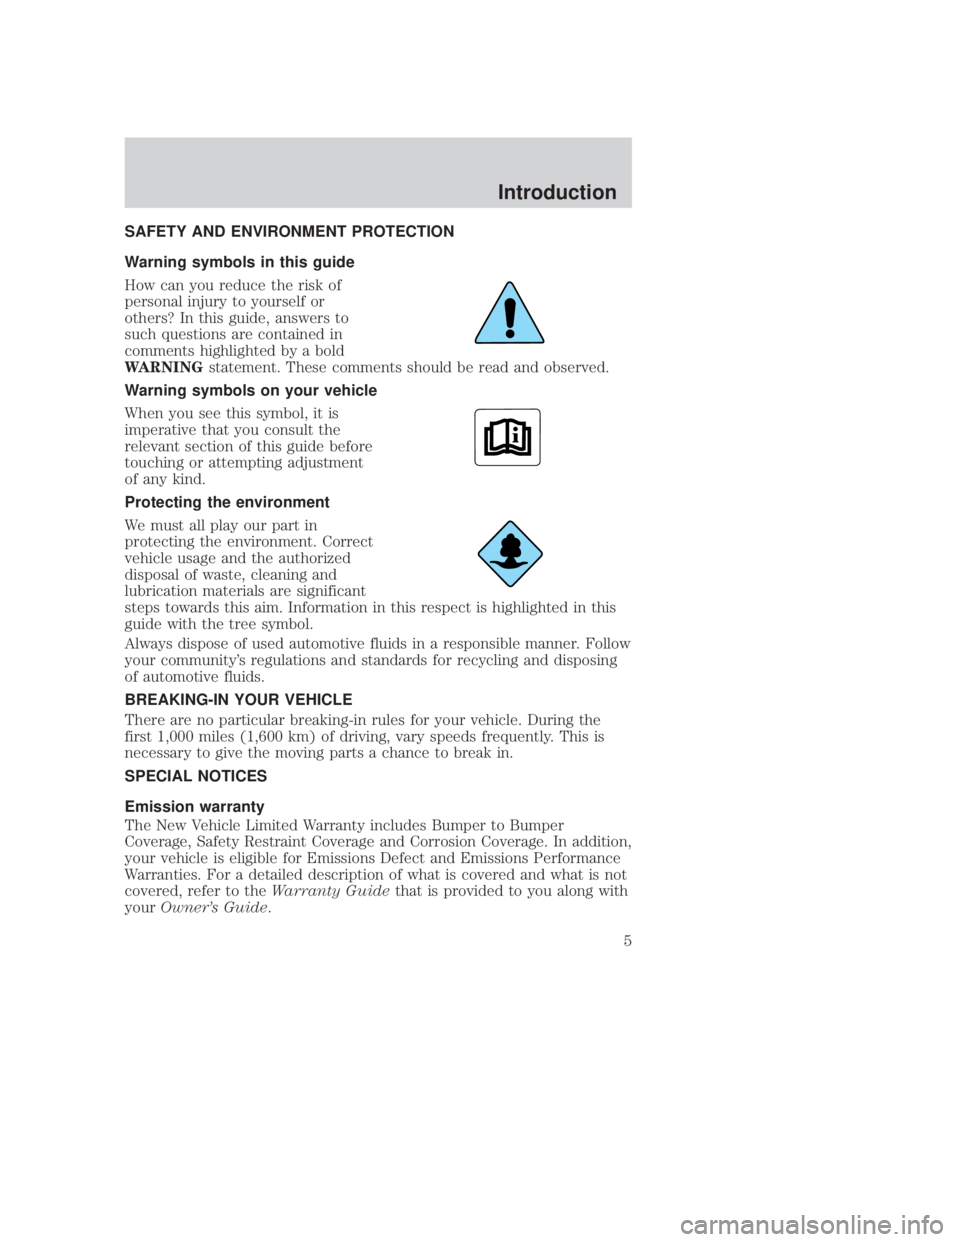
Warning symbols in this guide
How can you reduce the risk of
personal injury to yourself or
others? In this guide, answers to
such questions are contained in
comments highlighted by a bold
WARNINGstatement. These comments should be read and observed.
Warning symbols on your vehicle
When you see this symbol, it is
imperative that you consult the
relevant section of this guide before
touching or attempting adjustment
of any kind.
Protecting the environment
We must all play our part in
protecting the environment. Correct
vehicle usage and the authorized
disposal of waste, cleaning and
lubrication materials are significant
steps towards this aim. Information in this respect is highlighted in this
guide with the tree symbol.
Always dispose of used automotive fluids in a responsible manner. Follow
your community's regulations and standards for recycling and disposing
of automotive fluids.
BREAKING-IN YOUR VEHICLE
There are no particular breaking-in rules for your vehicle. During the
first 1,000 miles (1,600 km) of driving, vary speeds frequently. This is
necessary to give the moving parts a chance to break in.
SPECIAL NOTICES
Emission warranty
The New Vehicle Limited Warranty includes Bumper to Bumper
Coverage, Safety Restraint Coverage and Corrosion Coverage. In addition,
your vehicle is eligible for Emissions Defect and Emissions Performance
Warranties. For a detailed description of what is covered and what is not
covered, refer to the Warranty Guidethat is provided to you along with
your Owner's Guide.CIMS #729502
com_environ-info itdseq=3
CIMS #958891
com_handbook-warn.mazda
itdseq=4
CIMS #958892
com_warns-on-vehicle.mazda itdseq=5
CIMS #1123266
com_environ-protect.mazda itdseq=6
CIMS #689351
com_breaking_veh.j14 itdseq=7
CIMS #729514
com_special-note-title itdseq=8
CIMS #689352
com_emission-warning.j14 itdseq=9
art=expii001_b
art=ctoss542_a
art=expii002_b
REVIEW COPY ÐÐ
2006 B-Series (mbs), Owners Guide (post-2002-fmt) (own2002),Market:USA(fus)
PAGE: 5OP: root EDIT SESSION: 1DATE: SEPT 15 2005 at 8:21JOB:@ibm2/ford_pdm/CLS_ford/GRP_own2002/JOB_mbs/DIV_og
Introduction
5
Page 12 of 266
JOBNAME: No Job Name PAGE: 12 SESS: 1 OUTPUT: Thu Sep 15 08:22:27 2005
/ford_pdm/ford/own2002/mbs/og
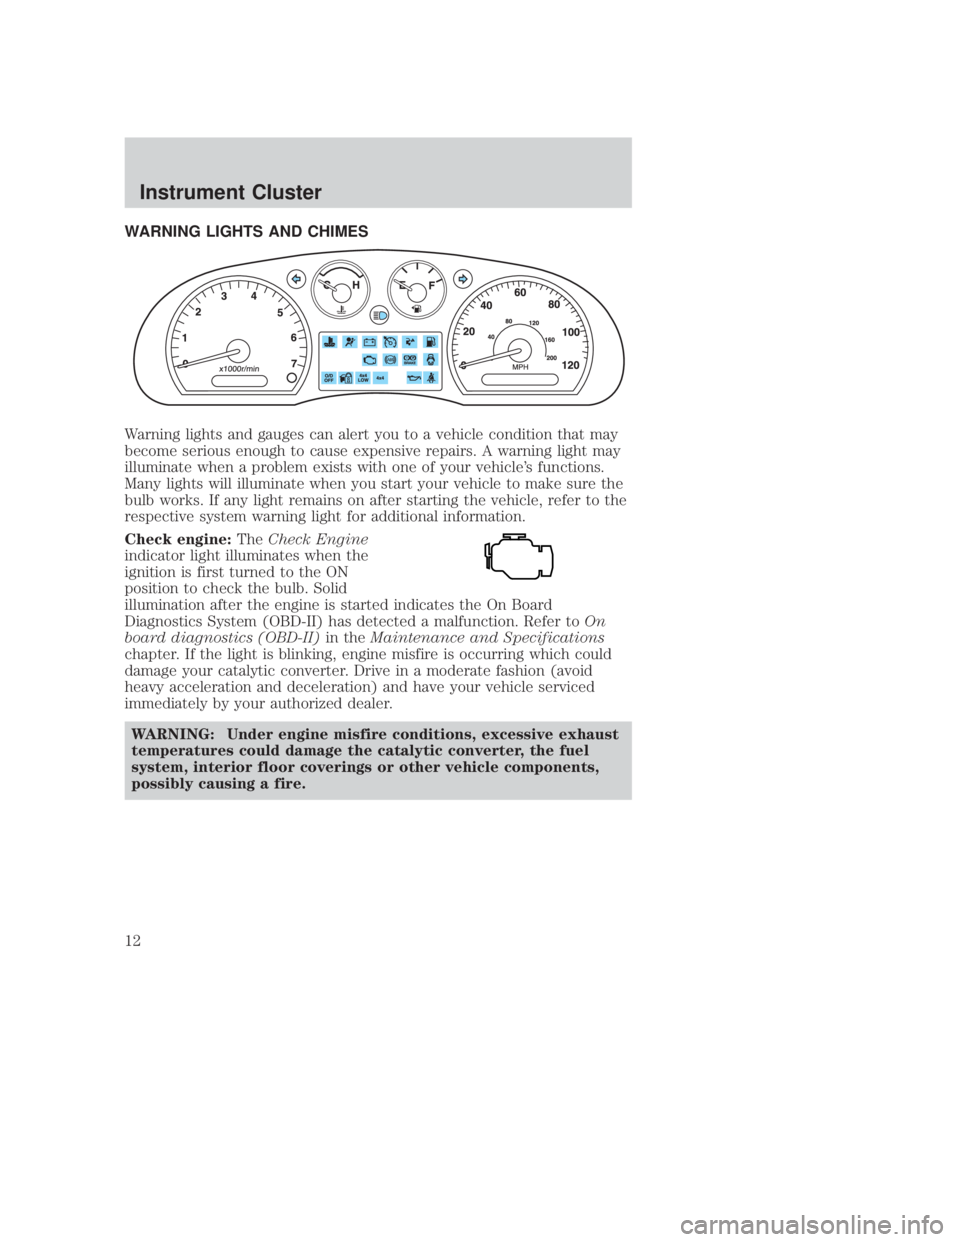
WARNING LIGHTS AND CHIMES
Warning lights and gauges can alert you to a vehicle condition that may
become serious enough to cause expensive repairs. A warning light may
illuminate when a problem exists with one of your vehicle's functions.
Many lights will illuminate when you start your vehicle to make sure the
bulb works. If any light remains on after starting the vehicle, refer to the
respective system warning light for additional information.
Check engine:TheCheck Engine
indicator light illuminates when the
ignition is first turned to the ON
position to check the bulb. Solid
illumination after the engine is started indicates the On Board
Diagnostics System (OBD-II) has detected a malfunction. Refer to On
board diagnostics (OBD-II) in theMaintenance and Specifications
chapter. If the light is blinking, engine misfire is occurring which could
damage your catalytic converter. Drive in a moderate fashion (avoid
heavy acceleration and deceleration) and have your vehicle serviced
immediately by your authorized dealer.
WARNING: Under engine misfire conditions, excessive exhaust
temperatures could damage the catalytic converter, the fuel
system, interior floor coverings or other vehicle components,
possibly causing a fire.CIMS #1264223
com_warn-lights.mbs04 itdseq=19
art=mbsis302_b
art=expis315_a
REVIEW COPY ÐÐ
2006 B-Series (mbs), Owners Guide (post-2002-fmt) (own2002),Market:USA(fus)
PAGE: 12OP: root EDIT SESSION: 1DATE: SEPT 15 2005 at 8:21JOB:@ibm2/ford_pdm/CLS_ford/GRP_own2002/JOB_mbs/DIV_og
Instrument Cluster
12
Page 39 of 266
JOBNAME: No Job Name PAGE: 39 SESS: 1 OUTPUT: Thu Sep 15 08:22:27 2005
/ford_pdm/ford/own2002/mbs/og
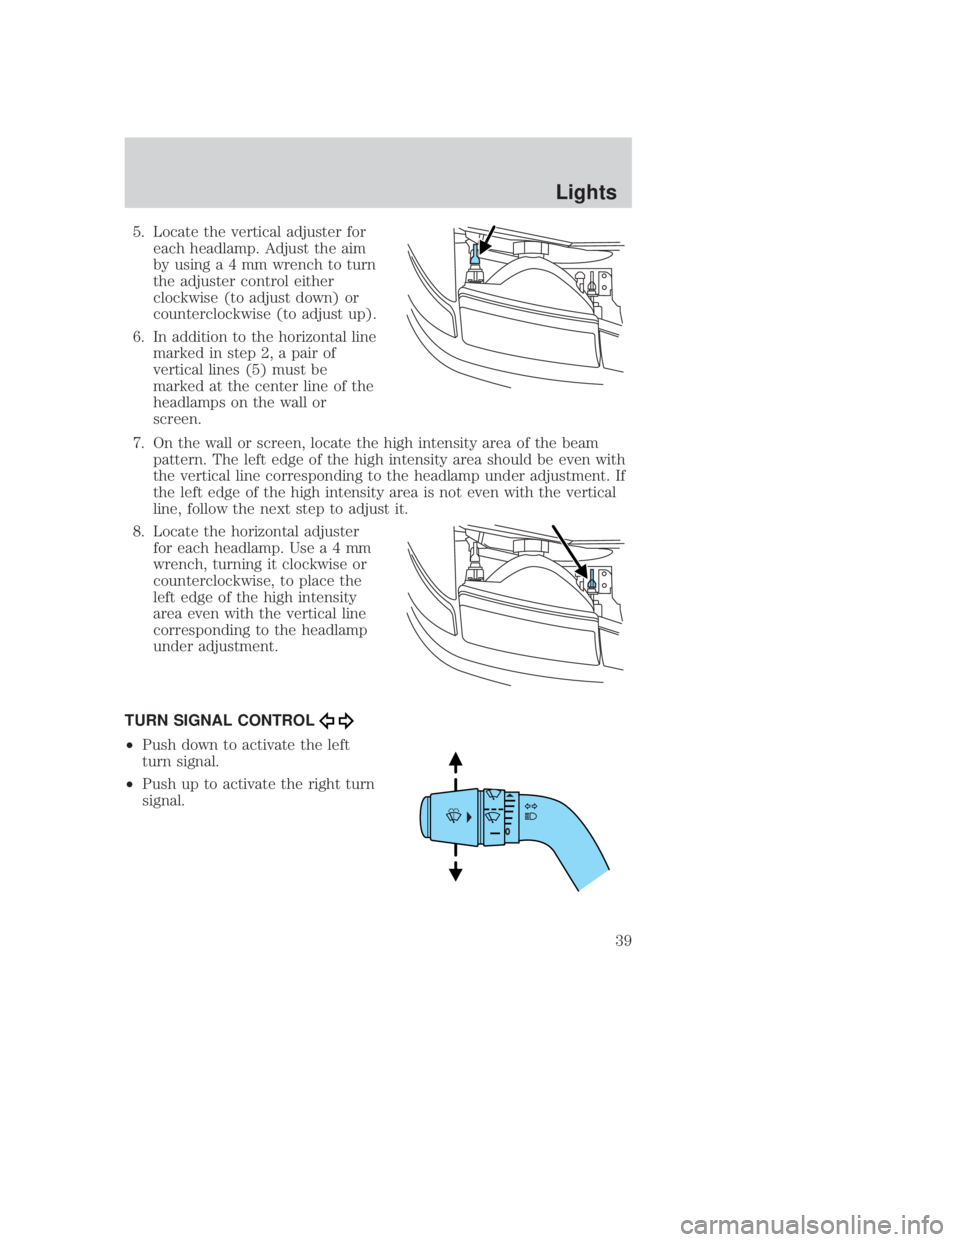
5. Locate the vertical adjuster foreach headlamp. Adjust the aim
by usinga4mmwrench to turn
the adjuster control either
clockwise (to adjust down) or
counterclockwise (to adjust up).
6. In addition to the horizontal line marked in step 2, a pair of
vertical lines (5) must be
marked at the center line of the
headlamps on the wall or
screen.
7. On the wall or screen, locate the high intensity area of the beam pattern. The left edge of the high intensity area should be even with
the vertical line corresponding to the headlamp under adjustment. If
the left edge of the high intensity area is not even with the vertical
line, follow the next step to adjust it.
8. Locate the horizontal adjuster for each headlamp. Us ea4mm
wrench, turning it clockwise or
counterclockwise, to place the
left edge of the high intensity
area even with the vertical line
corresponding to the headlamp
under adjustment.
TURN SIGNAL CONTROL
² Push down to activate the left
turn signal.
² Push up to activate the right turn
signal.
CIMS #54764
com_turn_indicator
itdseq=43
art=mbscf406_a
art=mbscf407_a
art=rancf324_a
REVIEW COPY ÐÐ
2006 B-Series (mbs), Owners Guide (post-2002-fmt) (own2002),Market:USA(fus)
PAGE: 39OP: root EDIT SESSION: 1DATE: SEPT 15 2005 at 8:21JOB:@ibm2/ford_pdm/CLS_ford/GRP_own2002/JOB_mbs/DIV_og
Lights
39
Page 56 of 266
JOBNAME: No Job Name PAGE: 56 SESS: 1 OUTPUT: Thu Sep 15 08:22:27 2005
/ford_pdm/ford/own2002/mbs/og
KEYS
The key operates all locks on your vehicle. In case of loss, replacement
keys are available from your dealer.
You should always carry a second key with you in a safe place in case
you require it in an emergency.
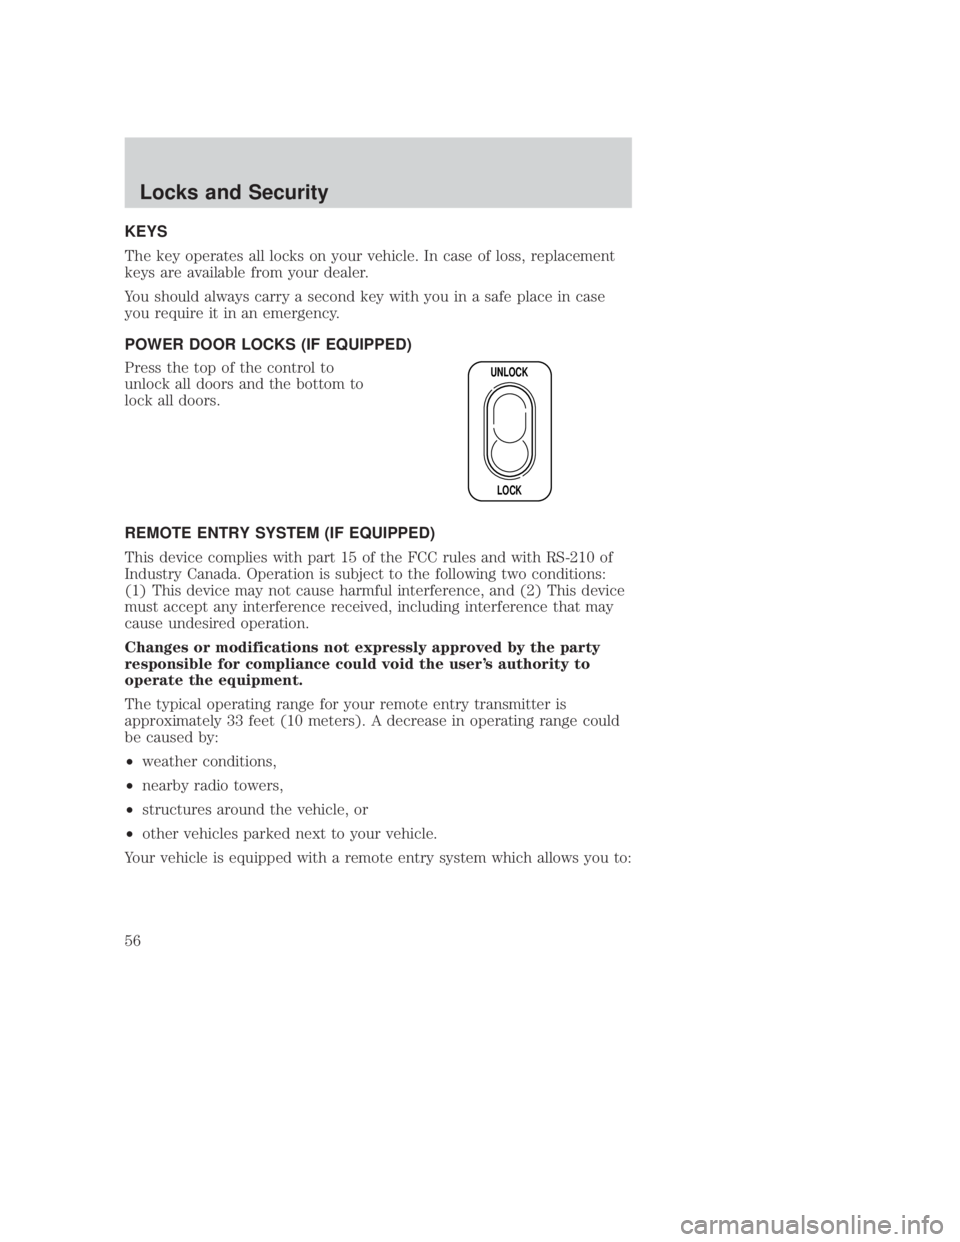
POWER DOOR LOCKS (IF EQUIPPED)
Press the top of the control to
unlock all doors and the bottom to
lock all doors.
REMOTE ENTRY SYSTEM (IF EQUIPPED)
This device complies with part 15 of the FCC rules and with RS-210 of
Industry Canada. Operation is subject to the following two conditions:
(1) This device may not cause harmful interference, and (2) This device
must accept any interference received, including interference that may
cause undesired operation.
Changes or modifications not expressly approved by the party
responsible for compliance could void the user's authority to
operate the equipment.
The typical operating range for your remote entry transmitter is
approximately 33 feet (10 meters). A decrease in operating range could
be caused by:
²weather conditions,
² nearby radio towers,
² structures around the vehicle, or
² other vehicles parked next to your vehicle.
Your vehicle is equipped with a remote entry system which allows you to:
UNLOCK
LOCK
CIMS #977601 com_keys.vil itdseq=70
CIMS #83545
com_powerdoor-title.ie itdseq=71
CIMS #101856
com_power-doors.03
itdseq=72
CIMS #1392205
com_remote-title-ie.fly itdseq=73
CIMS #1031085
com_rem-entry.fly-panic itdseq=74
art=rancf508_a
REVIEW COPY ÐÐ
2006 B-Series (mbs), Owners Guide (post-2002-fmt) (own2002),Market:USA(fus)
PAGE: 56OP: root EDIT SESSION: 1DATE: SEPT 15 2005 at 8:21JOB:@ibm2/ford_pdm/CLS_ford/GRP_own2002/JOB_mbs/DIV_og
Locks and Security
56
Page 68 of 266
JOBNAME: No Job Name PAGE: 68 SESS: 1 OUTPUT: Thu Sep 15 08:22:27 2005
/ford_pdm/ford/own2002/mbs/og
WARNING: The lap belts should fit snugly and as low as
possible around the hips, not around the waist. Failure to
position the lap belt correctly may cause serious injury in an
accident.
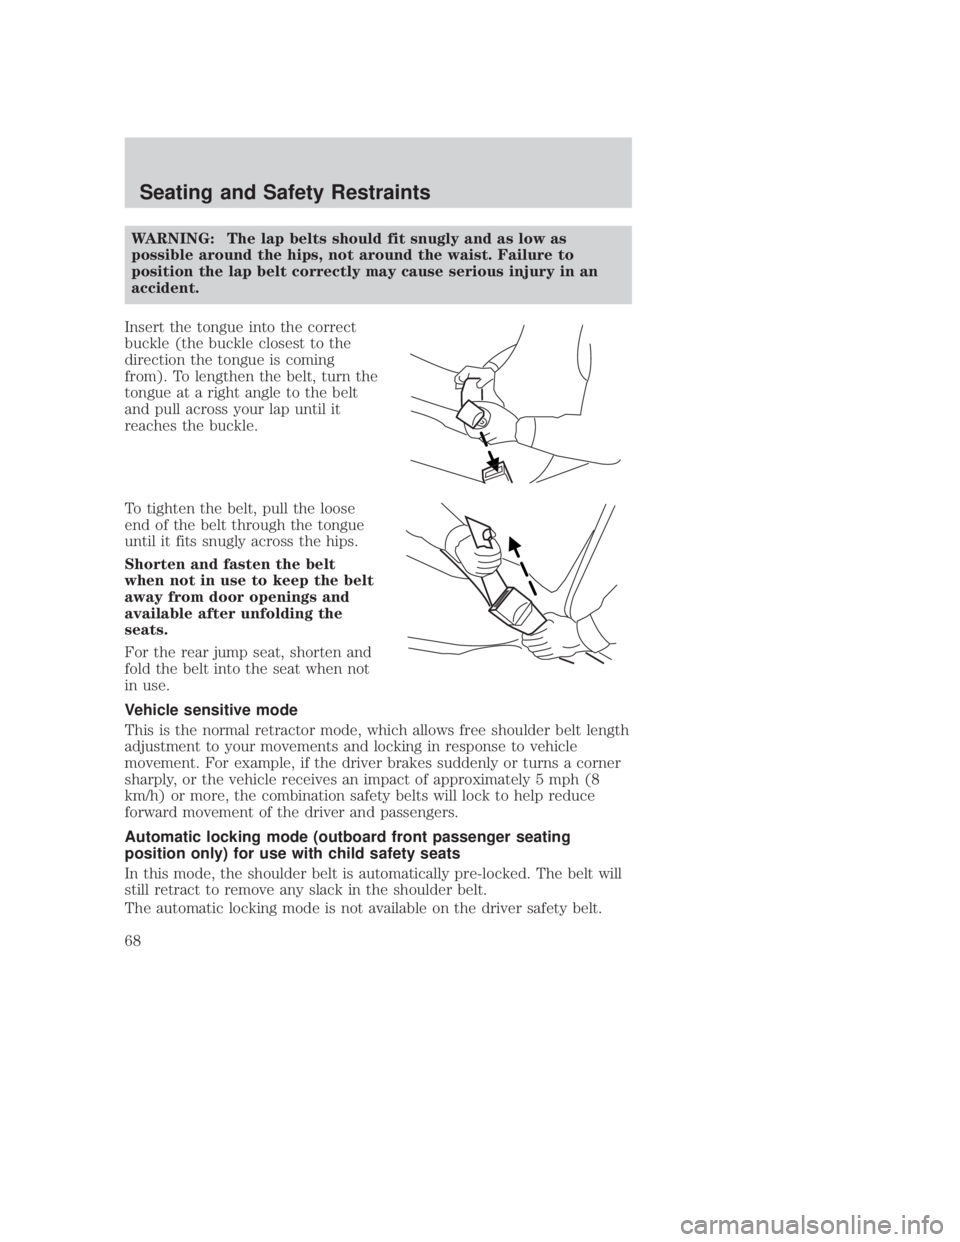
Insert the tongue into the correct
buckle (the buckle closest to the
direction the tongue is coming
from). To lengthen the belt, turn the
tongue at a right angle to the belt
and pull across your lap until it
reaches the buckle.
To tighten the belt, pull the loose
end of the belt through the tongue
until it fits snugly across the hips.
Shorten and fasten the belt
when not in use to keep the belt
away from door openings and
available after unfolding the
seats.
For the rear jump seat, shorten and
fold the belt into the seat when not
in use.
Vehicle sensitive mode
This is the normal retractor mode, which allows free shoulder belt length
adjustment to your movements and locking in response to vehicle
movement. For example, if the driver brakes suddenly or turns a corner
sharply, or the vehicle receives an impact of approximately 5 mph (8
km/h) or more, the combination safety belts will lock to help reduce
forward movement of the driver and passengers.
Automatic locking mode (outboard front passenger seating
position only) for use with child safety seats
In this mode, the shoulder belt is automatically pre-locked. The belt will
still retract to remove any slack in the shoulder belt.
The automatic locking mode is not available on the driver safety belt.
CIMS #73763
com_vehicle-locking-mode.01 itdseq=96
CIMS #1124247
com_when_use-title.mbs itdseq=97
CIMS #690605
com_when-to-use-lok-mode.mbs itdseq=98
art=mbsss111_a
art=mbsss112_a
REVIEW COPY ÐÐ
2006 B-Series (mbs), Owners Guide (post-2002-fmt) (own2002),Market:USA(fus)
PAGE: 68OP: root EDIT SESSION: 1DATE: SEPT 15 2005 at 8:21JOB:@ibm2/ford_pdm/CLS_ford/GRP_own2002/JOB_mbs/DIV_og
Seating and Safety Restraints
68
Page 86 of 266
JOBNAME: No Job Name PAGE: 86 SESS: 1 OUTPUT: Thu Sep 15 08:22:27 2005
/ford_pdm/ford/own2002/mbs/og
WARNING: If the light is illuminated when the passenger
airbag ON/OFF switch is in the ON position and the ignition
switch is ON, have the passenger airbag ON/OFF switch serviced
at your authorized Mazda dealership immediately.
The passenger side airbag should always be ON (the airbag OFF light
should notbe illuminated) except for certain vulnerable persons. See
guidance on following pages.
WARNING: The safety belts for the driver and right front
passenger seating positions have been specifically designed to
function together with the airbags in certain types of crashes.
When you turn OFF your airbag, you not only lose the
protection of the airbag, you also may reduce the effectiveness
of your safety belt system, which was designed to work with the
airbag. Most vehicles with full back seats do not have cut-off
switches, but NHTSA and Transport Canada will allow a cut-off
switch to be installed on request for a certain category of
persons who must ride up front and there is a concern about
riding there. Please see the guidance below.
WARNING: Always use safety belts and child restraints
properly. If a child in a rear facing infant seat must be
transported in front, the passenger airbag mustbe turned OFF.
This is because the back of the infant seat is too close to the
inflating airbag and the risk of a fatal injury to the infant when
the airbag inflates is substantial.
The vast majority of drivers and passengers over the age of 12 years are
much safer with an airbag than without. To do their job and reduce the
risk of life threatening injuries, airbags must open with great force, and
this force can pose a potentially deadly risk in some situations,
particularly when a front seat occupant is not properly buckled up. The
most effective way to reduce the risk of unnecessary airbag injuries
without reducing the overall safety of the vehicle is to make sure all
occupants are properly restrained in the vehicle, especially in the front
seat. This provides the protection of safety belts and permits the airbags
to provide the additional protection they were designed to provide. If
you choose to deactivate your airbag, you are losing the very significant
risk reducing benefits of the airbag and you are also reducing the
REVIEW COPY ÐÐ 2006 B-Series (mbs), Owners Guide (post-2002-fmt) (own2002),Market:USA(fus)
PAGE: 86OP: root EDIT SESSION: 1DATE: SEPT 15 2005 at 8:21JOB:@ibm2/ford_pdm/CLS_ford/GRP_own2002/JOB_mbs/DIV_og
Seating and Safety Restraints
86
Page 91 of 266
JOBNAME: No Job Name PAGE: 91 SESS: 1 OUTPUT: Thu Sep 15 08:22:27 2005
/ford_pdm/ford/own2002/mbs/og
WARNING: Do not leave children, unreliable adults, or pets
unattended in your vehicle. Leaving a child or an animal
unattended in a parked vehicle is dangerous. In hot weather,
temperatures inside a vehicle can become high enough to cause
brain damage or even death. Always take all children and
animals with you or leave a responsible person with them.
Leaving children in a vehicle with the ignition key is dangerous.
This could result in someone being badly injured or even killed.
They could play with power windows or other controls, or even
make the vehicle move. Don't leave the keys in your vehicle
with children.
WARNING: Placing a child, 12 years or younger, in the front
seat is dangerous. The child could be hit by a deploying airbag
and be seriously injured or even killed. Never place a child
safety seat in a center facing rear jump seat. If you must place
a child safety seat in a front seating position, make sure the
passenger airbag is turned off. SeeTurning the airbag Offin
this section. Never use a rear-facing child restraint system in
the front seat with an airbag that could deploy.
Child booster seats
Children outgrow a typical convertible or toddler seat when they weigh
40 pounds and are around 4 years of age. Although the lap/shoulder belt
will provide some protection, these children are still too small for
lap/shoulder belts to fit properly, which could increase the risk of serious
injury.
To improve the fit of both the lap and shoulder belt on children who
have outgrown child safety seats, Mazda recommends use of a
belt-positioning booster.
Booster seats position a child so that safety belts fit better. They lift the
child up so that the lap belt rests low across the hips and the knees
bend comfortably. Booster seats also make the shoulder belt fit better
and more comfortably for growing children.
When children should use booster seats
Children need to use booster seats from the time they outgrow the
toddler seat until they are big enough for the vehicle seat and
lap/shoulder belt to fit properly. Generally this is when they weigh about
80 lb. (about 8 to 12 years old).
CIMS #992731
com_booster_seat.mazda itdseq=124
REVIEW COPY ÐÐ
2006 B-Series (mbs), Owners Guide (post-2002-fmt) (own2002),Market:USA(fus)
PAGE: 91OP: root EDIT SESSION: 1DATE: SEPT 15 2005 at 8:21JOB:@ibm2/ford_pdm/CLS_ford/GRP_own2002/JOB_mbs/DIV_og
Seating and Safety Restraints
91
Page 106 of 266
JOBNAME: No Job Name PAGE: 106 SESS: 1 OUTPUT: Thu Sep 15 08:22:27 2005
/ford_pdm/ford/own2002/mbs/og
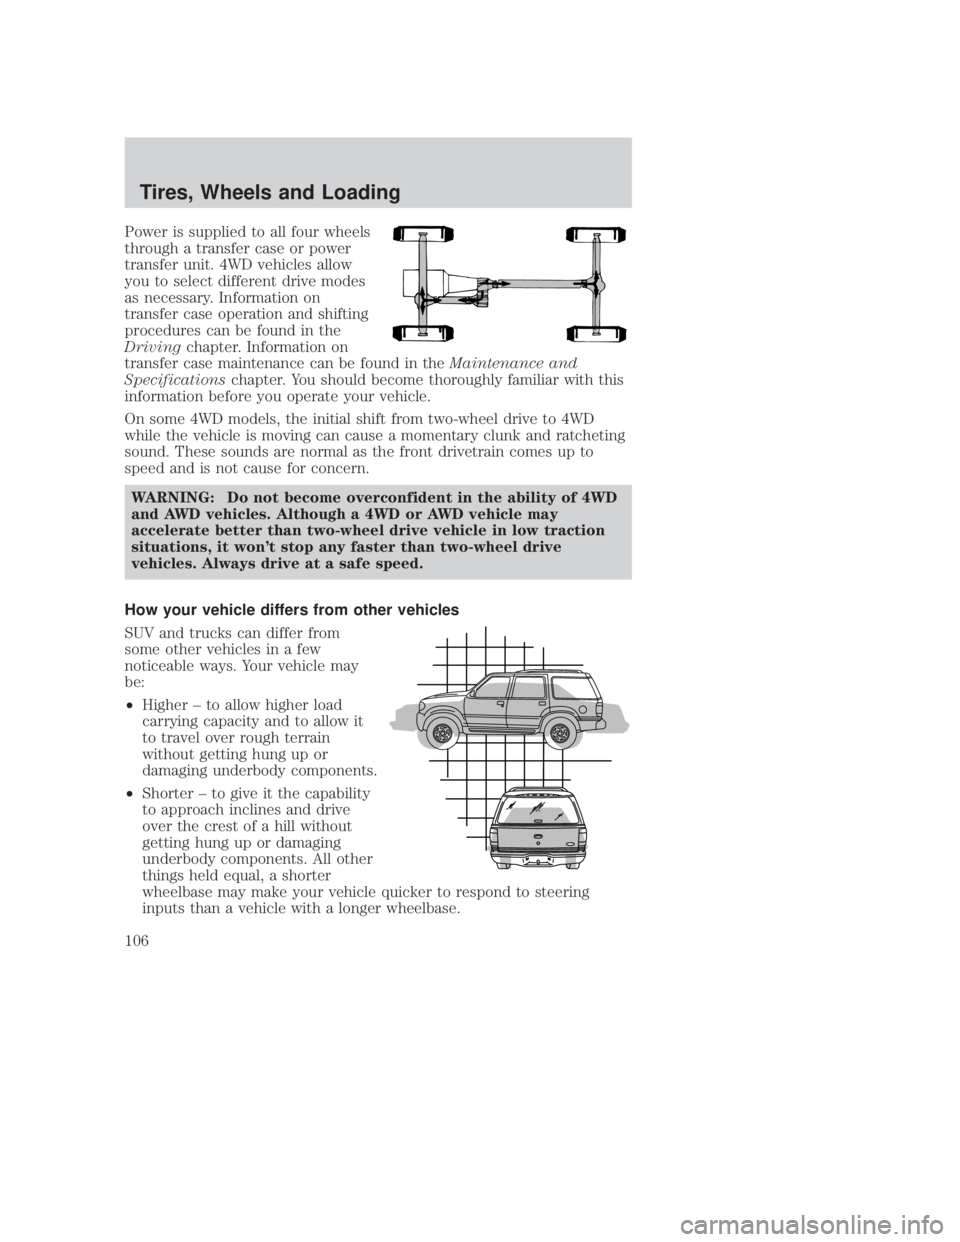
Power is supplied to all four wheels
through a transfer case or power
transfer unit. 4WD vehicles allow
you to select different drive modes
as necessary. Information on
transfer case operation and shifting
procedures can be found in the
Drivingchapter. Information on
transfer case maintenance can be found in the Maintenance and
Specifications chapter. You should become thoroughly familiar with this
information before you operate your vehicle.
On some 4WD models, the initial shift from two-wheel drive to 4WD
while the vehicle is moving can cause a momentary clunk and ratcheting
sound. These sounds are normal as the front drivetrain comes up to
speed and is not cause for concern.
WARNING: Do not become overconfident in the ability of 4WD
and AWD vehicles. Although a 4WD or AWD vehicle may
accelerate better than two-wheel drive vehicle in low traction
situations, it won't stop any faster than two-wheel drive
vehicles. Always drive at a safe speed.
How your vehicle differs from other vehicles
SUV and trucks can differ from
some other vehicles in a few
noticeable ways. Your vehicle may
be:
² Higher ± to allow higher load
carrying capacity and to allow it
to travel over rough terrain
without getting hung up or
damaging underbody components.
² Shorter ± to give it the capability
to approach inclines and drive
over the crest of a hill without
getting hung up or damaging
underbody components. All other
things held equal, a shorter
wheelbase may make your vehicle quicker to respond to steering
inputs than a vehicle with a longer wheelbase.
CIMS #1434026
com_veh-dr-differs
itdseq=134
art=supfw001_a
art=supfw010_a
REVIEW COPY ÐÐ
2006 B-Series (mbs), Owners Guide (post-2002-fmt) (own2002),Market:USA(fus)
PAGE: 106OP:root EDIT SESSION: 1DATE: SEPT 15 2005 at 8:21JOB:@ibm2/ford_pdm/CLS_ford/GRP_own2002/JOB_mbs/DIV_og
Tires, Wheels and Loading
106
Page 108 of 266
JOBNAME: No Job Name PAGE: 108 SESS: 1 OUTPUT: Thu Sep 15 08:22:27 2005
/ford_pdm/ford/own2002/mbs/og
and one-half (1 1/2) times as well on the government course as a tire
graded 100. The relative performance of tires depends upon the actual
conditions of their use, however, and may depart significantly from the
norm due to variations in driving habits, service practices, and
differences in road characteristics and climate.
Traction AA A B C
The traction grades, from highest to lowest are AA, A, B, and C. The
grades represent the tire's ability to stop on wet pavement as measured
under controlled conditions on specified government test surfaces of
asphalt and concrete. A tire marked C may have poor traction
performance.
NOTE:The traction grade assigned to this tire is based on
straight-ahead braking traction tests, and does not include acceleration,
cornering, hydroplaning or peak traction characteristics.
Temperature A B C
The temperature grades are A (the highest), B, and C, representing the
tire's resistance to the generation of heat and its ability to dissipate heat
when tested under controlled conditions on a specified indoor laboratory
test wheel. Sustained high temperature can cause the material of the tire
to degenerate and reduce tire life, and excessive temperature can lead to
sudden tire failure. The grade C corresponds to a level of performance
which all passenger car tires must meet under the Federal Motor Vehicle
Safety Standard No. 109. Grades B and A represent higher levels of
performance on the laboratory test wheel than the minimum required by
law.
WARNING: The temperature grade for this tire is established
for a tire that is properly inflated and not overloaded.
Excessive speed, underinflation, or excessive loading, either
separately or in combination, can cause heat buildup and
possible tire failure.
TIRES
Tires are designed to give many thousands of miles of service, but they
must be maintained in order to get the maximum benefit from them.
Glossary of tire terminology
² Tire label: A label showing the OE (Original Equipment) tire sizes,
recommended inflation pressure and the maximum weight the vehicle
can carry.
CIMS #599890
com_traction_a-b-c.j14 itdseq=137
CIMS #600046
com_temp_a-b-c.j14 itdseq=138
CIMS #1272072
com_tire-intro itdseq=139
CIMS #1272100
com_glossary-of-tire-terms itdseq=140
REVIEW COPY ÐÐ
2006 B-Series (mbs), Owners Guide (post-2002-fmt) (own2002),Market:USA(fus)
PAGE: 108OP:root EDIT SESSION: 1DATE: SEPT 15 2005 at 8:21JOB:@ibm2/ford_pdm/CLS_ford/GRP_own2002/JOB_mbs/DIV_og
Tires, Wheels and Loading
108
Page 111 of 266
JOBNAME: No Job Name PAGE: 111 SESS: 1 OUTPUT: Thu Sep 15 08:22:27 2005
/ford_pdm/ford/own2002/mbs/og
maximum load can be carried by the tire. This pressure is normally
higher than the manufacturer's recommended cold inflation pressure
which can be found on the Safety Compliance Certification Label or Tire
Label which is located on the structure by the trailing edge of the
driver's door or the edge of the driver's door. The cold inflation pressure
should never be set lower than the recommended pressure on the Safety
Compliance Certification Label or the Tire Label.
When weather temperature changes occur, tire inflation pressures also
change. A 10É F (6É C) temperature drop causes a corresponding drop of
1 psi (7 kPa) in inflation pressure. Check your tire pressures frequently
and adjust them to the proper pressure which can be found on the
Safety Compliance Certification Label or the Tire Label.
If checking tire pressure when the tire is hot, (i.e. driven more than 1
mile [1.6 km]), never ªbleedº or reduce air pressure. The tires are hot
from driving and it is normal for pressures to increase above
recommended cold pressures. A hot tire at or below recommended cold
inflation pressure could be significantly under-inflated.
To check the pressure in your tire(s):1. Make sure the tires are cool, meaning they are not hot from driving even a mile.
Note: If you have to drive a distance to get air for your tire(s), check
and record the tire pressure first and add the appropriate air pressure
when you get to the pump. It is normal for tires to heat up and the air
pressure inside to go up as you drive. Never ªbleedº or reduce air
pressure when tires are hot.
2. Remove the cap from the valve on one tire, then firmly press the tire gauge onto the valve and measure the pressure.
3. Add enough air to reach the recommended air pressure
Note: If you overfill the tire, release air by pushing on the metal stem in
the center of the valve. Then recheck the pressure with your tire gauge.
4. Replace the valve cap.
5. Repeat this procedure for each tire, including the spare.
Note: Some spare tires operate at a higher inflation pressure than the
other tires. For T-type/mini-spare tires (see T-Type/Mini-Spare Tire
Information section for description): Store and maintain at 60psi (4.15
bars). For Full Size and Dissimilar spare tires (see Dissimilar Spare
Tire/Wheel Information section for description): Store and maintain at
the higher of the front and rear inflation pressure as shown on the Tire
Label.
REVIEW COPY ÐÐ
2006 B-Series (mbs), Owners Guide (post-2002-fmt) (own2002),Market:USA(fus)
PAGE: 111OP:root EDIT SESSION: 1DATE: SEPT 15 2005 at 8:22JOB:@ibm2/ford_pdm/CLS_ford/GRP_own2002/JOB_mbs/DIV_og
Tires, Wheels and Loading
111