hood open MAZDA MODEL B4000 2003 Owners Manual
[x] Cancel search | Manufacturer: MAZDA, Model Year: 2003, Model line: MODEL B4000, Model: MAZDA MODEL B4000 2003Pages: 250, PDF Size: 2.85 MB
Page 42 of 250

WARNING: Handling Halogen Bulbs: When a halogen bulb
breaks, it is dangerous. These bulbs contain pressurized gas. If
one is broken, it will explode and serious injuries could be
caused by the flying glass. If the glass portion of the bulb is
touched with bare hands, body oil could cause the bulb to
overheat and explode when lit. Never touch the glass portion of
the bulb with your bare hands and always wear eye protection
when handling or working around halogen bulbs.
Children and Halogen Bulbs: Playing with a halogen bulb is
dangerous. Serious injuries could be caused by dropping a
halogen bulb or breaking in some other way. Always keep
halogen bulbs out of the reach of children.
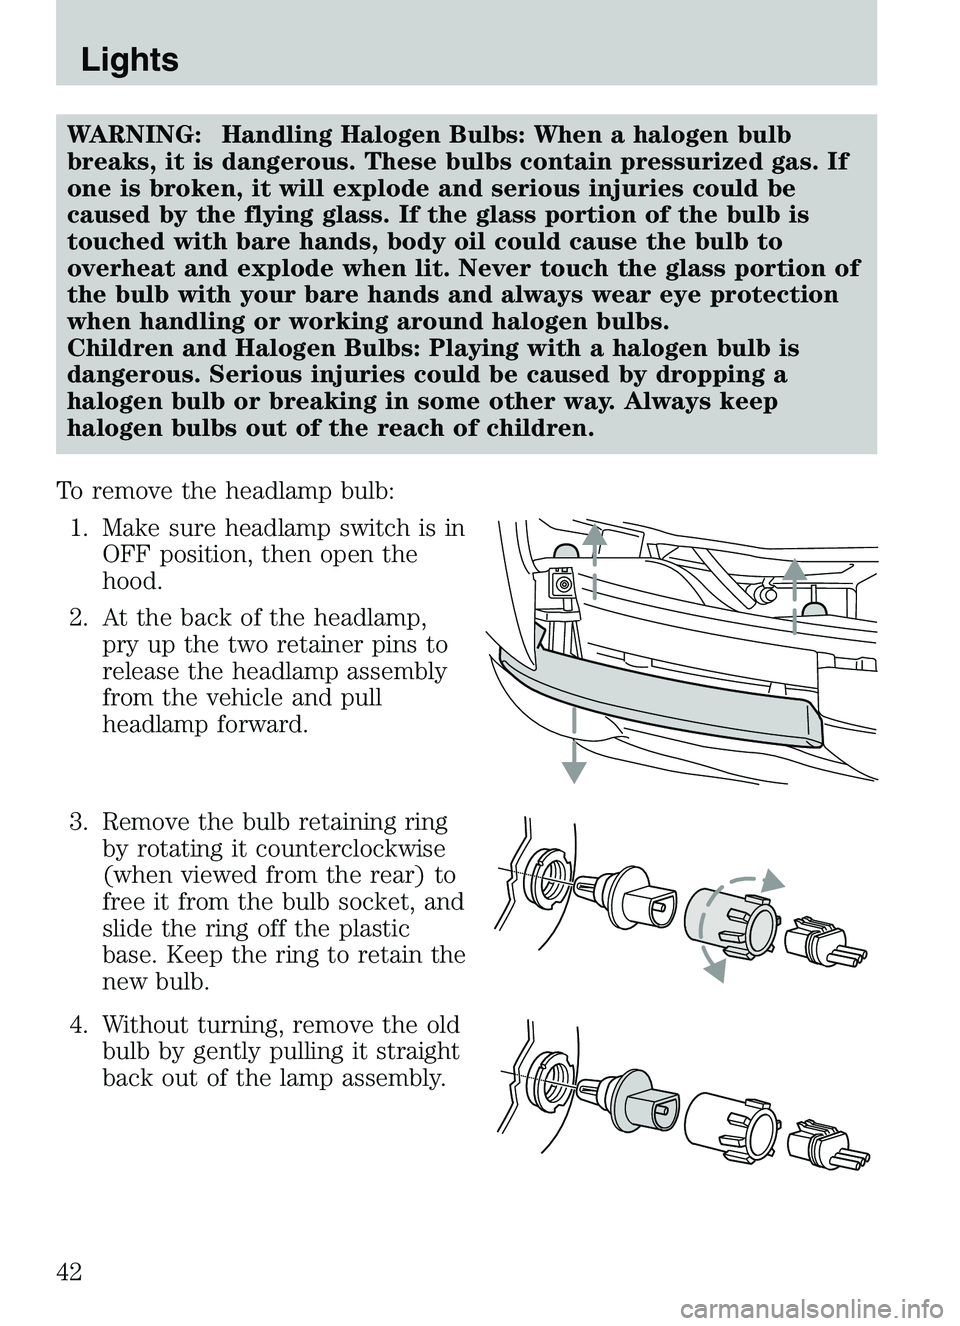
To remove the headlamp bulb: 1. Make sure headlamp switch is in OFF position, then open the
hood.
2. At the back of the headlamp, pry up the two retainer pins to
release the headlamp assembly
from the vehicle and pull
headlamp forward.
3. Remove the bulb retaining ring by rotating it counterclockwise
(when viewed from the rear) to
free it from the bulb socket, and
slide the ring off the plastic
base. Keep the ring to retain the
new bulb.
4. Without turning, remove the old bulb by gently pulling it straight
back out of the lamp assembly.
Lights
42
Page 43 of 250

To install the new bulb:
Handle a halogen headlamp bulb carefully and keep out of
children’s reach. Grasp the bulb only by its plastic base and do
not touch the glass. The oil from your hands could cause the bulb
to break the next time the headlamps are operated. Always wear
safety glasses while handling bulbs.
NOTE: If the bulb is accidentally touched, it should be cleaned with
rubbing alcohol before being used.1. With the flat side of the bulb’s plastic base facing upward, insert the glass end of the bulb into the lamp assembly. You may need to turn
the bulb left or right to align the grooves in the plastic base with the
tabs in the lamp assembly. When the grooves are aligned, push the
bulb into the lamp assembly until the plastic base contacts the rear
of the lamp assembly.
2. Install the bulb retaining ring over the plastic base until it contacts the rear of the socket by rotating clockwise until you feel a “stop.”
3. Install the electrical connector into the plastic base until it snaps, locking it into position.
4. Install the headlamp on vehicle, push rearward and secure with two retainer pins.
5. Turn the headlamps on and make sure they work properly. If the headlamp was correctly aligned before you changed the bulb, you
should not need to align it again.
Replacing front side marker bulbs 1. Open the hood.
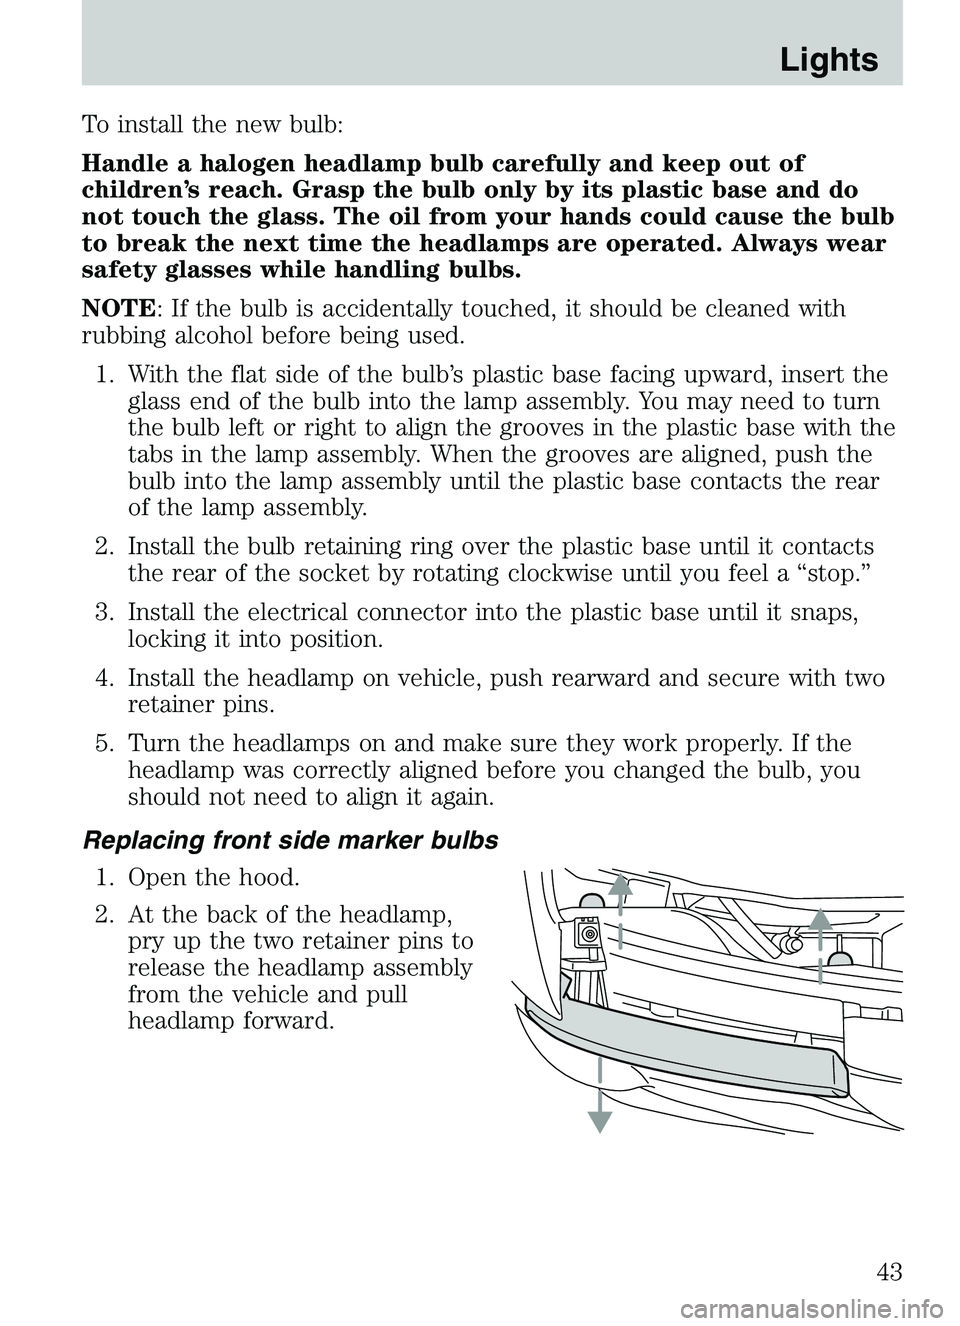
2. At the back of the headlamp, pry up the two retainer pins to
release the headlamp assembly
from the vehicle and pull
headlamp forward.
Lights
43
Page 150 of 250

Fuse/RelayLocation Fuse Amp
Rating Power Distribution Box
Description
42 10A* Right headlamp low beam
43 — Not used
44 — Not used
45A — Wiper HI/LO relay 45B — Wiper park/run relay
46A — Fuel pump relay 46B — Trailer tow relay
47A — A/C clutch solenoid relay 47B — Front washer pump relay
48A — Fog lamps 48B — Fog lamp relay 51 — Not used
52 — Not used
53 — Powertrain Control Module (PCM) Diode
54 — Powertrain Control Module (PCM)
55 — Blower relay
56 — Starter relay
* Mini Fuses ** Maxi Fuses
OVERHEATING
If the temperature gauge indicates overheating and you experience
power loss, you hear a loud knocking or pinging noise, the engine is
probably too hot.
If this happens: 1. Drive safely to the side of the road and park off the right-of-way.
2. Shift the automatic transmission into P (Park) or the manual transmission into the neutral position, and apply the parking brake.
3. Turn off the air conditioner.
WARNING: Steam from an overheated engine is dangerous. The
escaping steam could seriously burn you. Open the hood ONLY
after steam is no longer escaping from the engine.
Roadside Emergencies
150
Page 151 of 250

4. Check whether coolant or steam is escaping from under the hood orfrom the engine compartment.
• If steam is coming from the engine compartment:do not go near
the front of the vehicle. Stop the engine, then turn the ignition switch
to the ON position without starting the engine. The radiator cooling
fans will start to cool the engine.
• If neither coolant nor steam is escaping: open the hood and idle
the engine until it cools. If this does not lower the temperature, stop
the engine and let it cool.
5. Check the coolant level. If it is low, look for leaks in the radiator hoses and connections, heater hoses and connections, radiator and
water pump.
If you find a leak or other damage, or if coolant is still leaking, stop the
engine and call an Authorized Mazda dealer.
See Adding coolant in theMaintenance and specifications section. If
you find no problems, the engine is cool and no leaks are obvious,
carefully add coolant as required.
WARNING: When the engine and radiator are hot, scalding
coolant and steam may shoot out under pressure and cause
serious injury. Do not remove the cooling system cap when the
engine and radiator are hot.
Note: If the engine continues to overheat or frequently overheats, have
the cooling system inspected. The engine could be seriously damaged
unless repairs are made.
CHANGING THE TIRES
If you get a flat tire while driving, do not apply the brake heavily.
Instead, gradually decrease your speed. Hold the steering wheel firmly
and slowly move to a safe place on the side of the road.
WARNING: The use of tire sealants is not recommended and
may compromise the integrity of your tires.
2003 Mazda B Series (mbs)
New Owners Guide own2002 (own2002)
USA English (fus)
Roadside Emergencies
151
Page 191 of 250

Working with the engine on
•Automatic transmission:
1. Set the parking brake and shift to P (Park).
2. Block the wheels.
• Manual transmission:
1. Set the parking brake, depress the clutch and place the gearshift in N (Neutral).
2. Block the wheels.
Note: Do not start your engine with the air cleaner removed and do not
remove it while the engine is running.
OPENING THE HOOD
1. Inside the vehicle, pull the hood release handle located under
the bottom of the instrument
panel near the steering column.
2. Go to the front of the vehicle and release the auxiliary latch
that is located under the front
center of the hood.
3. Lift the hood and support it with the prop rod.
Maintenance and Specifications
191
Page 196 of 250

1. Make sure the vehicle is on level ground.
2. Turn the engine off and wait a few minutes for the oil to drain intothe oil pan.
3. Set the parking brake and ensure the gearshift is securely latched in P (Park) (automatic transmission) or 1 (First) (manual
transmission).
4. Open the hood. Protect yourself from engine heat.
5. Locate and carefully remove the engine oil level indicator (dipstick).
• 2.3L I4 engine
MAX
MIN
Maintenance and Specifications
196