overheating MAZDA MODEL CX-5 2020 Owners Manual (in English)
[x] Cancel search | Manufacturer: MAZDA, Model Year: 2020, Model line: MODEL CX-5, Model: MAZDA MODEL CX-5 2020Pages: 714
Page 143 of 714

Floor Mat
We recommend the use of Genuine
Mazda floor mats.
WA R N I N G
Make sure the floor mats are hooked on the
retention pins to prevent them from
bunching up under the foot pedals:
Using a floor mat that is not secured is
dangerous as it will interfere with the
accelerator and brake pedal operation,
which could result in an accident.
Do not install two floor mats, one on top of
the other, on the driver's side:
Installing two floor mats, one on top of the
other, on the driver's side is dangerous as
the retention pins can only keep one floor
mat from sliding forward.
Loose floor mat(s) will interfere with the
foot pedals and could result in an accident.
If using an all-weather mat for winter use
always remove the original floor mat.
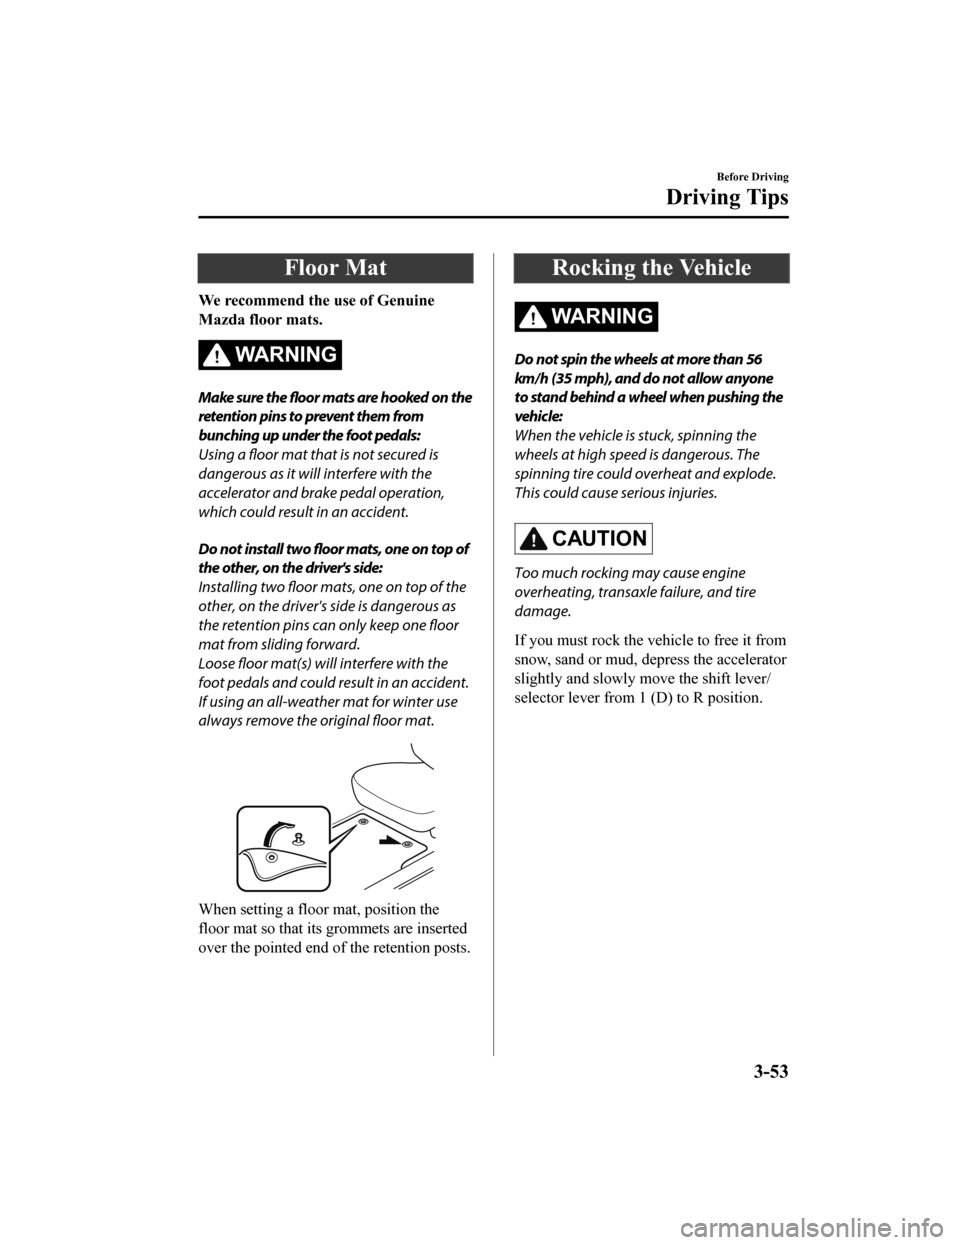
When setting a floor mat, position the
floor mat so that its grommets are inserted
over the pointed end of the retention posts.
Rocking the Vehicle
WA R N I N G
Do not spin the wheels at more than 56
km/h (35 mph), and do not allow anyone
to stand behind a wheel when pushing the
vehicle:
When the vehicle is stuck, spinning the
wheels at high speed is dangerous. The
spinning tire could overheat and explode.
This could cause serious injuries.
CAUTION
Too much rocking may cause engine
overheating, transaxle failure, and tire
damage.
If you must rock the vehicle to free it from
snow, sand or mud, depress the accelerator
slightly and slowly move the shift lever/
selector lever from 1 (D) to R position.
Before Driving
Driving Tips
3-53
CX-5_8HX6-EA-19I_Edition2_old 2019-9-19 9:26:07
Page 155 of 714

Backing up
Backing a vehicle with a trailer requires practice and patience. Back slowly, and have a
helper outside at the rear of the trailer to reduce the risk of an accident.
To turn the trailer, place your hand at the bottom of the steering wheel and turn it in the
direction you want the trailer to go. Make only slight movements to prevent sharp or
prolonged turning.
Ascending a hill
Shift into a lower gear to reduce the possibility of overloading or overheating the engine, or
both.
Descending a hill
Shift into a lower gear and use engine compression as a braking effect.
WA R N I N G
Always use lower gears to reduce speed:
Holding the brake pedal down too long or too f requently is dangerous as it could cause the
brakes to overheat and lose power, resulting in loss of control and a serious accident. Use
lower gears to help reduce speed . Pull off the road and allow brakes to cool down whenever
braking performance feels reduced.
Overheated engine
The extra weight of the trailer may strain the engine on hot days and on long or steep
upgrades.
If the temperature gauge indicates overheating, turn off the air conditioner, drive safely to
the side of the road, park off the right-of- way and wait for engine to cool. Refer to
Overheating on page 7-18.
Parking
Always make sure the tires of the trailer and the tow vehicle are blocked while parked.
Apply the parking brake firmly and put the transaxle in P.
Avoid parking on an incline, but if you must, follow these instructions:
1. Depress and hold down the brake pedal.
2. Have a helper put wheel blocks against the downhill side of all vehicle and trailer tires.
3. Then release the brake pedal slowly until the blocks bear the load.
If the grade is downhill, turn the steering wheel so that the front of the front tires face
the curb.
If it is uphill, face the rear of the front tires against the curb.
Before Driving
To w i n g
3-65
CX-5_8HX6-EA-19I_Edition2_old 2019-9-19 9:26:07
Page 175 of 714

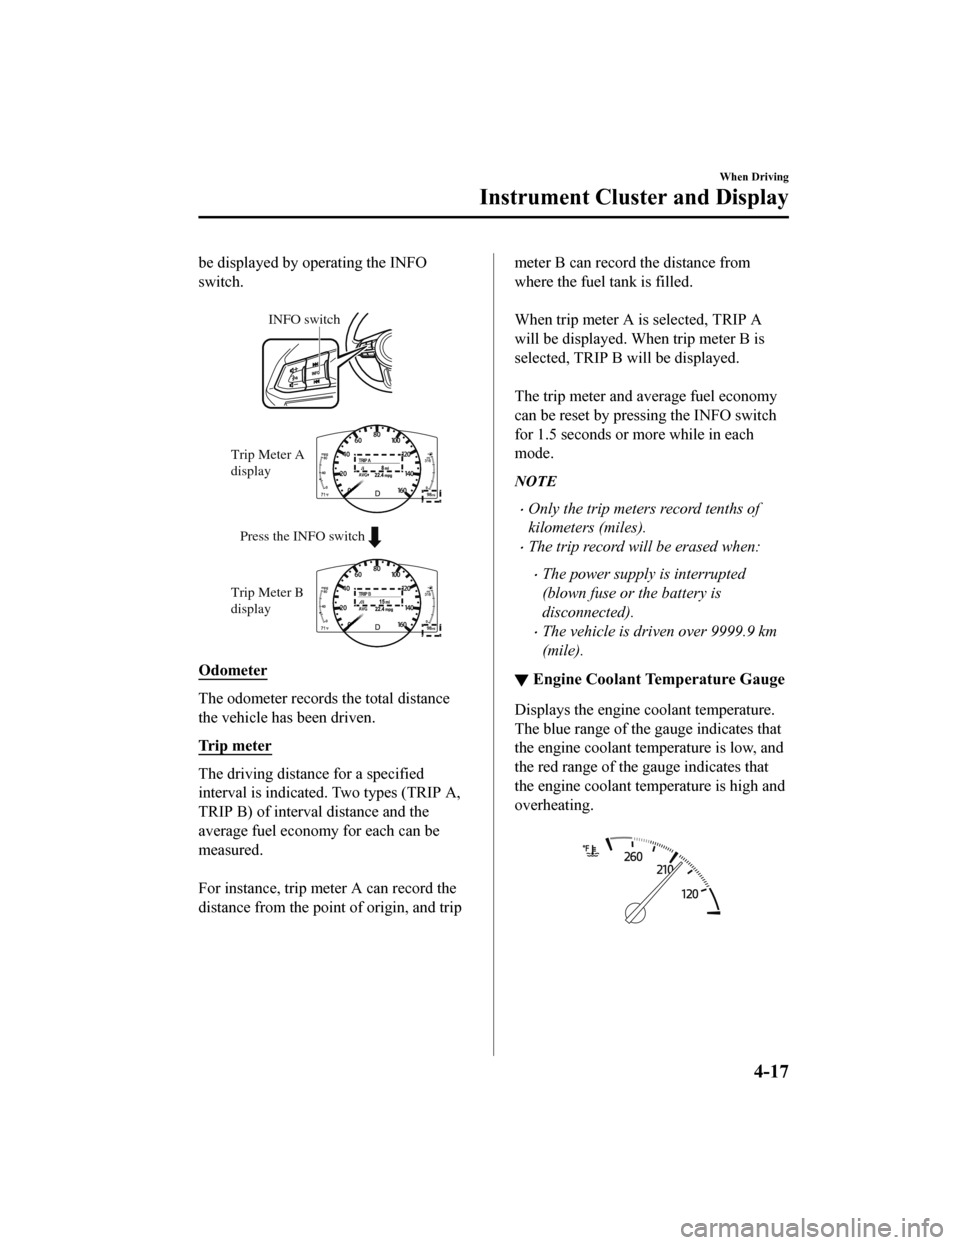
be displayed by operating the INFO
switch.
INFO switch
Press the INFO switch
Trip Meter A
display
Trip Meter B
display
Odometer
The odometer records the total distance
the vehicle has been driven.
Trip meter
The driving distance for a specified
interval is indicated. Two types (TRIP A,
TRIP B) of interval distance and the
average fuel economy for each can be
measured.
For instance, trip meter A can record the
distance from the point of origin, and trip
meter B can record the distance from
where the fuel tank is filled.
When trip meter A is
selected, TRIP A
will be displayed. When trip meter B is
selected, TRIP B will be displayed.
The trip meter and average fuel economy
can be reset by pressing the INFO switch
for 1.5 seconds or more while in each
mode.
NOTE
Only the trip meters record tenths of
kilometers (miles).
The trip record will be erased when:
The power supply is interrupted
(blown fuse or the battery is
disconnected).
The vehicle is driven over 9999.9 km
(mile).
▼ Engine Coolant Temperature Gauge
Displays the engine coolant temperature.
The blue range of the gauge indicates that
the engine coolant temperature is low, and
the red range of the gauge indicates that
the engine coolant temperature is high and
overheating.
When Driving
Instrument Cluster and Display
4-17
CX-5_8HX6-EA-19I_Edition2_old
2019-9-19 9:26:07
Page 176 of 714

CAUTION
If the engine coolant temperature gauge
needle is in the red range, there is the
possibility of overheating. Drive slowly to
reduce engine load until you can find a safe
place to stop the vehicle and wait for the
engine to cool down.
Refer to Overheating on page 7-18.
NOTE
(SKYACTIV-G 2.5T, SKYACTIV-D 2.2)
If the engine coolant temperature is high
or the engine is hot, the engine output
may be limited.
During normal driving, the engine
coolant temperature stabilizes at 100 °C
(210 °F) or less, and the gauge indicates
a range lower than 100 °C (210 °F).
▼Fuel Gauge
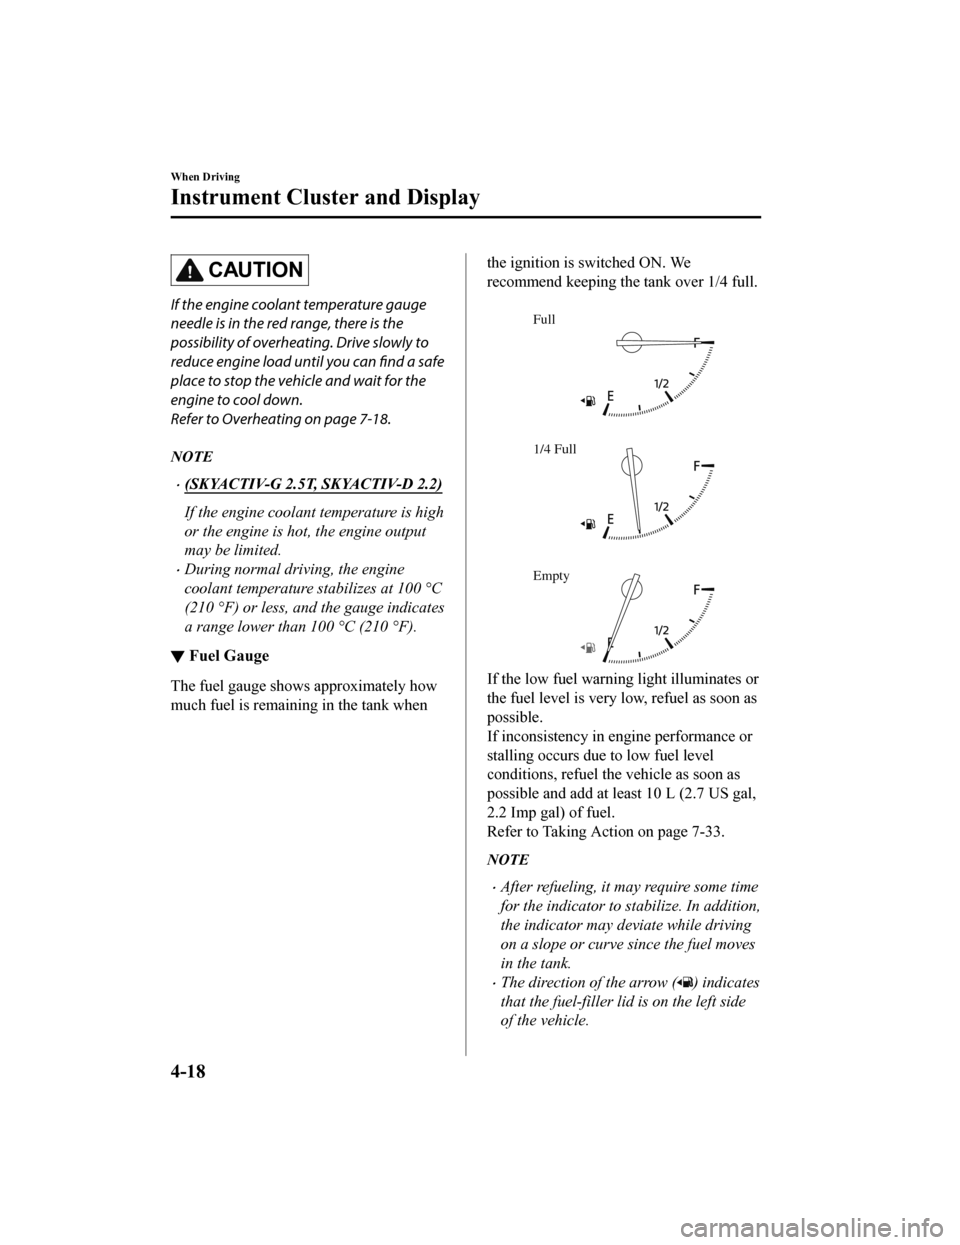
The fuel gauge shows approximately how
much fuel is remaining in the tank when
the ignition is switched ON. We
recommend keeping the tank over 1/4 full.
Full
1/4 Full
Empty
If the low fuel warning light illuminates or
the fuel level is very
low, refuel as soon as
possible.
If inconsistency in engine performance or
stalling occurs due to low fuel level
conditions, refuel the vehicle as soon as
possible and add at least 10 L (2.7 US gal,
2.2 Imp gal) of fuel.
Refer to Taking Action on page 7-33.
NOTE
After refueling, it may require some time
for the indicator to st abilize. In addition,
the indicator may deviate while driving
on a slope or curve since the fuel moves
in the tank.
The direction of the arrow () indicates
that the fuel-filler lid is on the left side
of the vehicle.
When Driving
Instrument Cluster and Display
4-18
CX-5_8HX6-EA-19I_Edition2_old 2019-9-19 9:26:07
Page 191 of 714

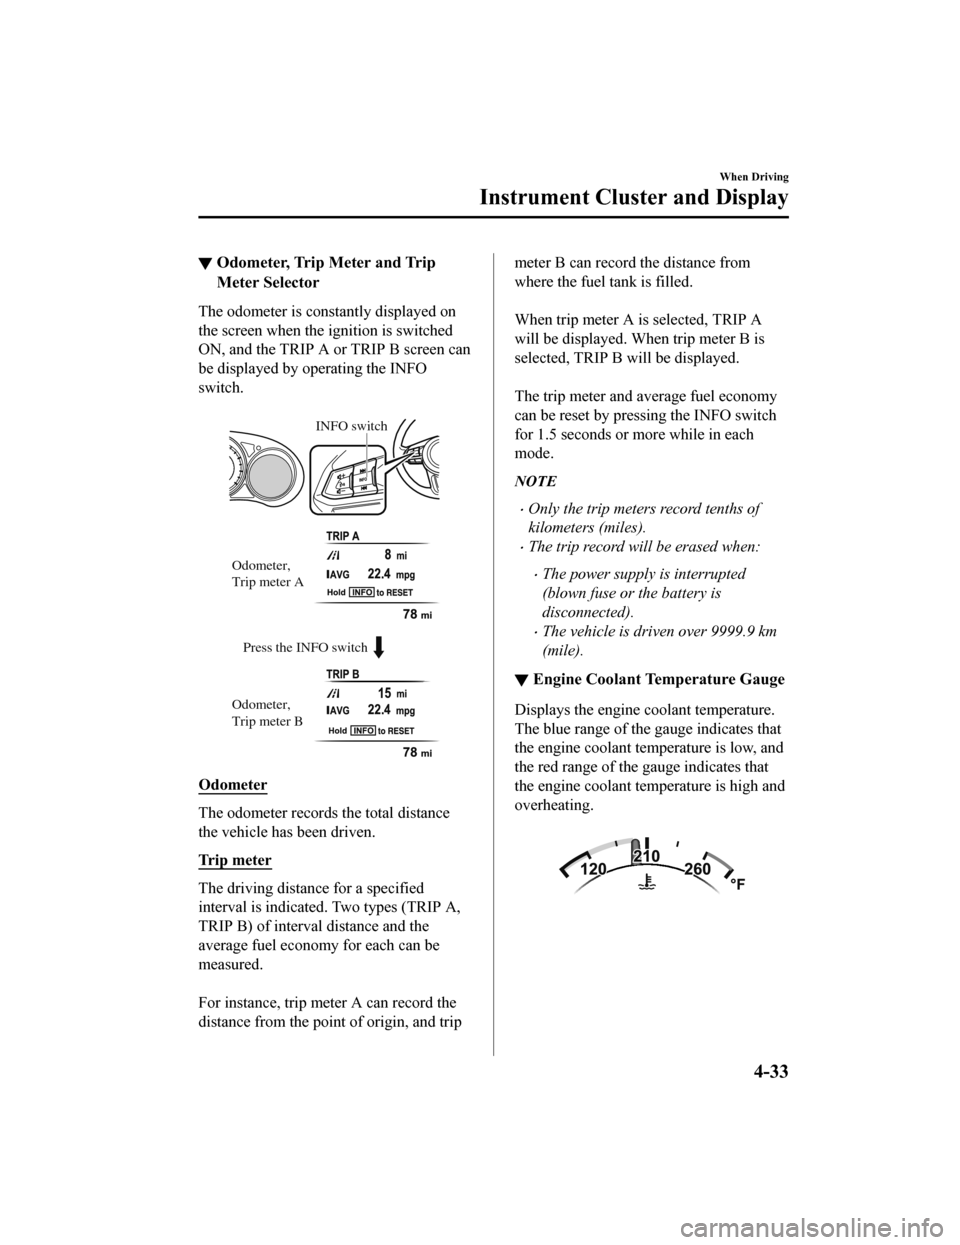
▼Odometer, Trip Meter and Trip
Meter Selector
The odometer is constantly displayed on
the screen when the ignition is switched
ON, and the TRIP A or TRIP B screen can
be displayed by operating the INFO
switch.
Press the INFO switch INFO switch
Odometer,
Trip meter A
Odometer,
Trip meter B
Odometer
The odometer records the total distance
the vehicle has been driven.
Trip meter
The driving distance for a specified
interval is indicated. Two types (TRIP A,
TRIP B) of interval distance and the
average fuel economy for each can be
measured.
For instance, trip meter A can record the
distance from the point of origin, and trip
meter B can record the distance from
where the fuel tank is filled.
When trip meter A is selected, TRIP A
will be displayed. When trip meter B is
selected, TRIP B will be displayed.
The trip meter and average fuel economy
can be reset by pressing the INFO switch
for 1.5 seconds or more while in each
mode.
NOTE
Only the trip meters record tenths of
kilometers (miles).
The trip record will be erased when:
The power supply is interrupted
(blown fuse or the battery is
disconnected).
The vehicle is driven over 9999.9 km
(mile).
▼ Engine Coolant Temperature Gauge
Displays the engine coolant temperature.
The blue range of the gauge indicates that
the engine coolant temperature is low, and
the red range of the gauge indicates that
the engine coolant temperature is high and
overheating.
When Driving
Instrument Cluster and Display
4-33
CX-5_8HX6-EA-19I_Edition2_old
2019-9-19 9:26:07
Page 192 of 714

CAUTION
If the high engine coolant temperature
warning light (red) flashes, there is a
possibility of overheating. Drive slowly to
reduce engine load until you can find a safe
place to stop the vehicle and wait for the
engine to cool down.
Refer to Overheating on page 7-18.
NOTE
(SKYACTIV-G 2.5T, SKYACTIV-D 2.2)
If the engine coolant temperature is high
or the engine is hot, the engine output
may be limited.
The temperature unit (Centigrade/
Fahrenheit) of the engine coolant gauge
display changes in conjunction with the
temperature unit of the outside
temperature display.
Refer to Personalization Features on
page 9-11.
During normal driving, the engine
coolant temperature stabilizes at 100 °C
(210 °F) or less, and the gauge indicates
a range lower than 100 °C (210 °F).
▼Fuel Gauge
The fuel gauge shows approximately how
much fuel is remaining in the tank when
the ignition is switched ON. We
recommend keeping the tank over 1/4 full.
Full
1/4 Full
Empty
If the fuel level is low, () and () turn an
amber color. Refuel as soon as possible.
If inconsistency in engine performance or
stalling occurs due to low fuel level
conditions, refuel the vehicle as soon as
possible and add at least 10 L (2.7 US gal,
2.2 Imp gal) of fuel.
Refer to Taking Action on page 7-33.
NOTE
After refueling, it may require some time
for the indicator to st abilize. In addition,
the indicator may deviate while driving
on a slope or curve since the fuel moves
in the tank.
The direction of the arrow () indicates
that the fuel-filler lid is on the left side
of the vehicle.
When Driving
Instrument Cluster and Display
4-34
CX-5_8HX6-EA-19I_Edition2_old 2019-9-19 9:26:07
Page 207 of 714

and the red range of the gauge indicates
that the engine coolant temperature is high
and overheating.
CAUTION
If the engine coolant temperature gauge
needle (white) flashes, there is a possibility
of overheating. Drive slowly to reduce
engine load until you can find a safe place
to stop the vehicle and wait for the engine
to cool down.
Refer to Overheating on page 7-18.
NOTE
(SKYACTIV-G 2.5T)
If the engine coolant temperature is high
or the engine is hot, the engine output
may be limited.
The temperature unit (Centigrade/
Fahrenheit) of the engine coolant gauge
display changes in conjunction with the
temperature unit of the outside
temperature display.
Refer to Personalization Features on
page 9-11.
During normal driving, the engine
coolant temperature stabilizes at 100 °C
(210 °F) or less, and the gauge indicates
a range lower than 100 °C (210 °F).
▼Fuel Gauge
The fuel gauge shows approximately how
much fuel is remaining in the tank when
the ignition is switched ON. We
recommend keeping the tank over 1/4 full.
Full
1/4 Full
Empty
If the low fuel warning light illuminates or
the fuel level is very low, refuel as soon as
possible.
If inconsistency in engine performance or
stalling occurs due to low fuel level
conditions, refuel the vehicle as soon as
possible and add at least 10 L (2.7 US gal,
2.2 Imp gal) of fuel.
Refer to Taking Action on page 7-33.
NOTE
After refueling, it may require some time
for the indicator to
stabilize. In addition,
the indicator may deviate while driving
on a slope or curve since the fuel moves
in the tank.
The display indicating a quarter or less
remaining fuel has more segments to
show the remaining fuel level in greater
detail.
When Driving
Instrument Cluster and Display
4-49
CX-5_8HX6-EA-19I_Edition2_old 2019-9-19 9:26:07
Page 232 of 714

Climbing steep grades from a stop
To climb a steep grade from a stopped
position:
1. Depress the brake pedal.
2. Shift to D or M1, depending on theload weight and grade steepness.
3. Release the brake pedal while gradually accelerating.
Descending steep grades
When descending a steep grade, shift to
lower gears, depending on load weight and
grade steepness. Descend slowly, using the
brakes only occasionally to prevent them
from overheating.
When Driving
Automatic Transaxle
4-74
CX-5_8HX6-EA-19I_Edition2_old 2019-9-19 9:26:07
Page 250 of 714

“Programming HomeLink” step 3 with
the following:
NOTE
If programming a garage door opener or
gate operator, it is advised to unplug the
device during the “cycling” process to
prevent possible overheating.
Continue to press and hold the HomeLink
button while you press and release ―
every two seconds (“cycle”) your
hand-held transmitter until the frequency
signal has successfully been accepted by
HomeLink. (The indicator light will flash
slowly and then rapidly.)
Proceed with “Programming” step 4 to
complete.
▼ Operating the HomeLink System
Press the programmed HomeLink button
to operate a programmed device. The code
will continue being transmitted for a
maximum of 20 seconds.
▼Reprogramming the HomeLink
system
To program a device to HomeLink using a
HomeLink button previously trained,
follow these steps:
1. Press and hold the desired HomeLink
button. DO NOT release the button.
2. The indicator light will begin to flash after 20 seconds. Without releasing the
HomeLink button, proceed with
“Programming” - step 1.
▼Erasing Programmed HomeLink
Buttons
To erase the existing programming from
all three operating channels, press and
hold the two outside buttons (
, ) on
the auto-dimming mirror until the
HomeLink indicator light
begins to flash
after approximately 10 seconds.
Verify that the programming has been
erased when you resell the vehicle.
When Driving
Switches and Controls
4-92
CX-5_8HX6-EA-19I_Edition2_old 2019-9-19 9:26:07
Page 253 of 714

NOTE
To program the remaining two HomeLink
buttons, go back to Step 1 of
Programming the HomeLink System and
repeat the procedure.
For questions or comments, please contact
HomeLink at www.homelink.com or
www.youtube.com/HomeLinkGentex , or
the HomeLink toll-free hotline at
1-800-355-3515 (for calls placed outside
of the USA, Canada, and Puerto Rico,
international rates will apply and may
differ based on landline or mobile phone).
▼ Gate operator/Canadian
Programming
Canadian radio-frequency laws require
transmitter signals to “time-out” (or quit)
after several seconds of transmission
―
which may not be long enough for
HomeLink to pick up the signal during
programming. Similar to this Canadian
law, some U.S. gate operators are designed
to “time-out” in the same manner.
If you live in Canada or are having
difficulties programming a gate operator
by using the programming procedures
(regardless of where you live), replace
Step 3 of Programming the HomeLink
System with the following:
NOTE
If programming a garage door opener or
gate operator, it is advised to unplug the
device during the “cycling” process to
prevent possible overheating.
While the indicator light is flashing in
amber, press the button on the hand-held
transmitter for 2 seconds and release it
repeatedly until the i ndicator light changes
from amber to green.
Go back to Step 4 of Programming the
HomeLink System to complete the
procedure.
▼ Operating the HomeLink System
Press the programmed HomeLink button
to operate a programmed device.
▼Reprogramming the HomeLink
system
To program a device to HomeLink using a
HomeLink button previously trained,
follow these steps:
1. Press and hold the desired HomeLink
button. DO NOT release the button.
2. After 20 seconds, the indicator light flashes in amber. After the indicator
light flashes, release the HomeLink
button.
3. Go back to Step 2 of Programming the HomeLink System to complete the
procedure.
NOTE
If the programming has not been
completed, the system returns to the
previous programming.
▼Erasing Programmed HomeLink
Buttons
NOTE
All of the programmed HomeLink
buttons are reset. Individual buttons
cannot be reset, however, individual
buttons can be reprogrammed. For
individual button reprogramming, refer
to Reprogramming the HomeLink
System (page 4-95).
When Driving
Switches and Controls
4-95
CX-5_8HX6-EA-19I_Edition2_old
2019-9-19 9:26:07