ECO mode MAZDA MODEL CX-7 2010 (in English) Owner's Manual
[x] Cancel search | Manufacturer: MAZDA, Model Year: 2010, Model line: MODEL CX-7, Model: MAZDA MODEL CX-7 2010Pages: 510, PDF Size: 8.55 MB
Page 224 of 510
Black plate (224,1)
Lighting Control
qHeadlights
CAUTION
(With AUTO position)
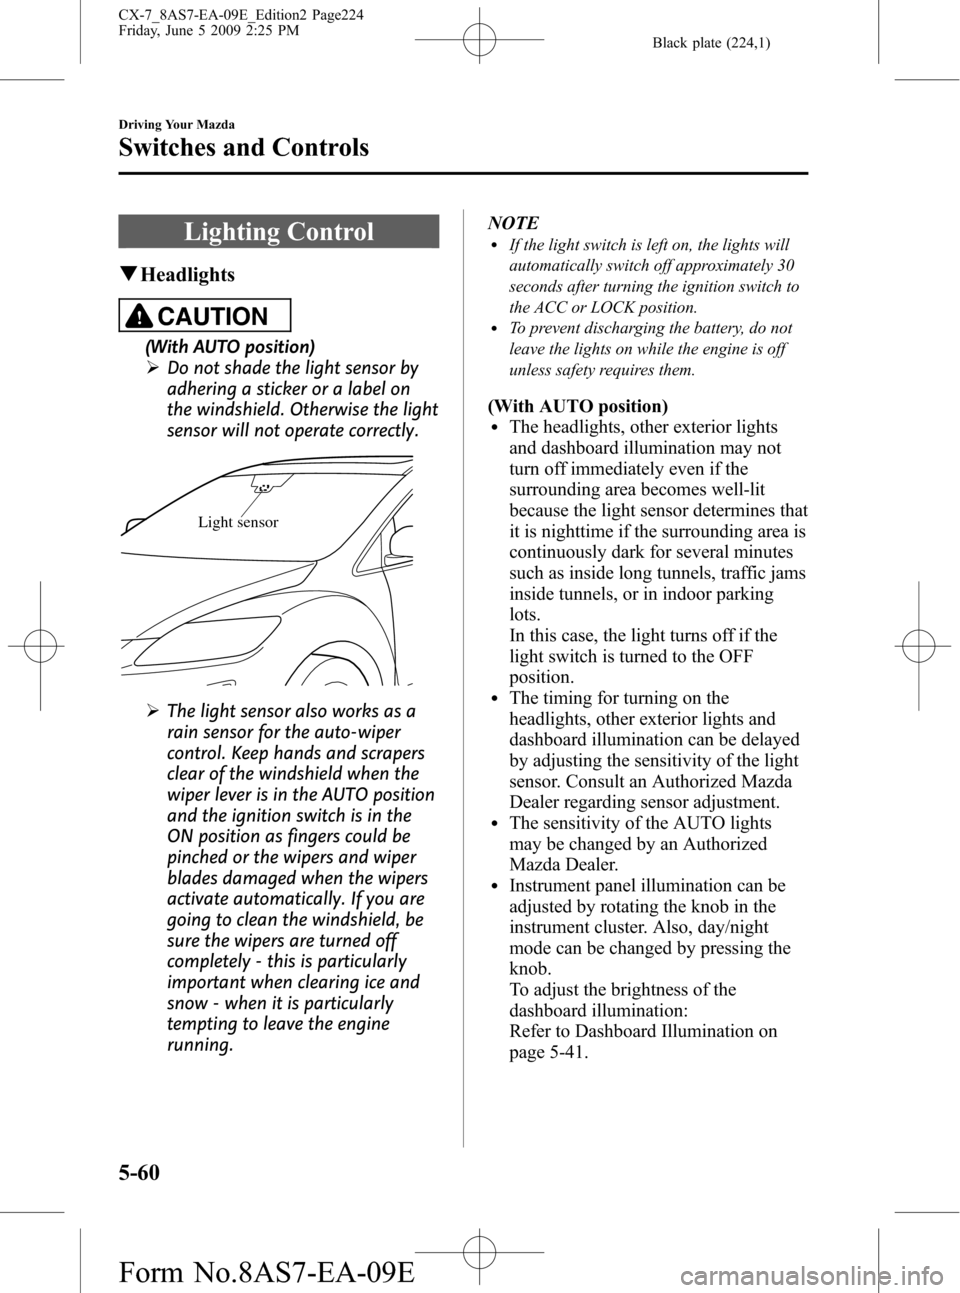
ØDo not shade the light sensor by
adhering a sticker or a label on
the windshield. Otherwise the light
sensor will not operate correctly.
Light sensor
ØThe light sensor also works as a
rain sensor for the auto-wiper
control. Keep hands and scrapers
clear of the windshield when the
wiper lever is in the AUTO position
and the ignition switch is in the
ON position as fingers could be
pinched or the wipers and wiper
blades damaged when the wipers
activate automatically. If you are
going to clean the windshield, be
sure the wipers are turned off
completely - this is particularly
important when clearing ice and
snow - when it is particularly
tempting to leave the engine
running.NOTE
lIf the light switch is left on, the lights will
automatically switch off approximately 30
seconds after turning the ignition switch to
the ACC or LOCK position.
lTo prevent discharging the battery, do not
leave the lights on while the engine is off
unless safety requires them.
(With AUTO position)lThe headlights, other exterior lights
and dashboard illumination may not
turn off immediately even if the
surrounding area becomes well-lit
because the light sensor determines that
it is nighttime if the surrounding area is
continuously dark for several minutes
such as inside long tunnels, traffic jams
inside tunnels, or in indoor parking
lots.
In this case, the light turns off if the
light switch is turned to the OFF
position.
lThe timing for turning on the
headlights, other exterior lights and
dashboard illumination can be delayed
by adjusting the sensitivity of the light
sensor. Consult an Authorized Mazda
Dealer regarding sensor adjustment.
lThe sensitivity of the AUTO lights
may be changed by an Authorized
Mazda Dealer.
lInstrument panel illumination can be
adjusted by rotating the knob in the
instrument cluster. Also, day/night
mode can be changed by pressing the
knob.
To adjust the brightness of the
dashboard illumination:
Refer to Dashboard Illumination on
page 5-41.
5-60
Driving Your Mazda
Switches and Controls
CX-7_8AS7-EA-09E_Edition2 Page224
Friday, June 5 2009 2:25 PM
Form No.8AS7-EA-09E
Page 247 of 510
Black plate (247,1)
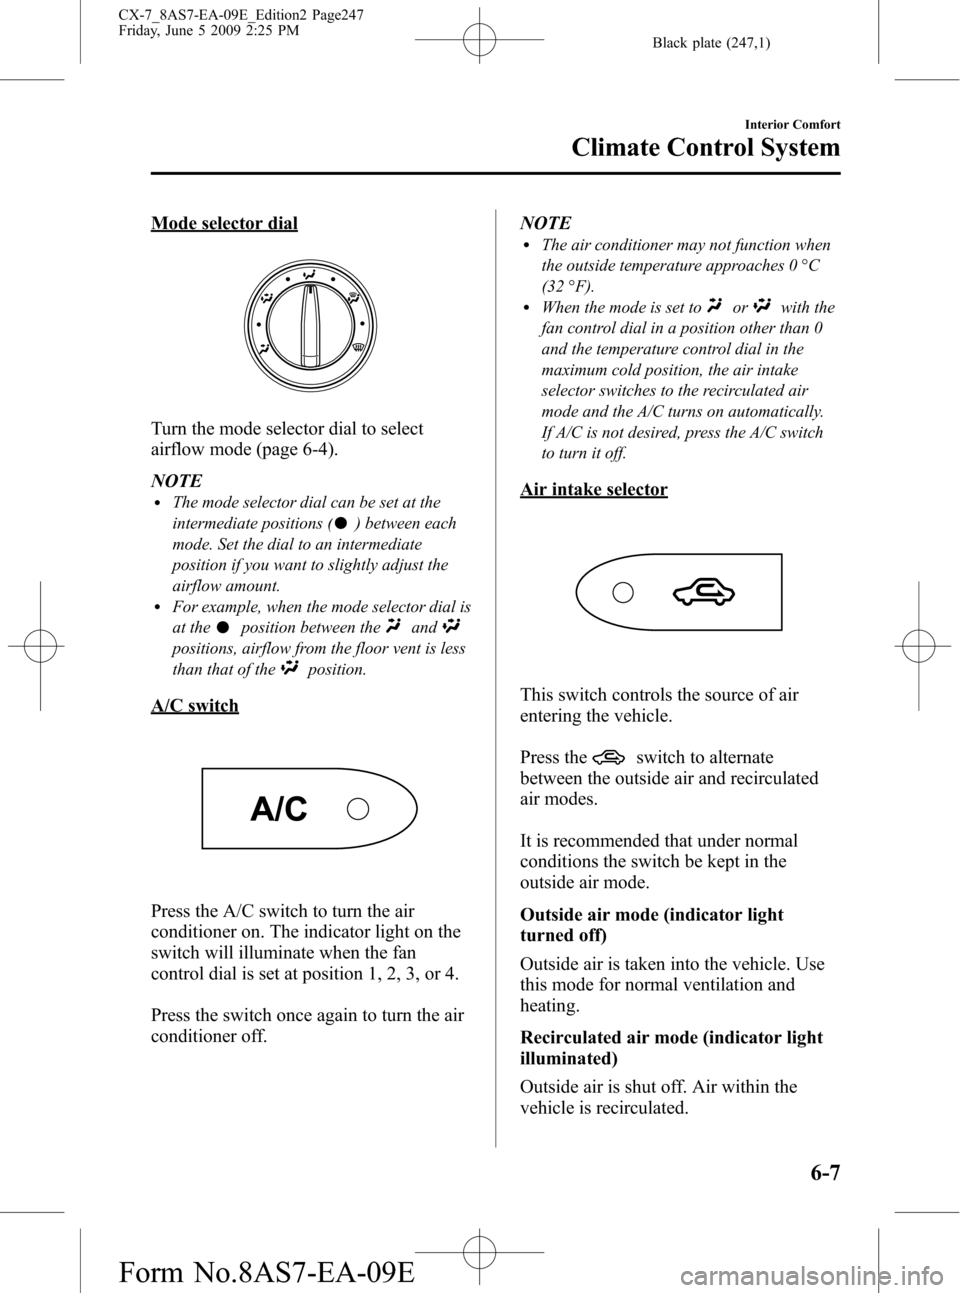
Mode selector dial
Turn the mode selector dial to select
airflow mode (page 6-4).
NOTE
lThe mode selector dial can be set at the
intermediate positions (
) between each
mode. Set the dial to an intermediate
position if you want to slightly adjust the
airflow amount.
lFor example, when the mode selector dial is
at the
position between theand
positions, airflow from the floor vent is less
than that of the
position.
A/C switch
Press the A/C switch to turn the air
conditioner on. The indicator light on the
switch will illuminate when the fan
control dial is set at position 1, 2, 3, or 4.
Press the switch once again to turn the air
conditioner off.NOTE
lThe air conditioner may not function when
the outside temperature approaches 0 °C
(32 °F).
lWhen the mode is set toorwith the
fan control dial in a position other than 0
and the temperature control dial in the
maximum cold position, the air intake
selector switches to the recirculated air
mode and the A/C turns on automatically.
If A/C is not desired, press the A/C switch
to turn it off.
Air intake selector
This switch controls the source of air
entering the vehicle.
Press the
switch to alternate
between the outside air and recirculated
air modes.
It is recommended that under normal
conditions the switch be kept in the
outside air mode.
Outside air mode (indicator light
turned off)
Outside air is taken into the vehicle. Use
this mode for normal ventilation and
heating.
Recirculated air mode (indicator light
illuminated)
Outside air is shut off. Air within the
vehicle is recirculated.
Interior Comfort
Climate Control System
6-7
CX-7_8AS7-EA-09E_Edition2 Page247
Friday, June 5 2009 2:25 PM
Form No.8AS7-EA-09E
Page 254 of 510
Black plate (254,1)
Antenna
qDetachable Type
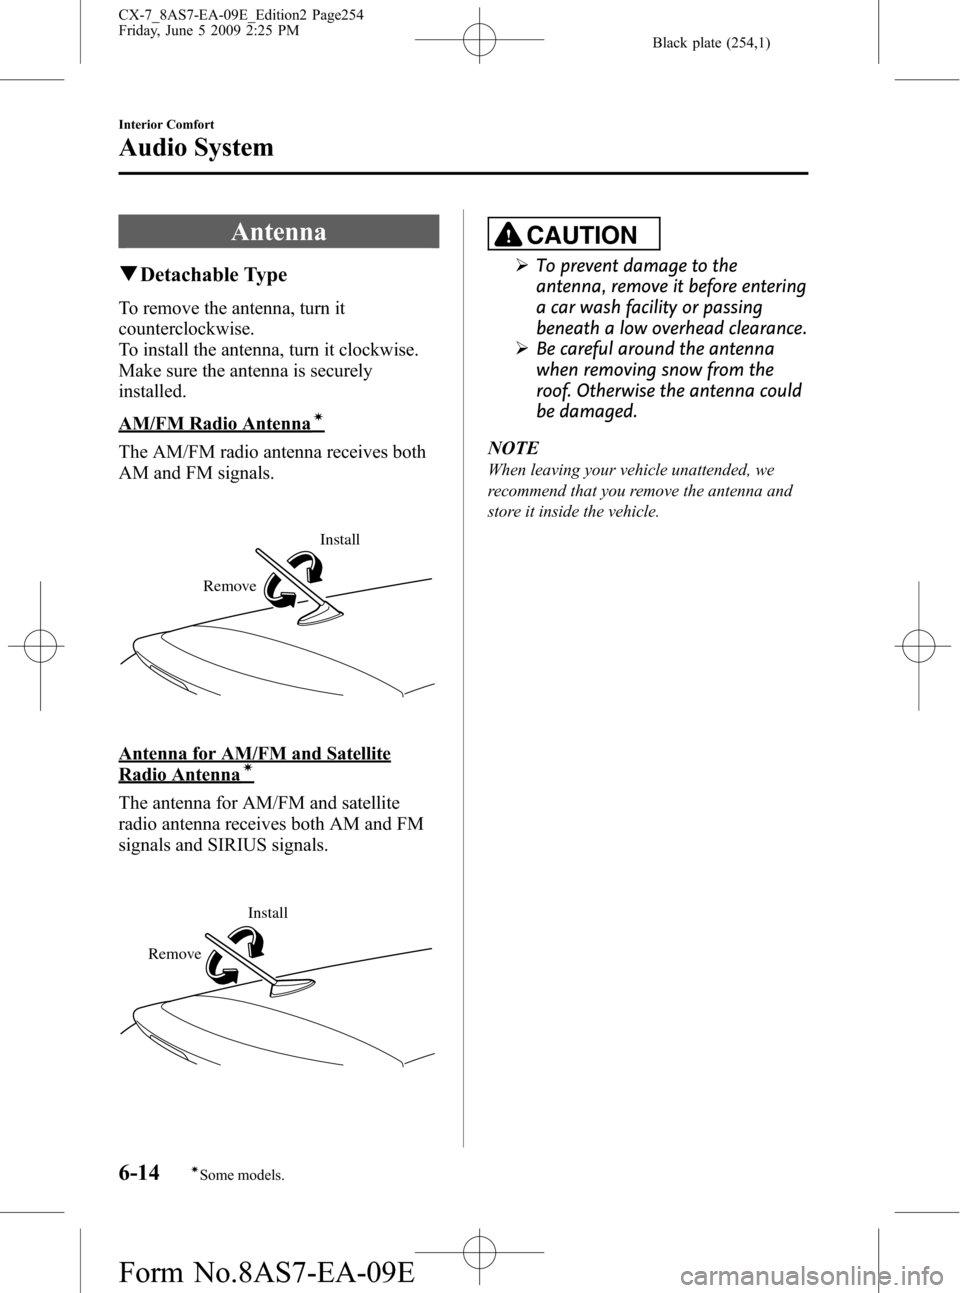
To remove the antenna, turn it
counterclockwise.
To install the antenna, turn it clockwise.
Make sure the antenna is securely
installed.
AM/FM Radio Antennaí
The AM/FM radio antenna receives both
AM and FM signals.
Install
Remove
Antenna for AM/FM and Satellite
Radio Antennaí
The antenna for AM/FM and satellite
radio antenna receives both AM and FM
signals and SIRIUS signals.
Install
Remove
CAUTION
ØTo prevent damage to the
antenna, remove it before entering
a car wash facility or passing
beneath a low overhead clearance.
ØBe careful around the antenna
when removing snow from the
roof. Otherwise the antenna could
be damaged.
NOTE
When leaving your vehicle unattended, we
recommend that you remove the antenna and
store it inside the vehicle.
6-14
Interior Comfort
íSome models.
Audio System
CX-7_8AS7-EA-09E_Edition2 Page254
Friday, June 5 2009 2:25 PM
Form No.8AS7-EA-09E
Page 263 of 510
Black plate (263,1)
Playable WMA file specification
CD-R and CD-RW including WMA files
can be played with this unit. Discs which
conform to the following formats can be
played.
Playable WMA files are as follows:
Item Content
SpecificationWindows Media
Audio Version 7.0,
8.0, 9.0
Sampling
frequencyBit rate32kHz.......32,40,
48 kbps
44.1kHz.....32,48,
64, 80, 96, 128, 160,
192, 256, 320 kbps
48kHz.......64,96,
128, 160, 192 kbps
VBR (Variable Bit Rate) Supported
Channel mode Stereo/Monaural
WMA tagTitle, artist name,
album name
CAUTION
This unit plays files with the (.wma)
file extension as a WMA file. Do not
use the WMA file extension for files
other than WMA files. It may cause
noise or a malfunction.
lIn a WMA file, the track name, artist
name and album name are recorded
with data called“WMA-Tag”, and the
information can be displayed.
lWMA files which do not comply with
the specific standard may not be played
correctly or its file and folder name
may not be displayed correctly.
lThe file extension may not be provided
depending on the computer operating
system, version, software, or settings.
In this case, add the file extension
“.wma”to the end of the file name, and
then write the disc.
Interior Comfort
Audio System
6-23
CX-7_8AS7-EA-09E_Edition2 Page263
Friday, June 5 2009 2:25 PM
Form No.8AS7-EA-09E
Page 268 of 510
Black plate (268,1)
NOTE
About 5 seconds after selecting any mode, the
volume function will be automatically selected.
To reset bass, treble, fade, and balance, press
the audio control dial for 2 seconds. The unit
will beep and“CLEAR”will be displayed.
Automatic Level Control (ALC)
(Standard audio-equipped model)
The automatic level control is a feature
that automatically adjusts audio volume
and sound quality according to the vehicle
speed.
The volume increases in accordance with
the increase in vehicle speed, and
decreases as vehicle speed decreases.
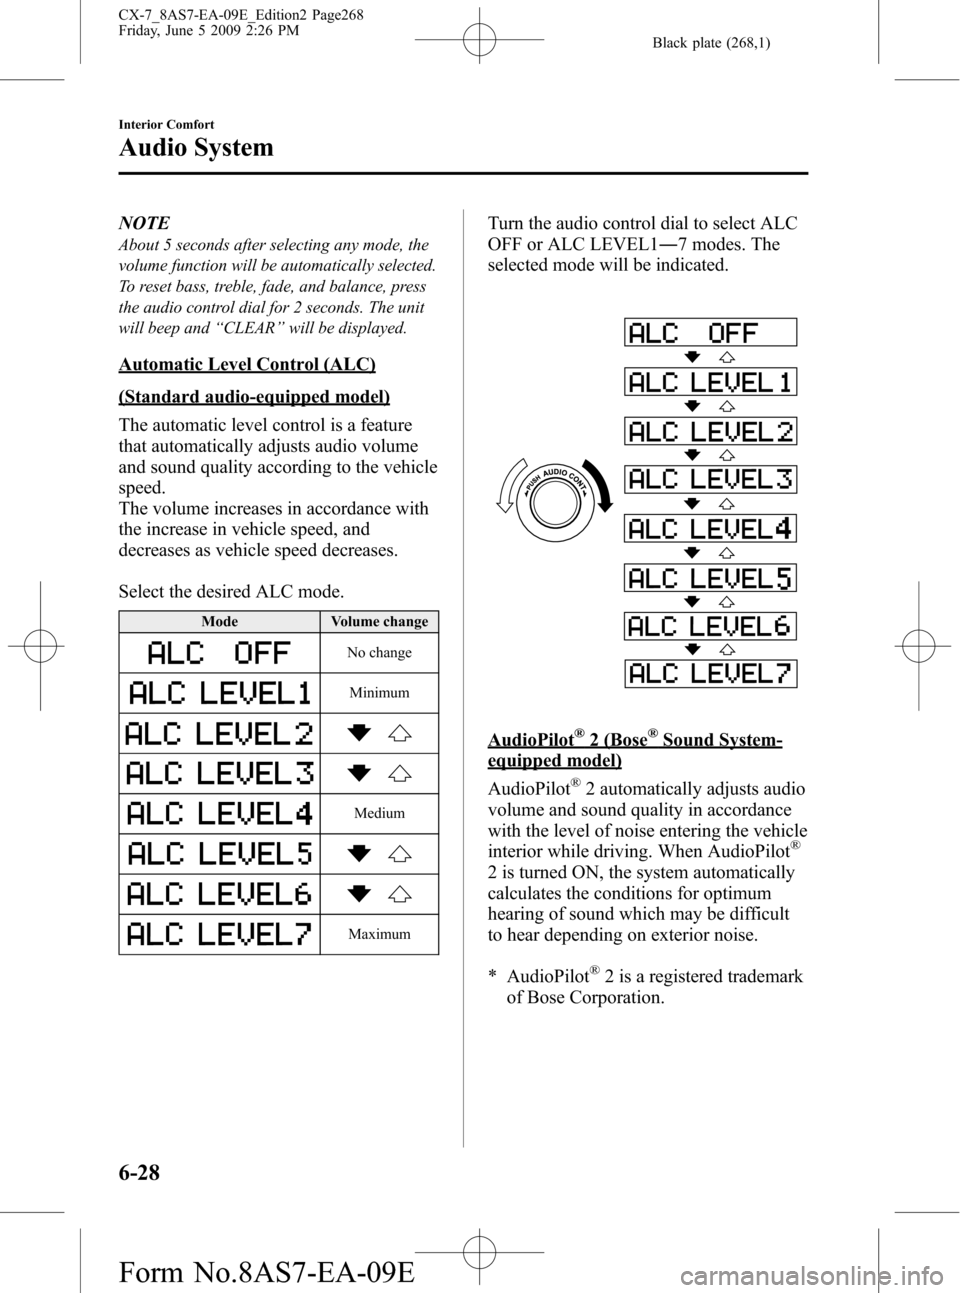
Select the desired ALC mode.
Mode Volume change
No change
Minimum
Medium
Maximum
Turn the audio control dial to select ALC
OFF or ALC LEVEL1―7 modes. The
selected mode will be indicated.
AudioPilot®2 (Bose®Sound System-
equipped model)
AudioPilot
®2 automatically adjusts audio
volume and sound quality in accordance
with the level of noise entering the vehicle
interior while driving. When AudioPilot
®
2 is turned ON, the system automatically
calculates the conditions for optimum
hearing of sound which may be difficult
to hear depending on exterior noise.
* AudioPilot
®2 is a registered trademark
of Bose Corporation.
6-28
Interior Comfort
Audio System
CX-7_8AS7-EA-09E_Edition2 Page268
Friday, June 5 2009 2:26 PM
Form No.8AS7-EA-09E
Page 270 of 510
Black plate (270,1)
BT SETUP modeí
Music and other audio such as voice data
recorded on portable audio devices and
mobile phones available on the market
which are equipped with the Bluetooth
transmission function can be listened to
via wireless transmission over the
vehicle's speakers. Using the BT SETUP
mode, these devices can be programmed
to the Bluetooth unit or changed. For
details, refer to Bluetooth audio (page
6-63).
6-30
Interior Comfort
íSome models.
Audio System
CX-7_8AS7-EA-09E_Edition2 Page270
Friday, June 5 2009 2:26 PM
Form No.8AS7-EA-09E
Page 272 of 510
Black plate (272,1)
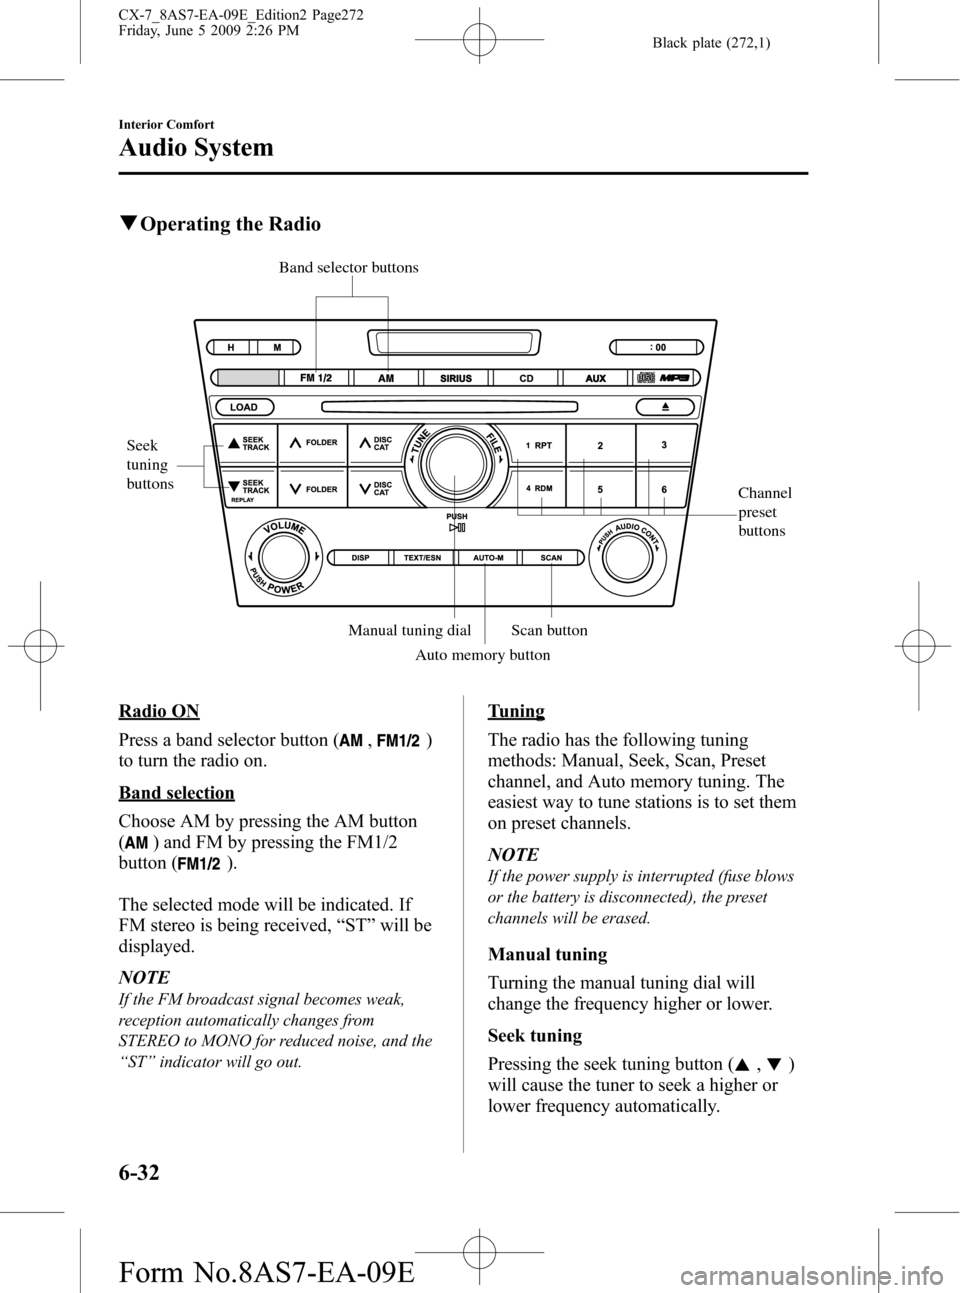
qOperating the Radio
Channel
preset
buttons
Seek
tuning
buttons
Band selector buttons
Scan button Manual tuning dial
Auto memory button
Radio ON
Press a band selector button (
,)
to turn the radio on.
Band selection
Choose AM by pressing the AM button
(
) and FM by pressing the FM1/2
button (
).
The selected mode will be indicated. If
FM stereo is being received,“ST”will be
displayed.
NOTE
If the FM broadcast signal becomes weak,
reception automatically changes from
STEREO to MONO for reduced noise, and the
“ST”indicator will go out.
Tuning
The radio has the following tuning
methods: Manual, Seek, Scan, Preset
channel, and Auto memory tuning. The
easiest way to tune stations is to set them
on preset channels.
NOTE
If the power supply is interrupted (fuse blows
or the battery is disconnected), the preset
channels will be erased.
Manual tuning
Turning the manual tuning dial will
change the frequency higher or lower.
Seek tuning
Pressing the seek tuning button (
,)
will cause the tuner to seek a higher or
lower frequency automatically.
6-32
Interior Comfort
Audio System
CX-7_8AS7-EA-09E_Edition2 Page272
Friday, June 5 2009 2:26 PM
Form No.8AS7-EA-09E
Page 276 of 510
Black plate (276,1)
How to subscribe to satellite radio
Once the system is installed you must first
subscribe to the SIRIUS Radio service to
activate the system.
The SIRIUS Radio service uses an ID
code to identify your radio. This code is
needed to subscribe to SIRIUS Radio, and
if needed, is also used to report any
problems should there be any in the
future. Listeners can subscribe using any
of the following methods:
lVisiting SIRIUS on the web at
www.sirius.com
lSubscribing to SIRIUS customer care,
available 24 hours a day, 7 days a
week.
lCalling 1-888-539-SIRI (7474)lE-mail at: customercare@sirius-
radio.com
lWriting to: SIRIUS XM RADIO
1221 Avenue of the Americas
New York, NY 10020
Attention: Customer Care
Customers should have their SIRIUS
Radio ID Electronic Serial Number (ESN)
ready.
NOTE
Your ESN should have been recorded at the
time of installation. If not, press the ESN
button for 1.5 seconds or longer, or turn the
manual tuning dial to channel 0 to display the
12-digit ESN for the SIRIUS tuner.
Satellite radio activation
For activation and subscription
information call toll-free at 1-888-539-
SIRI (7474). A SIRIUS Customer Care
representative will take the necessary
information and walk you through the
activation process. Or you can visit
SIRIUS online at www.sirius.com.Please have the following information
ready when attempting to activate your
service:
lSIRIUS ID (ESN*)lValid credit card information (type,
number, expiration date)
When you are ready to receive the on-air
activation signals you will be instructed
(for activation via phone) to turn on your
tuner, have the antenna pointed skyward,
and to turn the manual tuning dial to
channel 184.
Once the signal is sent from the national
studio it may take up to ten minutes to be
received by your unit.
NOTE
On-air activation is completed after the
procedure, in most cases from ten seconds to
ten minutes.
*ESN: Electronic Serial Number
SIRIUS operation
All operations of the satellite radio are
conducted by means of the audio unit.
SIRIUS radio mode selection
When the satellite button is pressed during
ACC ON, it will play the last SIRIUS
channel in use before the mode was
switched over to another mode or the
power was turned off.
When the satellite button is pressed in a
mode other than the SIRIUS mode, the
last channel in use will be received.
6-36
Interior Comfort
Audio System
CX-7_8AS7-EA-09E_Edition2 Page276
Friday, June 5 2009 2:26 PM
Form No.8AS7-EA-09E
Page 277 of 510
Black plate (277,1)
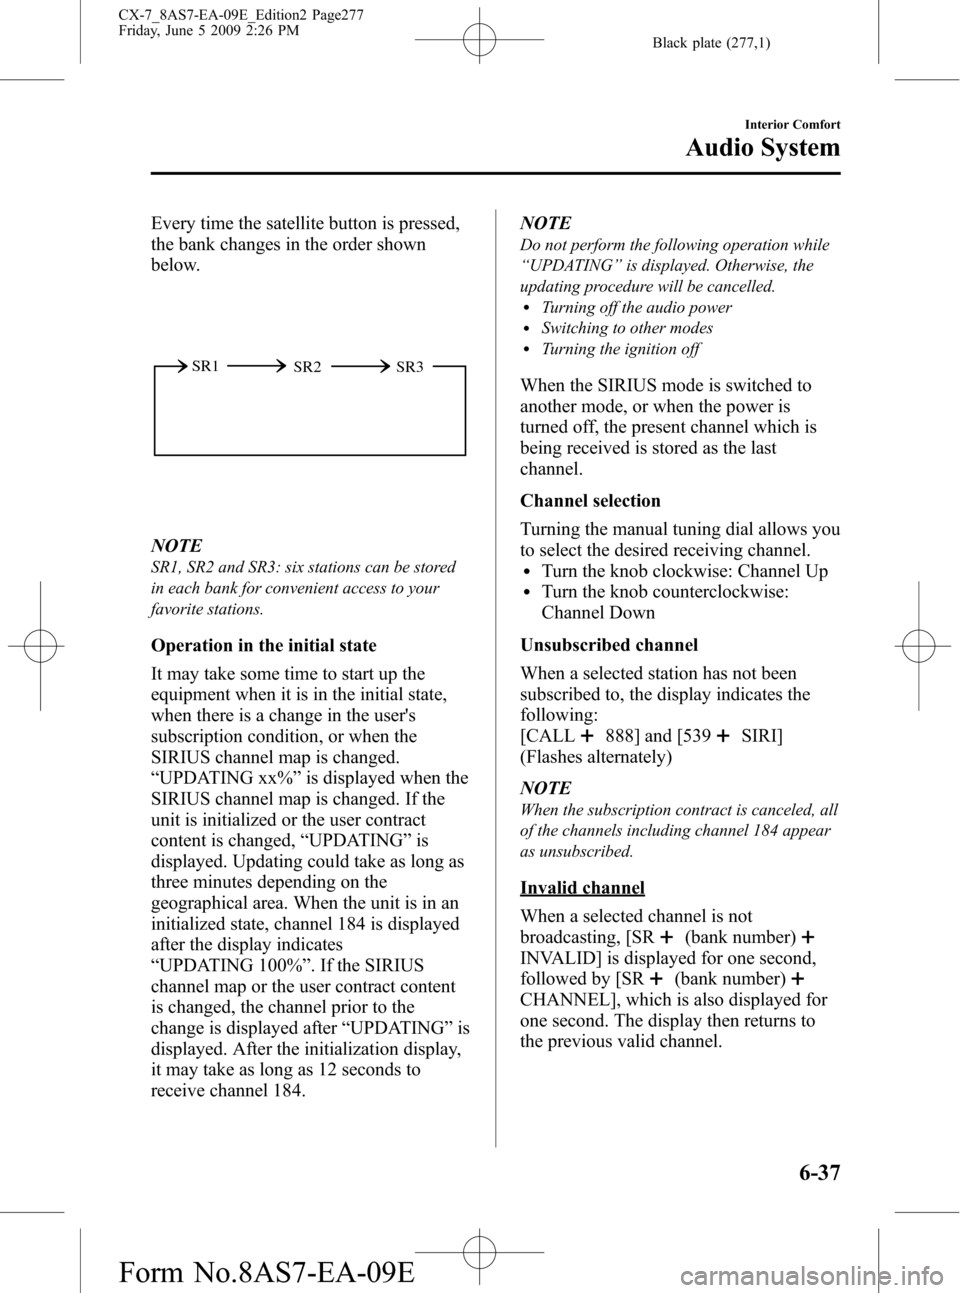
Every time the satellite button is pressed,
the bank changes in the order shown
below.
SR2 SR1
SR3
NOTE
SR1, SR2 and SR3: six stations can be stored
in each bank for convenient access to your
favorite stations.
Operation in the initial state
It may take some time to start up the
equipment when it is in the initial state,
when there is a change in the user's
subscription condition, or when the
SIRIUS channel map is changed.
“UPDATING xx%”is displayed when the
SIRIUS channel map is changed. If the
unit is initialized or the user contract
content is changed,“UPDATING”is
displayed. Updating could take as long as
three minutes depending on the
geographical area. When the unit is in an
initialized state, channel 184 is displayed
after the display indicates
“UPDATING 100%”. If the SIRIUS
channel map or the user contract content
is changed, the channel prior to the
change is displayed after“UPDATING”is
displayed. After the initialization display,
it may take as long as 12 seconds to
receive channel 184.NOTE
Do not perform the following operation while
“UPDATING”is displayed. Otherwise, the
updating procedure will be cancelled.
lTurning off the audio powerlSwitching to other modeslTurning the ignition off
When the SIRIUS mode is switched to
another mode, or when the power is
turned off, the present channel which is
being received is stored as the last
channel.
Channel selection
Turning the manual tuning dial allows you
to select the desired receiving channel.
lTurn the knob clockwise: Channel UplTurn the knob counterclockwise:
Channel Down
Unsubscribed channel
When a selected station has not been
subscribed to, the display indicates the
following:
[CALL
888] and [539SIRI]
(Flashes alternately)
NOTE
When the subscription contract is canceled, all
of the channels including channel 184 appear
as unsubscribed.
Invalid channel
When a selected channel is not
broadcasting, [SR
(bank number)
INVALID] is displayed for one second,
followed by [SR
(bank number)
CHANNEL], which is also displayed for
one second. The display then returns to
the previous valid channel.
Interior Comfort
Audio System
6-37
CX-7_8AS7-EA-09E_Edition2 Page277
Friday, June 5 2009 2:26 PM
Form No.8AS7-EA-09E
Page 278 of 510
Black plate (278,1)
NOTE
If the last channel selected has become
unavailable because of a channel update the
above indication is displayed until any button
is pressed.
Preset channel programming
(Programming with“channel number”
display)
1. Select the desired channel to be
programmed. At this point, the
following is displayed:
[SR
(bank number)(channel
number)]
2. Keep pressing the channel preset
button for 1.5 seconds or more.
The programming process is complete
after the channel number flashes. Then,
[SR
(bank number)] is displayed
and a beep sound is heard at the same
time.
3. [SR
(bank number)CH
(preset number)(channel number)]
are displayed.
(Programming with“text”display (e.g.
channel name))
1. Select the desired channel to be
programmed. At this point, the
following is displayed:
[SR
(bank number)(selected
text (e.g. channel name))]
2. Keep pressing the channel preset
button for 1.5 seconds or more.
The programming process is complete
after the text (e.g. channel name)
flashes. Then, [SR
(bank number)]
is displayed and you will hear beep
sound at the same time.3. SR
(bank number)CH
(preset number)(channel number)]
are displayed.
4. Three seconds later, it returns to normal
display. [SR
(bank number)(text
(e.g. channel name))]
NOTE
Six stations can be stored in each bank, SR1,
SR2, and SR3 for convenient access to your
favorite stations.
Preset channel call-up
Press and release the channel preset
button,
[SR
(bank number)CH(preset
number)
(channel number)] appears.
When the preset button is pressed during
text mode, its channel number is
displayed first for three second and then
its text is displayed.
NOTE
In the initial setting, all channels are preset to
184.
Category change
Press the category button (UP or DOWN)
and select the desired category.
lPress the category button (UP):
Category up
lPress the category button (DOWN):
Category down
Every time the category (UP) button is
pressed for 1.5 second or less, the
category is changed over in the order
shown below.
At this time, the lowest (smallest-number)
channel within the category indicated is
received.
When the highest (or lowest) category is
reached, the category is changed over in
the order shown below.
6-38
Interior Comfort
Audio System
CX-7_8AS7-EA-09E_Edition2 Page278
Friday, June 5 2009 2:26 PM
Form No.8AS7-EA-09E