tow MAZDA MODEL CX-7 2011 (in English) Owner's Manual
[x] Cancel search | Manufacturer: MAZDA, Model Year: 2011, Model line: MODEL CX-7, Model: MAZDA MODEL CX-7 2011Pages: 520, PDF Size: 8.75 MB
Page 224 of 520

Black plate (224,1)
Xenon fusion headlight bulbsí
The low-beam bulbs of the headlights have xenon fusion bulbs that produce a bright white
beam over a wide area.
WARNING
Do not replace the xenon fusion bulbs yourself:
Replacing the xenon fusion bulbs yourself is dangerous. Because the xenon fusion
bulbs require high voltage, you could receive an electric shock if the bulbs are
handled incorrectly. Consult an Authorized Mazda Dealer when the replacement is
necessary.
NOTE
If the headlights flicker, or the brightness weakens, the bulb-life may be depleted and a replacement is
necessary. Consult an Authorized Mazda Dealer.
qHeadlight High-Low Beam
Press the lever forward to turn on the high
beams.
Pull the lever back to its original position
for the low beams.
High beam
Low beam
qFlashing the Headlights
To flash the headlights, pull the lever fully
towards you (the headlight switch does
not need to be on). The lever will return to
the normal position when released.
OFF
Flashing
5-66
Driving Your Mazda
íSome models.
Switches and Controls
CX-7_8BM8-EA-10I_Edition1 Page224
Friday, September 10 2010 4:23 PM
Form No.8BM8-EA-10I
Page 226 of 520

Black plate (226,1)
Turn and Lane-Change
Signals
Turn Signals
Move the signal lever down (for a left
turn) or up (for a right turn) to the stop
position. The signal will self-cancel after
the turn is completed.
If the indicator light continues to flash
after a turn, manually return the lever to
its original position.
Right turn
Left turn Right lane change
Left lane changeOFF
Green indicators on the dashboard show
which signal is working.
Lane-change signals
Move the lever slightly toward the
direction of the change―until the
indicator flashes―and hold it there. It
will return to the off position when
released.
NOTE
If an indicator light stays on without flashing
or if it flashes abnormally, one of the turn
signal bulbs may be burned out.
Fog Lightsí
Use this switch to turn on the fog lights.
They help you to see as well as to be seen.
To turn the fog lights on, rotate the fog
light switch to the
position.
The headlight switch must be in the
position before turning on the fog lights.
Fog light switch
To turn them off, rotate the fog light
switch to the OFF position or turn the
headlight switch to the
or OFF
position.
NOTE
lThe fog lights will turn off when the
headlights are set at high beam.
l(With auto-light control)
If the fog light switch is in the ON position
and the headlight switch is in the AUTO
position, the fog lights will be turned on
when the headlights, the exterior lights and
dashboard illumination are automatically
turned on.
5-68
Driving Your Mazda
íSome models.
Switches and Controls
CX-7_8BM8-EA-10I_Edition1 Page226
Friday, September 10 2010 4:23 PM
Form No.8BM8-EA-10I
Page 230 of 520

Black plate (230,1)
NOTElSwitching the auto-wiper lever from the
OFF to the AUTO position while driving at
a vehicle speed of 4 km/h (2 mph) or higher
(or after driving the vehicle) activates the
windshield wipers once, after which they
operate according to the rainfall amount.
lThe auto-wiper control may not operate
when the rain sensor temperature is about
_
10 °C (14 °F) or lower, or about 85 °C
(185 °F) or higher.
lIf the windshield is coated with water
repellent, the rain sensor may not be able to
sense the amount of rainfall correctly and
auto-wiper control may not operate
properly.
lIf dirt or foreign matter (Such as ice or
matter containing salt water) adheres to the
windshield above the rain sensor or if the
windshield is iced, it could cause the wipers
to move automatically. However, if the
wipers cannot remove this ice, dirt or
foreign matter, the auto-wiper control will
stop operation. In this case, set the wiper
lever to the low speed position or high
speed position for manual operation, or
remove the ice, dirt or foreign matter by
hand to restore the auto-wiper operation.
lIf the auto-wiper lever is left in the AUTO
position, the wipers could operate
automatically from the effect of strong light
sources, electromagnetic waves, or infrared
light because the rain sensor uses an
optical sensor. It is recommended that the
auto-wiper lever be switched to the OFF
position other than when driving the vehicle
under rainy conditions.
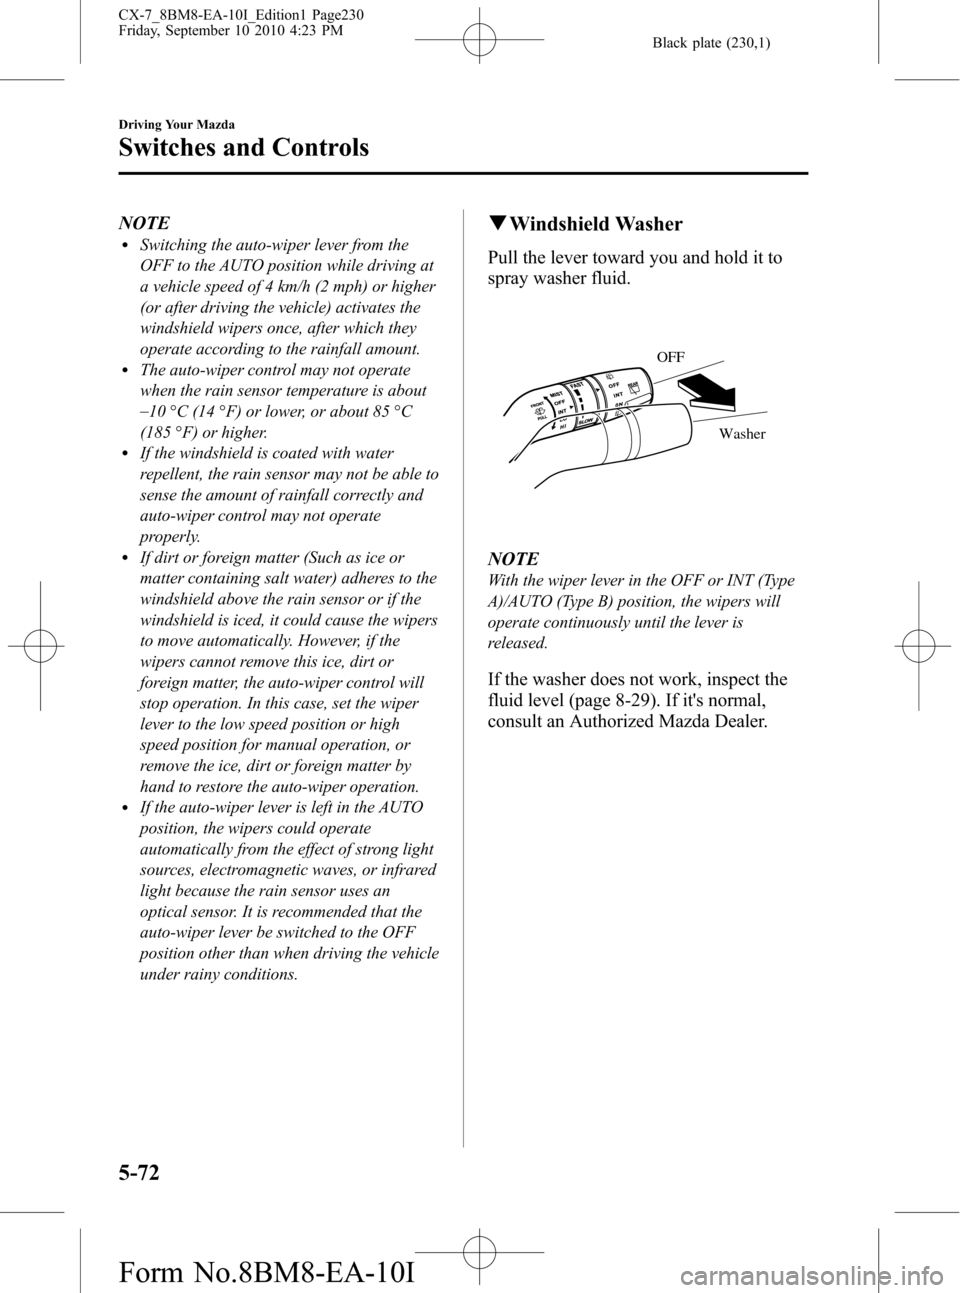
qWindshield Washer
Pull the lever toward you and hold it to
spray washer fluid.
Washer OFF
NOTE
With the wiper lever in the OFF or INT (Type
A)/AUTO (Type B) position, the wipers will
operate continuously until the lever is
released.
If the washer does not work, inspect the
fluid level (page 8-29). If it's normal,
consult an Authorized Mazda Dealer.
5-72
Driving Your Mazda
Switches and Controls
CX-7_8BM8-EA-10I_Edition1 Page230
Friday, September 10 2010 4:23 PM
Form No.8BM8-EA-10I
Page 233 of 520

Black plate (233,1)
Hazard Warning Flasher
The hazard warning lights should always
be used when you stop on or near a
roadway in an emergency.
The hazard warning lights warn other
drivers that your vehicle is a traffic hazard
and that they must take extreme caution
when near it.
Depress the hazard warning flasher and all
the turn signals will flash.
NOTE
lThe turn signals do not work when the
hazard warning lights are on.
lCheck local regulations about the use of
hazard warning lights while the vehicle is
being towed to verify that it is not in
violation of the law.
HomeLink Wireless
Control System
í
NOTE
HomeLink and HomeLink house are registered
trademarks of Johnson Controls.
The HomeLink system replaces up to 3
hand-held transmitters with a single built-
in component in the auto-dimming mirror.
Pressing the HomeLink button on the
auto-dimming mirror activates garage
doors, gates and other devices
surrounding your home.
HomeLink button
Indicator light
Driving Your Mazda
Switches and Controls
5-75íSome models. CX-7_8BM8-EA-10I_Edition1 Page233
Friday, September 10 2010 4:23 PM
Form No.8BM8-EA-10I
Page 253 of 520

Black plate (253,1)
Strong signal noise
This occurs very close to a transmitter
tower. The broadcast signals are
extremely strong, so the result is noise and
sound breakup at the radio receiver.
Station drift noise
When a vehicle reaches the area of two
strong stations broadcasting at similar
frequencies, the original station may be
temporarily lost and the second station
picked up. At this time there will be some
noise from this disturbance.
Station 2
88.3 MHz Station 1
88.1 MHz
qOperating Tips for CD Player/In-
Dash CD Changer
Condensation phenomenon
Immediately after turning on the heater
when the vehicle is cold, the CD or
optical components (prism and lens) in the
CD player/In-dash CD changer may
become clouded with condensation. At
this time, the CD will eject immediately
when placed in the unit. A clouded CD
can be corrected simply by wiping it with
a soft cloth. Clouded optical components
will clear naturally in about an hour. Wait
for normal operation to return before
attempting to use the unit.
Handling the CD player/In-dash CD
changer
The following precautions should be
observed.
lDo not spill any liquid on the audio
system.
lDo not insert any objects, other than
CDs, into the slot.
Interior Comfort
Audio System
6-17
CX-7_8BM8-EA-10I_Edition1 Page253
Friday, September 10 2010 4:23 PM
Form No.8BM8-EA-10I
Page 364 of 520

Black plate (364,1)
Bottle Holder
Bottle holders are on the inside of the
doors.
Bottle holder
CAUTION
Do not use the bottle holders for
containers without caps. The
contents may spill when the door is
opened or closed.
Storage Compartments
WARNING
Keep storage boxes closed when
driving:
Driving with the storage boxes open
is dangerous. To reduce the
possibility of injury in an accident or
a sudden stop, keep the storage
boxes closed when driving.
CAUTION
Do not leave lighters or eyeglasses in
the storage boxes while parked under
the sun. A lighter could explode or
the plastic material in eyeglasses
could deform and crack from high
temperature.
qGlove Compartment
To open the glove compartment, pull the
latch toward you.
To close the glove compartment, firmly
press in the center of the glove
compartment lid.
6-128
Interior Comfort
Interior Equipment
CX-7_8BM8-EA-10I_Edition1 Page364
Friday, September 10 2010 4:24 PM
Form No.8BM8-EA-10I
Page 369 of 520

Black plate (369,1)
7In Case of an Emergency
Helpful information on what to do in an emergency.
Parking in an Emergency ............................................................. 7-2
Parking in an Emergency .......................................................... 7-2
Flat Tire ......................................................................................... 7-3
Spare Tire and Tool Storage ...................................................... 7-3
Changing a Flat Tire ................................................................. 7-6
Overheating ................................................................................. 7-12
Overheating ............................................................................. 7-12
Emergency Starting .................................................................... 7-14
Starting a Flooded Engine ....................................................... 7-14
Jump-Starting .......................................................................... 7-15
Push-Starting ........................................................................... 7-18
Emergency Towing ..................................................................... 7-19
Towing Description ................................................................. 7-19
Tiedown Hooks ....................................................................... 7-20
Recreational Towing ............................................................... 7-23
7-1
CX-7_8BM8-EA-10I_Edition1 Page369
Friday, September 10 2010 4:24 PM
Form No.8BM8-EA-10I
Page 370 of 520

Black plate (370,1)
Parking in an Emergency
The hazard warning lights should always
be used when you stop on or near a
roadway in an emergency.
The hazard warning lights warn other
drivers that your vehicle is a traffic hazard
and that they must take extreme caution
when near it.
Depress the hazard warning flasher and all
the turn signals will flash.
NOTE
lThe turn signals do not work when the
hazard warning lights are on.
lCheck local regulations about the use of
hazard warning lights while the vehicle is
being towed to verify that it is not in
violation of the law.
7-2
In Case of an Emergency
Parking in an Emergency
CX-7_8BM8-EA-10I_Edition1 Page370
Friday, September 10 2010 4:24 PM
Form No.8BM8-EA-10I
Page 387 of 520

Black plate (387,1)
Towing Description
We recommend that towing be done only
by an Authorized Mazda Dealer or a
commercial tow-truck service.
Proper lifting and towing are necessary to
prevent damage to the vehicle.
Particularly when towing a AWD vehicle,
where all the wheels are connected to the
drive train, proper transporting of the
vehicle is absolutely essential to avoid
damaging the drive system. Government
and local laws must be followed.
Wheel dollies
A towed 2WD vehicle should have its
drive wheels (front wheels) off the
ground. If excessive damage or other
conditions prevent this, use wheel dollies.
When towing a 2WD vehicle with the rear
wheels on the ground, release the parking
brake.
A towed AWD vehicle must have all its
wheels off the ground.
CAUTION
Do not tow the vehicle pointed
backward with driving wheels on the
ground. This may cause internal
damage to the transaxle.
CAUTION
Do not tow with sling-type
equipment. This could damage your
vehicle. Use wheel-lift or flatbed
equipment.
In Case of an Emergency
Emergency Towing
7-19
CX-7_8BM8-EA-10I_Edition1 Page387
Friday, September 10 2010 4:24 PM
Form No.8BM8-EA-10I
Page 388 of 520

Black plate (388,1)
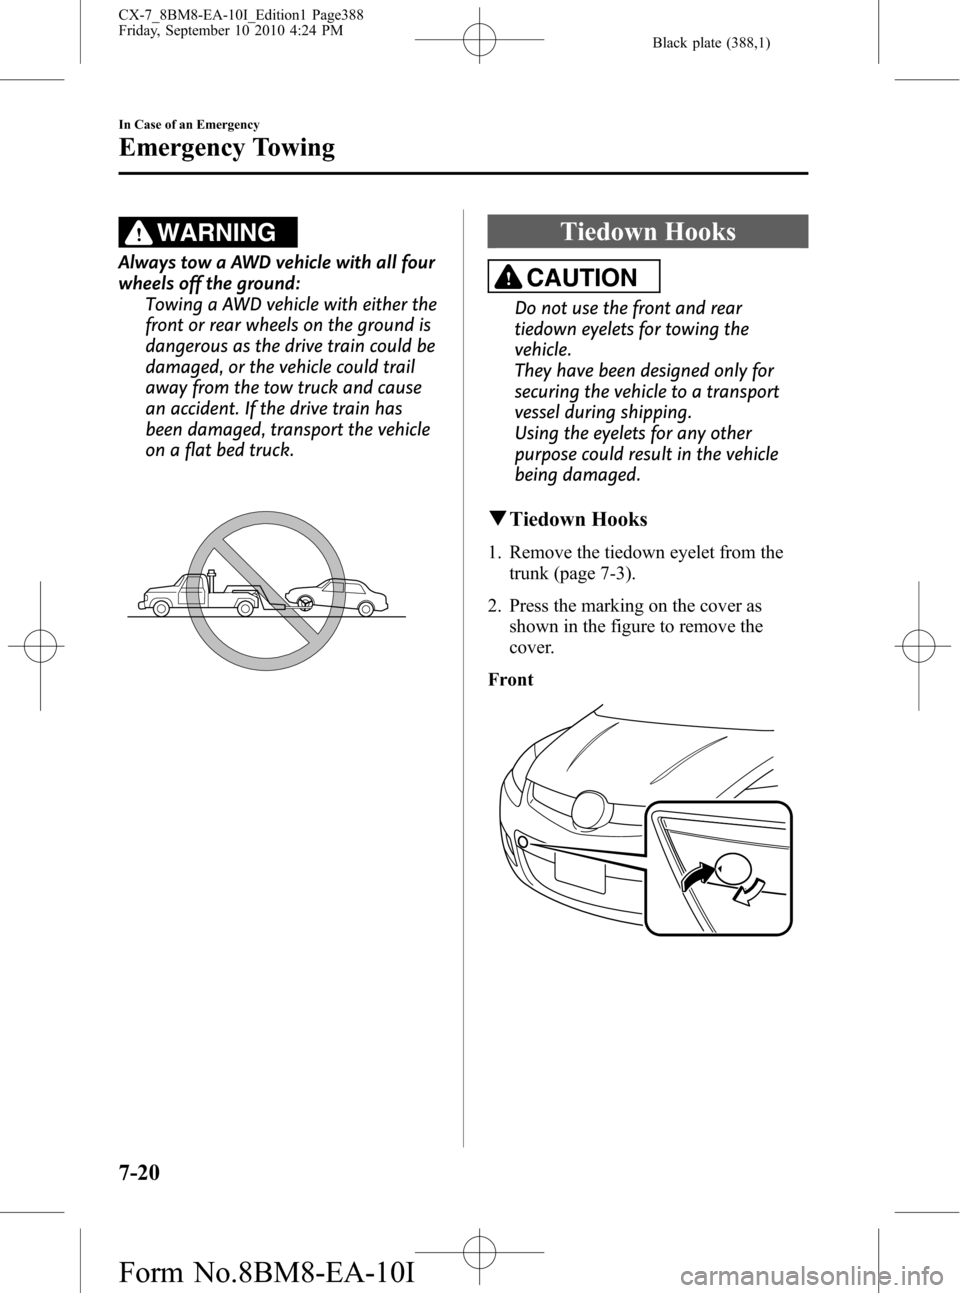
WARNING
Always tow a AWD vehicle with all four
wheels off the ground:
Towing a AWD vehicle with either the
front or rear wheels on the ground is
dangerous as the drive train could be
damaged, or the vehicle could trail
away from the tow truck and cause
an accident. If the drive train has
been damaged, transport the vehicle
on a flat bed truck.
Tiedown Hooks
CAUTION
Do not use the front and rear
tiedown eyelets for towing the
vehicle.
They have been designed only for
securing the vehicle to a transport
vessel during shipping.
Using the eyelets for any other
purpose could result in the vehicle
being damaged.
qTiedown Hooks
1. Remove the tiedown eyelet from the
trunk (page 7-3).
2. Press the marking on the cover as
shown in the figure to remove the
cover.
Front
7-20
In Case of an Emergency
Emergency Towing
CX-7_8BM8-EA-10I_Edition1 Page388
Friday, September 10 2010 4:24 PM
Form No.8BM8-EA-10I