MAZDA MODEL CX-9 2010 Owners Manual (in English)
Manufacturer: MAZDA, Model Year: 2010, Model line: MODEL CX-9, Model: MAZDA MODEL CX-9 2010Pages: 592
Page 281 of 592
Black plate (281,1)
Fast-forward/Reverse
Press and hold the fast-forward button
(
) to advance through a track at high
speed.
Press and hold the reverse button (
)to
reverse through a track at high speed.
Track search
Press the track up button (
) once to skip
forward to the beginning of the next track.
Press the track down button (
)onceto
skip back to the beginning of the current
track.
Folder search (during MP3 CD
playback)
To change to the previous folder, press the
folder down button (
), or press the
folder up button (
) to advance to the
next folder.
Music scan
During music CD playback
This function scans the titles on a CD and
plays 10 seconds of each song to aid you
in finding a song you want to listen to.
During MP3 CD playback
This function scans the titles in a folder
currently being played and plays 10
seconds of each song to aid you in finding
a song you want to listen to.
Press the scan button (
) during
playback to start the scan play operation
(the track number will flash).
Press the scan button (
) again to
cancel scan playback.
NOTE
If the unit is left in scan, normal playback will
resume where scan was selected.
Repeat playback
During music CD playback
1. Press the repeat button (
) during
playback to play the current track
repeatedly.“RPT”is displayed.
2. Press the button again to cancel the
repeat playback.
During MP3 CD playback
(Track repeat)
1. Press the repeat button (
) during
playback to play the current track
repeatedly.“TRACK RPT”is
displayed.
2. To cancel the repeat playback, press the
button again after 3 seconds.
(Folder repeat)
1. Press the repeat button (
) during
playback, and then press the button
again within 3 seconds to play the
tracks in the current folder repeatedly.
“FOLDER RPT”is displayed.
2. Press the button again to cancel the
repeat playback.
Random playback
Tracks are randomly selected and played.
During music CD playback
1. Press the random button (
) during
playback to play the tracks on the CD
randomly.“RDM”is displayed.
2. Press the button again to cancel the
random playback.
Interior Comfort
Audio System
6-33
CX-9_8AU2-EA-09G_Edition5 Page281
Thursday, May 6 2010 4:54 PM
Form No.8AU2-EA-09G
Page 282 of 592
Black plate (282,1)
During MP3 CD playback
(Folder random)
1. Press the random button (
) during
playback to play the tracks in the folder
randomly.“FOLDER RDM”is
displayed.
2. To cancel the random playback, press
the button again after 3 seconds.
(CD random)
1. Press the random button (
) during
playback, and then press the button
again within 3 seconds to play the
tracks on the CD randomly.
“DISC RDM”is displayed.
2. Press the button again to cancel the
random playback.
Switching the display
Each time the display button (
)is
pressed during playback, the display will
switch in the following order.
Music CD
Track number/Elapsed time
Album name
Artist name
Track name
MP3 CD
Folder number/File
number File number/Elapsed
time display
File name
Folder name
Album name (ID3 Tag)
Song name (ID3 Tag)
Artist name (ID3 Tag)
NOTE
(MP3 CD)lThe information viewable in the display is
only CD information (such as artist name,
song title) which has been recorded to the
CD.
lThe system can only display one-byte
alphabetic characters. If two-byte or other
types of characters have been recorded to
the CD, they may not display correctly.
Display scroll
Only 8 characters (File name) or 12
characters (Except file name) can be
displayed at one time. To display the rest
of the characters of a long title, turn the
display feed dial (
) to the right.
Hidden titles can be scrolled into the
display one character at a time.
6-34
Interior Comfort
Audio System
CX-9_8AU2-EA-09G_Edition5 Page282
Thursday, May 6 2010 4:54 PM
Form No.8AU2-EA-09G
Page 283 of 592
Black plate (283,1)
NOTE
The displayable number of characters is
limited. If the number of characters, including
the file extension (.mp3), exceeds 32
characters, it may not be fully displayed.
Message display
If“CHECK CD”is displayed, it means
that there is some CD malfunction. Check
the CD for damage, dirt, or smudges, and
then properly reinsert. If the message
appears again, take the unit to an
Authorized Mazda Dealer for service.
qOperating the Auxiliary jack
You can connect portable audio units or
similar products on the market to the
auxiliary jack to listen to music or audio
over the vehicle's speakers, refer to
Auxiliary Input (page 6-66).
Interior Comfort
Audio System
6-35
CX-9_8AU2-EA-09G_Edition5 Page283
Thursday, May 6 2010 4:54 PM
Form No.8AU2-EA-09G
Page 284 of 592
Black plate (284,1)
qError Indications
If you see an error indication on the display, find the cause in the chart. If you cannot clear
the error indication, take the vehicle to an Authorized Mazda Dealer.
Indication Cause Solution
CHECK CDCD is inserted upside downInsert the CD properly. If the error indication continues
to display, consult an Authorized Mazda Dealer.
CD is defectiveInsert another CD properly. If the error indication
continues to display, consult an Authorized Mazda
Dealer.
6-36
Interior Comfort
Audio System
CX-9_8AU2-EA-09G_Edition5 Page284
Thursday, May 6 2010 4:54 PM
Form No.8AU2-EA-09G
Page 285 of 592
Black plate (285,1)
Audio Set (Type B)
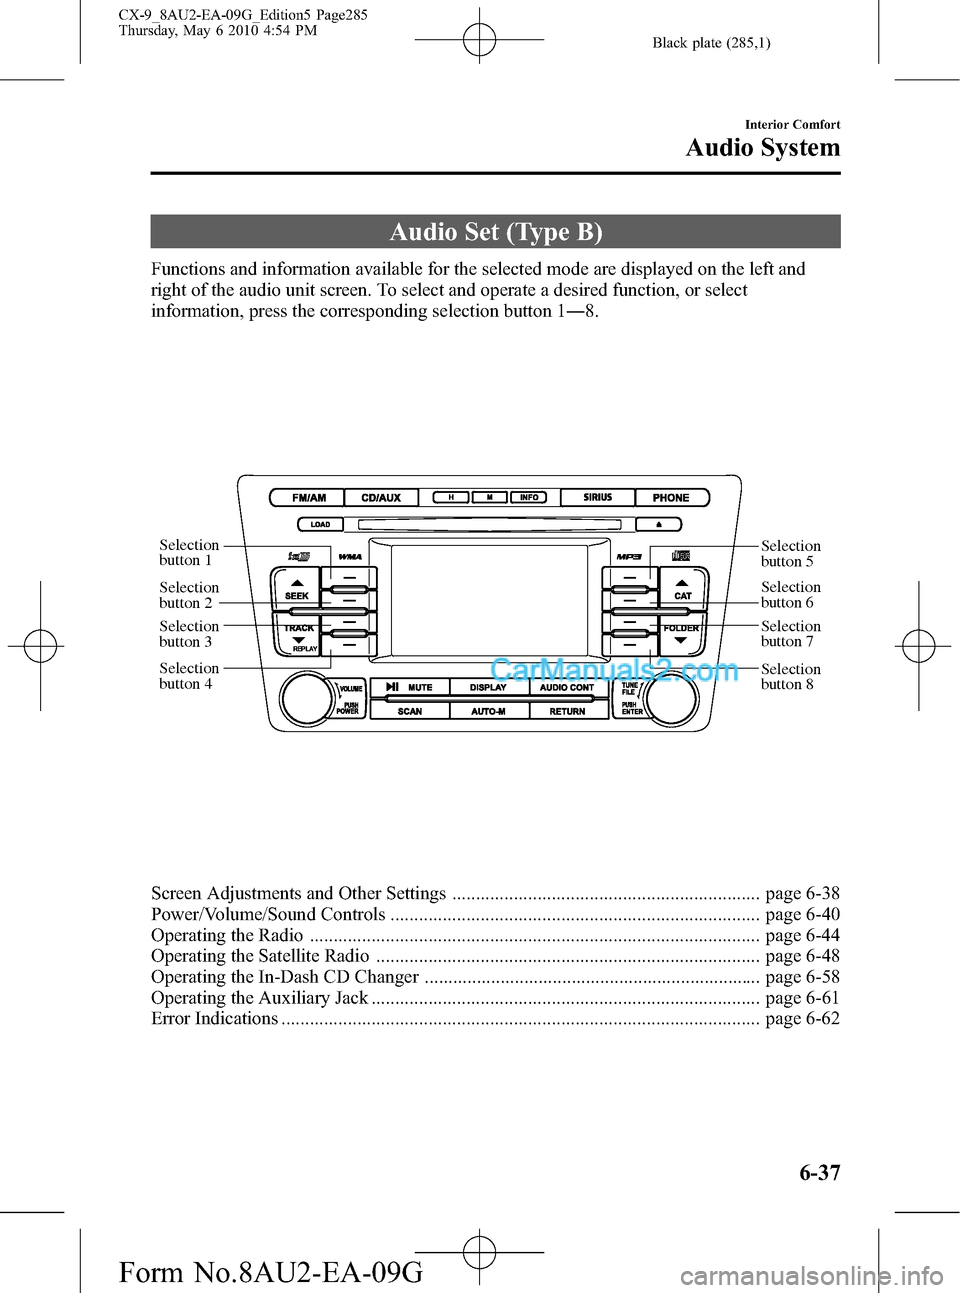
Functions and information available for the selected mode are displayed on the left and
right of the audio unit screen. To select and operate a desired function, or select
information, press the corresponding selection button 1―8.
Selection
button 1
Selection
button 2
Selection
button 3
Selection
button 4Selection
button 5
Selection
button 6
Selection
button 7
Selection
button 8
Screen Adjustments and Other Settings ................................................................. page 6-38
Power/Volume/Sound Controls .............................................................................. page 6-40
Operating the Radio ............................................................................................... page 6-44
Operating the Satellite Radio ................................................................................. page 6-48
Operating the In-Dash CD Changer ....................................................................... page 6-58
Operating the Auxiliary Jack .................................................................................. page 6-61
Error Indications ..................................................................................................... page 6-62
Interior Comfort
Audio System
6-37
CX-9_8AU2-EA-09G_Edition5 Page285
Thursday, May 6 2010 4:54 PM
Form No.8AU2-EA-09G
Page 286 of 592
Black plate (286,1)
qScreen Adjustments and Other Settings
Selection
button 1
Selection
button 2
Selection
button 3
Selection
button 4
Display button
Selection
button 5
Selection
button 6
Selection
button 7
Selection
button 8
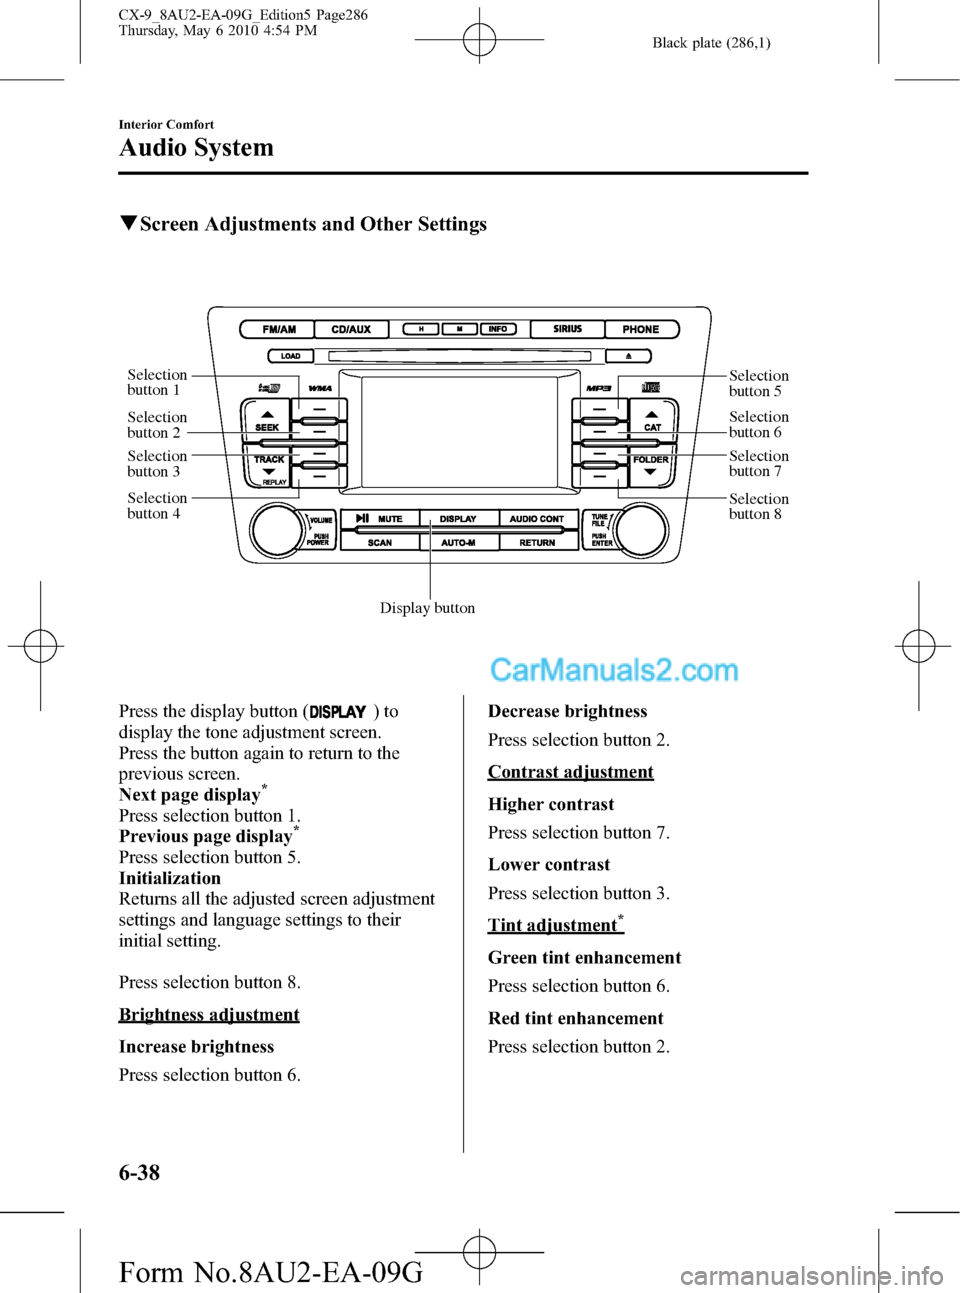
Press the display button ()to
display the tone adjustment screen.
Press the button again to return to the
previous screen.
Next page display
*
Press selection button 1.
Previous page display*
Press selection button 5.
Initialization
Returns all the adjusted screen adjustment
settings and language settings to their
initial setting.
Press selection button 8.
Brightness adjustment
Increase brightness
Press selection button 6.Decrease brightness
Press selection button 2.
Contrast adjustment
Higher contrast
Press selection button 7.
Lower contrast
Press selection button 3.
Tint adjustment*
Green tint enhancement
Press selection button 6.
Red tint enhancement
Press selection button 2.
6-38
Interior Comfort
Audio System
CX-9_8AU2-EA-09G_Edition5 Page286
Thursday, May 6 2010 4:54 PM
Form No.8AU2-EA-09G
Page 287 of 592
Black plate (287,1)
Color adjustment*
To deepen a color
Press selection button 7.
To fade color
Press selection button 3.
* Adjustment is available depending on
the display.
NOTE
Continuous adjustment of the brightness,
contrast, tint, and color can be done by long-
pressing the selection button for the adjustment
item.
Daytime/Night screen
When the headlights are on, daytime
mode can also be selected (if a brighter
screen is needed at night). This selection
can only be done when the headlights are
on.
The screen can be returned to the daytime
screen while the headlights or running
lights are on by pressing the dashboard
illumination knob.
Language setting
The displayed language can be changed to
one of the three available languages.
Press selection button 5 to display the
language setting screen.
English display
Press selection button 2.
French display
Press selection button 3.
Spanish display
Press selection button 4.NOTE
A language setting is unavailable for the
satellite radio. English is constantly displayed.
Screen display off
Press selection button 4.
Press the display button (
)to
return to the previously selected mode's
screen.
Interior Comfort
Audio System
6-39
CX-9_8AU2-EA-09G_Edition5 Page287
Thursday, May 6 2010 4:54 PM
Form No.8AU2-EA-09G
Page 288 of 592
Black plate (288,1)
qPower/Volume/Sound Controls
Audio control buttonPower/Volume dial
Selection
button 1
Selection
button 2
Selection
button 3Selection
button 5
Selection
button 6
Selection
button 7
Selection
button 8
Power ON/OFF
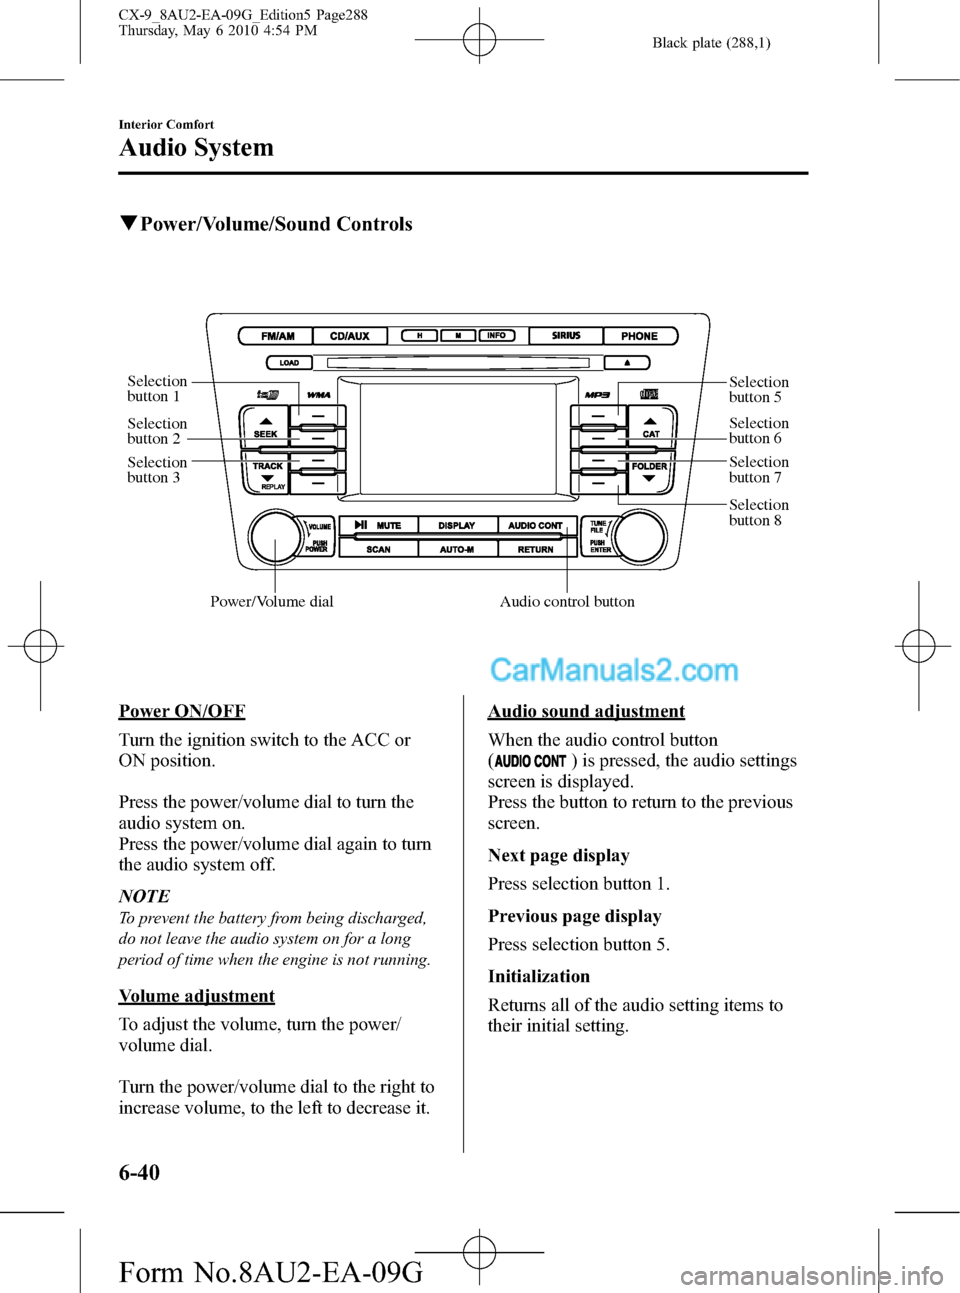
Turn the ignition switch to the ACC or
ON position.
Press the power/volume dial to turn the
audio system on.
Press the power/volume dial again to turn
the audio system off.
NOTE
To prevent the battery from being discharged,
do not leave the audio system on for a long
period of time when the engine is not running.
Volume adjustment
To adjust the volume, turn the power/
volume dial.
Turn the power/volume dial to the right to
increase volume, to the left to decrease it.
Audio sound adjustment
When the audio control button
(
) is pressed, the audio settings
screen is displayed.
Press the button to return to the previous
screen.
Next page display
Press selection button 1.
Previous page display
Press selection button 5.
Initialization
Returns all of the audio setting items to
their initial setting.
6-40
Interior Comfort
Audio System
CX-9_8AU2-EA-09G_Edition5 Page288
Thursday, May 6 2010 4:54 PM
Form No.8AU2-EA-09G
Page 289 of 592
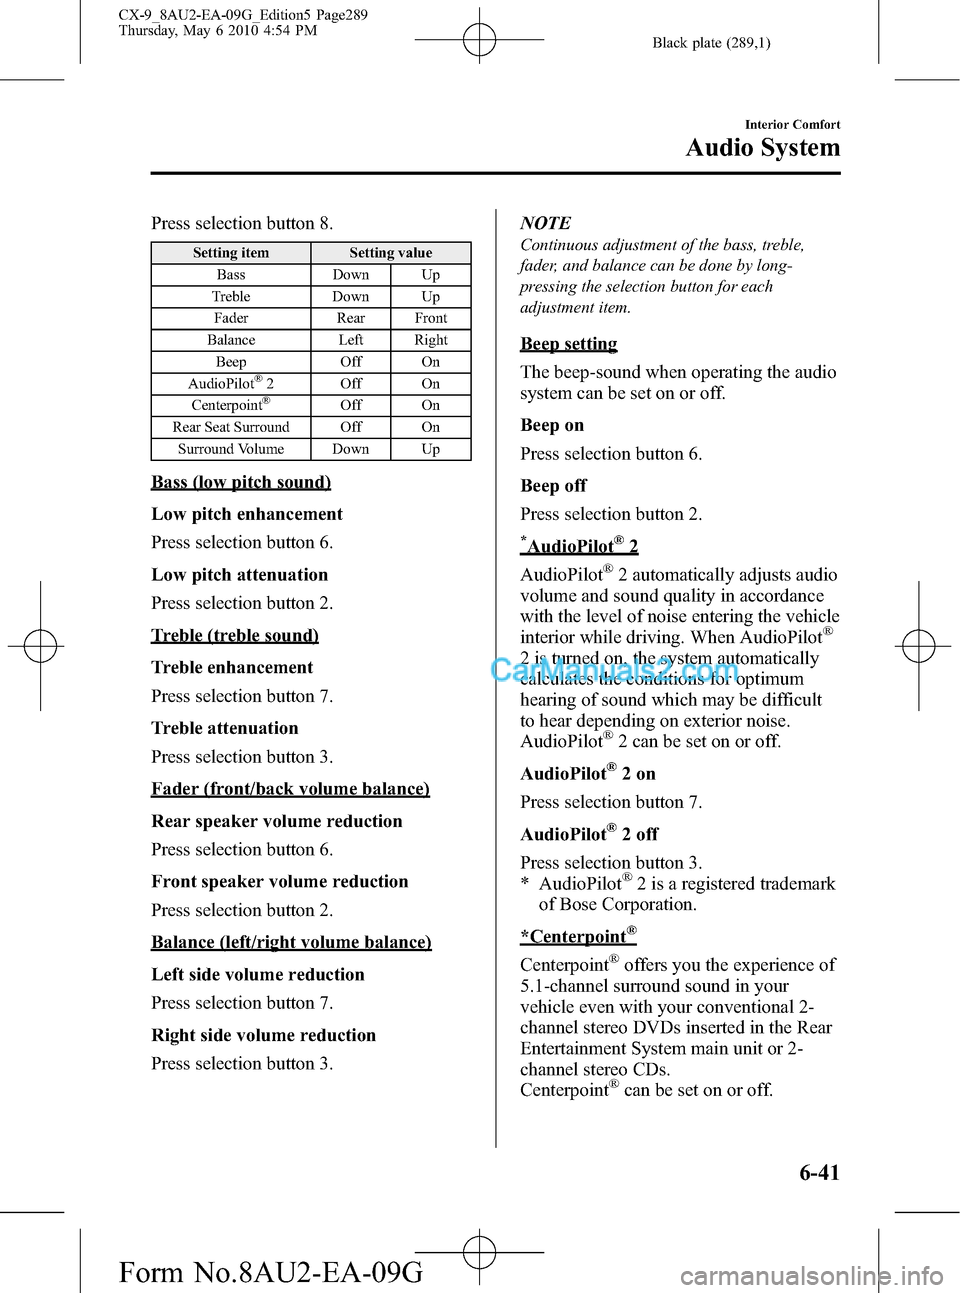
Black plate (289,1)
Press selection button 8.
Setting item Setting value
Bass Down Up
Treble Down Up
Fader Rear Front
Balance Left Right
Beep Off On
AudioPilot
®2 Off On
Centerpoint®Off On
Rear Seat Surround Off On
Surround Volume Down Up
Bass (low pitch sound)
Low pitch enhancement
Press selection button 6.
Low pitch attenuation
Press selection button 2.
Treble (treble sound)
Treble enhancement
Press selection button 7.
Treble attenuation
Press selection button 3.
Fader (front/back volume balance)
Rear speaker volume reduction
Press selection button 6.
Front speaker volume reduction
Press selection button 2.
Balance (left/right volume balance)
Left side volume reduction
Press selection button 7.
Right side volume reduction
Press selection button 3.NOTE
Continuous adjustment of the bass, treble,
fader, and balance can be done by long-
pressing the selection button for each
adjustment item.
Beep setting
The beep-sound when operating the audio
system can be set on or off.
Beep on
Press selection button 6.
Beep off
Press selection button 2.
*AudioPilot®2
AudioPilot
®2 automatically adjusts audio
volume and sound quality in accordance
with the level of noise entering the vehicle
interior while driving. When AudioPilot
®
2 is turned on, the system automatically
calculates the conditions for optimum
hearing of sound which may be difficult
to hear depending on exterior noise.
AudioPilot
®2 can be set on or off.
AudioPilot
®2on
Press selection button 7.
AudioPilot
®2 off
Press selection button 3.
* AudioPilot
®2 is a registered trademark
of Bose Corporation.
*Centerpoint®
Centerpoint®offers you the experience of
5.1-channel surround sound in your
vehicle even with your conventional 2-
channel stereo DVDs inserted in the Rear
Entertainment System main unit or 2-
channel stereo CDs.
Centerpoint
®can be set on or off.
Interior Comfort
Audio System
6-41
CX-9_8AU2-EA-09G_Edition5 Page289
Thursday, May 6 2010 4:54 PM
Form No.8AU2-EA-09G
Page 290 of 592
Black plate (290,1)
Centerpoint®on
Press selection button 6.
Centerpoint
®off
Press selection button 2.
NOTE
lCenterpoint®operates optimally with a 2-
channel stereo CD. MP3 audio files can be
played, however, MP3 audio files encoded
with high compression may result in poor
sound quality.
lCenterpoint®is available for 2-channel
stereo audio except for AM radio/FM radio/
SIRIUS digital satellite radio/AUX/BT
audio.
* Centerpoint®is a registered trademark
of Bose Corporation.
Rear Seat Surround (Rear
Entertainment System-equipped model)
The rear seat-optimized function allows
passengers to optimize the audio output to
the rear for a more pleasurable acoustic
field when selecting the 5.1-channel
sound mode.
Rear Seat Surround can be set on or off.
NOTE
Rear seat-optimized is only effective if a CD or
a DVD inserted in the Rear Entertainment
System main unit is 5.1 Dolby Digital/DTS
audio.
Rear Seat Surround on
Press selection button 7.
Rear Seat Surround off
Press selection button 3.
Surround Volume
Surround Volume up
Press selection button 6.Surround Volume down
Press selection button 2.
NOTE
Surround Volume adjustment is available if
Centerpoint®or Rear Seat Surround is on.
6-42
Interior Comfort
Audio System
CX-9_8AU2-EA-09G_Edition5 Page290
Thursday, May 6 2010 4:54 PM
Form No.8AU2-EA-09G