auto MAZDA MODEL CX-9 2015 Owners Manual (in English)
[x] Cancel search | Manufacturer: MAZDA, Model Year: 2015, Model line: MODEL CX-9, Model: MAZDA MODEL CX-9 2015Pages: 604, PDF Size: 9.15 MB
Page 9 of 604
Black plate (9,1)
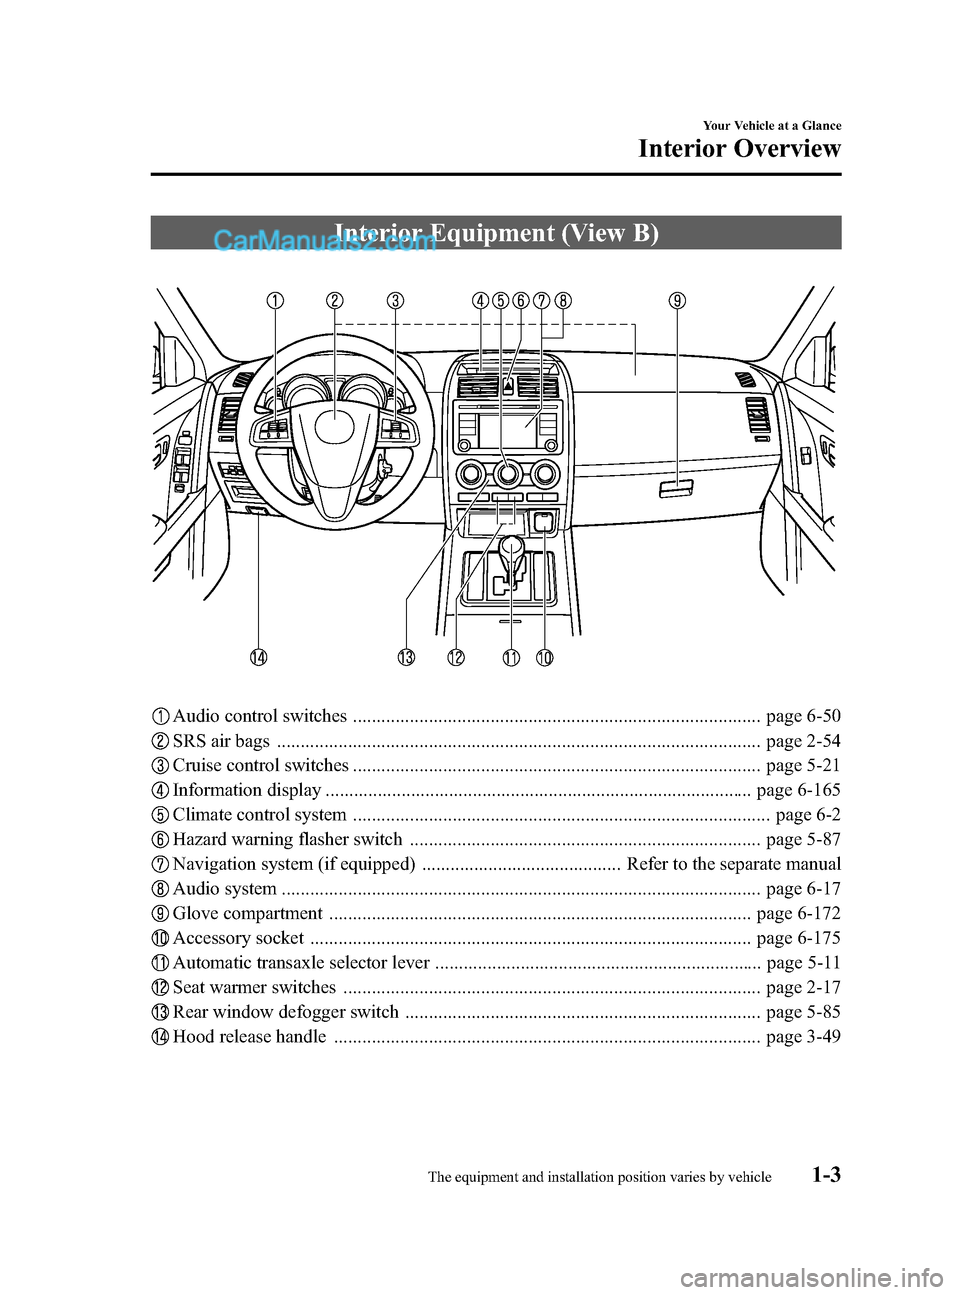
Interior Equipment (View B)
Audio control switches ...................................................................................... page 6-50
SRS air bags ...................................................................................................... page 2-54
Cruise control switches ...................................................................................... page 5-21
Information display .......................................................................................... page 6-165
Climate control system ........................................................................................ page 6-2
Hazard warning flasher switch .......................................................................... page 5-87
Navigation system (if equipped) .......................................... Refer to the separate manual
Audio system ..................................................................................................... page 6-17
Glove compartment ......................................................................................... page 6-172
Accessory socket ............................................................................................. page 6-175
Automatic transaxle selector lever ..................................................................... page 5-11
Seat warmer switches ........................................................................................ page 2-17
Rear window defogger switch ........................................................................... page 5-85
Hood release handle .......................................................................................... page 3-49
Your Vehicle at a Glance
Interior Overview
1-3The equipment and installation position varies by vehicle
CX-9_8DU1-EA-14H_Edition1 Page9
Thursday, June 5 2014 4:17 PM
Form No.8DU1-EA-14H
Page 18 of 604
Black plate (18,1)
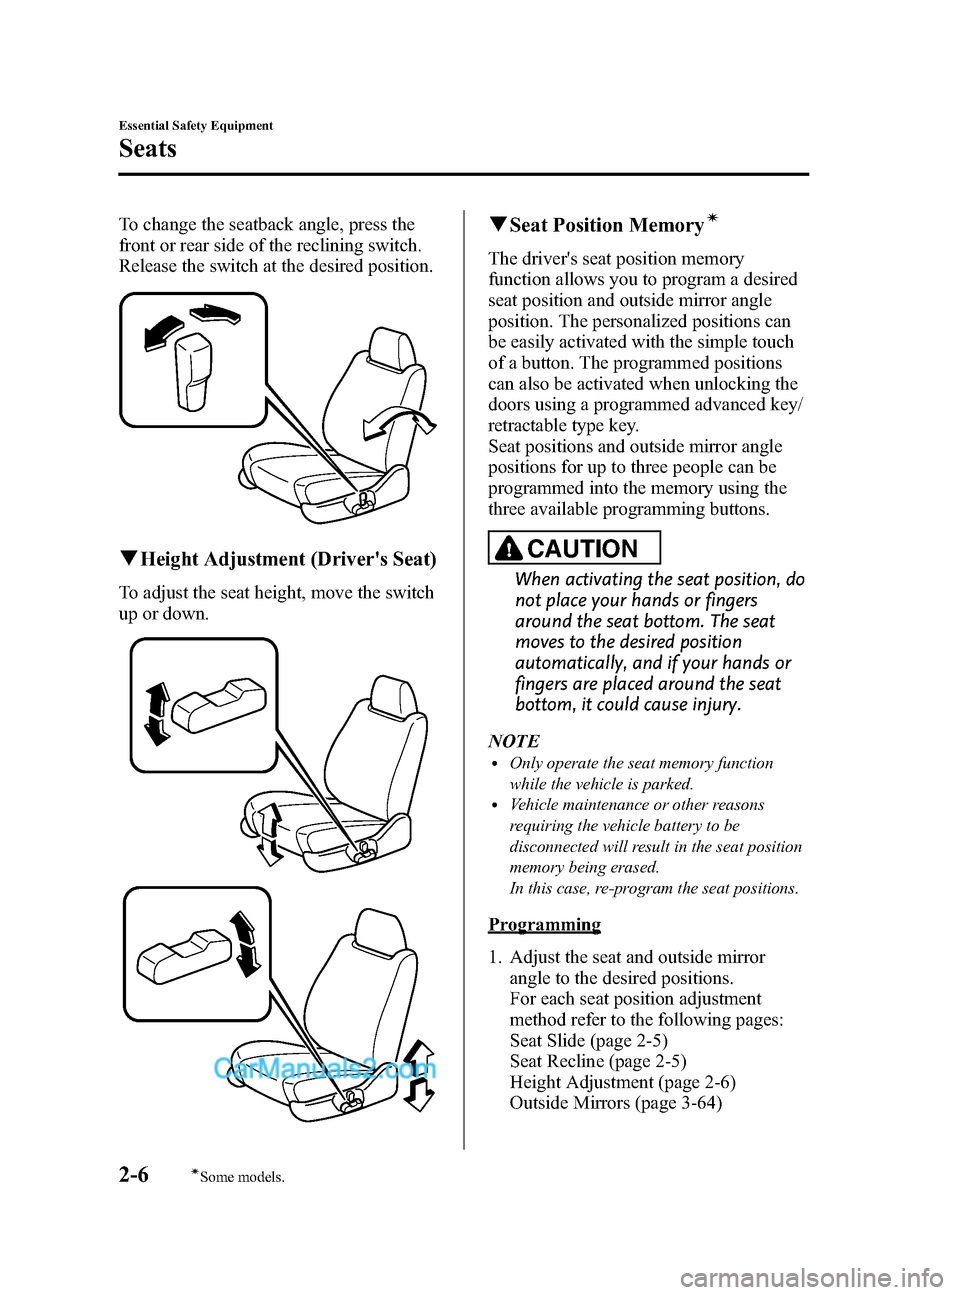
To change the seatback angle, press the
front or rear side of the reclining switch.
Release the switch at the desired position.
qHeight Adjustment (Driver's Seat)
To adjust the seat height, move the switch
up or down.
qSeat Position Memoryí
The driver's seat position memory
function allows you to program a desired
seat position and outside mirror angle
position. The personalized positions can
be easily activated with the simple touch
of a button. The programmed positions
can also be activated when unlocking the
doors using a programmed advanced key/
retractable type key.
Seat positions and outside mirror angle
positions for up to three people can be
programmed into the memory using the
three available programming buttons.
CAUTION
When activating the seat position, do
not place your hands or fingers
around the seat bottom. The seat
moves to the desired position
automatically, and if your hands or
fingers are placed around the seat
bottom, it could cause injury.
NOTE
lOnly operate the seat memory function
while the vehicle is parked.
lVehicle maintenance or other reasons
requiring the vehicle battery to be
disconnected will result in the seat position
memory being erased.
In this case, re-program the seat positions.
Programming
1. Adjust the seat and outside mirror angle to the desired positions.
For each seat position adjustment
method refer to the following pages:
Seat Slide (page 2-5)
Seat Recline (page 2-5)
Height Adjustment (page 2-6)
Outside Mirrors (page 3-64)
2-6
Essential Safety Equipment
íSome models.
Seats
CX-9_8DU1-EA-14H_Edition1 Page18
Thursday, June 5 2014 4:17 PM
Form No.8DU1-EA-14H
Page 30 of 604
Black plate (30,1)
WARNING
ØBe careful when using the seat
warmer. The heat from the seat
warmer may be too hot for some
people, as indicated below, and
could cause a low-temperature
burn.
ØInfants, small babies, elderly
people, and physically
challenged people
ØPeople with delicate skin
ØPeople who are excessively
fatigued
ØPeople who are intoxicated
ØPeople who have taken sleep-
inducing medicine such as
sleeping pills or cold medicine
Ø Do not use the seat warmer with
anything having high moisture-
retention ability such as a blanket
or cushion on the seat. The seat
may be heated excessively and
cause a low-temperature burn.
Ø Do not use the seat warmer even
when taking a short nap in the
vehicle. The seat may be heated
excessively and cause a low-
temperature burn.
Ø Do not place heavy objects with
sharp projections on the seat, or
insert needles or pins into it. This
could cause the seat to become
excessively heated and result in
injury from a minor burn.
CAUTION
Do not use organic solvents to clean
the seat. It may damage the seat
surface and the heater. NOTE
lIf the ignition is switched off while the seat
warmer is operating (High or Low) and
then switched ON again, the seat warmer
will automatically operate at the
temperature set before switching off the
ignition.
lUse the seat warmer when the engine is
running, and do not continue to use it for a
long period of time.
lThe temperature of the seat warmer cannot
be adjusted beyond High and Low because
the seat warmer is controlled by a
thermostat.
2-18
Essential Safety Equipment
Seats
CX-9_8DU1-EA-14H_Edition1 Page30
Thursday, June 5 2014 4:17 PM
Form No.8DU1-EA-14H
Page 31 of 604
Black plate (31,1)
Seat Belt Precautions
Seat belts help to decrease the possibility of severe injury during accidents and sudden
stops. Mazda recommends that the driver and all passengers always wear seat belts.
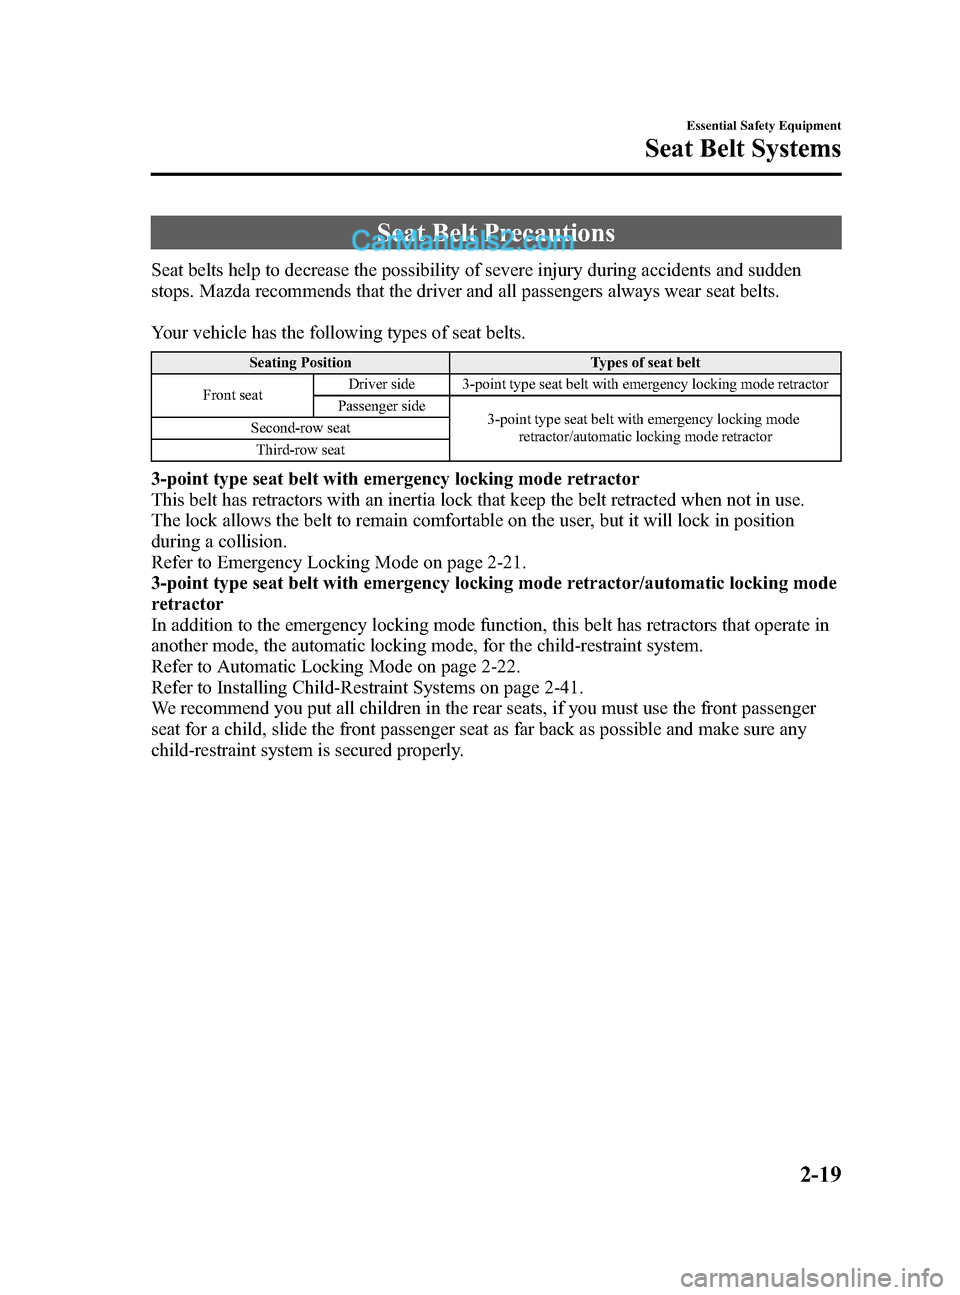
Your vehicle has the following types of seat belts.
Seating PositionTypes of seat belt
Front seat Driver side 3-point type seat belt with emergency locking mode retractor
Passenger side 3-point type seat belt with emergency locking mode
retractor/automatic locking mode retractor
Second-row seat
Third-row seat
3-point type seat belt with emergency locking mode retractor
This belt has retractors with an inertia lock that keep the belt retracted when not in use.
The lock allows the belt to remain comfortable on the user, but it will lock in position
during a collision.
Refer to Emergency Locking Mode on page 2-21.
3-point type seat belt with emergency locking mode retractor/automatic locking mode
retractor
In addition to the emergency locking mode function, this belt has retractors that operate in
another mode, the automatic locking mode, for the child-restraint system.
Refer to Automatic Locking Mode on page 2-22.
Refer to Installing Child-Restraint Systems on page 2-41.
We recommend you put all children in the rear seats, if you must use the front passenger
seat for a child, slide the front passenger seat as far back as possible and make sure any
child-restraint system is secured properly.
Essential Safety Equipment
Seat Belt Systems
2-19
CX-9_8DU1-EA-14H_Edition1 Page31
Thursday, June 5 2014 4:17 PM
Form No.8DU1-EA-14H
Page 33 of 604
Black plate (33,1)
CAUTION
Belt retraction may become difficult if the belts and rings are soiled, so try to keep
them clean. For more details about cleaning the seat belts, refer to“Cleaning the
Lap/Shoulder Belt Webbing ”(page 8-62).
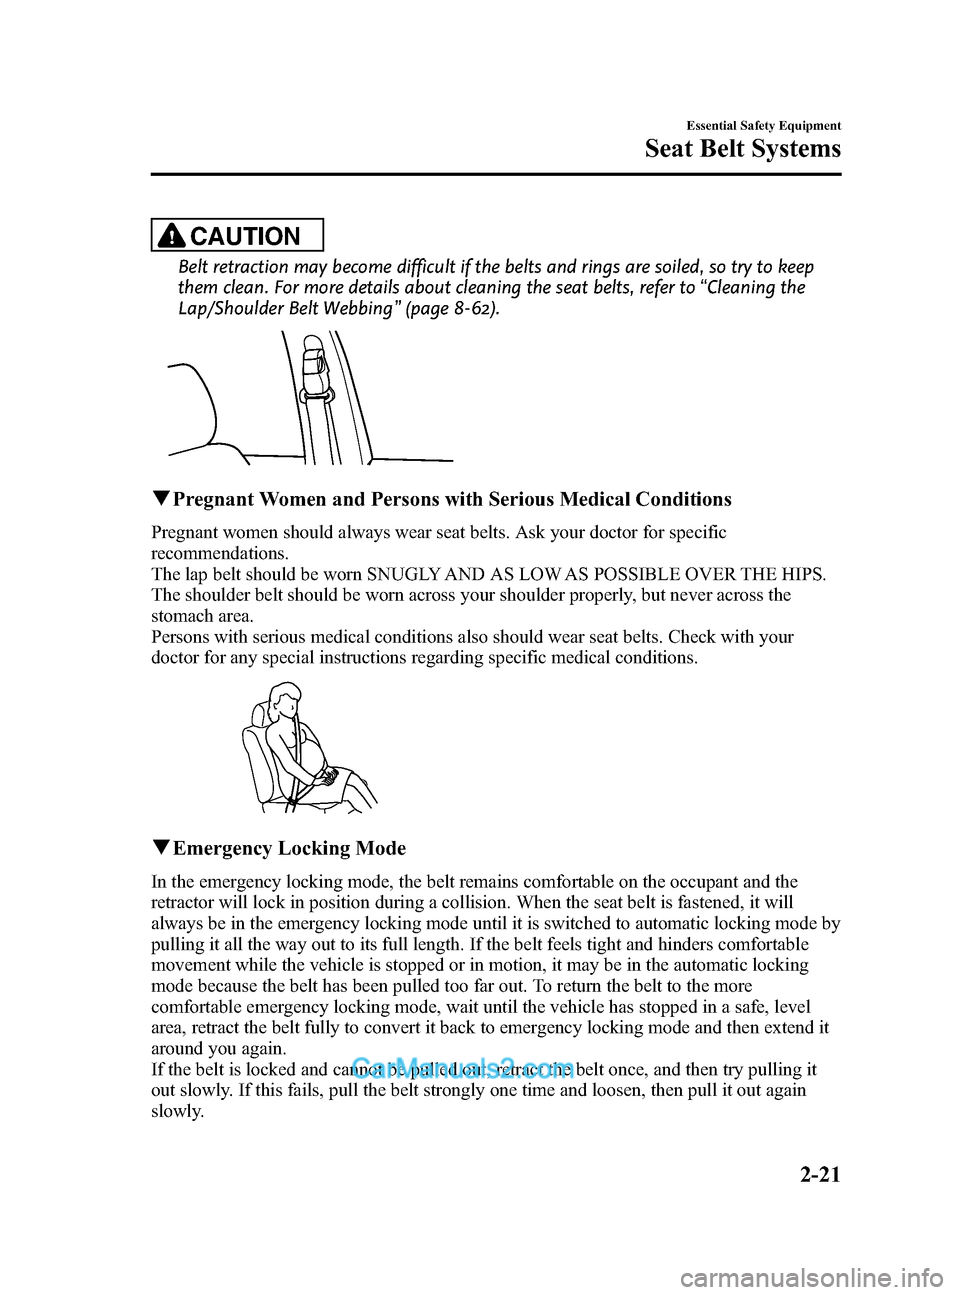
q Pregnant Women and Persons with Serious Medical Conditions
Pregnant women should always wear seat belts. Ask your doctor for specific
recommendations.
The lap belt should be worn SNUGLY AND AS LOW AS POSSIBLE OVER THE HIPS.
The shoulder belt should be worn across your shoulder properly, but never across the
stomach area.
Persons with serious medical conditions also should wear seat belts. Check with your
doctor for any special instructions regarding specific medical conditions.
qEmergency Locking Mode
In the emergency locking mode, the belt remains comfortable on the occupant and the
retractor will lock in position during a collision. When the seat belt is fastened, it will
always be in the emergency locking mode until it is switched to automatic locking mode by
pulling it all the way out to its full length. If the belt feels tight and hinders comfortable
movement while the vehicle is stopped or in motion, it may be in the automatic locking
mode because the belt has been pulled too far out. To return the belt to the more
comfortable emergency locking mode, wait until the vehicle has stopped in a safe, level
area, retract the belt fully to convert it back to emergency locking mode and then extend it
around you again.
If the belt is locked and cannot be pulled out, retract the belt once, and then try pulling it
out slowly. If this fails, pull the belt strongly one time and loosen, then pull it out again
slowly.
Essential Safety Equipment
Seat Belt Systems
2-21
CX-9_8DU1-EA-14H_Edition1 Page33
Thursday, June 5 2014 4:17 PM
Form No.8DU1-EA-14H
Page 34 of 604
Black plate (34,1)
qAutomatic Locking Mode
Always use the automatic locking mode to keep the child-restraint system from shifting to
an unsafe position in the event of an accident. To enable seat belt automatic locking mode,
pull it all the way out and connect it as instructed on the child-restraint system. It will
retract down to the child-restraint system and stay locked on it. See the section on child
restraint (page 2-35).
2-22
Essential Safety Equipment
Seat Belt Systems
CX-9_8DU1-EA-14H_Edition1 Page34
Thursday, June 5 2014 4:17 PM
Form No.8DU1-EA-14H
Page 37 of 604
Black plate (37,1)
Front Seat Belt Pretensioner
and Load Limiting Systems
For optimum protection, the driver and
front passenger seat belts are equipped
with pretensioner and load limiting
systems. For both these systems to work
properly you must wear the seat belt
properly.
Pretensioners:
The front seat belt retractors remove slack
quickly as the air bags are expanding.
Any time the air bags and seat belt
pretensioners have deployed they must be
replaced.
For deployment details, refer to the SRS
Air Bag Deployment Criteria (page 2-67).
(With Driver and Front Passenger
Occupant Classification System)
In addition, the pretensioner system for
the front passenger, like the front
passenger air bag, is designed to only
deploy in accordance with the total seated
weight on the front passenger seat. For
details, refer to the driver and front
passenger occupant classification system
(page 2-70).
Load limiter:
The load limiting system releases belt
webbing in a controlled manner to reduce
belt force on the occupant's chest. While
the most severe load on a seat belt occurs
in frontal collisions, the load limiter has
an automatic mechanical function and can
activate in any accident mode with
sufficient occupant movement.
Even if the pretensioners have not
deployed, the load limiting function must
be checked by an Authorized Mazda
Dealer.
WARNING
Wear seat belts only as recommended
in this owner's manual:Incorrect positioning of the driver and
front passenger seat belts is
dangerous. Without proper
positioning, the pretensioner and
load limiting systems cannot provide
adequate protection in an accident
and this could result in serious injury.
For more details about wearing seat
belts, refer to “Fastening the seat
belts ”(page 2-23).
Have your seat belts changed
immediately if the pretensioner or load
limiter has been expended: Always have an Authorized Mazda
Dealer immediately inspect the front
seat belt pretensioners and air bags
after any collision. Like the air bags,
the front seat belt pretensioners and
load limiters will only function once
and must be replaced after any
collision that caused them to deploy.
A seat belt with an expended
pretensioner or load limiter is still
better than wearing no seat belt at
all; however, if the front seat belt
pretensioners and load limiters are
not replaced, the risk of injury in a
collision will increase.
Essential Safety Equipment
Seat Belt Systems
2-25
CX-9_8DU1-EA-14H_Edition1 Page37
Thursday, June 5 2014 4:17 PM
Form No.8DU1-EA-14H
Page 43 of 604
Black plate (43,1)
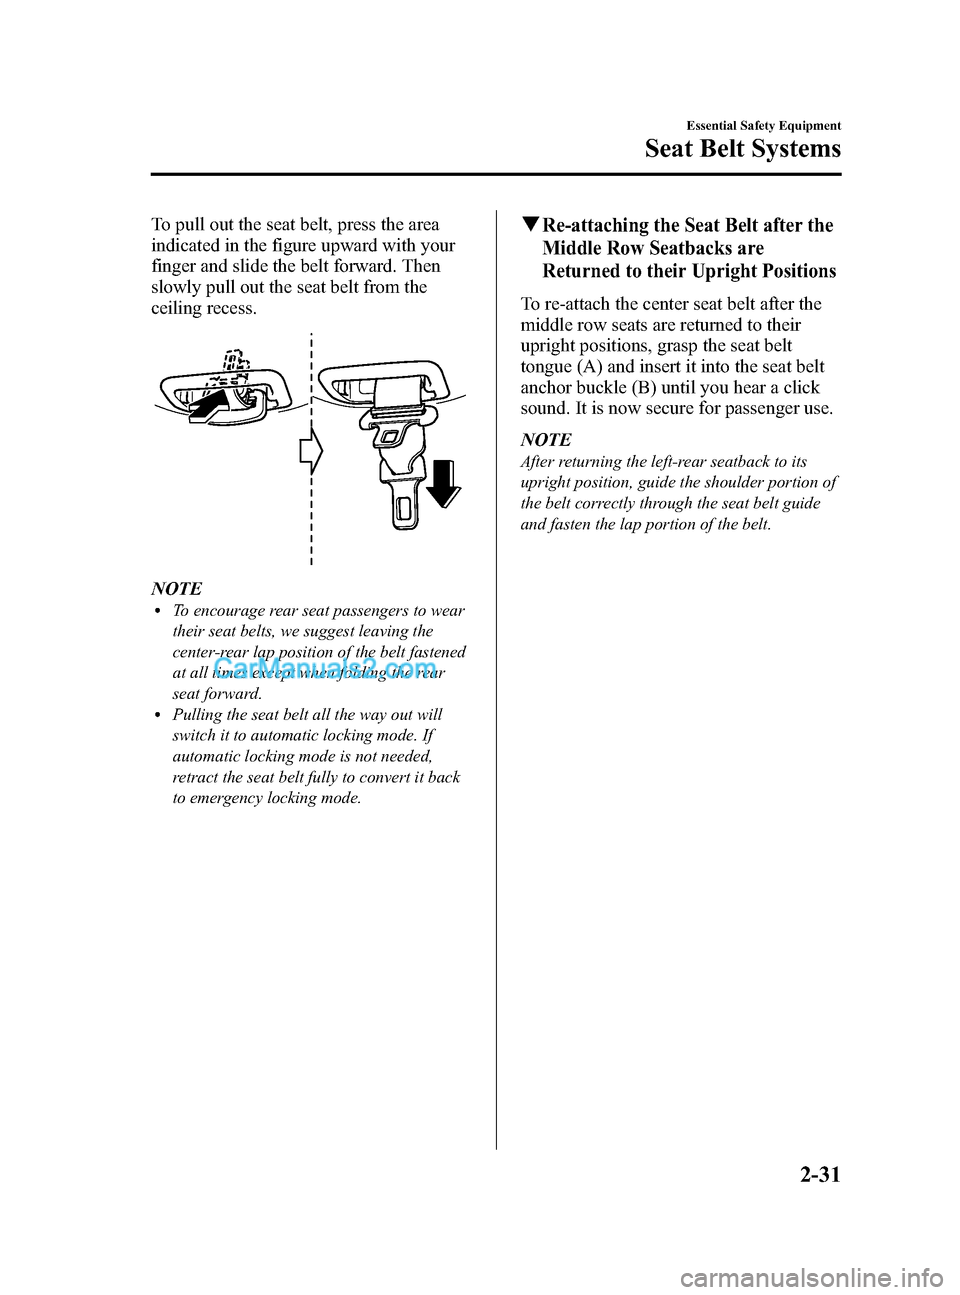
To pull out the seat belt, press the area
indicated in the figure upward with your
finger and slide the belt forward. Then
slowly pull out the seat belt from the
ceiling recess.
NOTElTo encourage rear seat passengers to wear
their seat belts, we suggest leaving the
center-rear lap position of the belt fastened
at all times except when folding the rear
seat forward.
lPulling the seat belt all the way out will
switch it to automatic locking mode. If
automatic locking mode is not needed,
retract the seat belt fully to convert it back
to emergency locking mode.
qRe-attaching the Seat Belt after the
Middle Row Seatbacks are
Returned to their Upright Positions
To re-attach the center seat belt after the
middle row seats are returned to their
upright positions, grasp the seat belt
tongue (A) and insert it into the seat belt
anchor buckle (B) until you hear a click
sound. It is now secure for passenger use.
NOTE
After returning the left-rear seatback to its
upright position, guide the shoulder portion of
the belt correctly through the seat belt guide
and fasten the lap portion of the belt.
Essential Safety Equipment
Seat Belt Systems
2-31
CX-9_8DU1-EA-14H_Edition1 Page43
Thursday, June 5 2014 4:17 PM
Form No.8DU1-EA-14H
Page 53 of 604
Black plate (53,1)
Installing Child-Restraint
Systems
Accident statistics reveal that a child is
safer in the rear seats. The front
passenger's seat is clearly the worst choice
for any child under 12, and with rear-
facing child-restraint systems it is clearly
unsafe due to air bags.
NOTE
Even if your vehicle is equipped with front
passenger seat weight sensors (page 2-70),
which automatically deactivates the front
passenger air bag, a rear seat is the safest
place for a child of any age or size.
Some child-restraint systems now come
with tethers and therefore must be
installed on the seats that take tethers to
be effective. In your Mazda, tethered
child-restraint systems can only be
accommodated in the three positions on
the second-row seats.
Some child-restraint systems also employ
specially designed LATCH attachments;
refer to“LATCH Child-Restraint
Systems ”(page 2-49).
WARNING
Tethered Child-Restraint Systems Work
Only on Tether-Equipped Rear Seats:
Installation of a tether equipped
child-restraint system in the front
passenger's seat or the third-row
seats defeats the safety design of the
system and will result in an increased
chance of serious injury if the child-
restraint system goes forward
without benefit of being tethered.
Place tether equipped child-restraint
systems where there are tether
anchors.
qSecond-Row Seats Child-
Restraint System Installation
Follow these instructions when using a
child-restraint system, unless you are
attaching a LATCH-equipped child-
restraint system to the rear LATCH lower
anchors. Refer to “LATCH Child-
Restraint Systems ”(page 2-49).
NOTE
Follow the child-restraint system
manufacturer's instructions carefully. If you
are not sure whether you have a LATCH
system or tether, check in the child-restraint
system manufacturer's instructions and follow
them accordingly. Depending on the type of
child-restraint system, it may use LATCH
system instead of seat belts or if the belt goes
across the child's chest, may recommend
against using automatic locking mode.
1. When installing the child-restraint system on the second-row seat, make
sure that the center-rear seat belt is
routed through the seat belt guide.
Essential Safety Equipment
Child Restraint
2-41
CX-9_8DU1-EA-14H_Edition1 Page53
Thursday, June 5 2014 4:17 PM
Form No.8DU1-EA-14H
Page 54 of 604

Black plate (54,1)
2. If the seat in which you install a child-restraint system has a seat slide
function, slide the seat as far back as
possible.
3. Make sure the seatback is securely latched by pushing it back until it is
fully locked.
4. Raise the head restraint to the top locked position.
Refer to Head Restraints on page 2-15.
5. Secure the child-restraint system with the lap portion of the lap/shoulder belt.
See the manufacturer's instructions on
the child-restraint system for belt
routing instructions.
6. To get the retractor into the automatic locking mode, pull the shoulder belt
portion of the seat belt until the entire
length of the belt is out of the retractor.7. Push the child-restraint system firmlyinto the vehicle seat. Be sure the belt
retracts as snugly as possible. A
clicking noise from the retractor will be
heard during retraction if the system is
in the automatic locking mode. If the
belt does not lock the seat down tight,
repeat this step.
NOTE
Inspect this function before each use of the
child-restraint system. You should not be able
to pull the shoulder belt out of the retractor
while the system is in the automatic locking
mode. When you remove the child-restraint
system, be sure the belt fully retracts to return
the system to emergency locking mode before
occupants use the seat belts.
8. If your child-restraint system requiresthe use of a tether strap, refer to the
manufacturer's instructions to hook and
tighten the tether strap after raising the
head restraint.
2-42
Essential Safety Equipment
Child Restraint
CX-9_8DU1-EA-14H_Edition1 Page54
Thursday, June 5 2014 4:17 PM
Form No.8DU1-EA-14H