change time MAZDA MODEL CX-9 2017 (in English) User Guide
[x] Cancel search | Manufacturer: MAZDA, Model Year: 2017, Model line: MODEL CX-9, Model: MAZDA MODEL CX-9 2017Pages: 612
Page 107 of 612

3–25
Before Driving
Doors and Locks
NOTE
If the power liftgate switch/power liftgate
close switch is pressed or the electric
liftgate opener is operated while the
liftgate is opening/closing electrically, the
beep sound is heard and the liftgate stops.
Then, it reverses when any of the switches
are pressed again.
Changing the power liftgate fully open
position
The power liftgate fully-open position can
be changed according to the height of a
garage.
When changing the position
1. Stop the liftgate at the desired position.
2. Press the power liftgate close switch
for about three seconds.
A beep sound is activated two times to
indicate that the position change has
been completed.
NOTE
Set the desired fully-open position of the
liftgate at the position where it is open
more than halfway. The position where it
is less than halfway open cannot be set.
To reset
1. Open the liftgate.
2. Press the power liftgate close switch
for about seven seconds.
A beep sound is activated three times
to indicated that the reset has been
completed.
NOTE
After about 3 seconds have elapsed since
the switch was pressed, a beep sound
is activated 2 times to indicate that the
liftgate fully-open position has changed.
Continuously press the switch for about
7 seconds to complete the reset.
Jam-safe equipment
While the power liftgate is opening/
closing electrically and the system detects
a person or an object in the liftgate's
path, the liftgate will move in the reverse
direction automatically and stops.
WARNING
Always check the area around the
power liftgate before opening/closing it:
Not checking for occupants and
objects around the power liftgate
before opening/closing it is dangerous.
The jam-safe equipment is designed
to prevent jamming in the event an
obstruction is in the liftgate's path. The
system may not detect certain objects
obstructing the liftgate depending
on the way they are positioned and
their shape. However, if the jam-safe
function detects an obstruction and
moves the liftgate in the reverse
direction, an occupant in the liftgate's
path could be seriously injured.
CX-9_8FS7-EA-16K_Edition2.indb 25CX-9_8FS7-EA-16K_Edition2.indb 252016/12/15 18:33:132016/12/15 18:33:13
Page 144 of 612

3–62
Before Driving
Towing
Trailer Towing Tips
Verify that your Mazda maintains a near-normal attitude when a loaded or unloaded trailer
is connected. Do not drive if it has an abnormal front-up or front-down position. Inspect
for incorrect tongue load, worn suspension parts, and trailer overloading.
Make sure the trailer is properly loaded and the cargo is secure to prevent it from shifting.
Make sure the mirrors conform to all government regulations. If they do not, install
required rear view mirrors appropriate for towing purposes.
The three main causes of vehicle-trailer accidents are driver error, excessive speed, and
improper trailer loading.
Before driving
Have your cooling and braking system checked by an Authorized Mazda Dealer.
Before starting out, inspect the operation of all vehicle and trailer lights and all vehicle-
to-trailer connections. Stop and re-inspect all lights and connections after driving a short
distance.
Driving
Your Mazda will handle differently with a trailer in tow, so practice turning, backing, and
stopping in a traffi c-free area.
Take time to get accustomed to the extra weight and length.
Allow more room between your vehicle and the one in front because braking distance
increases with a trailer. For each 16 km/h (10 mph) of speed, allow at least one vehicle
and trailer length between your Mazda and the vehicle ahead.
Avoid jerky starts or sudden acceleration.
Avoid sudden braking. It may cause loss of control and result in jackknifi ng, especially so
on wet or slippery roads.
Shift the shift lever to the D position when towing a trailer in hilly terrain or when heavily
loaded.
The D position will allow operating the vehicle without frequent shifting.
Lane changes and turning
Avoid quick lane changes, sudden turns, and tight turns. Slow down before turning to avoid
the need of sudden braking.
A turning trailer will make a tighter arc than the tow vehicle. Compensate with turns that are
larger than normal.
CX-9_8FS7-EA-16K_Edition2.indb 62CX-9_8FS7-EA-16K_Edition2.indb 622016/12/15 18:33:292016/12/15 18:33:29
Page 166 of 612

4–18
When Driving
Instrument Cluster and Display
Function for cancelling illumination
dimmer
The illumination dimmer can be canceled
by rotating the dashboard illumination
knob to the right until a beep sound is
heard while the instrument cluster is
dimmed with the ignition switched ON.
If the instrument cluster's visibility is
reduced due to glare from surrounding
brightness, cancel the illumination
dimmer.
NOTE
(With Multi-information Display)
The illumination dimmer can be
canceled by pressing the dashboard
illumination knob.
When the illumination dimmer is
canceled, the instrument cluster cannot
be dimmed even if the position lights are
turned on.
When the illumination dimmer is
canceled, the screen in the center
display switches to constant display of
the daytime screen.
Outside Temperature Display
(Without Multi-information
Display)
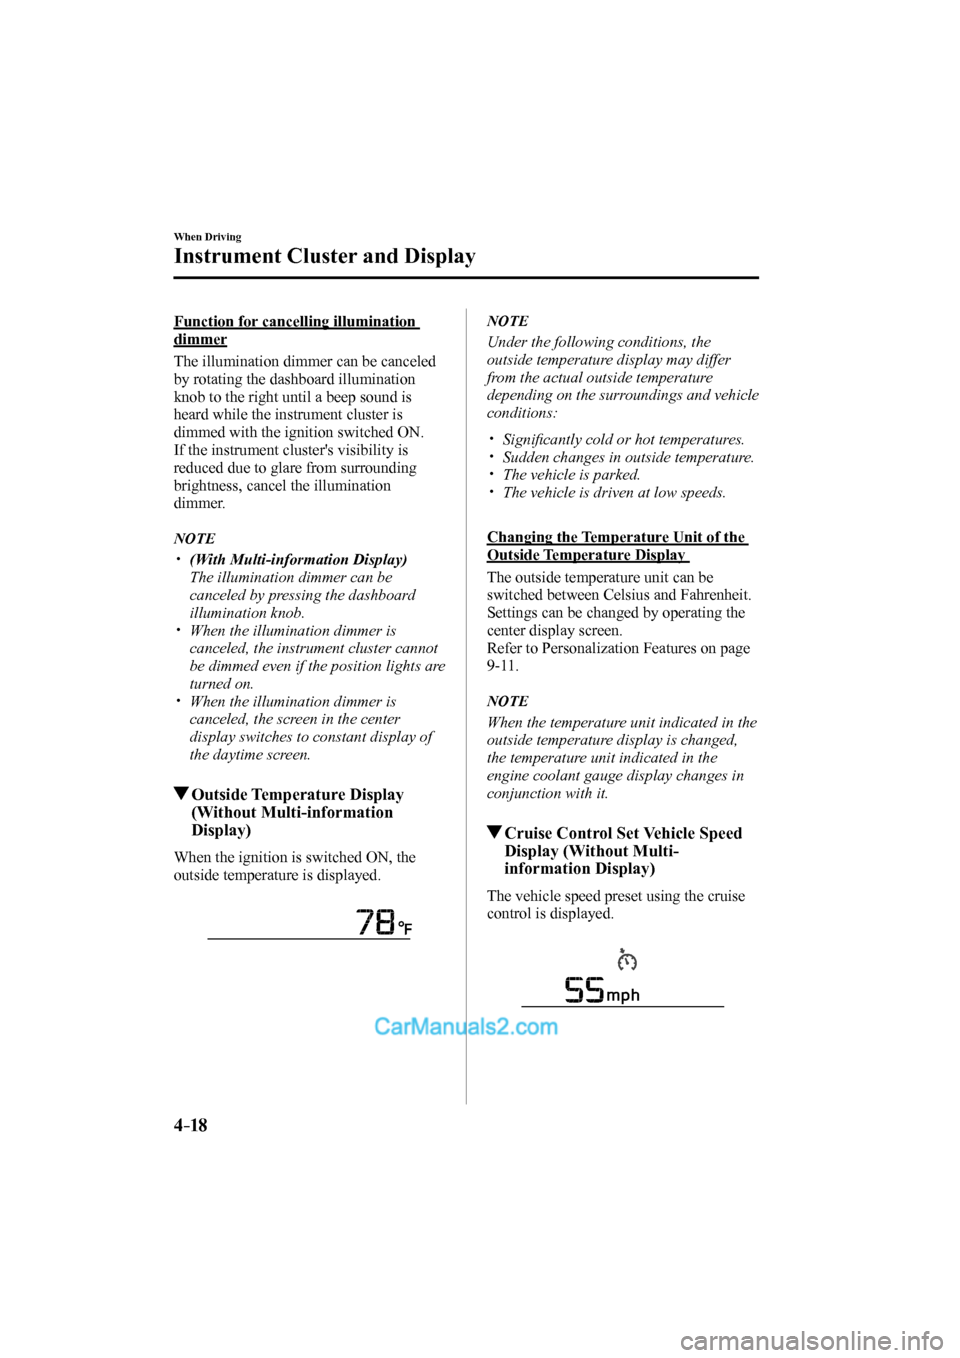
When the ignition is switched ON, the
outside temperature is displayed.
NOTE
Under the following conditions, the
outside temperature display may differ
from the actual outside temperature
depending on the surroundings and vehicle
conditions:
Signifi cantly cold or hot temperatures.
Sudden changes in outside temperature.
The vehicle is parked.
The vehicle is driven at low speeds.
Changing the Temperature Unit of the
Outside Temperature Display
The outside temperature unit can be
switched between Celsius and Fahrenheit.
Settings can be changed by operating the
center display screen.
Refer to Personalization Features on page
9-11 .
NOTE
When the temperature unit indicated in the
outside temperature display is changed,
the temperature unit indicated in the
engine coolant gauge display changes in
conjunction with it.
Cruise Control Set Vehicle Speed
Display (Without Multi-
information Display)
The vehicle speed preset using the cruise
control is displayed.
CX-9_8FS7-EA-16K_Edition2.indb 18CX-9_8FS7-EA-16K_Edition2.indb 182016/12/15 18:33:382016/12/15 18:33:38
Page 170 of 612

4–22
When Driving
Instrument Cluster and Display
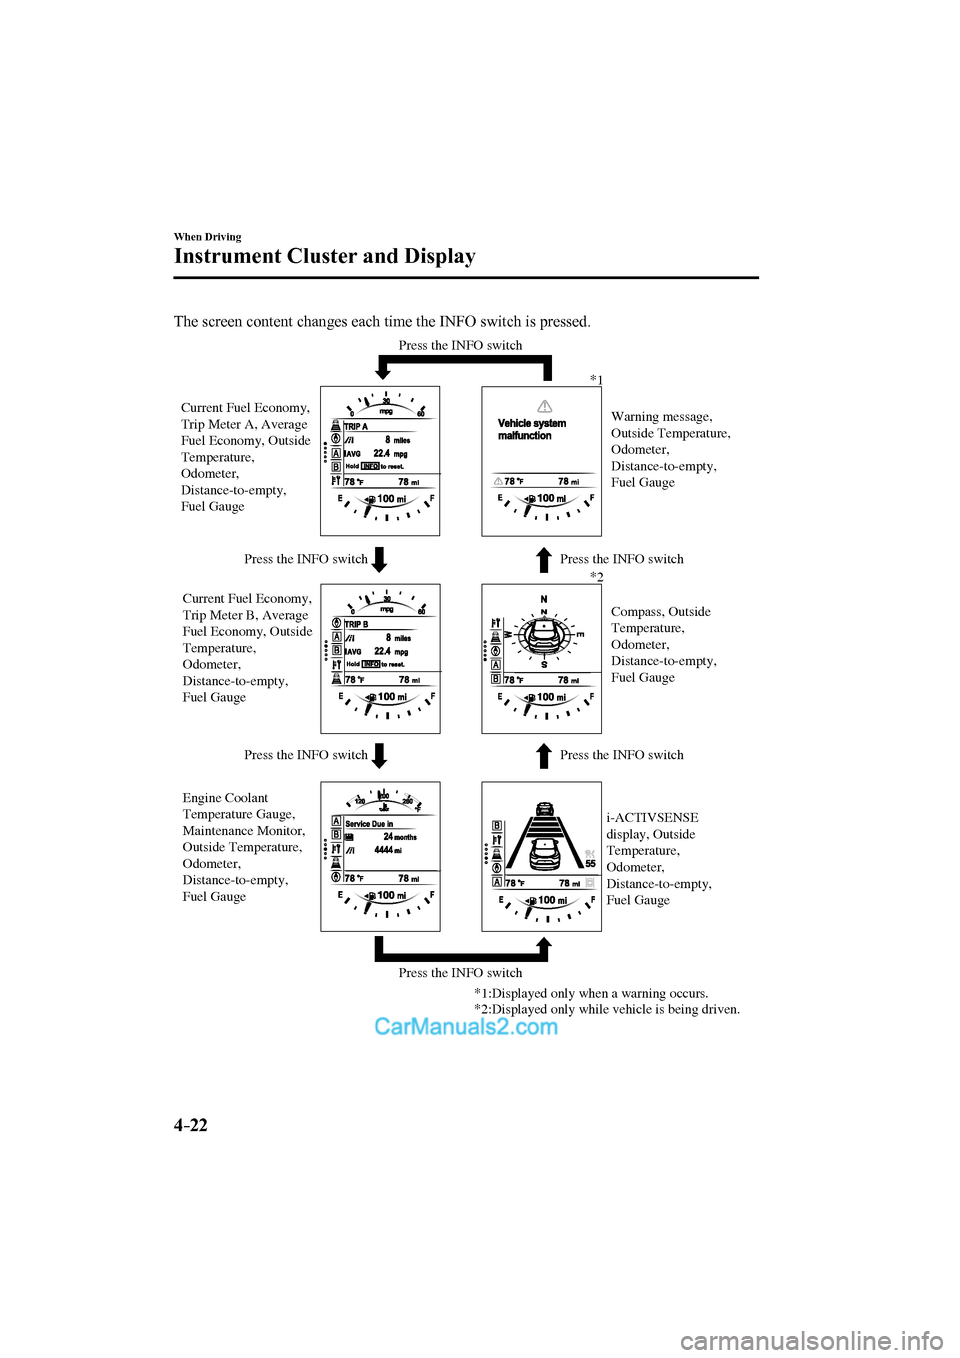
The screen content changes each time the INFO switch is pressed.
Press the INFO switch Press the INFO switch
Press the INFO switch Press the INFO switch
Press the INFO switch Press the INFO switch
Current Fuel Economy,
Trip Meter A, Average
Fuel Economy, Outside
Temperature,
Odometer,
Distance-to-empty,
Fuel Gauge
Current Fuel Economy,
Trip Meter B, Average
Fuel Economy, Outside
Temperature,
Odometer,
Distance-to-empty,
Fuel Gauge
Engine Coolant
Temperature Gauge,
Maintenance Monitor,
Outside Temperature,
Odometer,
Distance-to-empty,
Fuel Gaugei-ACTIVSENSE
display, Outside
Temperature,
Odometer,
Distance-to-empty,
Fuel GaugeCompass, Outside
Temperature,
Odometer,
Distance-to-empty,
Fuel Gauge Warning message,
Outside Temperature,
Odometer,
Distance-to-empty,
Fuel Gauge *1
*2
*1:Displayed only when a warning occurs.
*2:Displayed only while vehicle is being driven.
CX-9_8FS7-EA-16K_Edition2.indb 22CX-9_8FS7-EA-16K_Edition2.indb 222016/12/15 18:33:402016/12/15 18:33:40
Page 172 of 612

4–24
When Driving
Instrument Cluster and Display
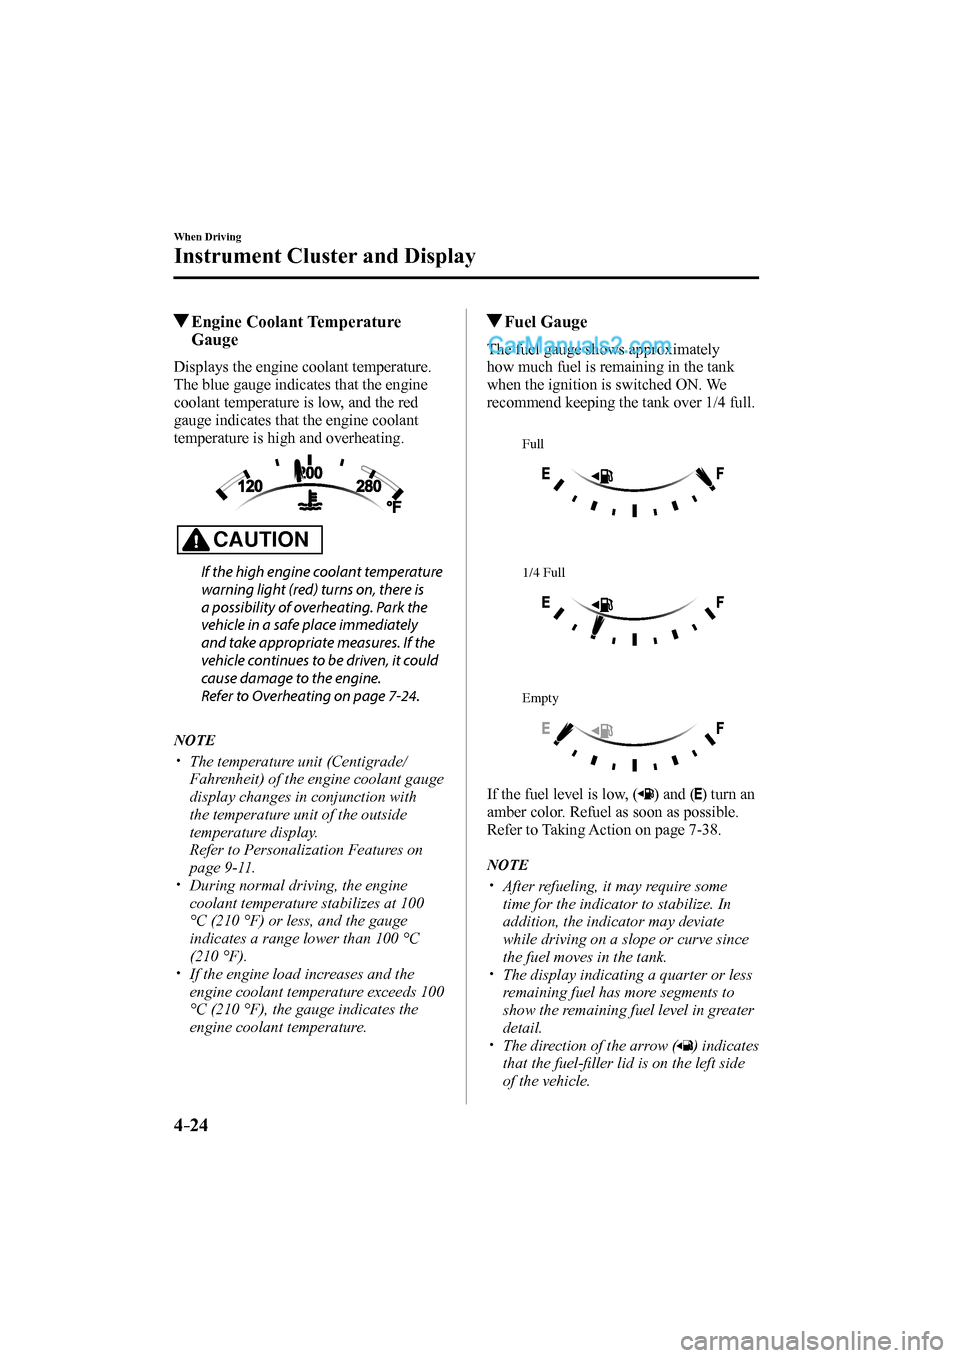
Engine Coolant Temperature
Gauge
Displays the engine coolant temperature.
The blue gauge indicates that the engine
coolant temperature is low, and the red
gauge indicates that the engine coolant
temperature is high and overheating.
CAUTION
If the high engine coolant temperature
warning light (red) turns on, there is
a possibility of overheating. Park the
vehicle in a safe place immediately
and take appropriate measures. If the
vehicle continues to be driven, it could
cause damage to the engine.
Refer to Overheating on page 7-24 .
NOTE
The temperature unit (Centigrade/
Fahrenheit) of the engine coolant gauge
display changes in conjunction with
the temperature unit of the outside
temperature display.
Refer to Personalization Features on
page 9-11 .
During normal driving, the engine
coolant temperature stabilizes at 100
°C (210 °F) or less, and the gauge
indicates a range lower than 100 °C
(210 °F).
If the engine load increases and the
engine coolant temperature exceeds 100
°C (210 °F), the gauge indicates the
engine coolant temperature.
Fuel Gauge
The fuel gauge shows approximately
how much fuel is remaining in the tank
when the ignition is switched ON. We
recommend keeping the tank over 1/4 full.
Full
1/4 Full
Empty
If the fuel level is low, (
) and ( ) turn an
amber color. Refuel as soon as possible.
Refer to Taking Action on page 7-38 .
NOTE
After refueling, it may require some
time for the indicator to stabilize. In
addition, the indicator may deviate
while driving on a slope or curve since
the fuel moves in the tank.
The display indicating a quarter or less
remaining fuel has more segments to
show the remaining fuel level in greater
detail.
The direction of the arrow ( ) indicates
that the fuel-fi ller lid is on the left side
of the vehicle.
CX-9_8FS7-EA-16K_Edition2.indb 24CX-9_8FS7-EA-16K_Edition2.indb 242016/12/15 18:33:412016/12/15 18:33:41
Page 174 of 612

4–26
When Driving
Instrument Cluster and Display
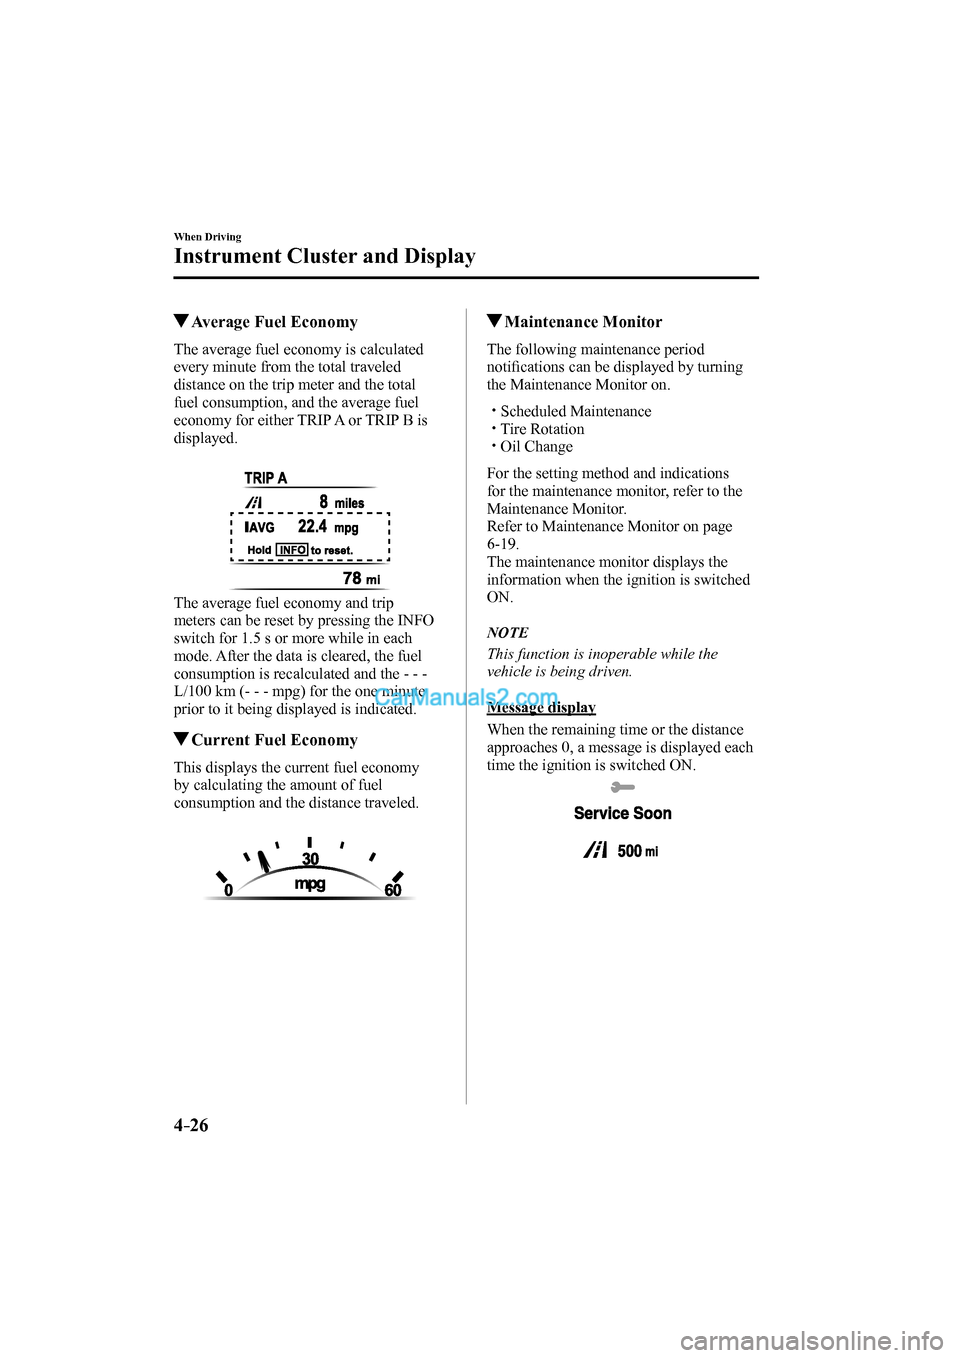
Average Fuel Economy
The average fuel economy is calculated
every minute from the total traveled
distance on the trip meter and the total
fuel consumption, and the average fuel
economy for either TRIP A or TRIP B is
displayed.
The average fuel economy and trip
meters can be reset by pressing the INFO
switch for 1.5 s or more while in each
mode. After the data is cleared, the fuel
consumption is recalculated and the - - -
L/100 km (- - - mpg) for the one minute
prior to it being displayed is indicated.
Current Fuel Economy
This displays the current fuel economy
by calculating the amount of fuel
consumption and the distance traveled.
Maintenance Monitor
The following maintenance period
notifi cations can be displayed by turning
the Maintenance Monitor on.
Scheduled Maintenance
Tire Rotation
Oil Change
For the setting method and indications
for the maintenance monitor, refer to the
Maintenance Monitor.
Refer to Maintenance Monitor on page
6-19 .
The maintenance monitor displays the
information when the ignition is switched
ON.
NOTE
This function is inoperable while the
vehicle is being driven.
Message display
When the remaining time or the distance
approaches 0, a message is displayed each
time the ignition is switched ON.
CX-9_8FS7-EA-16K_Edition2.indb 26CX-9_8FS7-EA-16K_Edition2.indb 262016/12/15 18:33:432016/12/15 18:33:43
Page 196 of 612

4–48
When Driving
Switches and Controls
Lighting Control
Headlights
Turn the headlight switch to turn the headlights and other exterior lights on or off.
When the lights are turned on, the lights-on indicator light in the instrument cluster turns on.
NOTE
If the light switch is left on, the lights will automatically switch off approximately 30
seconds after switching the ignition off.
The time setting can be changed.
Refer to Personalization Features on page 9-11 .
To prevent discharging the battery, do not leave the lights on while the engine is off unless
safety requires them.
CX-9_8FS7-EA-16K_Edition2.indb 48CX-9_8FS7-EA-16K_Edition2.indb 482016/12/15 18:33:562016/12/15 18:33:56
Page 199 of 612

4–51
When Driving
Switches and Controls
*Some models.
Auto-light control *
When the headlight switch is in the
position and the ignition is switched ON, the light
sensor senses the surrounding lightness or darkness and automatically turns the headlights
and other exterior lights on or off.
CAUTION
Do not shade the light sensor by adhering a sticker or a label on the windshield. Otherwise
the light sensor will not operate correctly.
The light sensor also works as a rain sensor for the auto-wiper control. Keep hands and
scrapers clear of the windshield when the wiper lever is in the
position and the
ignition is switched ON as fi ngers could be pinched or the wipers and wiper blades could be
damaged when the wipers activate automatically. If you are going to clean the windshield,
be sure the wipers are turned off completely when it is particularly tempting to leave the
engine running. This is particularly important when clearing ice and snow.
NOTE
The headlights and other exterior lights may not turn off immediately even if the
surrounding area becomes well-lit because the light sensor determines that it is night
time if the surrounding area is continuously dark for several minutes such as inside long
tunnels, traffi c jams inside tunnels, or in indoor parking lots.
In this case, the lights turn off if the light switch is turned to the position.
If the headlight switch and the windshield wiper switch are in , and the wipers are
operated at low or high speed by the auto wiper control for several seconds, bad weather
conditions are determined and the headlights may be turned on.
The sensitivity of the auto-light control may be changed.
Refer to Personalization Features on page 9-11 .
CX-9_8FS7-EA-16K_Edition2.indb 51CX-9_8FS7-EA-16K_Edition2.indb 512016/12/15 18:33:572016/12/15 18:33:57
Page 200 of 612

4–52
When Driving
Switches and Controls
Headlight High-Low Beam
The headlights switch between high and
low beams by moving the lever forward or
backward.
High beam
Low beam
When the headlight high-beams are on,
the headlight high-beam indicator light is
turned on.
Flashing the Headlights
Can be used when the ignition is switched
ON.
T o fl ash the headlights, pull the lever fully
towards you (the headlight switch does not
need to be on).
OFF
Headlight
flashing
The headlight high-beam indicator light
in the instrument cluster illuminates
simultaneously. The lever will return to the
normal position when released.
Coming Home Light
The coming home light turns on the
headlights (low beams) when the lever is
operated.
To turn on the lights
When the lever is pulled with the ignition
switched to ACC or OFF, the low beam
headlights turn on.
The headlights turn off after a certain
period of time has elapsed after the doors
are closed.
NOTE
The time until the headlights turn off
after all of the doors are closed can be
changed.
Refer to Personalization Features on
page 9-11 .
If no operations are done for 3 minutes
after the lever is pulled, the headlights
turn off.
The headlights turn off if the lever is
pulled again while the headlights are
illuminated.
CX-9_8FS7-EA-16K_Edition2.indb 52CX-9_8FS7-EA-16K_Edition2.indb 522016/12/15 18:33:582016/12/15 18:33:58
Page 201 of 612

4–53
When Driving
Switches and Controls
Leaving Home Light
The leaving home light turns on the lights
when the transmitter unlock button is
pressed while away from the vehicle.
The following lights turn on when the
leaving home light is operated.
Low beams, Parking lights, Taillights,
License lights.
To turn on the lights
When the ignition switch and the headlight
switch are in the following conditions,
the headlights will illuminate when the
transmitter unlock button is pressed and
the vehicle receives the transmitter signal.
The headlights turn off after a certain
period of time has elapsed (30 seconds).
Ignition switch: off
Headlight switch: , , or
Lock button
Unlock
button
NOTE
Operation of the leaving home light can
be turned on or off.
Refer to Personalization Features on
page 9-11 .
When the transmitter lock button is
pressed and the vehicle receives the
transmitter signal, the headlights turn
off.
When the headlight switch is turned to
the
position, the headlights turn off.
Headlight Leveling
The number of passengers and weight of
cargo in the luggage compartment change
the angle of the headlights.
The angle of the headlights will be
automatically adjusted when turning on
the headlights.
Daytime Running Lights
Some countries require moving vehicles
to have their lights on (daytime running
lights) during the daytime.
The daytime running lights turn on when
the vehicle is driven and turn off when the
parking brake is operated or the selector
lever is shifted to the P position.
NOTE
(Except Canada)
The daytime running lights can be
deactivated.
Refer to Personalization Features on page
9-11 .
CX-9_8FS7-EA-16K_Edition2.indb 53CX-9_8FS7-EA-16K_Edition2.indb 532016/12/15 18:33:592016/12/15 18:33:59