set clock MAZDA MODEL CX-9 2020 Owners Manual (in English)
[x] Cancel search | Manufacturer: MAZDA, Model Year: 2020, Model line: MODEL CX-9, Model: MAZDA MODEL CX-9 2020Pages: 706
Page 411 of 706
Front Air Conditioner
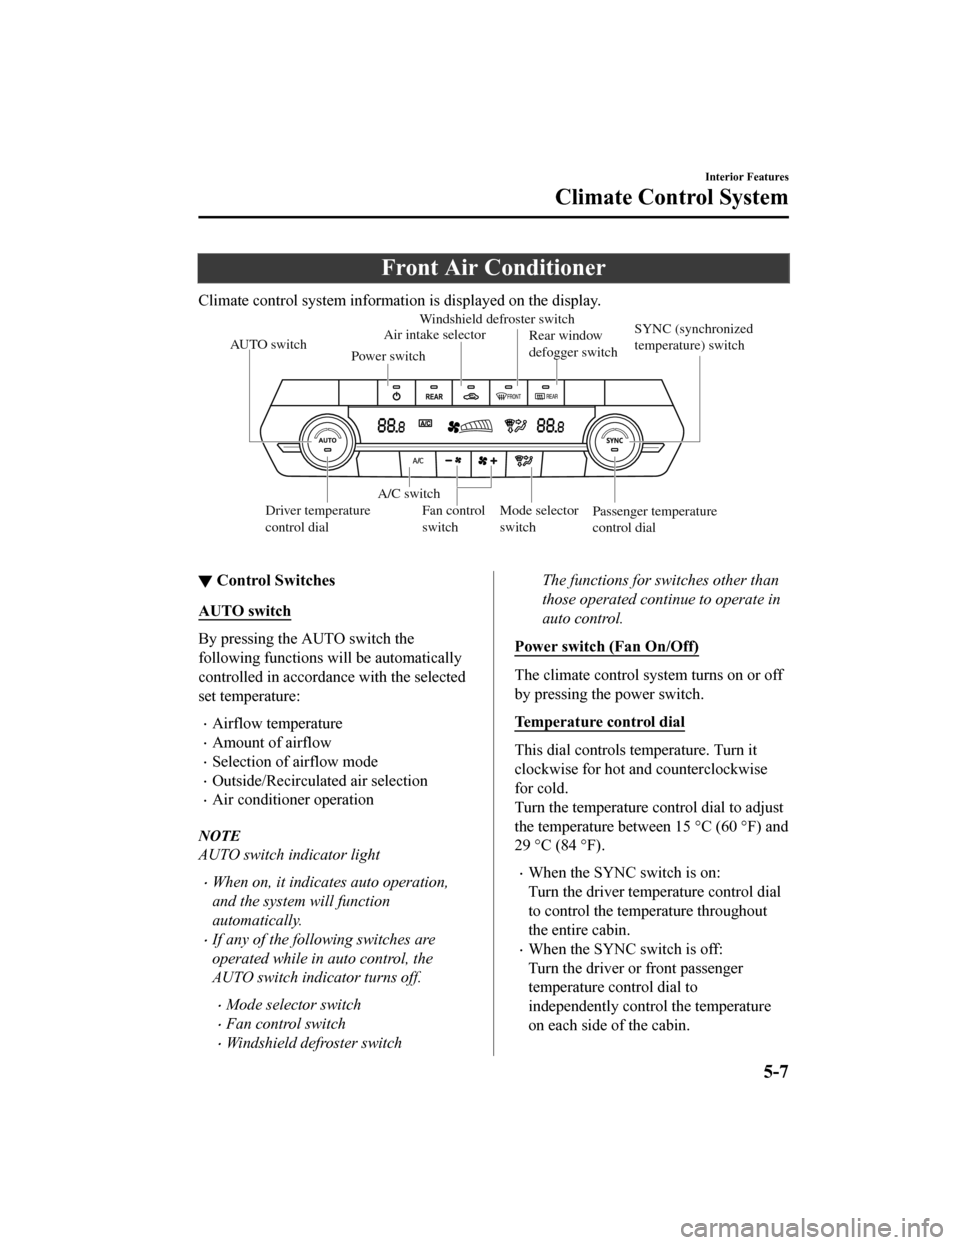
Climate control system information is displayed on the display.
AUTO switchSYNC (synchronized
temperature) switch
Passenger temperature
control dial
Driver temperature
control dial Rear window
defogger switch
Windshield defroster switch
Air intake selector
A/C switch
Power switch
Mode selector
switch
Fan control
switch
▼
Control Switches
AUTO switch
By pressing the AUTO switch the
following functions will be automatically
controlled in accordance with the selected
set temperature:
Airflow temperature
Amount of airflow
Selection of airflow mode
Outside/Recirculated air selection
Air conditioner operation
NOTE
AUTO switch indicator light
When on, it indicates auto operation,
and the system will function
automatically.
If any of the following switches are
operated while in auto control, the
AUTO switch indicator turns off.
Mode selector switch
Fan control switch
Windshield defroster switch
The functions for switches other than
those operated continue to operate in
auto control.
Power switch (Fan On/Off)
The climate control system turns on or off
by pressing the power switch.
Temperature control dial
This dial controls temperature. Turn it
clockwise for hot and counterclockwise
for cold.
Turn the temperature c ontrol dial to adjust
the temperature between 15 °C (60 °F) and
29 °C (84 °F).
When the SYNC switch is on:
Turn the driver temperature control dial
to control the temperature throughout
the entire cabin.
When the SYNC switch is off:
Turn the driver or front passenger
temperature control dial to
independently control the temperature
on each side of the cabin.
Interior Features
Climate Control System
5-7
CX-9_8HT8-EA-19I_Edition2_old 2019-9-24 13:14:55
Page 424 of 706
Basic Operation Method
NOTE
The explanation of functions described in this manual may differ from the actual
operation, and the shapes of screens and buttons and the letters and characters displayed
may also differ from the actual appearance.
Additionally, depending on future software updates, the content may successively change
without notice.
For additional information regarding Mazda Connect, please refer to the following
Website.
http://infotainment.mazdahandsfree.com/
Audio Set has 3 different human interfaces.
Commander switch
Touch panel
Voice recognition with steering switch and microphone
Refer to Voice Recognition on page 5-75.
▼ Commander switch operation
NOTE
For safety reasons, some operations are disabled while the vehicle is being driven.
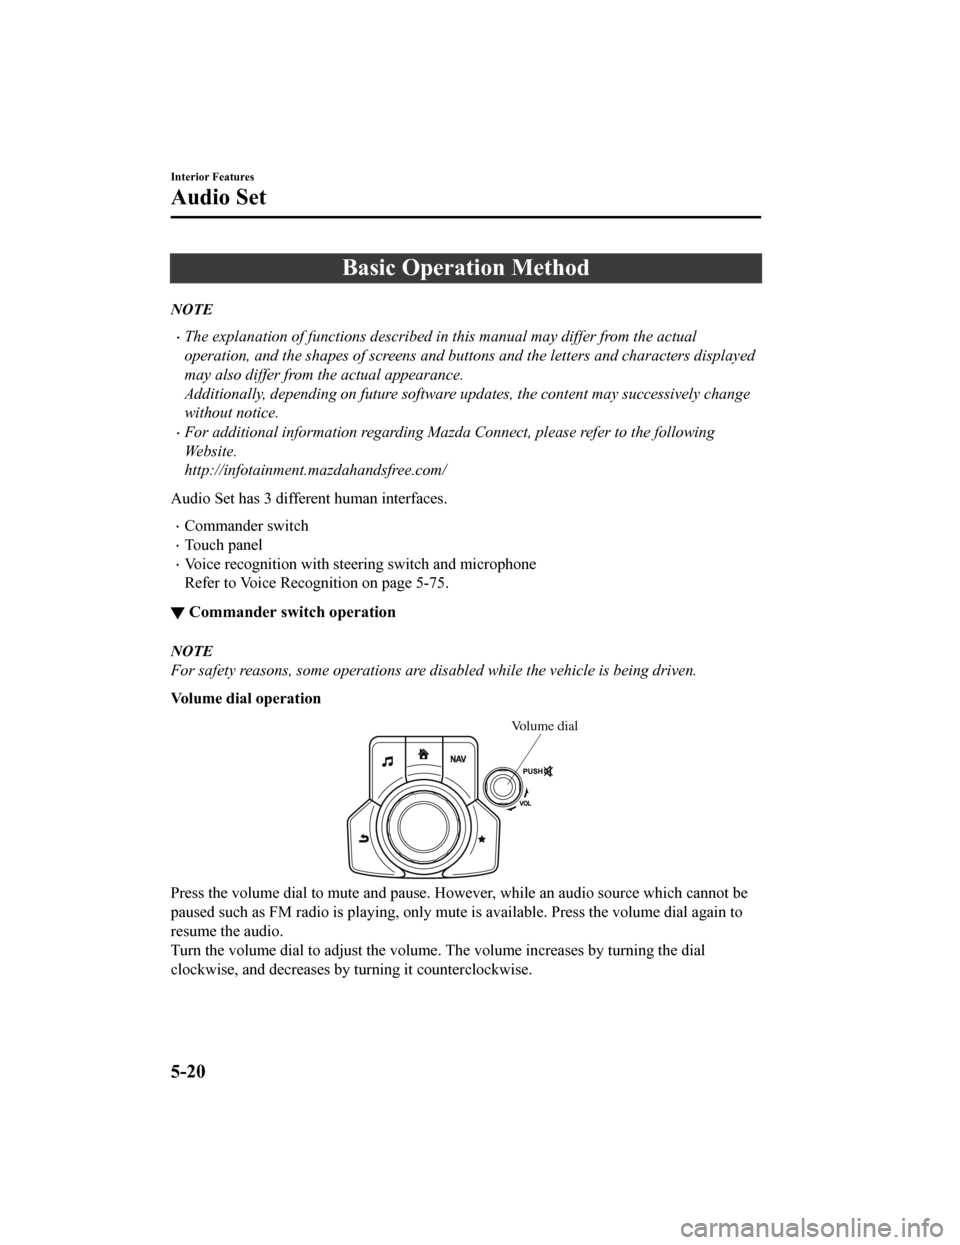
Volume dial operation
Volume dial
Press the volume dial to mute and pause. However, while an audio source which cannot be
paused such as FM radio is playing, only mute
is available. Press the volume dial again to
resume the audio.
Turn the volume dial to adjust the volume. The volume increases by turning the dial
clockwise, and decreases by turning it counterclockwise.
Interior Features
Audio Set
5-20
CX-9_8HT8-EA-19I_Edition2_old 2019-9-24 13:14:55
Page 429 of 706
Volume/Display/Sound Controls
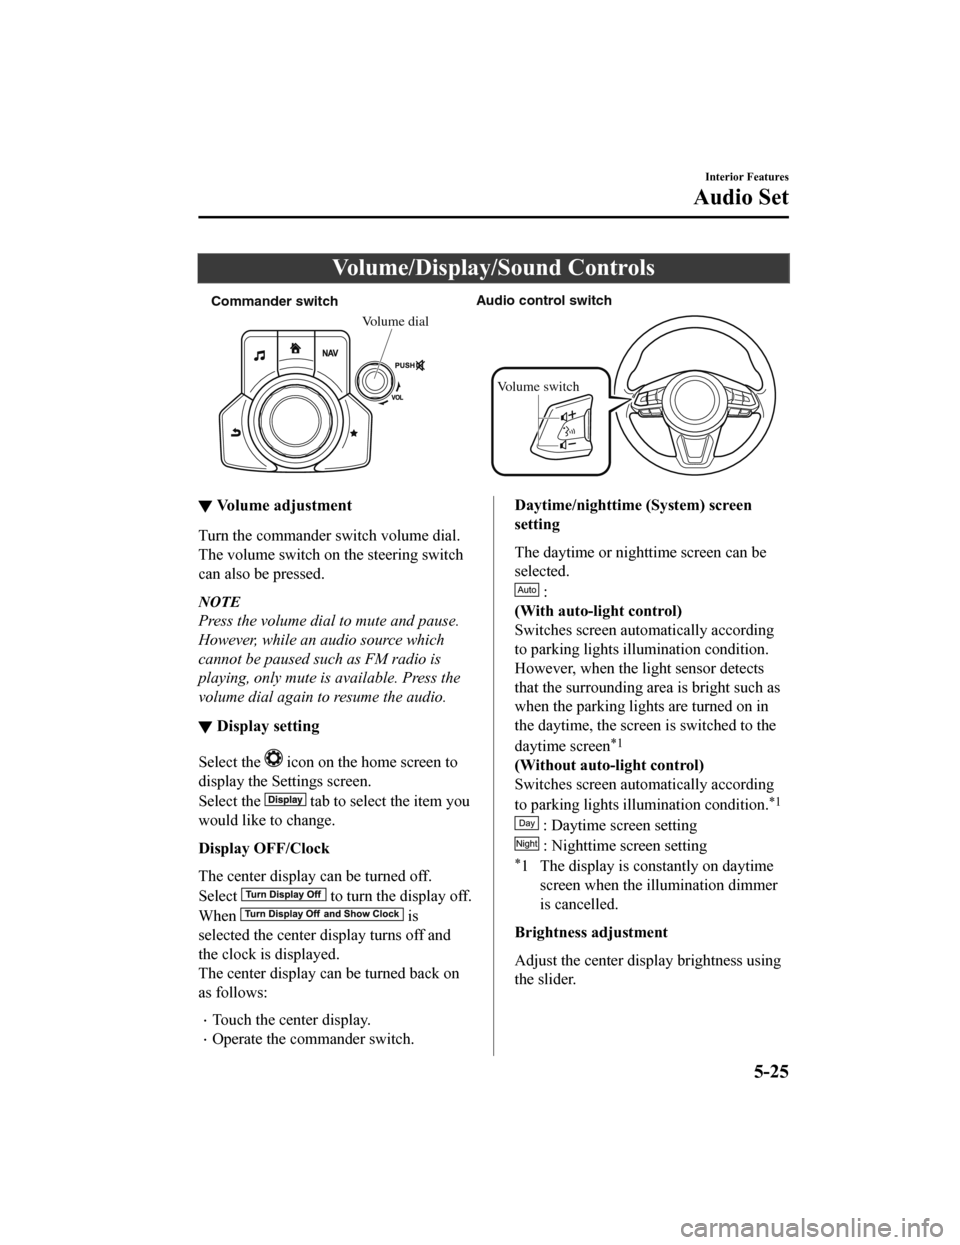
Commander switchAudio control switch
Volume dial
Volume switch
▼ Vo l u m e a d j u s t m e n t
Turn the commander switch volume dial.
The volume switch on the steering switch
can also be pressed.
NOTE
Press the volume dial to mute and pause.
However, while an audio source which
cannot be paused such as FM radio is
playing, only mute is available. Press the
volume dial again to resume the audio.
▼Display setting
Select the icon on the home screen to
display the Settings screen.
Select the
tab to select the item you
would like to change.
Display OFF/Clock
The center display can be turned off.
Select
to turn the display off.
When
is
selected the center display turns off and
the clock is displayed.
The center display can be turned back on
as follows:
Touch the center display.
Operate the commander switch.
Daytime/nighttime (System) screen
setting
The daytime or night time screen can be
selected.
:
(With auto-light control)
Switches screen auto matically according
to parking lights il lumination condition.
However, when the light sensor detects
that the surrounding area is bright such as
when the parking lights are turned on in
the daytime, the screen is switched to the
daytime screen
*1
(Without auto-light control)
Switches screen auto matically according
to parking lights il lumination condition.
*1
: Daytime screen setting
: Nighttime screen setting
*1 The display is constantly on daytime
screen when the illumination dimmer
is cancelled.
Brightness adjustment
Adjust the center disp lay brightness using
the slider.
Interior Features
Audio Set
5-25
CX-9_8HT8-EA-19I_Edition2_old 2019-9-24 13:14:55
Page 482 of 706
Settings
NOTE
Depending on the grade and specification, the screen display may differ.
Select the
icon on the home screen and display the Settings screen.
Switch the tab and select the setting item you want to change.
You can customize settings in the setup display as follows:
Tab Item Function
AD-Disp Height
Brightness Control
Other
Refer to Active Driving Display on page 4-56.
Display Refer to Volume/Display /Sound Controls on page 5-25.
Safety Distance Recognition Support System
SBS/SCBS
Other Refer to Personalization Features on page
9-9.
Sound Refer to Volume/Display/Sound Controls on page 5-25.
Clock Adjust Time
Displays the currently
set time is displayed.
Press
to advance the hour/minute, and select to move the hour/minute back.
AM/PM can only be sel ected with the 12-hour
clock display.
GPS Sync Synchronizes with GPS when turned on.
When turned off, the time can be changed
from “Adjust Time”.
Time Format Changes the display between 12 and 24-hour
clock time.
Time Zone Select When it's not synchron
ized with GPS, select
the region you want to specify.
Daylight Savings Time Turns the daylight savi
ng time setting on/off.
When ON, the time advances 1 hour. When
OFF, it returns to normal time.
Ve h i c l e Rain Sensing Wiper
Door Locks
Other Refer to Personalization Features on page
9-9.
Interior Features
Audio Set
5-78
CX-9_8HT8-EA-19I_Edition2_old
2019-9-24 13:14:55
Page 586 of 706
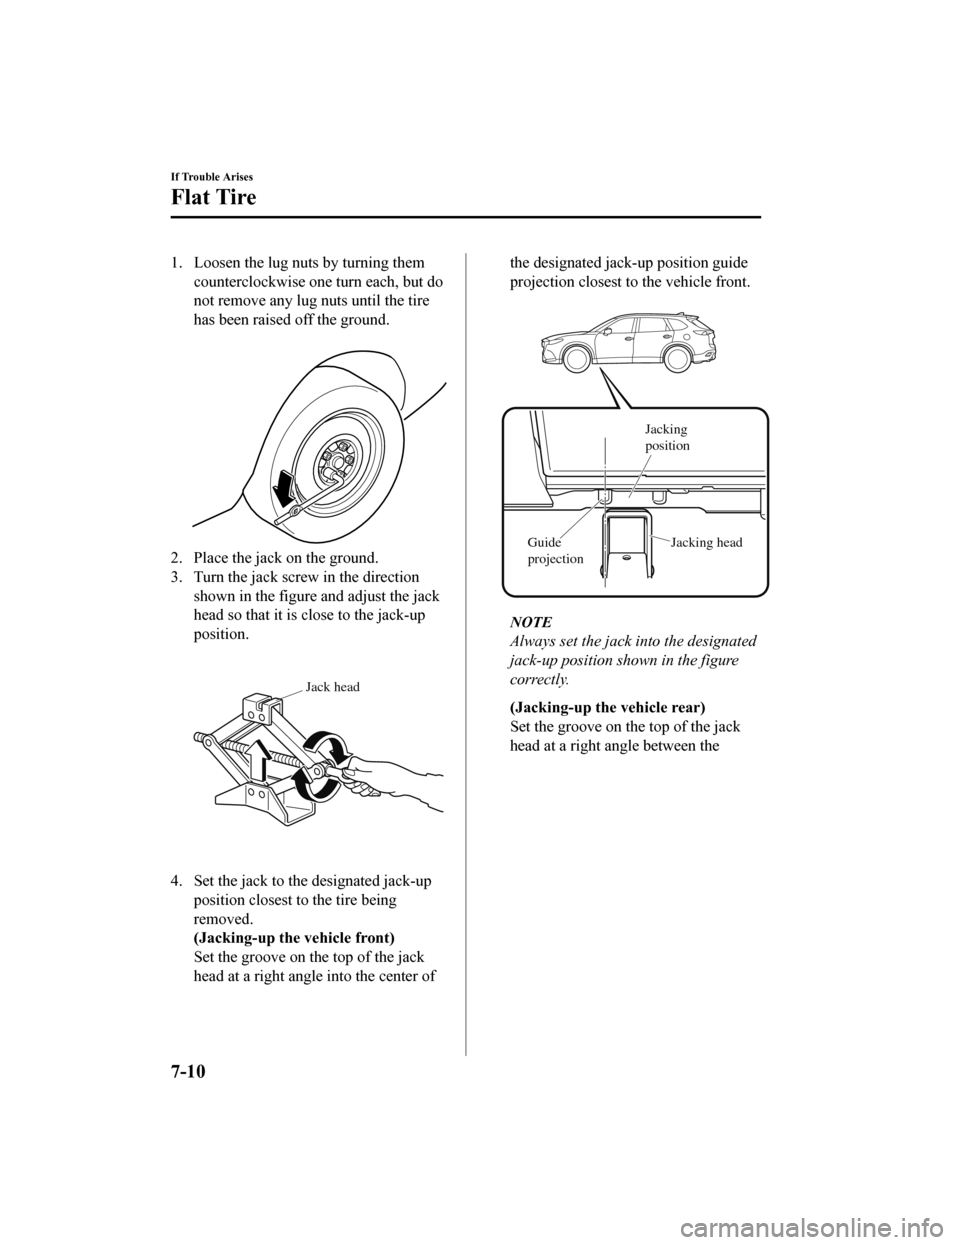
1. Loosen the lug nuts by turning themcounterclockwise one turn each, but do
not remove any lug nuts until the tire
has been raised off the ground.
2. Place the jack on the ground.
3. Turn the jack screw in the directionshown in the figure and adjust the jack
head so that it is close to the jack-up
position.
Jack head
4. Set the jack to the designated jack-upposition closest to the tire being
removed.
(Jacking-up the vehicle front)
Set the groove on the top of the jack
head at a right angle into the center of
the designated jack-up position guide
projection closest to the vehicle front.
Jacking
position
Jacking head
Guide
projection
NOTE
Always set the jack into the designated
jack-up position shown in the figure
correctly.
(Jacking-up the vehicle rear)
Set the groove on the top of the jack
head at a right angle between the
If Trouble Arises
Flat Tire
7-10
CX-9_8HT8-EA-19I_Edition2_old 2019-9-24 13:14:55