set clock MAZDA MODEL CX-9 2022 Owners Manual
[x] Cancel search | Manufacturer: MAZDA, Model Year: 2022, Model line: MODEL CX-9, Model: MAZDA MODEL CX-9 2022Pages: 715, PDF Size: 81.06 MB
Page 450 of 715

Front Air Conditioner
Climate control system information is displayed on the display.
AUTO switchSYNC (synchronized
temperature) switch
Passenger temperature
control dial
Driver temperature
control dial Rear window
defogger switch
Windshield defroster switch
Air intake selector
A/C switch
Power switch
Mode selector
switch
Fan control
switch
▼
Control Switches
AUTO switch
By pressing the AUTO switch the
following functions will be automatically
controlled in accordan
ce with the selected
set temperature:
Airflow temperature
Amount of airflow
Selection of airflow mode
Outside/Recirculated air selection
Air conditioner operation
NOTE
AUTO switch indicator light
When on, it indicates auto operation,
and the system will function
automatically.
If any of the following switches are
operated while in auto control, the
AUTO switch indicator turns off.
Mode selector switch
Fan control switch
Windshield defroster switch
The functions for switches other than
those operated continue to operate in
auto control.
Power switch (Fan On/Off)
The climate control system turns on or off
by pressing the power switch.
Temperature control dial
This dial controls t emperature. Turn it
clockwise for hot and counterclockwise
for cold.
Turn the temperature c ontrol dial to adjust
the temperature between 15 °C (60 °F) and
29 °C (84 °F).
When the SYNC switch is on:
Turn the driver temperature control dial
to control the temperature throughout
the entire cabin.
When the SYNC switch is off:
Turn the driver or front passenger
temperature control dial to
independently control the temperature
on each side of the cabin.
Interior Features
Climate Control System
5-5
CX-9_8KH5-EA-21K_Edition2_old 2021-9-16 14:11:22
Page 591 of 715

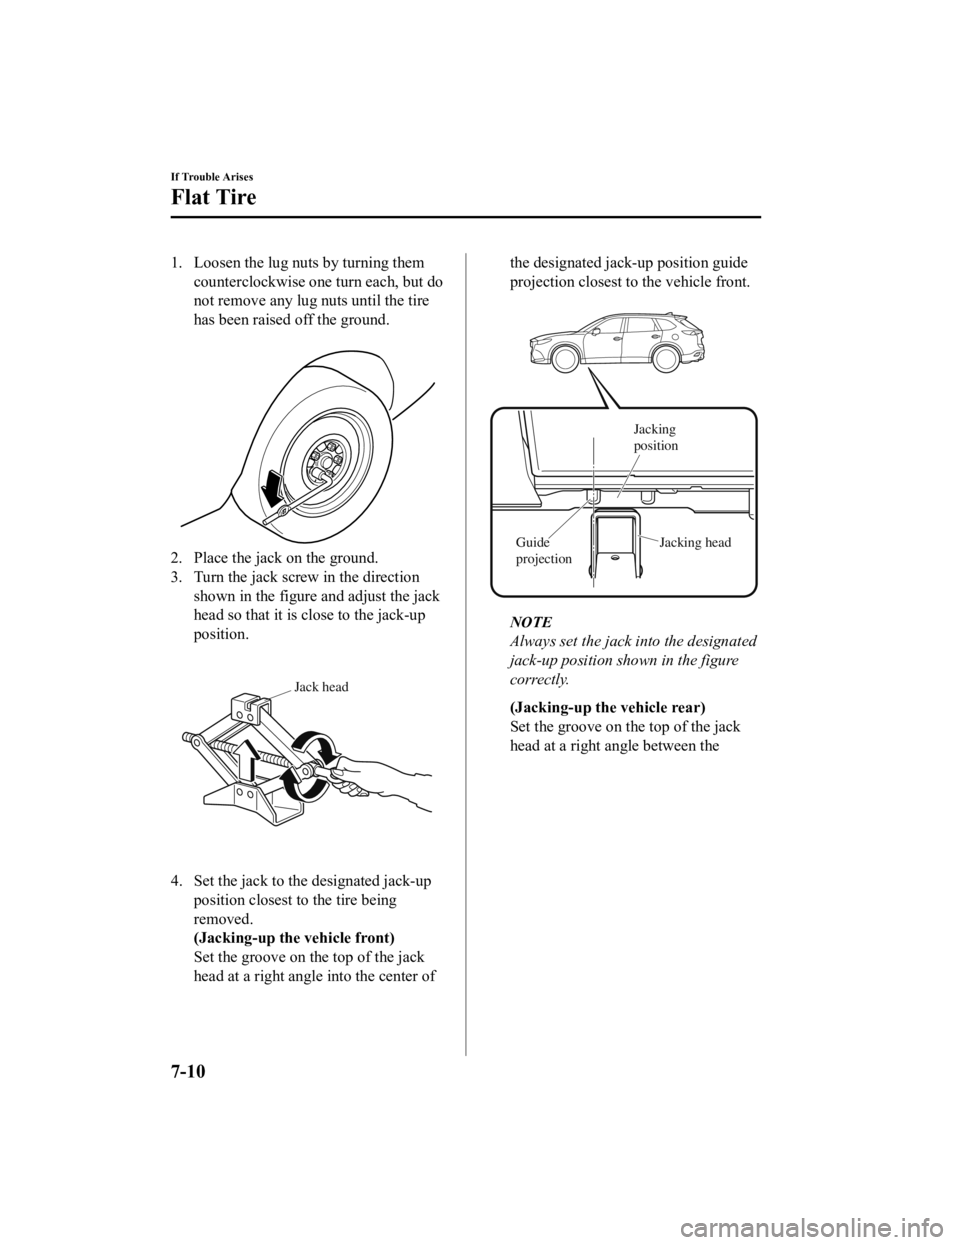
1. Loosen the lug nuts by turning themcounterclockwise one turn each, but do
not remove any lug nuts until the tire
has been raised off the ground.
2. Place the jack on the ground.
3. Turn the jack screw in the directionshown in the figure and adjust the jack
head so that it is close to the jack-up
position.
Jack head
4. Set the jack to the designated jack-upposition closest to the tire being
removed.
(Jacking-up the vehicle front)
Set the groove on the top of the jack
head at a right angle into the center of
the designated jack-up position guide
projection closest to the vehicle front.
Jacking
position
Jacking head
Guide
projection
NOTE
Always set the jack into the designated
jack-up position shown in the figure
correctly.
(Jacking-up the vehicle rear)
Set the groove on the top of the jack
head at a right an gle between the
If Trouble Arises
Flat Tire
7-10
CX-9_8KH5-EA-21K_Edition2_old 2021-9-16 14:11:22