lock MAZDA MODEL MX-5 MIATA 2018 User Guide
[x] Cancel search | Manufacturer: MAZDA, Model Year: 2018, Model line: MODEL MX-5 MIATA, Model: MAZDA MODEL MX-5 MIATA 2018Pages: 576, PDF Size: 55.37 MB
Page 32 of 576

An additional electrical device , such as a seat warmer is installed to the surface of the
passenger seat.
Do not allow a child or anyone to lean over or against the side window of a vehicle with side
air bags:
It is dangerous to allow anyone to lean over or against the side window, the area of the
passenger seat from which the side air bags depl oy, even if a child-restraint system is used.
The impact of inflation from a side air bag co uld cause serious injury or death to an out of
position child. Furthermore, leaning over or ag ainst the door could block the side air bags and
eliminate the advantages of su pplemental protection. Because the side air bag deploys from
the outboard shoulder of the seat, do not allow the child to lean over or against the side
window, even if the child is seated in a child-restraint system.
Never use one seat belt on more than one person at a time:
Using one seat belt for more than one person at a time is dangerous. A seat belt used in this
way cannot spread the impact forces properly and the two passengers could be crushed
together and seriously injured or even killed. Never use one belt for more than one person at a
time and always operate the vehicle with each occupant properly restrained.
Always use a child-restraint system designed for use without a tether or the LATCH lower
anchor:
Using a child-restraint system that requires a tether or the LATCH lower anchor is dangerous.
Your Mazda does not have a child-restraint tether or the LATCH lower anchor. The
child-restraint system cannot be properly secured . In a collision, it could move and injure
other occupants as well as result in serious injuries or death to the child.
CAUTION
A seat belt or child-restraint system can beco me very hot in a closed vehicle during warm
weather. To avoid burning yourself or a child, check them before you or your child touches
them.
Essential Safety Equipment
Child Restraint
2-18
MX-5_8GF7-EA-17J_Edition2 2017-10-31 14:07:27
Page 37 of 576

Installing Child-RestraintSystems
The passenger lap/shoulder belt can easily
be converted into the automatic locking
mode, which must be done to hold the
child-restraint system.
NOTE
ï‚·To check if your seats have side air
bags:
Mazda vehicles equipped with side air
bag will have an embossed "SRS
AIRBAG" marking on the outboard
shoulder of the seats.
ï‚·Follow the child-restraint system
manufacturer's instructions carefully.
Depending on the type of child-restraint
system, it may not employ seat belts
which are in automatic locking mode,
however if it uses an upper tether, it may
not be mounted properly in this vehicle
as there is no safe way to anchor the
tether. Confirm whether the
child-restraint system can be used with
seat belts by reading the child-restraint
system manufacturer's instructions.
WA R N I N G
Do not allow a child or anyone to lean over
or against the side window of a vehicle
with side air bags:
It is dangerous to allow anyone to lean
over or against the side window, the area
of the passenger seat from which the side
air bags deploy, even if a child-restraint
system is used. The impact of inflation from
a side air bag could cause serious injury or
death to an out of position child.
Furthermore, leaning over or against the
door could block the side air bags and
eliminate the advantages of supplemental
protection. Because the side air bag
deploys from the outboard shoulder of the
seat, do not allow the child to lean over or
against the side window, even if the child is
seated in a child-restraint system.
CAUTION
When moving the seats forward and
rearward, make sure you hold onto the
seatback with your hand while operating. If
the seatback is not he ld, the seat will move
suddenly and could cause injury.
Passenger's Seat Child-Restraint
System Installation (With Passenger
Occupant Classification System)
1. Make sure the ignition is switched off.
Essential Safety Equipment
Child Restraint
2-23
MX-5_8GF7-EA-17J_Edition2 2017-10-31 14:07:27
Page 38 of 576

2. Slide the seat as far back as possible.
3. Place the child-res traint system on the
seat without putting your weight on the
seat and secure the child-restraint
system with the lap portion of the lap/
shoulder belt. See the manufacturer's
instructions on the child-restraint
system for belt routing instructions.
4. To get the retractor into the automatic
locking mode, pull the shoulder belt
portion of the seat belt until the entire
length of the belt is out of the retractor.
5. Push the child-restraint system firmly
into the vehicle sea t. Be sure the belt
retracts as snugly as possible. A
clicking noise from the retractor will
be heard during retraction if the system
is in automatic lo cking mode. If the
belt does not lock the seat down tight,
repeat the previous step and also this
one.
NOTE
ï‚·Inspect this function before each use
of the child-restraint system. You
should not be able to pull the
shoulder belt out of the retractor
while the system is in the automatic
locking mode. When you remove the
child-restraint system, be sure the
belt fully retracts to return the
system to emergency locking mode
before occupants use the seat belts.
6. Seat your child safely in the child-restraint system and secure the
child according to the instructions
from the child-restraint system
manufacturer.
7. Switch the ignition ON and make sure the passenger air bag deactivation
indicator light illuminates after
installing a child-restraint system on
the passenger seat.
If the passenger a ir bag deactivation
indicator light does not illuminate,
remove the child-restraint system,
switch the ignition to OFF, and then
re-install the chil d-restraint system
(page 2-40).
Essential Safety Equipment
Child Restraint
2-24
MX-5_8GF7-EA-17J_Edition2 2017-10-31 14:07:27
Page 42 of 576

Do not sit too close to the driver and passenger air bags:
Sitting too close to the driver and passenger air bag modules or placing hands or feet on them
is extremely dangerous. The driver and passeng er air bags inflate with great force and speed.
Serious injuries could occur if someone is too close. The driver should always hold onto only
the rim of the steering wheel. The passenger should keep both feet on the floor. Seat
occupants should adjust their seats as far back as possible and always sit upright against the
seatbacks with seat belts worn properly.
Do not sit too close to a door or lean against doors in vehicles with side air bags:
Sitting too close to the side air bag module s or placing hands on them is extremely
dangerous. A side air bag inflates with great force and speed directly out of the outboard
shoulder of the seat and expands along the door on the side the car is hit. Serious injury could
occur if someone is sitting too close to the d oor or leaning against a window in the seats.
Furthermore, sleeping up against the door or hanging out the driver-side window while
driving could block the side air bag and eliminate the advantages of supplemental
protection. Give the side air bags room to work by sitting in the center of the seat while the
vehicle is moving with seat belts worn properly.
Sit in the center of the seat and wear seat belts properly:
Sitting too close to the side air bag modules or placing hands on them, or sleeping up against
the door or hanging out the windows is extremely dangerous. The side air bags
inflate with
great force and speed directly expanding along th e door on the side the car is hit. Serious
injury could occur if someone is sitting too clos e to the door. Give the side air bags room to
work by sitting in the center of the seat while the vehicle is moving with seat belts worn
properly.
Do not attach objects on or around the area where driver and passenger air bags deploy:
Attaching an object to the driver and passenger air bag modules or placing something in
front of them is dangerous. In an accident, an object could interfere with air bag inflation and
injure the occupants.
Do not attach objects on or around the area where a side air bag deploys:
Attaching objects to the seat in such a way as to cover the outboard side of the seat in any
way is dangerous. In an accident the object could interfere with the side air bag, which
inflates from the outboard side of the seats, impe ding the added protection of the side air bag
system or redirecting the air bag in a way that is dangerous. Furthermore, the bag could be
cut open releasing the gas.
Do not hang net bags, map pouches or backpacks with side straps on the seats. Never use
seat covers on the seats. Always keep the side air bag modules in your seats free to deploy in
the event of a side collision.
Essential Safety Equipment
SRS Air Bags
2-28
MX-5_8GF7-EA-17J_Edition2 2017-10-31 14:07:27
Page 59 of 576

3Before Driving
Use of various features, including keys, doors, mirrors and windows.
Keys.................................................... 3-2 Keys.............................................. 3-2
Keyless Entry System................... 3-3
Advanced Keyless Entry
System.................................................3-9 Advanced Keyless Entry System
*.....
...................................................... 3-9
Operational Range...................... 3-10
Doors and Locks.............................. 3-11 Door Locks................................. 3-11
Trunk Lid................. ................... 3-19
Inside Trunk Release Lever
*...... 3-21
Fuel and Emission........................... 3-23 Fuel and Engine Exhaust
Precautions................................. 3-23
Fuel-Filler Lid and Cap.............. 3-26
Steering Wheel................................. 3-28 Steering Wheel....... .................... 3-28
Mirrors............................................. 3-29 Mirrors........................................ 3-29
Windows........................................... 3-32 Power Windows..........................3-32
Convertible Top (Soft Top)............. 3-35
Convertible Top (Sof t Top).........3-35
Convertible Top (Hardtop)............. 3-40 Convertible Top (Har dtop)......... 3-40
Security System............................... 3-46 Modification and Add-On
Equipment...................................3-46
Immobilizer System....................3-46
Theft-Deterrent System
*.............3-48
Driving Tips..................................... 3-50 Break-In Period.......................... 3-50
Saving Fuel and Protection of the
Environment............................... 3-50
Hazardous Driving.... ..................3-51
Floor Mat.................................... 3-51
Rocking the Vehicle....................3-52
Winter Driving............................3-52
Driving In Flooded A rea............ 3-54
Overloading................................ 3-55
Driving on Uneven Road............ 3-56
Towing.............................................. 3-57 Trailer Towing............................ 3-57
Recreational Towing................... 3-57
*Some models.3-1
MX-5_8GF7-EA-17J_Edition2 2017-10-31 14:07:27
Page 61 of 576

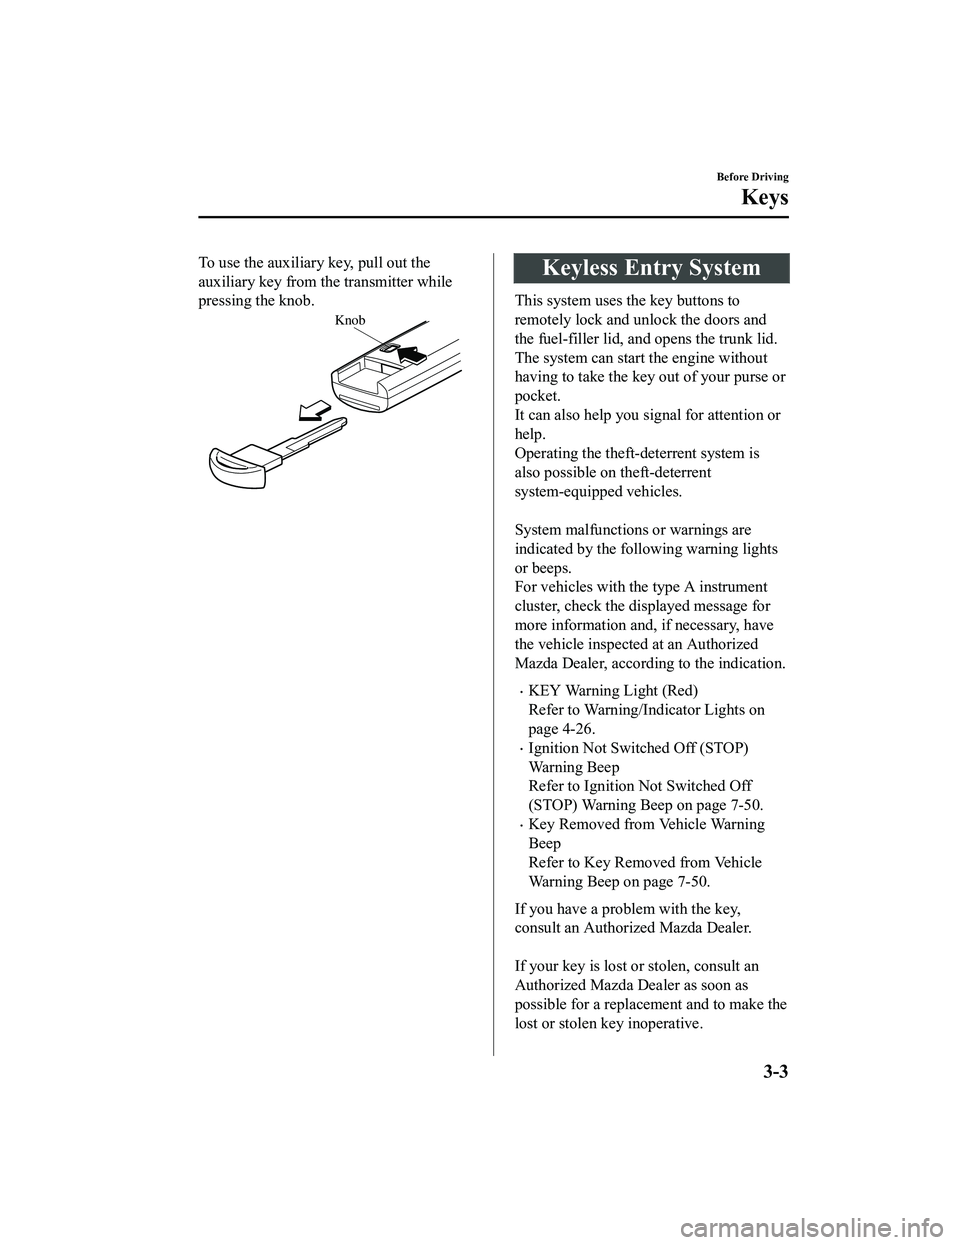
To use the auxiliary key, pull out the
auxiliary key from th e transmitter while
pressing the knob.
Knob
Keyless Entry System
This system uses the key buttons to
remotely lock and unlock the doors and
the fuel-filler lid, and opens the trunk lid.
The system can start the engine without
having to take the key out of your purse or
pocket.
It can also help you signal for attention or
help.
Operating the theft-deterrent system is
also possible on theft-deterrent
system-equipped vehicles.
System malfunctions or warnings are
indicated by the following warning lights
or beeps.
For vehicles with the type A instrument
cluster, check the displayed message for
more information and, if necessary, have
the vehicle inspected at an Authorized
Mazda Dealer, according to the indication.
ï‚·KEY Warning Light (Red)
Refer to Warning/Indicator Lights on
page 4-26.
ï‚·Ignition Not Switched Off (STOP)
Warning Beep
Refer to Ignition Not Switched Off
(STOP) Warning Beep on page 7-50.
ï‚·Key Removed from Vehicle Warning
Beep
Refer to Key Removed from Vehicle
Warning Beep on page 7-50.
If you have a problem with the key,
consult an Authorized Mazda Dealer.
If your key is lost or stolen, consult an
Authorized Mazda Dealer as soon as
possible for a replacement and to make the
lost or stolen k ey inoperative.
Before Driving
Keys
3-3
MX-5_8GF7-EA-17J_Edition2 2017-10-31 14:07:27
Page 62 of 576

CAUTION
Radio equipment like this is governed by
laws in the United States.
Changes or modifications not expressly
approved by the party responsible for
compliance could void the user's authority
to operate the equipment.
NOTE
ï‚·The keyless entry system operation may
vary due to local conditions.
ï‚·The keyless entry system is fully
operational (door/fuel-filler lid lock/
unlock) when the ignition is switched
off. The system does not operate if the
ignition is switched to any position other
than off.
ï‚·If the key does not operate when
pressing a button or the operational
range becomes too small, the battery
may be weak. To install a new battery,
refer to Key Battery Replacement (page
6-33).
ï‚·Battery life is about one year. Replace
the battery with a new one if the KEY
indicator light (green) flashes in the
instrument cluster (for vehicles with a
type A instrument cluster (page 4-26),
messages are displayed in the
instrument cluster). Replacing the
battery about once a year is
recommended because the KEY warning
light/indicator light may not illuminate
or flash depending on the rate of battery
depletion.
ï‚·Additional keys can be obtained at an
Authorized Mazda Dealer. Up to 6 keys
can be used with the keyless functions
per vehicle. Bring all keys to an
Authorized Mazda Dealer when
additional keys are required.
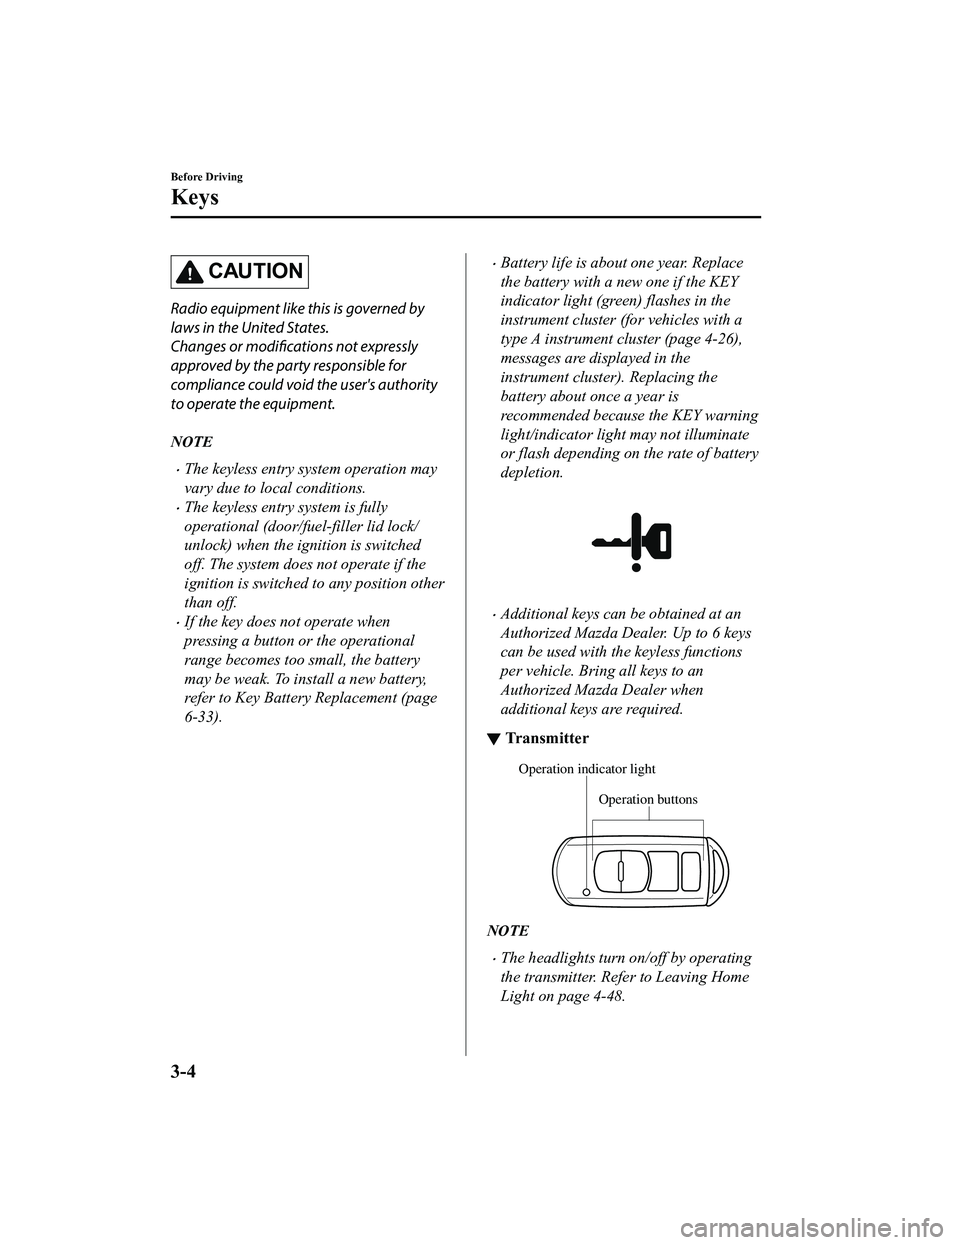
â–¼Tr a n s m i t t e r
Operation buttons
Operation indicator light
NOTE
ï‚·The headlights turn on/off by operating
the transmitter. Refer to Leaving Home
Light on page 4-48.
Before Driving
Keys
3-4
MX-5_8GF7-EA-17J_Edition2
2017-10-31 14:07:27
Page 63 of 576

ï‚·(With theft-deterrent system)
The hazard warning lights flash when
the theft-deterrent system is armed or
turned off.
Refer to Theft-Deterrent System on page
3-48.
ï‚·(With the advanced keyless function)
A beep sound can be heard for
confirmation when the doors and the
fuel-filler lid are locked/unlocked using
the key. If you prefer, the beep sound can
be turned off.
The volume of the beep sound can also
be changed.
Refer to Personalization Features on
page 9-9.
Use the following procedure to change the
setting.
1. Switch the ignition off and close both of the doors and the trunk lid.
2. Open the driver's door.
3. Within 30 seconds of opening the driver's door, press and hold the LOCK
button on the key for 5 seconds or
longer (Both of the doors and the
fuel-filler lid are locked and unlocked
when the LOCK button on the key is
pressed and held for five seconds.).
The beep sound activates at the
currently set volume. The setting
changes each time the LOCK button on
the key is pressed and the beep sound
activates at the set volume. (If the beep
sound has been set to not activate, it
will not activate.)
4. The setting change is completed by
doing any one of the following:
ï‚·Switching the ign ition to ACC or
ON.
ï‚·Closing the driver's door.
ï‚·Opening the trunk lid.
ï‚·Not operating the key for 10
seconds.
ï‚·Pressing any button except the
LOCK button on the key.
ï‚·Pressing a request switch.
The operation indicator light flashes when
the buttons are pressed.
Lock button
To lock the doors and the fuel-filler lid,
press the lock button and the hazard
warning lights will flash once.
(With the advanced k eyless function)
A beep sound will be heard once.
To confirm that both doors and the
fuel-filler lid have be en locked, press the
lock button again within 5 seconds. If they
are closed and locked, the horn will sound.
NOTE
ï‚·The doors and the fuel-filler lid can be
locked by pressing the lock button while
any other door or the trunk lid is open.
The hazard warning lights will not flash.
When the lock button is pressed while
any door is open and then the door is
closed, both the doors and the fuel-filler
lid are locked.
ï‚·Confirm that both doors and the
fuel-filler lid are locked visually or
audibly by use of the double click.
ï‚·Make sure both doors and the fuel-filler
lid are locked after pressing the button.
Before Driving
Keys
3-5
MX-5_8GF7-EA-17J_Edition2 2017-10-31 14:07:27
Page 64 of 576

ï‚·(With theft-deterrent system)
When the doors are locked by pressing
the lock button on the key while the
theft-deterrent system is armed, the
hazard warning lights will flash once to
indicate that the system is armed.
Unlock button
To unlock the driver's door and the
fuel-filler lid, press the unlock button and
the hazard warning ligh ts will flash twice.
(With the advanced keyless function)
A beep sound will be heard twice.
To unlock both doors and the fuel-filler
lid, press the unlock b utton again within 3
seconds and two more beep sounds will be
heard.
NOTE
ï‚·The system can be set to unlock both
doors by performing a single operation.
Refer to Personalization Features on
page 9-9.
Use the following procedure to change
the setting.
1. Switch the ignition off and close both of the doors and the trunk lid.
2. Open the driver's door.
3. Within 30 seconds of opening the driver's door, press and hold the
UNLOCK button on the key for 5
seconds or longer (the sound of the
doors locking/unlocking can be
heard).
After this, the system switches the
setting each time the UNLOCK
button is pressed (the sound of the
doors locking/unlocking can be
heard).
4. The setting change is completed by doing any one of the following:
ï‚·Switching the igni tion to ACC or
ON.
ï‚·Closing the driver's door.
ï‚·Opening the trunk lid.
ï‚·Not operating the key for 10
seconds.
ï‚·Pressing any button except the
UNLOCK button on the key.
ï‚·Pressing a request switch.
ï‚·(Auto re-lock function)
After unlocking with the key, both doors
and the fuel-filler lid will automatically
lock if any of the following operations
are not performed within about 60
seconds. If your vehicle has a
theft-deterrent system, the hazard
warning lights will flash for
confirmation.
The time required for the doors to lock
automatically can be changed.
Refer to Personalization Features on
page 9-9.
ï‚·A door or the trunk lid is opened.
ï‚·The ignition is switched to any
position other than off.
ï‚·(With theft-deterrent system)
When the doors are unlocked by
pressing the unlock button on the key
while the theft-deterrent system is turned
off, the hazard warning lights will flash
twice to indicate that the system is
turned off.
Before Driving
Keys
3-6
MX-5_8GF7-EA-17J_Edition2 2017-10-31 14:07:27
Page 66 of 576

NOTE
The engine may not start if the key is
placed in the following areas:
ï‚·Around the dashboard
ï‚·In the storage compartments or the
center console
â–¼Key Suspend Function
If a key is left in the v
ehicle, the functions
of the key left in the vehicle are
temporarily suspended to prevent theft of
the vehicle.
To restore the functions, press the unlock
button on the functions-suspended key in
the vehicle.
Before Driving
Keys
3-8
MX-5_8GF7-EA-17J_Edition2 2017-10-31 14:07:27