battery MERCEDES-BENZ A-CLASS HATCHBACK 2015 User Guide
[x] Cancel search | Manufacturer: MERCEDES-BENZ, Model Year: 2015, Model line: A-CLASS HATCHBACK, Model: MERCEDES-BENZ A-CLASS HATCHBACK 2015Pages: 417, PDF Size: 11.91 MB
Page 115 of 417
Problems with the seat heating
Problem
Possible causes/consequences and
M
MSolutions The seat heating has
switched off prema-
turely or cannot be
switched on. The on-board voltage is too low because too many electrical con-
sumers are switched on.
X Switch off electrical consumers that you do not need, such as
the rear window heating or interior lighting.
Once the battery is sufficiently charged, the seat heating will
switch back on automatically. Steering wheel
Important safety notes
G
WARNING
You could lose control of the vehicle while
driving if you:
R adjust the driver's seat, steering wheel or
mirrors
R fasten the seat belt
There is a risk of an accident.
Adjust the driver's seat, head restraint, steer-
ing wheel and mirrors and fasten your seat
belt before starting the engine. G
WARNING
Children could become trapped by the steer-
ing wheel if they adjust it. There is a risk of
injury.
When leaving the vehicle, always take the key with you and lock the vehicle. Never leave
children unattended in the vehicle. Adjusting the steering wheel
G
WARNING
The steering wheel may move unexpectedly if you adjust it while driving. This could cause
you to lose control of the vehicle. There is a
risk of an accident.
Make sure that the steering wheel is locked
before driving off. Never unlock the steering
wheel when the vehicle is in motion. :
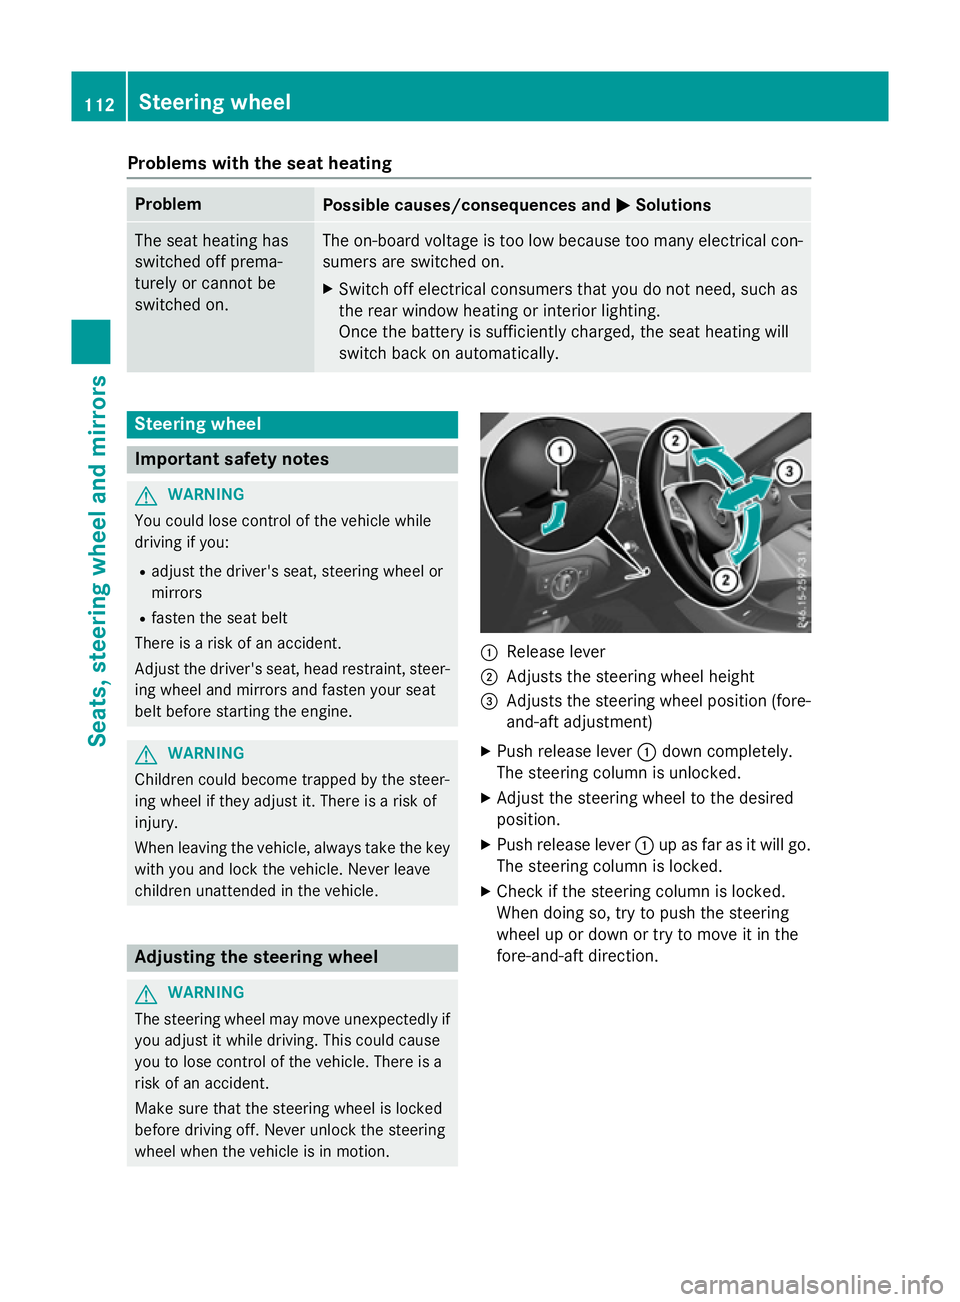
Release lever
; Adjusts the steering wheel height
= Adjusts the steering wheel position (fore-
and-aft adjustment)
X Push release lever :down completely.
The steering column is unlocked.
X Adjust the steering wheel to the desired
position.
X Push release lever :up as far as it will go.
The steering column is locked.
X Check if the steering column is locked.
When doing so, try to push the steering
wheel up or down or try to move it in the
fore-and-aft direction. 112
Steering wheelSeats, steering wheel and mirrors
Page 117 of 417
Folding the exterior mirrors in/out elec-
trically X
Turn the key to position 1or 2in the ignition
lock (Y page 157).
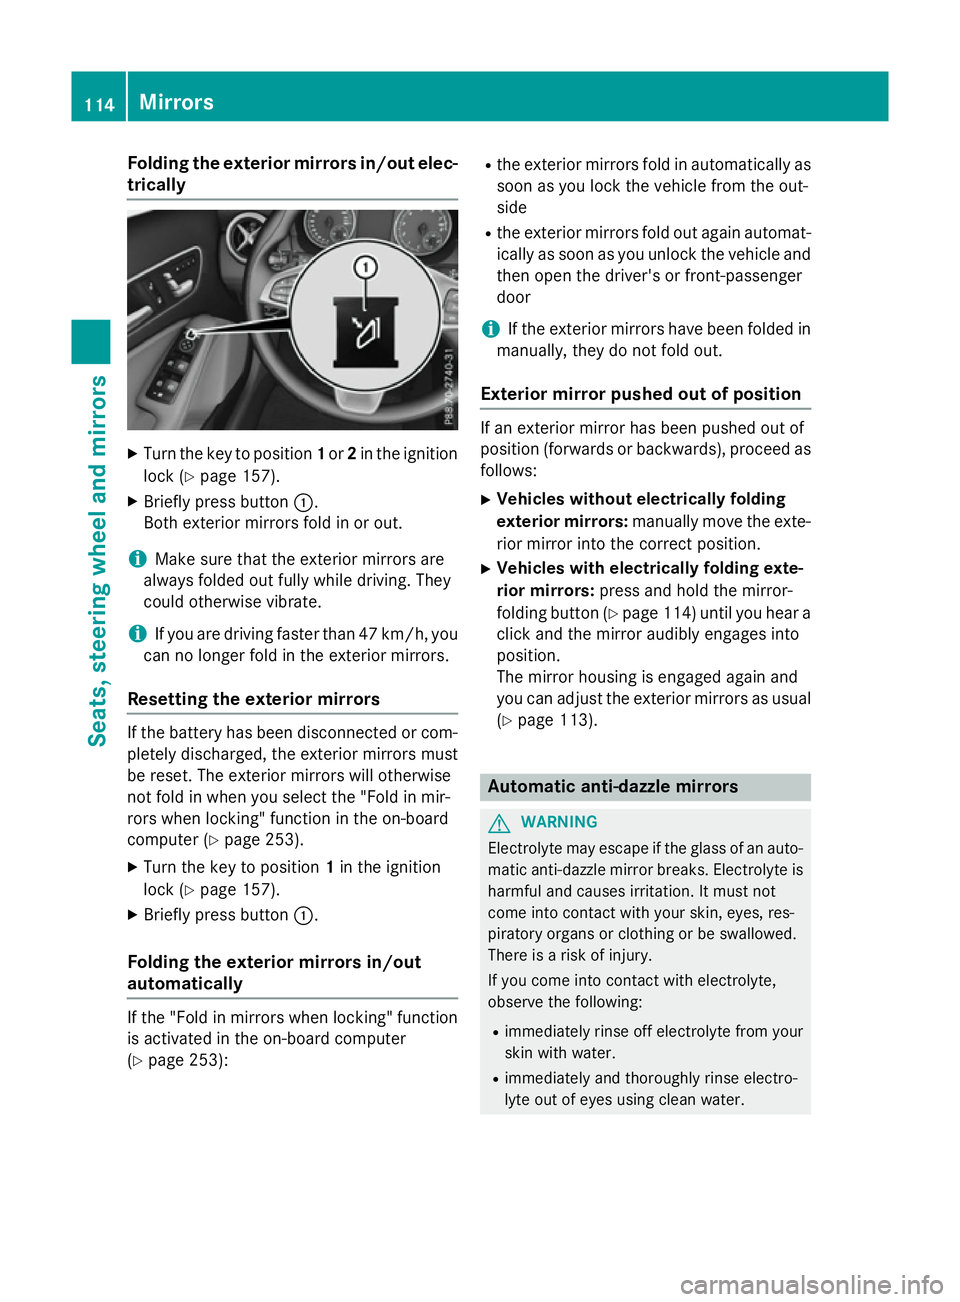
X Briefly press button :.
Both exterior mirrors fold in or out.
i Make sure that the exterior mirrors are
always folded out fully while driving. They
could otherwise vibrate.
i If you are driving faster than 47 km/h, you
can no longer fold in the exterior mirrors.
Resetting the exterior mirrors If the battery has been disconnected or com-
pletely discharged, the exterior mirrors must
be reset. The exterior mirrors will otherwise
not fold in when you select the "Fold in mir-
rors when locking" function in the on-board
computer (Y page 253).
X Turn the key to position 1in the ignition
lock (Y page 157).
X Briefly press button :.
Folding the exterior mirrors in/out
automatically If the "Fold in mirrors when locking" function
is activated in the on-board computer
(Y page 253): R
the exterior mirrors fold in automatically as
soon as you lock the vehicle from the out-
side
R the exterior mirrors fold out again automat-
ically as soon as you unlock the vehicle and
then open the driver's or front-passenger
door
i If the exterior mirrors have been folded in
manually, they do not fold out.
Exterior mirror pushed out of position If an exterior mirror has been pushed out of
position (forwards or backwards), proceed as
follows:
X Vehicles without electrically folding
exterior mirrors: manually move the exte-
rior mirror into the correct position.
X Vehicles with electrically folding exte-
rior mirrors: press and hold the mirror-
folding button (Y page 114) until you hear a
click and the mirror audibly engages into
position.
The mirror housing is engaged again and
you can adjust the exterior mirrors as usual
(Y page 113). Automatic anti-dazzle mirrors
G
WARNING
Electrolyte may escape if the glass of an auto- matic anti-dazzle mirror breaks. Electrolyte is
harmful and causes irritation. It must not
come into contact with your skin, eyes, res-
piratory organs or clothing or be swallowed.
There is a risk of injury.
If you come into contact with electrolyte,
observe the following:
R immediately rinse off electrolyte from your
skin with water.
R immediately and thoroughly rinse electro-
lyte out of eyes using clean water. 114
MirrorsSeats, steering wheel and
mirrors
Page 124 of 417
tion in the on-board computer, the daytime
driving lights or the side lamps and dipped- beam headlamps are switched on or off
automatically depending on the brightness of the ambient light
X To switch on the automatic headlamps:
turn the light switch to the Ãposition. G
WARNING
When the light switch is set to Ã, the
dipped-beam headlamps may not be switched on automatically if there is fog, snow or othercauses of poor visibility due to the weather
conditions such as spray. There is a risk of an
accident.
In such situations, turn the light switch to
L.
The automatic headlamp feature is only an
aid. The driver is responsible for the vehicle
lighting at all times.
The daytime driving lights improve the detect- ability of your vehicle during the day. To do
this, the daytime driving lights function must
be switched on via the on-board computer
(Y page 251).
When the side lamps and dipped-beam head- lamps are switched on, the green T(side
lamps) and L(dipped-beam headlamps)
indicator lamps in the instrument cluster light
up.
Dipped-beam headlamps
When the ignition is switched on and the light switch is in the Lposition, the side lamps
and dipped-beam headlamps are switched on even if the light sensor does not sense dark
ambient light conditions. This is advanta-
geous when there is fog or rain.
X To switch on the dipped beam head-
lamps: turn the key to position 2in the
ignition lock or start the engine.
X Turn the light switch to L.
The green Lindicator lamp in the instru-
ment cluster lights up. Rear foglamp
The rear foglamp improves the visibility of
your vehicle in heavy fog for the following
traffic. Please observe the country-specific
laws on the use of rear foglamps.
X To switch on the rear foglamp: turn the
key to position 2in the ignition lock or start
the engine.
X Turn the light switch to LorÃ.
X Press the Rbutton.
The yellow Rindicator lamp in the
instrument cluster lights up.
X To switch off the rear foglamp: press the
R button.
The yellow Rindicator lamp in the
instrument cluster goes out.
Side lamps
! If the battery has been excessively dis-
charged, the side lamps or parking lamps
are automatically switched off to enable
the next engine start. Always park your
vehicle safely and sufficiently lit according
to legal standards. Avoid the continuous
use of the Tside lamps for several
hours. If possible, switch on the Xright
or the Wleft parking lamp.
X To switch on: turn the light switch to T.
The green Tindicator lamp in the instru-
ment cluster lights up.
Parking lamps
Switching on the parking lamps ensures that
the corresponding side of the vehicle is illu-
minated.
X To switch on the parking lamps: the key
should not be in the ignition lock or it
should be in position 0.
X Turn the light switch to W(left-hand side
of the vehicle) or X(right-hand side of
the vehicle). Exterior lighting
121Lights andwindscreen wipers Z
Page 128 of 417
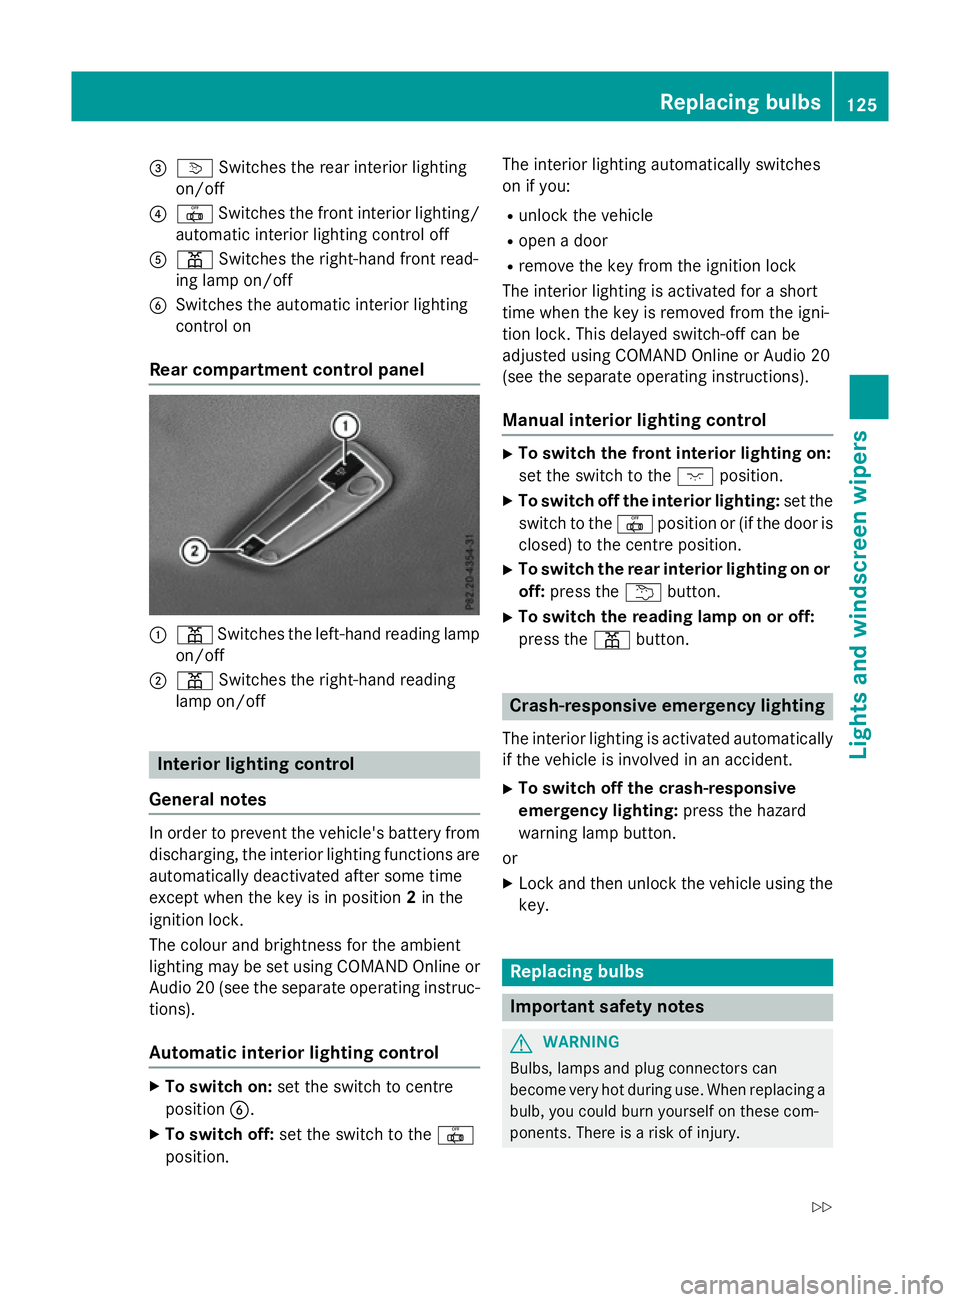
=
v Switches the rear interior lighting
on/off
? | Switches the front interior lighting/
automatic interior lighting control off
A p Switches the right-hand front read-
ing lamp on/off
B Switches the automatic interior lighting
control on
Rear compartment control panel :
p Switches the left-hand reading lamp
on/off
; p Switches the right-hand reading
lamp on/off Interior lighting control
General notes In order to prevent the vehicle's battery from
discharging, the interior lighting functions are
automatically deactivated after some time
except when the key is in position 2in the
ignition lock.
The colour and brightness for the ambient
lighting may be set using COMAND Online or
Audio 20 (see the separate operating instruc-
tions).
Automatic interior lighting control X
To switch on: set the switch to centre
position B.
X To switch off: set the switch to the |
position. The interior lighting automatically switches
on if you:
R unlock the vehicle
R open a door
R remove the key from the ignition lock
The interior lighting is activated for a short
time when the key is removed from the igni-
tion lock. This delayed switch-off can be
adjusted using COMAND Online or Audio 20
(see the separate operating instructions).
Manual interior lighting control X
To switch the front interior lighting on:
set the switch to the cposition.
X To switch off the interior lighting: set the
switch to the |position or (if the door is
closed) to the centre position.
X To switch the rear interior lighting on or
off: press the ubutton.
X To switch the reading lamp on or off:
press the pbutton. Crash-responsive emergency lighting
The interior lighting is activated automatically
if the vehicle is involved in an accident.
X To switch off the crash-responsive
emergency lighting: press the hazard
warning lamp button.
or X Lock and then unlock the vehicle using the
key. Replacing bulbs
Important safety notes
G
WARNING
Bulbs, lamps and plug connectors can
become very hot during use. When replacing a bulb, you could burn yourself on these com-
ponents. There is a risk of injury. Replacing bulbs
125Lights and windscreen wipers
Z
Page 148 of 417
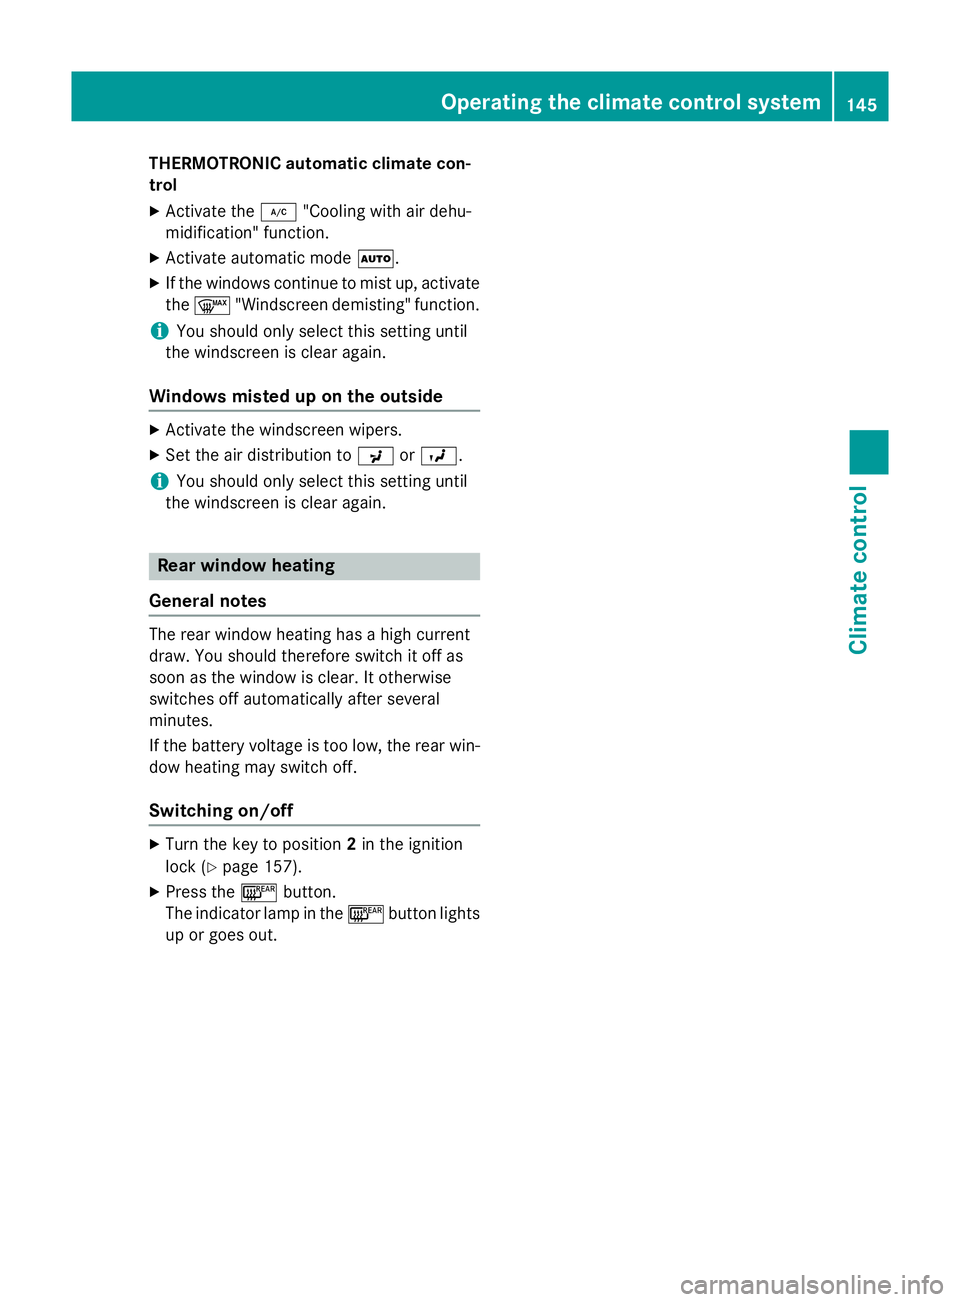
THERMOTRONIC automatic climate con-
trol
X Activate the ¿"Cooling with air dehu-
midification" function.
X Activate automatic mode Ã.
X If the windows continue to mist up, activate
the ¬ "Windscreen demisting" function.
i You should only select this setting until
the windscreen is clear again.
Windows misted up on the outside X
Activate the windscreen wipers.
X Set the air distribution to PorO.
i You should only select this setting until
the windscreen is clear again. Rear window heating
General notes The rear window heating has a high current
draw. You should therefore switch it off as
soon as the window is clear. It otherwise
switches off automatically after several
minutes.
If the battery voltage is too low, the rear win-
dow heating may switch off.
Switching on/off X
Turn the key to position 2in the ignition
lock (Y page 157).
X Press the ¤button.
The indicator lamp in the ¤button lights
up or goes out. Operating the climate control system
145Climate control
Page 149 of 417
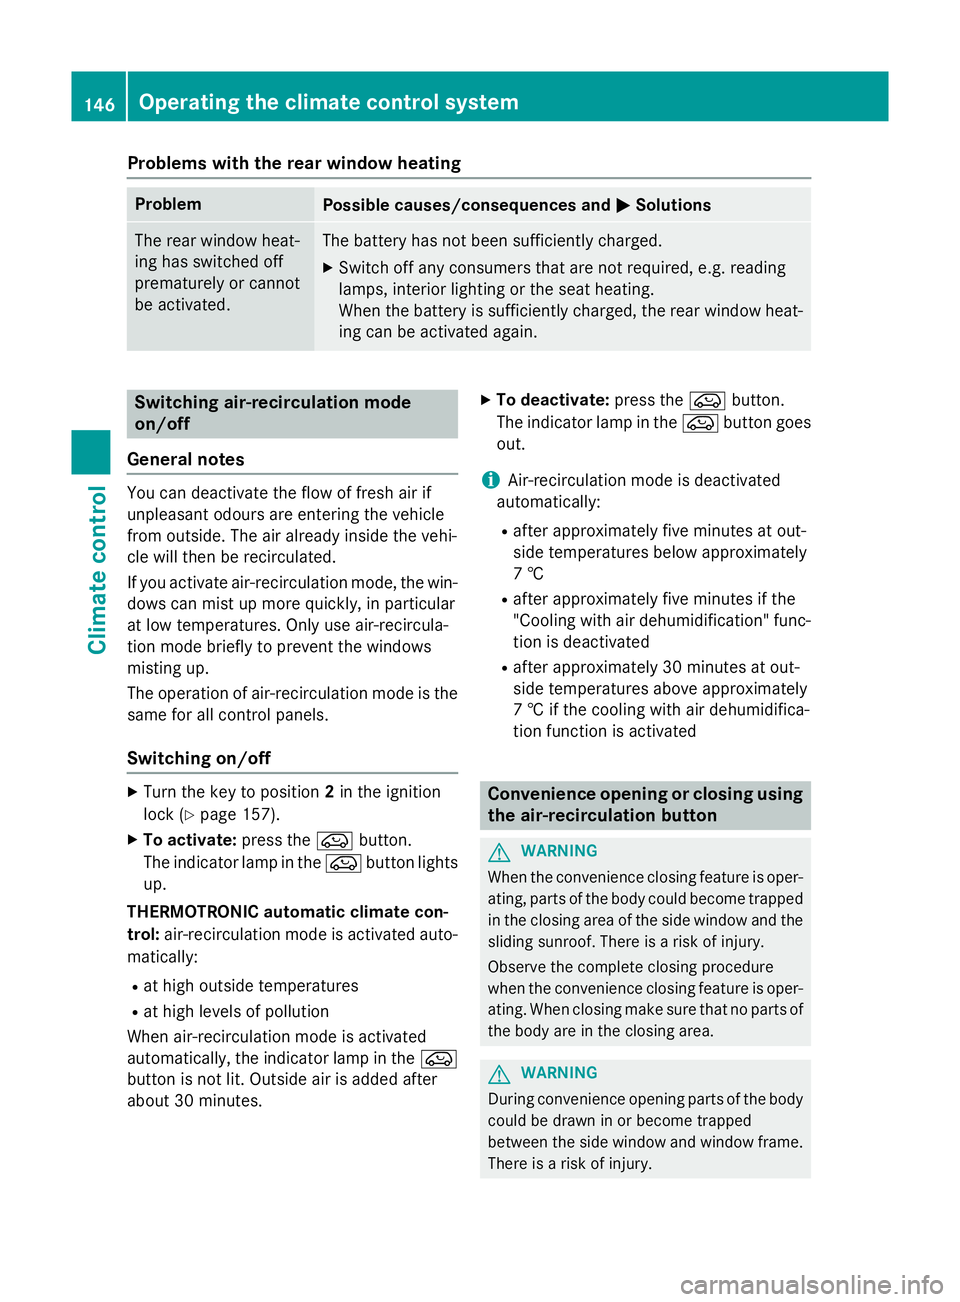
Problems with the rear window heating
Problem
Possible causes/consequences and
M
MSolutions The rear window heat-
ing has switched off
prematurely or cannot
be activated. The battery has not been sufficiently charged.
X Switch off any consumers that are not required, e.g. reading
lamps, interior lighting or the seat heating.
When the battery is sufficiently charged, the rear window heat- ing can be activated again. Switching air-recirculation mode
on/off
General notes You can deactivate the flow of fresh air if
unpleasant odours are entering the vehicle
from outside. The air already inside the vehi-
cle will then be recirculated.
If you activate air-recirculation mode, the win-
dows can mist up more quickly, in particular
at low temperatures. Only use air-recircula-
tion mode briefly to prevent the windows
misting up.
The operation of air-recirculation mode is the same for all control panels.
Switching on/off X
Turn the key to position 2in the ignition
lock (Y page 157).
X To activate: press theebutton.
The indicator lamp in the ebutton lights
up.
THERMOTRONIC automatic climate con-
trol: air-recirculation mode is activated auto-
matically:
R at high outside temperatures
R at high levels of pollution
When air-recirculation mode is activated
automatically, the indicator lamp in the e
button is not lit. Outside air is added after
about 30 minutes. X
To deactivate: press theebutton.
The indicator lamp in the ebutton goes
out.
i Air-recirculation mode is deactivated
automatically:
R after approximately five minutes at out-
side temperatures below approximately
7 †
R after approximately five minutes if the
"Cooling with air dehumidification" func-
tion is deactivated
R after approximately 30 minutes at out-
side temperatures above approximately
7 † if the cooling with air dehumidifica-
tion function is activated Convenience opening or closing using
the air-recirculation button G
WARNING
When the convenience closing feature is oper- ating, parts of the body could become trapped
in the closing area of the side window and the
sliding sunroof. There is a risk of injury.
Observe the complete closing procedure
when the convenience closing feature is oper-
ating. When closing make sure that no parts of the body are in the closing area. G
WARNING
During convenience opening parts of the body could be drawn in or become trapped
between the side window and window frame.
There is a risk of injury. 146
Operating the climate control systemClimate control
Page 151 of 417
Switching on/off
X
Turn the key to position 0in the ignition
lock or remove it (Y page 157).
X To activate: press theÌbutton.
The indicator lamp in the Ìbutton lights
up.
X To deactivate: press theÌbutton.
The indicator lamp in the Ìbutton goes
out.
i Residual heat is deactivated automati-
cally:
R after approximately 30 minutes
R when the ignition is switched on
R if the battery voltage drops
R when the auxiliary heating is switched on Auxiliary heating
Important safety notes G
DANGER
If the exhaust pipe is blocked or sufficient
ventilation is not possible, toxic exhaust
fumes can enter the vehicle, especially car-
bon monoxide. This is the case, e.g. in
enclosed spaces, or if the vehicle is stuck in
snow. There is a risk of fatal injuries.
You should switch off the auxiliary heating in
enclosed spaces which do not have an extrac- tion system, e.g. a garage. If the vehicle is
stuck in snow and you must leave the auxiliary
heating running, keep the exhaust pipe and
the area around the vehicle clear of snow. To guarantee a sufficient supply of fresh air, open
a window on the side of the vehicle away from the wind. G
WARNING
When the auxiliary heating is switched on,
parts of the vehicle can become very hot. Flammable materials such as leaves, grass or
twigs may ignite if they come into contact
with:
R hot parts of the exhaust system
R the exhaust gas itself
There is a risk of fire.
When the auxiliary heating is switched on,
make sure that:
R no flammable materials come into contact
with hot vehicle components
R the exhaust gas can escape from the
exhaust pipe unhindered
R the exhaust gas does not come into contact
with flammable materials.
The auxiliary heating and the exhaust gas out-
let are situated in front of the right-hand front
wheel.
! Operating the auxiliary heating/ventila-
tion draws on the vehicle battery. After you
have heated or ventilated the vehicle a
maximum of two times, drive for a longer
distance.
Switch the auxiliary heating on regularly once
a month for about ten minutes.
The auxiliary heating timer function calcu-
lates the switch-on time according to the out-
side temperature so that the vehicle is pre-
heated by the departure time. When the
departure time is reached, the auxiliary heat- ing continues to heat for a further five
minutes and then switches off.
The auxiliary heating heats the air in the vehi-
cle interior to the set temperature. This
occurs without using the heat of the running
engine. The auxiliary heating is operated
directly using the vehicle's fuel. For this rea-
son, the fuel tank must be at least Õfull to
ensure that the auxiliary heating functions.
The auxiliary heating/ventilation automati-
cally adjusts to changes in temperature and
weather conditions. For this reason, the aux- iliary heating could switch from ventilation
mode to heating mode or from heating mode to ventilation mode. 148
Operating the climate control systemClimate control
Page 152 of 417
The auxiliary heating switches off when the
engine is switched off. The auxiliary ventila-
tion switches off when you turn the key to key
position 2(Y page 157).
The auxiliary heating switches off automati-
cally after 50 minutes.
You cannot use the auxiliary ventilation to
cool the vehicle interior to a temperature
lower than the outside temperature.
Before switching on X
Turn the key to position 2in the ignition
lock (Y page 157).
X Set the desired temperature.
Auxiliary heating or ventilation can also be
switched on if the manually set climate con-
trol is activated. Optimum comfort is attained by setting the system to automatic mode. Set
the temperature to 22 †.
The auxiliary heating/ventilation can be acti- vated or deactivated using the remote control or the button on the centre console.
The on-board computer can be used to spec-
ify up to three departure times, one of which
may be preselected (Y page 252).
Switching the auxiliary heating/venti-
lation on or off using the button on the
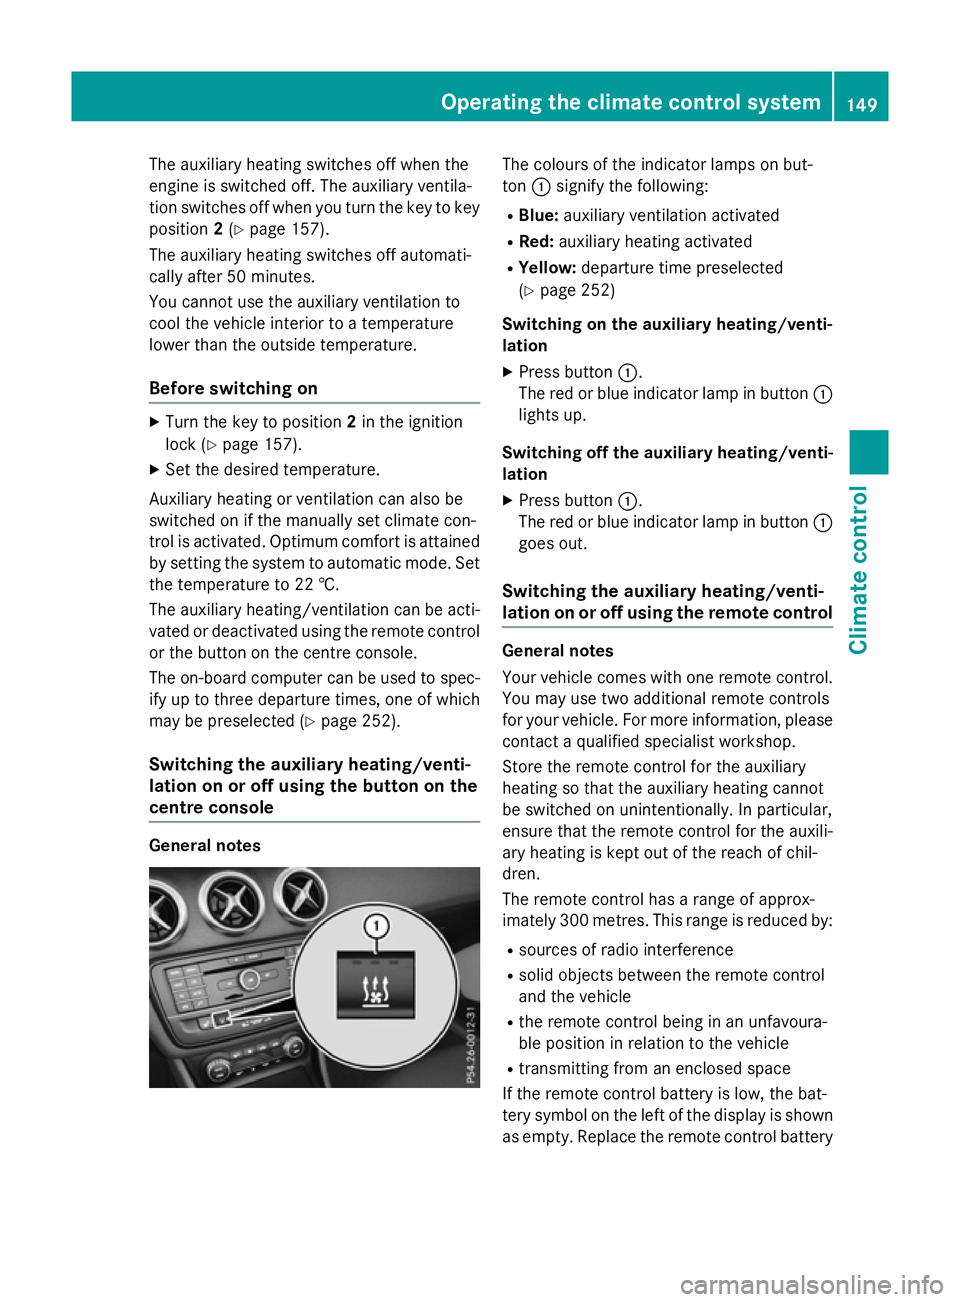
centre console General notes The colours of the indicator lamps on but-
ton
:signify the following:
R Blue: auxiliary ventilation activated
R Red: auxiliary heating activated
R Yellow: departure time preselected
(Y page 252)
Switching on the auxiliary heating/venti-
lation
X Press button :.
The red or blue indicator lamp in button :
lights up.
Switching off the auxiliary heating/venti-
lation
X Press button :.
The red or blue indicator lamp in button :
goes out.
Switching the auxiliary heating/venti-
lation on or off using the remote control General notes
Your vehicle comes with one remote control.
You may use two additional remote controls
for your vehicle. For more information, please
contact a qualified specialist workshop.
Store the remote control for the auxiliary
heating so that the auxiliary heating cannot
be switched on unintentionally. In particular,
ensure that the remote control for the auxili-
ary heating is kept out of the reach of chil-
dren.
The remote control has a range of approx-
imately 300 metres. This range is reduced by:
R sources of radio interference
R solid objects between the remote control
and the vehicle
R the remote control being in an unfavoura-
ble position in relation to the vehicle
R transmitting from an enclosed space
If the remote control battery is low, the bat-
tery symbol on the left of the display is shown as empty. Replace the remote control battery Operating the climate control system
149Climate control Z
Page 154 of 417
ing temperature is reached. If this is the case,
the y symbol appears in the remote con-
trol display and the running time is zero
minutes.
Setting the departure time
Make sure that the time set in the vehicle is
correct before setting the departure time (see the separate operating instructions). Other-
wise, the auxiliary heating may switch on at
the wrong time and at an unsuitable location.
When setting the departure time, observe the important safety notes (Y page 148).
X Briefly press the ubutton.
X Press the ,or. button repeatedly
until the time to be changed appears in the display.
X Press the uand^ buttons at the
same time.
The Îsymbol in the remote control dis-
play flashes.
X Press the ,or. button to set the
desired departure time.
i The longer you press the
,or.
button, the faster the time changes.
X Press the uand^ buttons at the
same time.
The new departure time is stored.
Activating the set departure time X Briefly press the ubutton.
X Press the ,or. button repeatedly
until the desired departure time appears in the display.
X Press the ubutton.
The Ísymbol, the departure time and,
depending on the selected departure time, the letter A, BorCappear in the display. Deactivating the set departure time
X Briefly press the ubutton.
The status of the auxiliary heating is shown in the display.
X Press the .button.
The first departure time stored appears in
the display.
X Press the ^button.
OFF is shown in the remote control display.
Replacing the remote control battery Important safety notes
G
WARNING
Batteries contain toxic and corrosive substan- ces. If batteries are swallowed, it can result in
severe health problems. There is a risk of fatal injury.
Keep batteries out of the reach of children. If
a battery is swallowed, seek medical attention immediately. H
Environmental note Batteries contain pollutants.
It is illegal to dispose of them
with the household rubbish.
They must be collected sep-
arately and disposed of in anenvironmentally responsible
recycling system. Dispose of batteries in an
environmentally responsible
manner. Take discharged
batteries to a qualified spe-
cialist workshop or to a col-
lection point for used batter-
ies. Operating the climate control system
151Climate control Z
Page 155 of 417
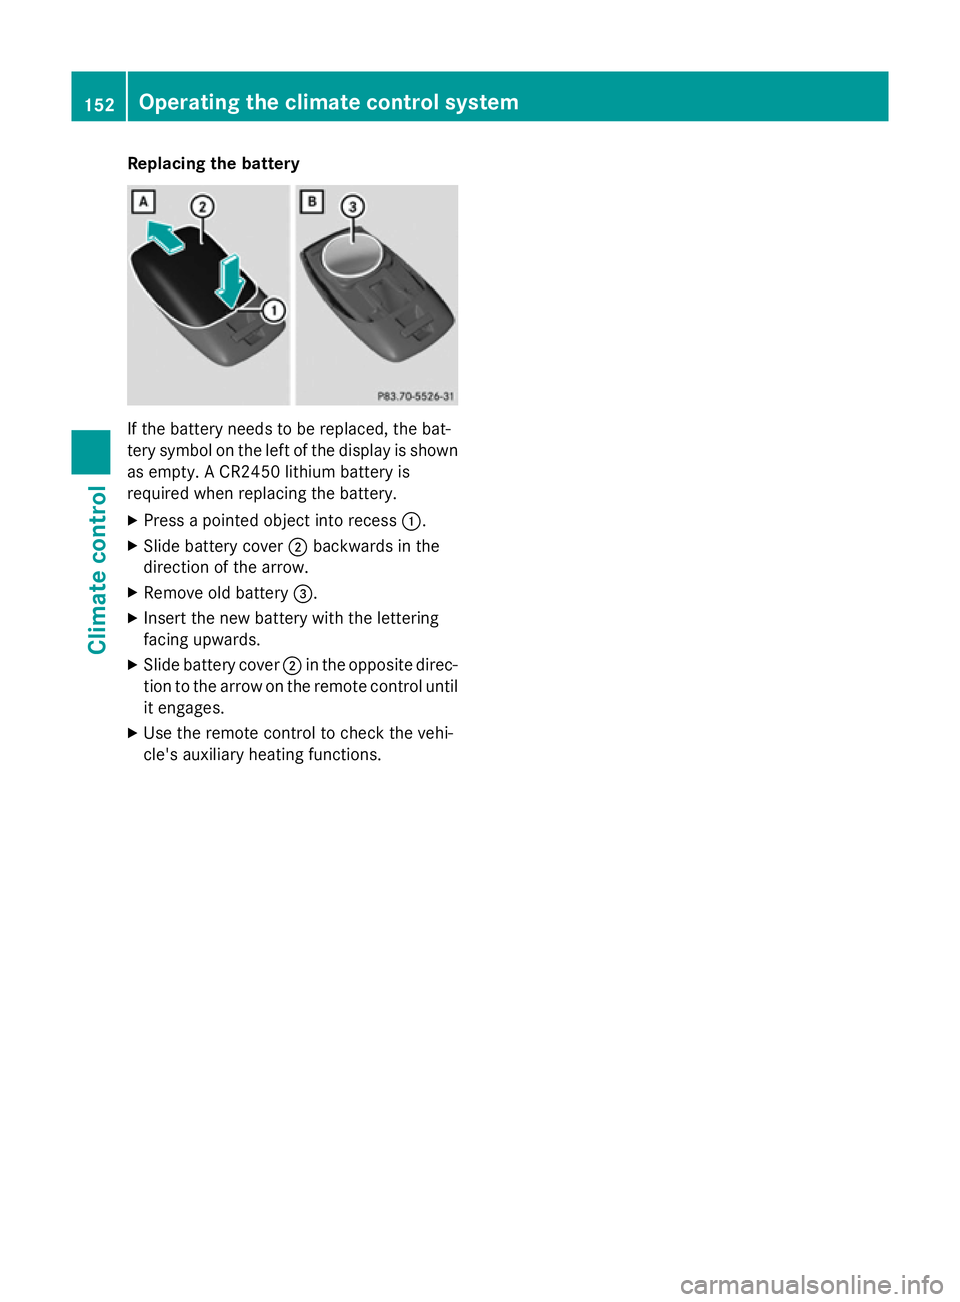
Replacing the battery
If the battery needs to be replaced, the bat-
tery symbol on the left of the display is shown as empty. A CR2450 lithium battery is
required when replacing the battery.
X Press a pointed object into recess :.
X Slide battery cover ;backwards in the
direction of the arrow.
X Remove old battery =.
X Insert the new battery with the lettering
facing upwards.
X Slide battery cover ;in the opposite direc-
tion to the arrow on the remote control until
it engages.
X Use the remote control to check the vehi-
cle's auxiliary heating functions. 152
Operating the climate control systemClimate control