display MERCEDES-BENZ A-CLASS HATCHBACK 2018 User Guide
[x] Cancel search | Manufacturer: MERCEDES-BENZ, Model Year: 2018, Model line: A-CLASS HATCHBACK, Model: MERCEDES-BENZ A-CLASS HATCHBACK 2018Pages: 609, PDF Size: 10.73 MB
Page 103 of 609
Operating
the memory function &
WARNING Risk of an accident if the
memory function is used while driving
If yo u use the memory function on the driv‐
er's side while driving, you could lose cont rol
of theve hicle as a result of the adjustments
being made. #
Only use the memory function on the
driver's side when theve hicle is station‐
ar y. &
WARNING Risk of entrapment when set‐
ting the seat with the memory function
When the memory function adjusts the seat,
yo u and other vehicle occupants – particu‐
lar lych ildren – could become trapped. #
During the adjustment process of the
memory function, make sure that no
one has any body parts in the sweep of
th e seat. #
If someone becomes trapped, press a
memory position switch or seat adjust‐
ment switch immediately. &
WARNING Risk of entrapment if the
memory function is activated bychildren
Children could become trapped if they acti‐
va te the memory function, particularly when
unattended. #
Never lea vechildren unat tended in the
ve hicle. #
When leaving theve hicle, alw aysta ke
th eke y with you and lock theve hicle.
This also applies tothe digital vehicle
ke y if the "Digital Vehicle Key" function
is activated via Mercedes me connect. The memory function can be used when
the igni‐
tion is switched off.
Seat adjustments for up tothre e people can be
st ored and called up using the memory function.
The following sy stems can be selected:
R Seat R
Seat conto ur
R Outside mir rors
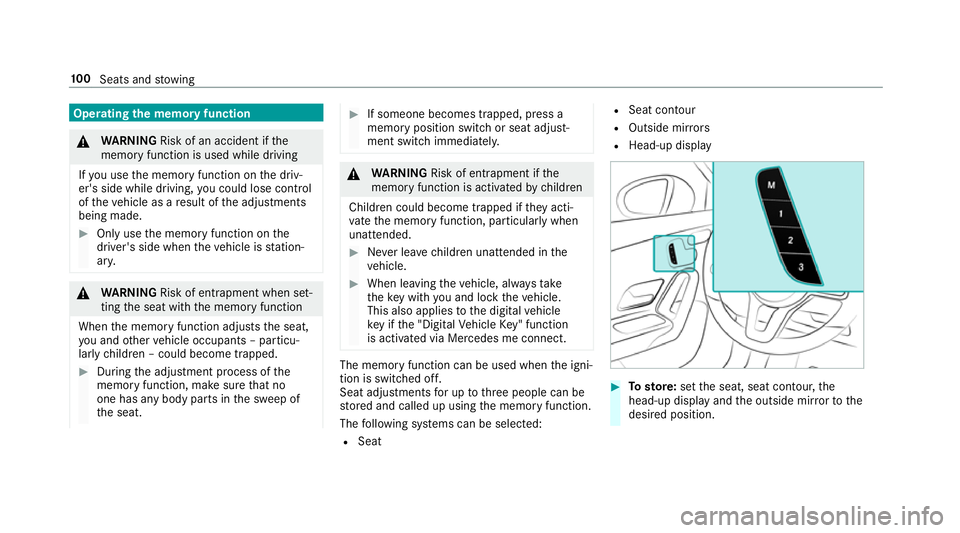
R Head-up display #
Tosto re:set the seat, seat conto ur,the
head-up display and the outside mir rorto the
desired position. 100
Seats and stowing
Page 122 of 609
*
NO
TEDama getoobjects caused by
placing them in the mobile phone stow‐
age compartment If objects are placed in
the mobile phone
stow age compartment, they may be dam‐
aged byelectromagnetic fields. #
Do not place credit cards, storage
media or other objects sensitive to
electromagnetic fields in the mobile
phone stowage compartment. *
NO
TEDama getothe mobile phone
stow age compartment caused byliquids If liquids enter
the mobile phone stowage
compartment, the compartment may be
damaged. #
Ensure that no liquids enter the mobile
phone stowage compartment. R
Depending on theve hicle equipment, the
mobile phone is connected totheve hicle's
ex terior aerial via thech arging module. R
The charging function and wireless connec‐
tion of the mobile phone totheve hicle's
ex terior aerial are only available if the ignition
is switched on.
R Small mobile phones may not be able tobe
ch arge d in everyposition of the mobile
phone stowage compartment.
R Largemobile phones which do not rest flat in
th e mobile phone stowage compartment may
not be able tobe charge d or connec ted with
th eve hicle's exterior aerial.
R The mobile phone may heat up during the
ch arging process. This can also depend on
th e applications (apps) cur rently running.
R Toensure more ef ficient charging and con‐
nection with theve hicle's exterior aerial,
re mo vethe pr otective co ver from the mobile
phone. Pr otective co vers which are designed
fo r wireless charging are excluded. Wire
lesscharging of the mobile phone Re
quirements:
R The mobile phone must be suitable for wire‐
less charging. You can find a li stof compati‐
ble mobile phones at:
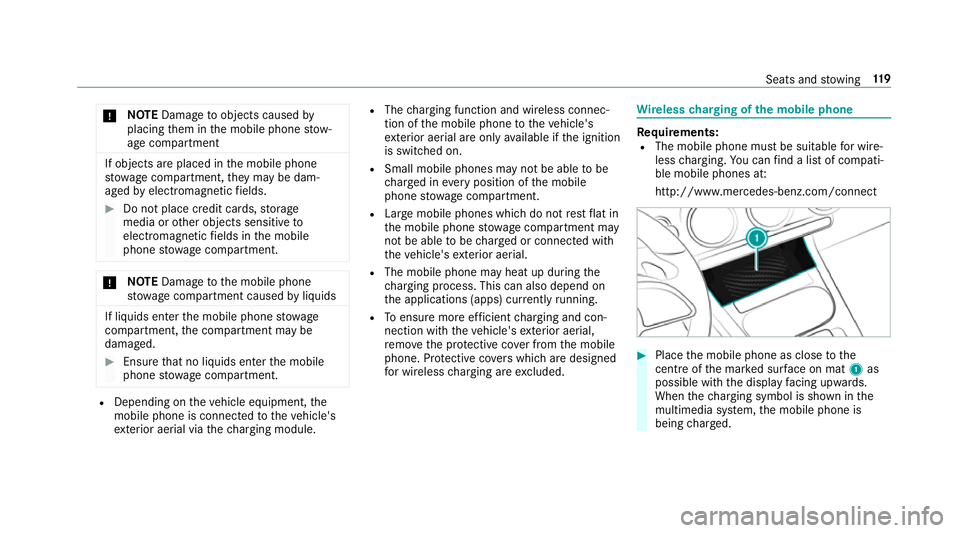
http://www.mercedes-benz.com/connect #
Place the mobile phone as close tothe
centre of the mar ked sur face on mat 1as
possible wi th the display facing up wards.
When thech arging symbol is shown in the
multimedia sy stem, the mobile phone is
being charge d. Seats and
stowing 11 9
Page 131 of 609
The high beam switches off automatically:
R Atspeeds below 25 km/h.
R Ifot her road users are de tected.
R Ifstre et lighting is suf ficient.
At speeds abo veappr oximately 50 km/h:
R The headlamp range of the low beam is regu‐
lated automatically based on the dis tance to
ot her road users.
The sy stem's optical sensor is located behind
th e windscreen near theov erhead control panel.
Switching Adaptive Highbeam Assist on/off #
Toswitch on: turnthe light switch tothe
à position. #
Switch on the main beam using the combina‐
tion switch.
When the main beam is switched on auto‐
matically in the dar k,the _ indicator
lamp on the multifunction display comes on. #
Toswitch off: switch offthe main beam
using the combination switch. Ad
aptive Highbeam Assist Plus Ad
aptive Highbeam Assist Plus function &
WARNING Risk of accident despi te
Ad aptive Highbeam Assist Plus
Ad aptive Highbeam Assist Plus does not rec‐
ognise thefo llowing road users:
R Road users without lights, e.g. pedes‐
trians
R Road users with poor lighting, e.g.
cyclists
R Road users whose lighting is obstructed,
e.g. bya bar rier
On very rare occasions, Adaptive Highbeam
Assist Plus may failto recognise other road
users that ha velights, or may recognise
th em too late.
In this, or in similar situations, the automatic
main beam will not be deactivated or will be
activated despite the presence of other road
users. #
Alw ays obser vethe tra ffic carefully and
switch off the main beam in good time. Ad
aptive Highbeam Assist Plus cannot take into
account road, weather or traf fic conditions.
De tection may be restricted:
R in poor visibility, e.g. fog, heavy rain or snow
R ifth ere is dirt on the sensors or the sensors
are obscured
Ad aptive Highbeam Assist Plus is on lyan aid.
Yo u are responsible for adju sting theve hicle's
lighting tothe pr evailing light, visibility and traf‐
fi c conditions. 12 8
Light and sight
Page 132 of 609
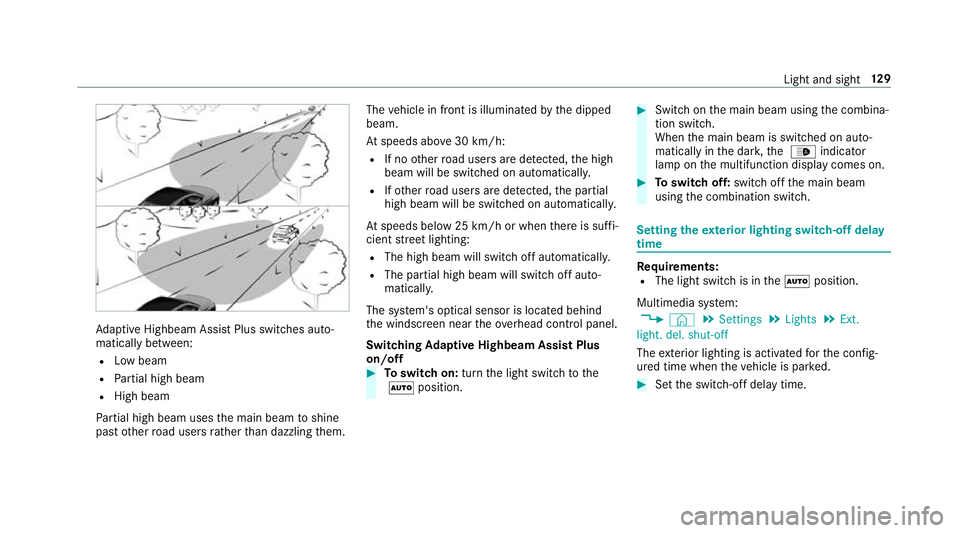
Ad
aptive Highbeam Assist Plus swit ches auto‐
matically between:
R Low beam
R Partial high beam
R High beam
Pa rtial high beam uses the main beam toshine
past other road users rath er than dazzling them. The
vehicle in front is illuminated bythe dipped
beam.
At speeds abo ve30 km/h:
R If no other road users are de tected, the high
beam will be switched on automaticall y.
R Ifot her road users are de tected, the partial
high beam will be switched on automaticall y.
At speeds below 25 km/h or when there is suf fi‐
cient stre et lighting:
R The high beam will switch off automaticall y.
R The partial high beam will switch off auto‐
maticall y.
The sy stem's optical sensor is located behind
th e windscreen near theov erhead control panel.
Switching Adaptive Highbeam Assist Plus
on/off #
Toswitch on: turnthe light switch tothe
à position. #
Switch on the main beam using the combina‐
tion switch.
When the main beam is switched on auto‐
matically in the dar k,the _ indicator
lamp on the multifunction display comes on. #
Toswitch off: switch offthe main beam
using the combination switch. Setting
theex terior lighting switch-off delay
time Re
quirements:
R The light switch is in theà position.
Multimedia sy stem:
, © .
Settings .
Lights .
Ext.
light. del. shut-off
The exterior lighting is activated forth e confi g‐
ured time when theve hicle is par ked. #
Set the switch-off delay time. Light and sight
12 9
Page 139 of 609
Fi
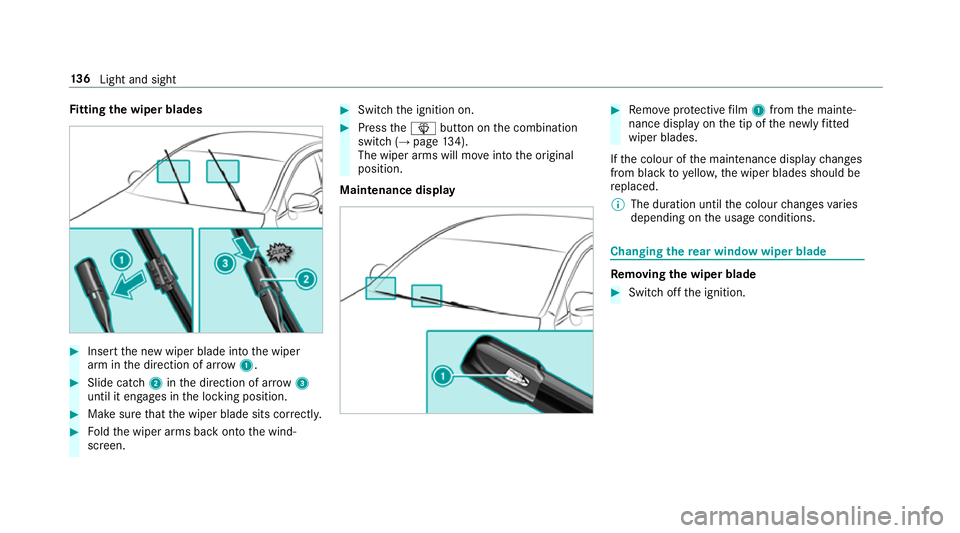
tting the wiper blades #
Inse rtthe new wiper blade into the wiper
arm in the direction of ar row1. #
Slide catch 2inthe direction of ar row 3
until it engages in the locking position. #
Make sure that the wiper blade sits cor rectly. #
Foldthe wiper arms back onto the wind‐
screen. #
Switch the ignition on. #
Press theî button on the combination
switch (→ page134).
The wiper arms will mo veinto the original
position.
Maintenance display #
Remo veprotective film 1 from the mainte‐
nance display on the tip of the newly fitted
wiper blades.
If th e colour of the maintenance display changes
from black to yellow, the wiper blades should be
re placed.
% The duration until the colour changes varies
depending on the usage conditions. Changing
there ar window wiper blade Re
moving the wiper blade #
Switch off the ignition. 13 6
Light and sight
Page 146 of 609
Calling up
the air conditioning menu Calling up
the air conditioning menu using
th e multimedia sy stem #
Select thete mp erature display at the lo wer
edge of the media displa y.
Calling up the air conditioning menu using
th e but ton on the control panel #
Press thet button on the control panel.
% The button on the control panel is not availa‐
ble on all equipment variants. In this case,
th e air conditioning menu can only be called
up using the multimedia sy stem. Ac
tivating/deactivating the A/C function
using the multimedia sy stem The A/C function heats, cools and dehumidifies
th
eve hicle's interior air. #
Call up the climate control menu
(→ page 143). #
Select A/C.
Depending on the pr evious status, the func‐
tion is activated or deactivated. Setting climate control
toautomatic mode In auto
matic mode, the set temp erature is con‐
trolled and maintained at a const ant levelby the
air suppl y. #
Press the à button. #
Toswitch tomanual mode: pressthe _
or à button.
In automatic mode, you can choose between five
dif fere nt air quantities using the H button.
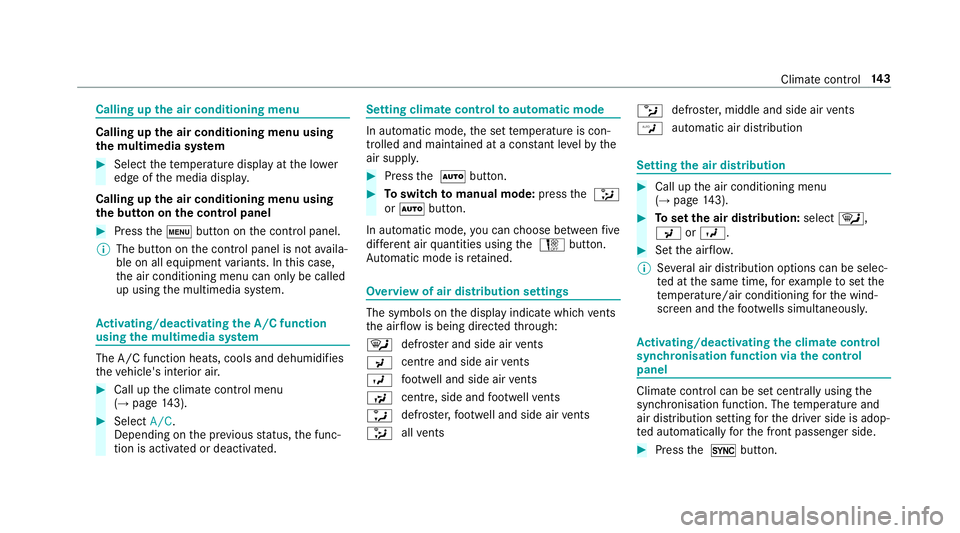
Au tomatic mode is retained. Overview of air distribution settings
The symbols on
the display indicate which vents
th e air flow is being directed thro ugh:
¯ def
rost er and side air vents
P centre and side air
vents
O fo
ot we ll and side air vents
S centre, side and
foot we llve nts
a defros
ter,fo ot we ll and side air vents
_ all
vents b
defros
ter,middle and side air vents
W au
tomatic air distribution Setting
the air distribution #
Call up the air conditioning menu
(→ page 143). #
Toset the air distribution: select¯,
P orO. #
Set the air flow.
% Several air distribution options can be selec‐
te d at the same time, forex ample toset the
te mp erature/air conditioning forth e wind‐
screen and thefo ot we lls simultaneousl y. Ac
tivating/deactivating the climate control
syn chro nisation function via the control
panel Climate control can be set centrally using
the
synchronisation function. The temp erature and
air distribution setting forth e driver side is adop‐
te d automatically forth e front passenger side. #
Press the 0 button. Climate control
14 3
Page 155 of 609
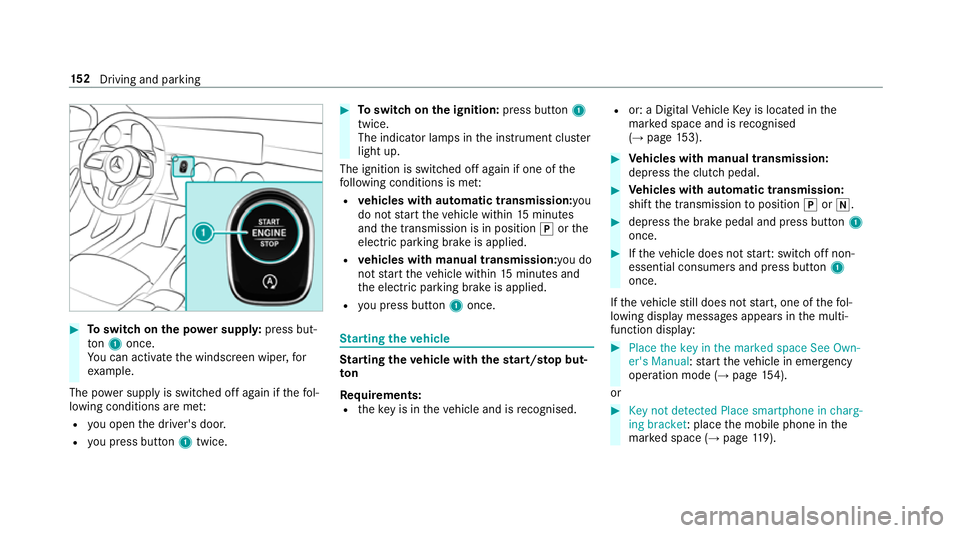
#
Toswitch on the po wer supp ly:press but‐
to n1 once.
Yo u can activate the windscreen wiper, for
ex ample.
The po wer supp lyis switched off again if thefo l‐
lowing conditions are me t:
R you open the driver's door.
R you press but ton1 twice. #
Toswitch on the ignition: press button 1
twice.
The indicator lamps in the instrument clus ter
light up.
The ignition is switched off again if one of the
fo llowing conditions is me t:
R vehicles with automatic transmission:you
do not start theve hicle within 15minutes
and the transmission is in position jorthe
electric parking brake is applied.
R vehicles with manual transmission: you do
not start theve hicle within 15minutes and
th e electric parking brake is applied.
R you press but ton1 once. St
arting theve hicle St
arting theve hicle with thest art/s top but‐
ton
Requ irements:
R theke y is in theve hicle and is recognised. R
or: a Digi talVe hicle Key is located in the
mar ked space and is recognised
(→ page 153). #
Vehicles with manual transmission:
depress the clutch pedal. #
Vehicles with automatic transmission:
shift the transmission toposition jori. #
depress the brake pedal and press button 1
once. #
Ifth eve hicle does not star t:switch off non-
essential consumers and press button 1
once.
If th eve hicle still does not start, one of thefo l‐
lowing display messages appears in the multi‐
function display: #
Place the key in the marked space See Own-
er's Manual :st art theve hicle in emer gency
operation mode (→ page 154).
or #
Key not detected Place smartphone in charg-
ing bracket: place the mobile phone in the
mar ked space (→ page119). 15 2
Driving and pa rking
Page 162 of 609
R
vehicles with automatic transmission:
yo u brake theve hicle toast andstill in trans‐
mission position hori.
R vehicles with automatic transmission:
yo u en gage transmission position j.
R if all vehicle conditions for an auto matic
engine stop are met.
If yo u swit chon the HOLD function or select
transmission position j,the engine will auto‐
matically stop in thefo llowing situations:
R youstop behind a vehicle that is pulling
aw ay.
R youstop at a stop sign when there is no vehi‐
cle in front of you.
R you turn thesteering wheel hard at a low
speed.
The è symbol appears in the multifunction
display when theve hicle is stationar y.If not all
th eve hicle conditions are met, theç symbol
appears in the multifunction displa y.The engine is
restar ted automatically if:
R vehicles with automatic transmission: in
transmission position h,youre lease the
brake pedal when the HOLD function is not
active.
R vehicles with automatic transmission:
yo u shift out of transmission position j.
R vehicles with automatic transmission:
yo u shift into transmission position hor
k.
R you depress the accelerator pedal.
R youch ange theve hicle le vel.
R an automatic engine start is necessar y.
If th e engine was switched off bythe ECO start/
st op function and you lea vetheve hicle, a warn‐
ing tone sounds. The displ aymessa geVehicle is
operational Switch off the ignition before exiting
also appears inthe multifunction displa y.Ifyou
do not switch off the ignition, the ignition is
automatically switched off af ter one minute. Switching
the ECO start/s top function
off/on #
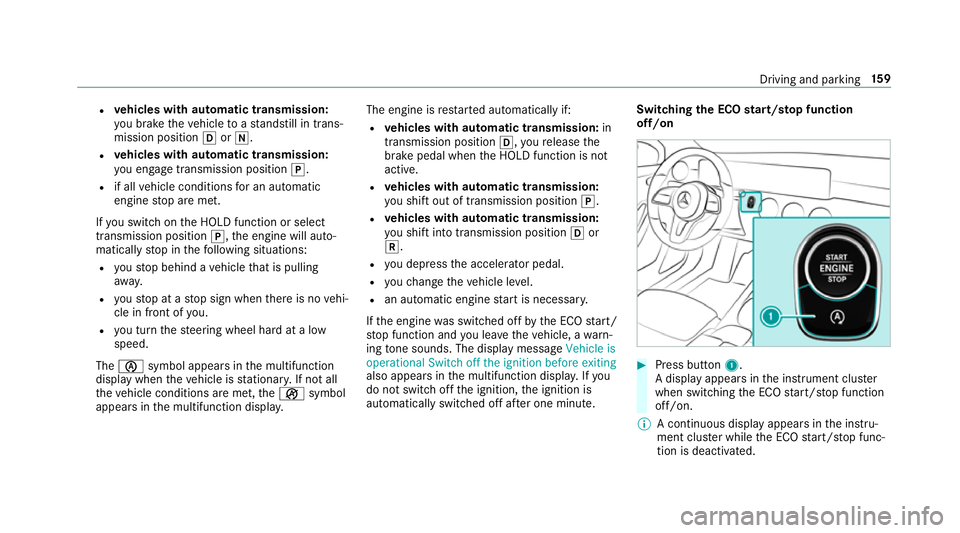
Press button 1.
A displ ayappears in the instrument clus ter
when swit ching the ECO start/ stop function
off/on.
% A continuous display appears in the instru‐
ment clus ter while the ECO start/ stop func‐
tion is deactivated. Driving and parking
15 9
Page 163 of 609
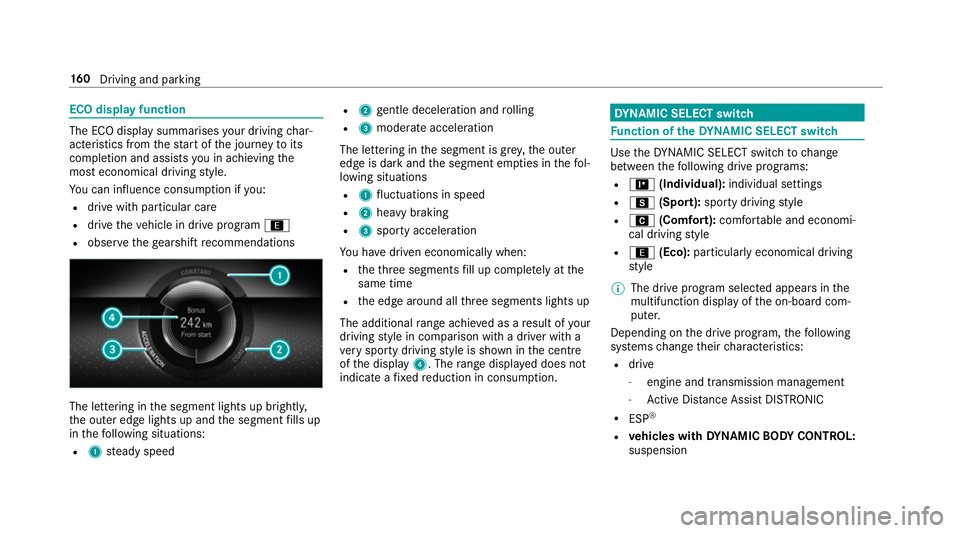
ECO display function
The ECO display summarises
your driving char‐
acteristics from thest art of the journey toits
completion and assists you in achieving the
most economical driving style.
Yo u can influence consum ption if you:
R drive with particular care
R drive theve hicle in drive program ;
R obser vethege arshift recommendations The lettering in
the segment lights up brightl y,
th e outer edge lights up and the segment fills up
in thefo llowing situations:
R 1 steady speed R
2 gentle deceleration and rolling
R 3 moderate acceleration
The lettering in the segment is gr ey,th e outer
edge is dark and the segment em pties in thefo l‐
lowing situations
R 1 fluctuations in speed
R 2 heavy braking
R 3 sporty acceleration
Yo u ha vedriven economically when:
R theth re e segments fill up comple tely at the
same time
R the edge around all thre e segments lights up
The additional range achi eved as a result of your
driving style in comparison with a driver with a
ve ry sporty driving style is shown in the cent re
of the display 4. Therange displ ayed does not
indicate a fixe dre duction in consum ption. DY
NA MIC SELECT switch Fu
nction of theDY NA MIC SELECT switch Use
theDY NA MIC SELECT switch tochange
between thefo llowing drive programs:
R = (Individual): individual settings
R C (Sport): sporty driving style
R A (Comfort): comfortable and economi‐
cal driving style
R ; (Eco): particularly economical driving
st yle
% The drive program selected appears in the
multifunction display of the on-board com‐
puter.
Depending on the drive prog ram, thefo llowing
sy stems change their characteristics:
R drive
-
engine and transmission management
- Active Dis tance Assi stDISTRONIC
R ESP ®
R vehicles with DYNA MIC BODY CONT ROL:
suspension 16 0
Driving and pa rking
Page 164 of 609
R
electric po werst eering Note
s on the roof load display Cer
tain drive programs and ESP ®
settings are
unsuitable for transporting a roof load.
When setting or selecting these drive prog rams,
a crossed-through vehicle with a roof load is
shown as a warning. When this symbol is shown,
th e selected drive program is not suitable for
transpo rting a load on thero of.
The following drive programs are af fected:
R Sport drive program
R Individual drive program wi th the Sport
ESP ®
setting
% The symbol is also shown in thefo llowing sit‐
uations:
R Within theth emes if a cor responding
drive program is sa ved
Fo r more information on themes see
(→ page 292). R
Within there set display if the pr eviously
active drive prog ram is unsui table forthe
transpo rtof a roof load
Fo r fur ther information on there set dis‐
pla y,see (→ page161). Selec
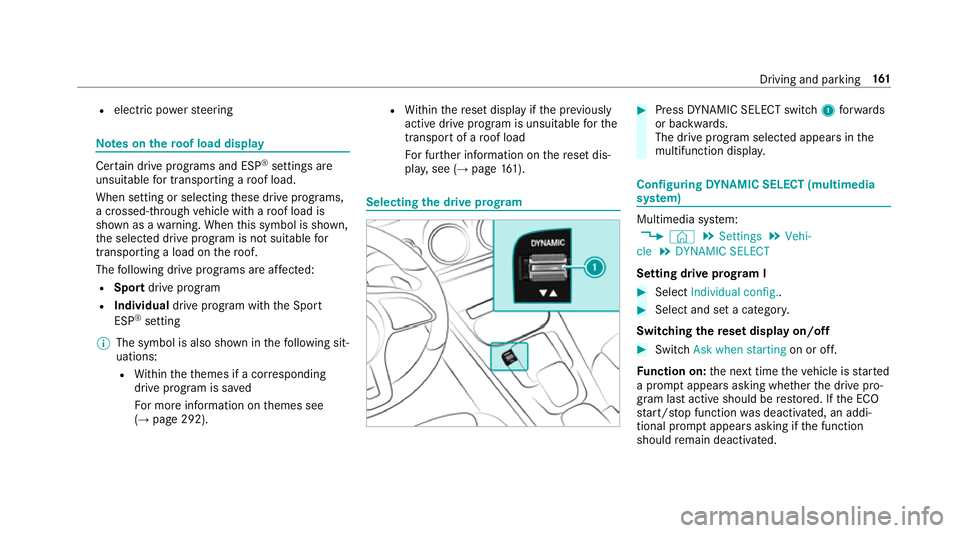
ting the drive prog ram #
Press DYNA MIC SELECT switch 1forw ards
or backwards.
The drive prog ram selected appears in the
multifunction displa y. Configuring
DYNA MIC SELECT (multimedia
sy stem) Multimedia sy
stem:
, © .
Settings .
Vehi-
cle .
DYNAMIC SELECT
Setting drive prog ram I #
Select Individual config.. #
Select and set a categor y.
Switching there set display on/off #
Switch Ask when starting on or off.
Fu nction on: the next time theve hicle is star ted
a prom ptappears asking whe ther the drive pro‐
gram last active should be restored. If the ECO
st art/ stop function was deactivated, an addi‐
tional prom ptappears asking if the function
should remain deactivated. Driving and parking
161