MERCEDES-BENZ AMG GT COUPE 2018 Owners Manual
Manufacturer: MERCEDES-BENZ, Model Year: 2018, Model line: AMG GT COUPE, Model: MERCEDES-BENZ AMG GT COUPE 2018Pages: 465, PDF Size: 8.25 MB
Page 91 of 465
#
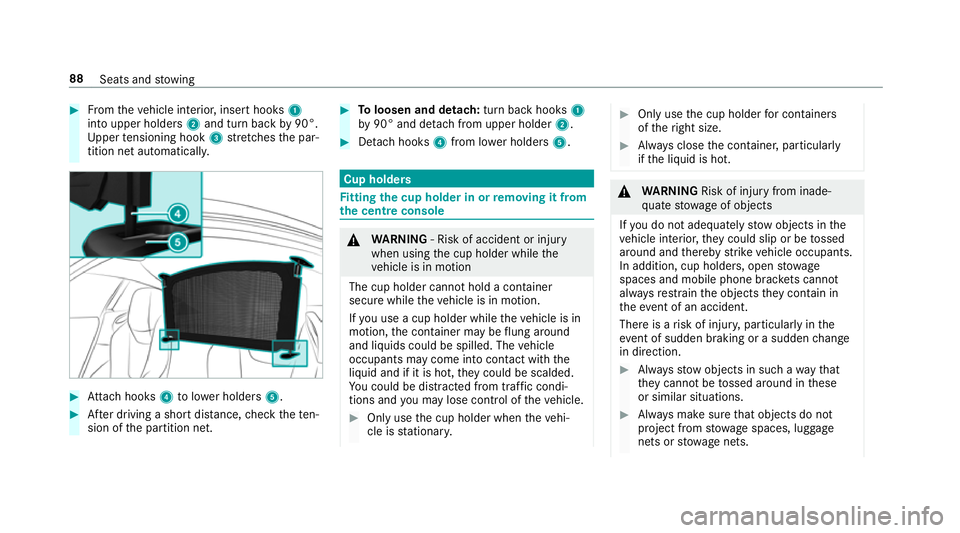
From theve hicle interior, insert hooks 1
into upper holders 2and turn back by90°.
Up per tensioning hook 3stre tches the par‐
tition net automaticall y.#
Attach hooks 4tolowe r holders 5. #
After driving a short dis tance, check thete n‐
sion of the partition net. #
Toloosen and detach: turn back hooks1
by 90° and de tach from upper holder 2. #
Detach hooks 4from lo wer holders 5. Cup holde
rs Fi
tting the cup holder in or removing it from
the centre console &
WARNING ‑ Risk of accident or inju ry
when using the cup holder while the
ve hicle is in motion
The cup holder cannot hold a container
secure while theve hicle is in motion.
If yo u use a cup holder while theve hicle is in
motion, the conta iner may be flung around
and liquids could be spilled. The vehicle
occupants may come into contact with the
liquid and if it is hot, they could be scalded.
Yo u could be distracted from traf fic condi‐
tions and you may lose cont rol of theve hicle. #
Only use the cup holder when theve hi‐
cle is stationar y. #
Only use the cup holder for containers
of theright size. #
Alw ays close the conta iner, particularly
if th e liquid is hot. &
WARNING Risk of inju ryfrom inade‐
qu ate stow age of objects
If yo u do not adequately stowobjects in the
ve hicle interior, they could slip or be tossed
around and thereby strike vehicle occupants.
In addition, cup holders, open stowage
spaces and mobile phone brac kets cann ot
alw aysre stra in the objects they contain in
th eev ent of an accident.
There is a risk of injur y,particularly in the
ev ent of sudden braking or a sudden change
in direction. #
Alw aysstow objects in such a wayth at
th ey cannot be tossed around in these
or similar situations. #
Alw ays make sure that objects do not
project from stowage spaces, luggage
nets or stowage nets. 88
Seats and stowing
Page 92 of 465
#
Close all sealable stowage spaces
before youstart your journe y. #
Stow and secure objects that are heavy,
hard, poin ted, sharp-edged, fragile or
to o lar geinthe load compartment. Obser
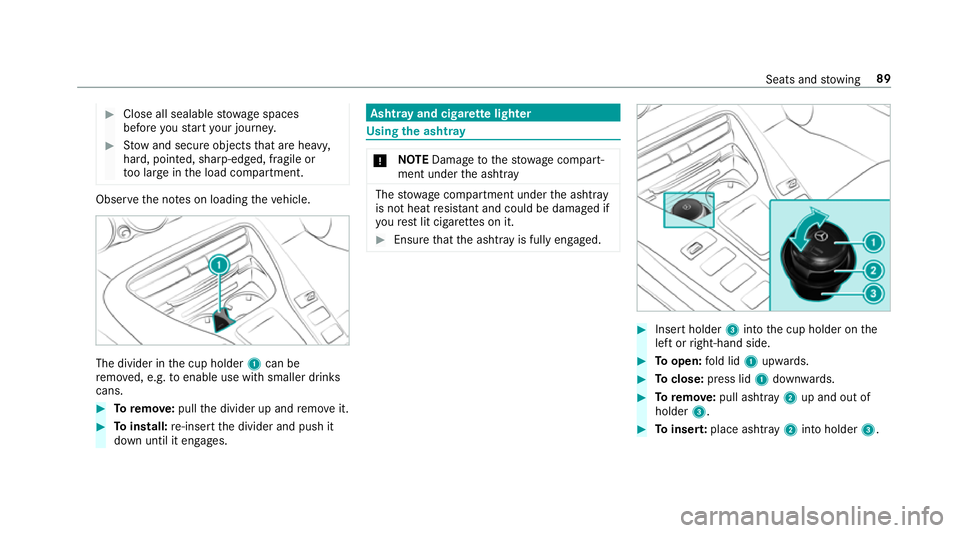
vethe no tes on loading theve hicle. The divider in
the cup holder 1can be
re mo ved, e.g. toenable use with smaller drinks
cans. #
Toremo ve:pull the divider up and remo veit. #
Toinstall: re-insert the divider and push it
down until it engages. Ashtr
ayand cigar ette lighter Using
the ashtr ay *
NO
TEDama getothestow age compart‐
ment under the ashtr ay The
stow age compartment under the ashtray
is not heat resis tant and could be dama ged if
yo ure st lit cigar ette s on it. #
Ensure that the ashtr ayis fully engaged. #
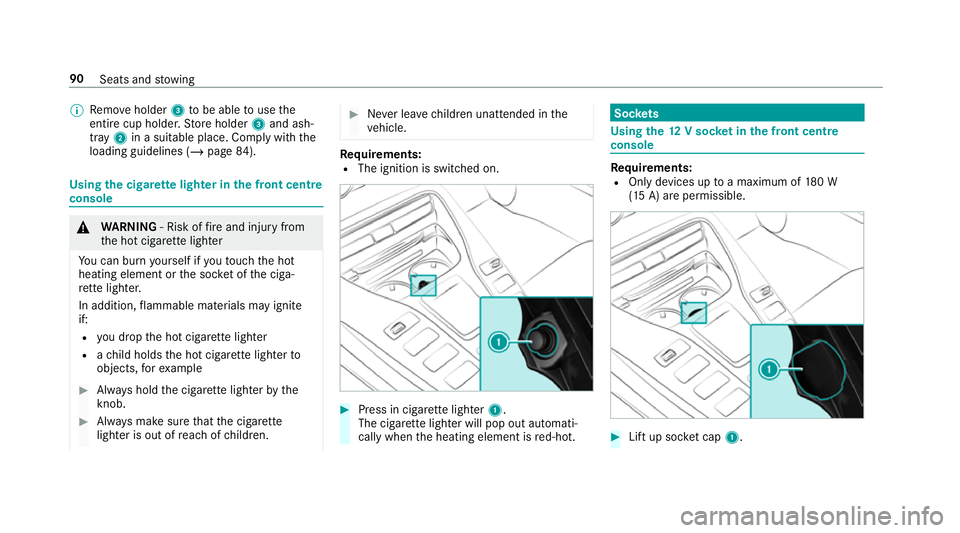
Insert holder 3into the cup holder on the
left or right-hand side. #
Toopen: fold lid 1upwards. #
Toclose: press lid 1down wards. #
Toremo ve: pull ashtray 2up and out of
holder 3. #
Toinser t:place ashtray 2into holder 3. Seats and
stowing 89
Page 93 of 465
%
Remo veholder 3tobe able touse the
entire cup holder. Store holder 3and ash‐
tr ay 2 in a suitable place. Comply with the
loading guidelines (/ page84). Using
the cigar ette lighter in the front centre
console &
WARNING ‑ Risk of fire and injury from
th e hot cigar ette lighter
Yo u can burn yourself if youto uch the hot
heating element or the soc ket of the ciga‐
re tte lighter.
In addition, flammable materials may ignite
if:
R you drop the hot cigar ette lighter
R ach ild holds the hot cigar ette lighter to
objects, forex ample #
Alw ays hold the cigar ette lighter bythe
knob. #
Alw ays make sure that the cigar ette
lighter is out of reach of children. #
Never lea vechildren unat tended in the
ve hicle. Re
quirements:
R The ignition is switched on. #
Press in cigar ette lighter 1.
The cigar ette lighter will pop out automati‐
cally when the heating element is red-hot. Soc
kets Using the
12V so cket inthe front centre
console Re
quirements:
R Only devices up toa maximum of 180 W
(15 A) are permissible. #
Lift up soc ket cap 1. 90
Seats and stowing
Page 94 of 465
#
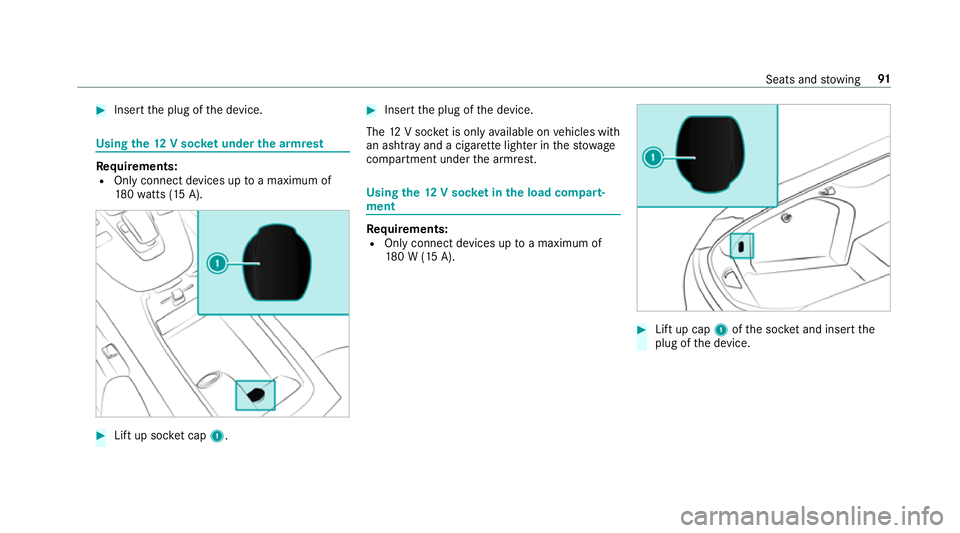
Insert the plug of the device. Using
the12 V so cket under the armrest Re
quirements:
R Only connect devices up toa maximum of
18 0wa tts (15 A). #
Lift up soc ket cap 1. #
Inse rtthe plug of the device.
The 12V soc ket is only available on vehicles with
an ashtr ayand a cigar ette lighter in thestow age
compartment under the armrest. Using
the12 V so cket inthe load compa rt‐
ment Re
quirements:
R Only connect devices up toa maximum of
18 0 W (15 A). #
Lift up cap 1ofthe soc ket and insert the
plug of the device. Seats and
stowing 91
Page 95 of 465
Fi
tting/ removing the floormats &
WARNING Risk of accident due to
objects in the driver's foot we ll
Objects in the driver's foot we ll may impede
pedal tr avel or block a depressed pedal.
This jeopardises the operating and road
saf ety of theve hicle. #
Stow all objects in theve hicle securely
so that they cannot getinto the driver's
fo ot we ll. #
Alw aysfit th efloor mats securely and
as prescribed in order toensure that
th ere is alw ays suf ficient room forthe
pedals. #
Do not use loose floor mats and do not
place floor mats on top of one ano ther. #
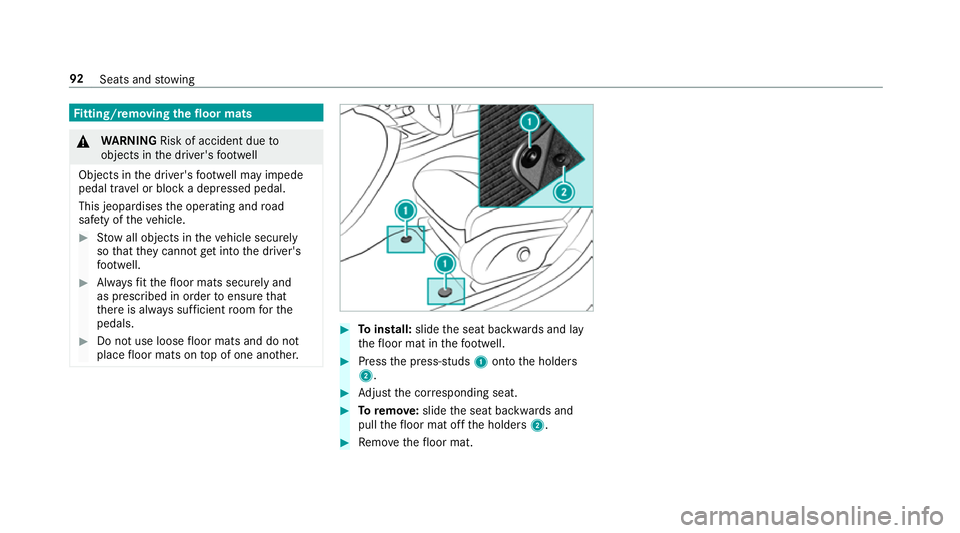
Toinstall: slidethe seat backwards and lay
th efloor mat in thefo ot we ll. #
Press the press-studs 1onto the holders
2. #
Adjust the cor responding seat. #
Toremo ve:slide the seat backwards and
pull thefloor mat off the holders 2. #
Remo vethefloor mat. 92
Seats and stowing
Page 96 of 465
Exterior lighting
Note
s onchanging the lights when driving
abroad It is not necessary
tochange the headlamps.
The legal requirements are also met in countries
in which traf fic drives on theot her side of the
ro ad. Information about lighting sy
stems and your
re sponsibility The
various lighting sy stems of theve hicle are
only aids. The driver of theve hicle is responsible
fo r cor rect vehicle illumination in accordance
with the pr evailing light and visibility conditions,
legal requirements and traf fic situation. Light switch
Ope
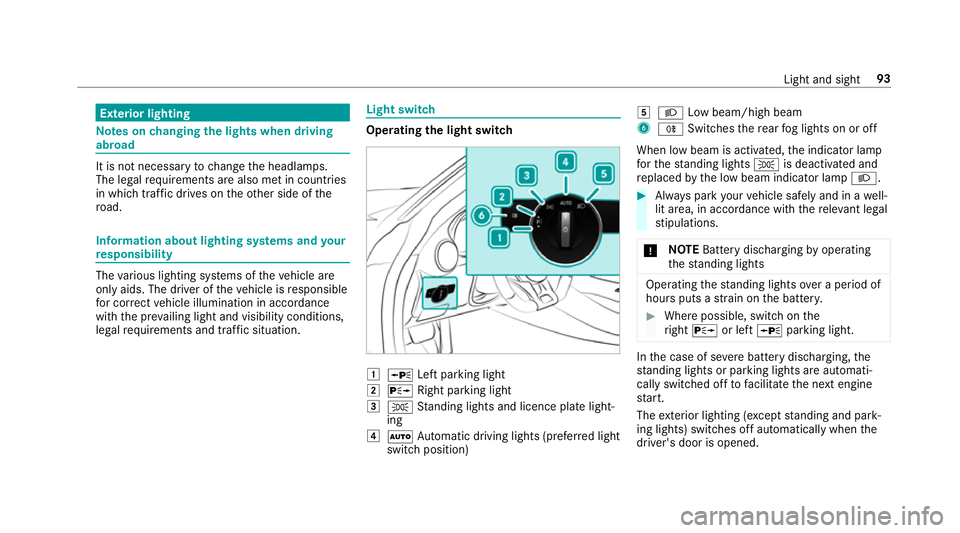
rating the light switch 1
W Left pa rking light
2 X Right parking light
3 T Standing lights and licence plate light‐
ing
4 Ã Automatic driving lights (prefer red light
switch position) 5
L Low beam/high beam
6 R Switches there ar fog lights on or off
When low beam is activated, the indicator lamp
fo rth est anding lights Tis deactivated and
re placed bythe low beam indicator lamp L. #
Alw ays park your vehicle safely and in a well-
lit area, in accordance with there leva nt le gal
st ipulations.
* NO
TEBattery discharging byoperating
th est anding lights Operating
thest anding lights over a period of
hours puts a stra in on the batter y. #
Where possible, switch on the
ri ght X or left Wparking light. In
the case of se vere battery discharging, the
st anding lights or parking lights are automati‐
cally swit ched off tofacilitate the next engine
st art.
The exterior lighting (e xcept standing and park‐
ing lights) swit ches off automatically when the
driver's door is opened. Light and sight
93
Page 97 of 465
R
Obser vethe no tes on sur round lighting
(/ page 97).
Au tomatic driving lights function
The standing lights, low beam and daytime run‐
ning lights are switched on au tomatical ly
depending on the ignition status and the light
conditions. &
WARNING Risk of accident when the
dipped beam is switched off in poor visi‐
bility
When the light switch is set toà ,the
dipped beam may not be switched on auto‐
matically if there is fog, snow or other causes
of poor visibility such as spr ay.#
In such cases, turn the light switch to
L . The automatic driving lights are only an aid.
Yo u
are responsible forve hicle lighting. Switching
there ar fog lights on or off
Re quirements:
R The light switch is in theL orà posi‐
tion. #
Press the R button.
Please obser vethe count ry-specific la wsonthe
use of rear fog lamps. Operating
the combination switch for the
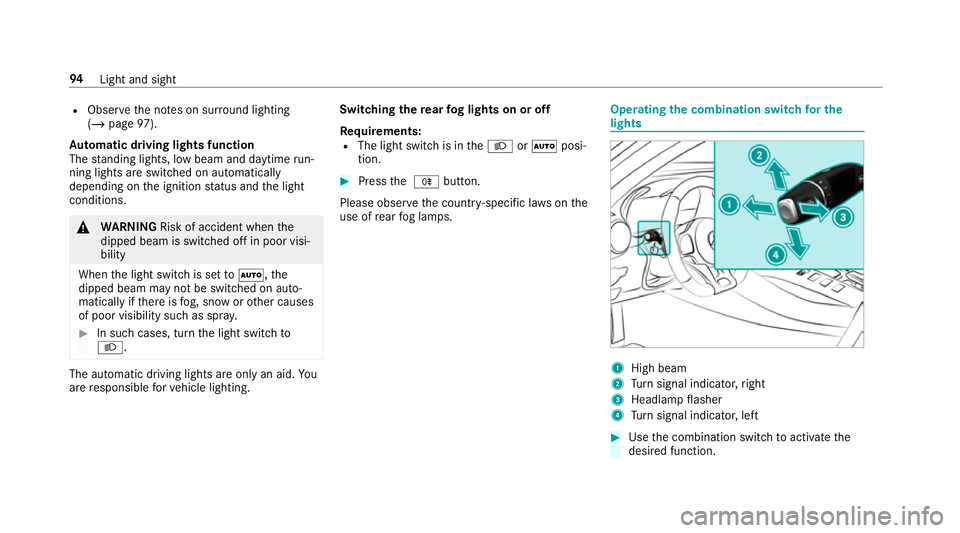
lights 1
High beam
2 Turn signal indicator, right
3 Headlamp flasher
4 Turn signal indicator, left #
Use the combination switch toactivate the
desired function. 94
Light and sight
Page 98 of 465
High beam
#
Toswitch on: turnthe light switch tothe
L orà position. #
Press the combination switch be yond the
point of resis tance in the direction of ar row
1 .
When the high beam is activated, the indica‐
to r lamp for low beam Lwill be deactiva‐
te d and replaced bythe indicator lamp for
high beam K. #
Toswitch off: movethe combination switch
back toits starting position.
Headla mpflasher #
Pull the combination switch in the direction
of ar row3.
Tu rn signal indicators #
Toindicate briefl y:press the combination
switch briefly tothe point of resis tance in the
direction of ar row2or4.
The cor responding turn signal indicator will
fl ash thre e times. #
Toindicate permanentl y:press the combi‐
nation switch be yond the point of resis tance
in the direction of ar row2or4. Ac
tivating/deactivating the hazard warning
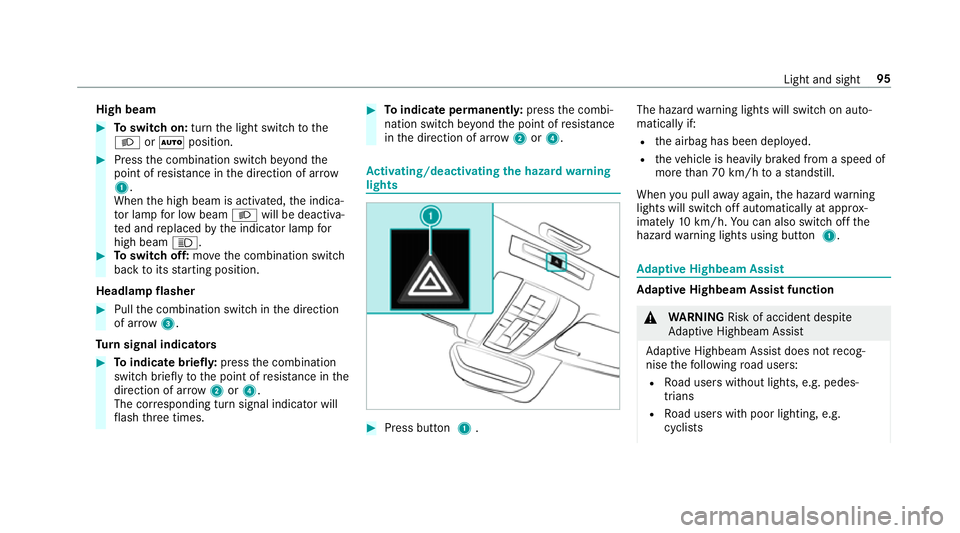
lights #
Press button 1. The hazard
warning lights will switch on auto‐
matically if:
R the airbag has been deplo yed.
R theve hicle is heavily braked from a speed of
more than 70 km/h toast andstill.
When you pull away again, the hazard warning
lights will switch off automatically at appr ox‐
imately 10km/h. You can also swit choff the
hazard warning lights using button 1. Ad
aptive Highbeam Assist Ad
aptive Highbeam Assist function &
WARNING Risk of accident despi te
Ad aptive Highbeam Assist
Ad aptive Highbeam Assist does not recog‐
nise thefo llowing road users:
R Road users without lights, e.g. pedes‐
trians
R Road users with poor lighting, e.g.
cyclists Light and sight
95
Page 99 of 465
R
Road users whose lighting is obstructed,
e.g. bya bar rier
On very rare occasions, Adaptive Highbeam
Assist may failto recognise other road users
with their own lighting, or may recognise
th em too late.
In this, or in similar situations, the automatic
main beam will not be deactivated or will be
activated despite the presence of other road
users. #
Alw ays obser vethe tra ffic carefully and
switch off the main beam in good time. Ad
aptive Highbeam Assist cannot take into
account road, weather or traf fic conditions.
De tection may be restricted in thefo llowing
cases:
R In poor visibilit y,e.g. fog, heavy rain or snow
R Ifth ere is dirt on the sensors or the sensors
are obscured
Ad aptive Highbeam Assist is on lyan aid. You are
re sponsible for adju sting theve hicle's lighting toth
e pr evailing light, visibility and traf fic condi‐
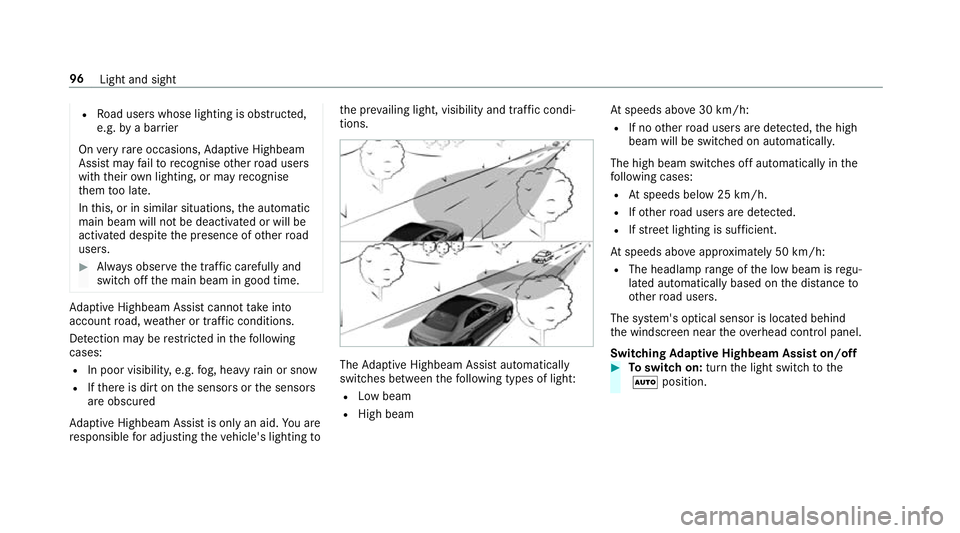
tions. The
Adaptive Highbeam Assist automatically
swit ches between thefo llowing types of light:
R Low beam
R High beam At
speeds abo ve30 km/h:
R If no other road users are de tected, the high
beam will be switched on automatically.
The high beam switches off automatically in the
fo llowing cases:
R Atspeeds below 25 km/h.
R Ifot her road users are de tected.
R Ifstre et lighting is suf ficient.
At speeds abo veappr oximately 50 km/h:
R The headlamp range of the low beam is regu‐
lated automatically based on the dis tance to
ot her road users.
The sy stem's optical sensor is located behind
th e windscreen near theov erhead control panel.
Switching Adaptive Highbeam Assist on/off #
Toswitch on: turnthe light switch tothe
à position. 96
Light and sight
Page 100 of 465
#
Switch on the main beam using the combina‐
tion switch.
When the main beam is switched on auto‐
matically in the dar k,the _ indicator
lamp on the multifunction display comes on. #
Toswitch off: switch offthe main beam
using the combination switch. Setting
theex terior lighting switch-off delay
time Multimedia sy
stem:
4 Vehicle 5
÷ Light settings
5 Exterior light shut-off #
Set the switch-off delay time. Setting
the sur round lighting Multimedia sy
stem:
4 Vehicle 5
÷ Light settings
5 Locator lighting #
Activate Oor deacti vate ª the function. If
th e sur round lighting is swit ched on, theex te‐
ri or lighting remains lit for 40 seconds af terthe
ve hicle is unloc ked. When youstart theve hicle,
th e sur round lighting is deactivated and the
automatic driving lights are activated. Interior lighting
Ad
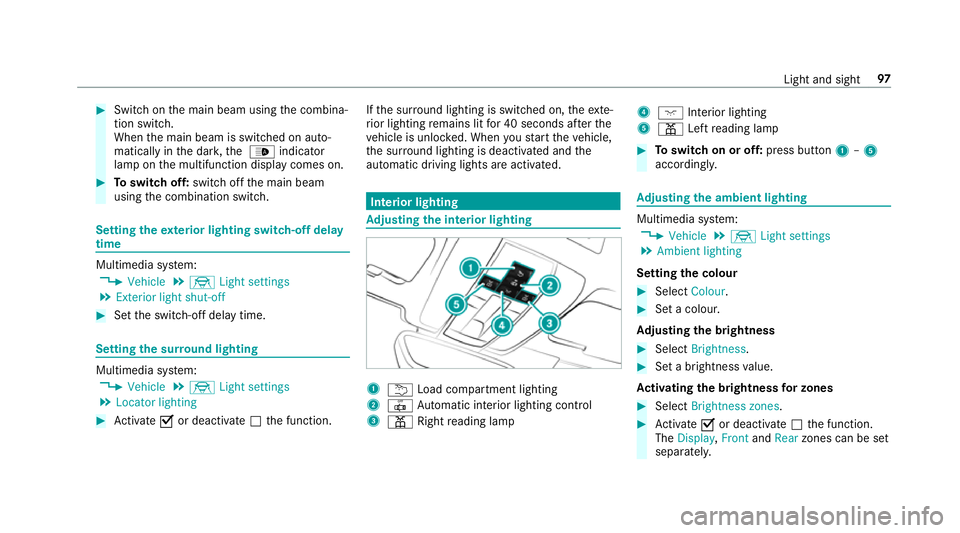
justing the in terior lighting 1
u Load compartment lighting
2 | Automatic interior lighting control
3 p Rightreading lamp 4
c Inte rior lighting
5 p Leftreading lamp #
Toswitch on or off: press button1–5
accordingly. Ad
justing the ambient lighting Multimedia sy
stem:
4 Vehicle 5
÷ Light settings
5 Ambient lighting
Setting the colour #
Select Colour. #
Set a colour.
Ad justing the brightness #
Select Brightness . #
Set a brightness value.
Ac tivating the brightness for zones #
Select Brightness zones . #
Activate Oor deacti vate ª the function.
The Display ,Front andRear zones can be set
separately. Light and sight
97