brakes MERCEDES-BENZ AMG GT R-ROADSTER 2020 User Guide
[x] Cancel search | Manufacturer: MERCEDES-BENZ, Model Year: 2020, Model line: AMG GT R-ROADSTER, Model: MERCEDES-BENZ AMG GT R-ROADSTER 2020Pages: 441, PDF Size: 7.76 MB
Page 299 of 441
Ke
eping the air-water duct free #
Keep the area between the bonn etand the
windscreen free of deposits, e.g. ice, snow
and lea ves. Cleaning and care
Information on
washing theve hicle in a car
wa sh &
WARNING Risk of an accident due to
re duced braking po wer af terwa shing the
ve hicle
Braking ef ficiency is reduced af terwa shing
th eve hicle. #
Afterth eve hicle has been washed,
brake carefully while paying attention to
th e traf fic conditions until braking
po we r has been fully restored. *
NO
TEDama gefrom auto matic braking If one of
thefo llowing functions is switched
on, theve hicle brakes automatically in cer‐
ta in situations:
R Active Brake Assi st
R Active Dis tance Assi stDISTRONIC
R HOLD function
To avo id damage totheve hicle, deactivate
th ese sy stems in thefo llowing or similar sit‐
uations: #
during towing #
in a car wash *
NO
TEDama gedue tounsuitable car
wa sh #
Before driving into a car wash make
sure that the car wash is suitable for
th eve hicle dimensions. #
Ensure there is suf ficient ground clear‐
ance between the underbody and the
guide rails of the car wash. #
Ensure that the clearance width of the
car wash, in particular the width of the
guide rails, is suf ficient. To
avo id damage to yourvehicle when using a
car wash, ensure thefo llowing beforehand:
R Active Dis tance Assi stDISTRONIC is deacti‐
va ted.
R The HOLD function is switched off.
R the active aerodynamics profile is fully
re tracted.
R the side windo wsare comple tely closed.
R the blo werfo rth eve ntilation/heating is
switched off.
R the windscreen wiper switch is in position
g.
R theke y is at a minimum dis tance of 3 m
aw ay from theve hicle, otherwise theta ilgate
could open unin tentional ly.
R in car washes with a con veyo r sy stem: neu‐
tral iis engaged. 296
Maintenance and care
Page 318 of 441
To
w- starting or towing away Pe
rm itted towing me thods *
NO
TEDama gefrom auto matic braking If one of
thefo llowing functions is switched
on, theve hicle brakes automatically in cer‐
ta in situations:
R Active Brake Assi st
R Active Dis tance Assi stDISTRONIC
R HOLD function
R Active Parking Assist
To avo id damage totheve hicle, deactivate
th ese sy stems in thefo llowing or similar sit‐
uations: #
During towing #
In a car wash Mercedes-Benz
recommends transporting your
ve hicle in the case of a breakdown, rath er than
to wing it away. Fo
rto wing, use a tow rope or tow bar with bo th
axles on the ground. Do not use tow bar sys‐
te ms. &
WARNING Risk of accident when towing
with steering wheel lock
Yo u will no lon ger be able tosteer theve hicle
if th esteering wheel lock is engaged. #
Alw ays switch on the ignition when tow‐
ing theve hicle with a tow cable or a tow
bar. *
NO
TEDama getotheve hicle due to tow‐
ing away incor rectly #
Obser vethe instructions and no tes on
to wing away. Pe
rm itted towing me thods
Bo th axles on
th e ground Ye
s, maximum 50 km at
50 km/h
Fr ont axle
ra ised No
Re ar axle
ra ised No To
wing theve hicle with bo thaxles on the
gr ound #
Obser vethe no tes on the permitted towing
me thods (/ page315). #
Makesure that the battery is connected and
ch arge d.
Obser vethefo llowing points when the battery is
dischar ged:
R the engine cann otbe star ted
R the electric parking brake cann otbe released
or applied Breakdown assis
tance 315
Page 328 of 441
ing condition (/
page 323). Observethe
no tes on tyre temp erature (/ page 322).
% The values displa yed in the multifunction dis‐
play may deviate from those of the tyre pres‐
sure gauge as they referto sea le vel.At high
altitudes, the tyre pressure values indicated
by a pressure gauge are higher than those
shown bythe on-board computer. In this
case, do not reduce the tyre pressure.
Re starting the ty repressure moni toring sys‐
tem
Re quirements:
R The recommended tyre pressure is cor rectly
set forth ere spective operating status on all
of the wheels (/ page 322).
Re start the tyre pressure monitoring sy stem in
th efo llowing situations:
R The tyre pressure has changed.
R The wheels or tyres ha vebeen changed or
newly fitted. On-boa
rdcompu ter:
4 Service 5
Tyres #
Swipe down wards on Touch Control on the
left-hand side of thesteering wheel.
The Use current tyre pressures as new refer-
ence values? message is shown in the multi‐
function displa y. #
Torestart, press Touch Control on the left-
hand side of thesteering wheel.
The Tyre press. monitor restarted message is
shown in the multifunction displa y.
Cur rent wa rning messages are dele ted and
th eye llow h warning lamp goes out.
Af teryo u ha vebeen driving for a few
minutes, the sy stem checks whe ther the cur‐
re nt tyre pressures are wi thin the specified
ra nge. The cur rent tyre pressures are then
accep ted as refere nce values and monitored.
Be sure toalso pay attention tothefo llowing
re lated topic:
R Notes on tyre pressure (/ page 322) Wheel
change Note
s on selecting, fitting and replacing
tyres &
WARNING Risk of accident due toincor‐
re ct dimensions of wheels and tyres
If wheels and tyres of the wrong size are
used, the wheel brakes or wheel suspension
components may become damaged. #
Alw aysre place wheels and tyres with
th ose that fulfil the specifications of the
original part.
When replacing wheels, make sure tofit the
cor rect:
R Designation
R Type
When replacing tyres, make sure tofit the
cor rect:
R Designation
R Manufactu rer
R Type Wheels and tyres
325
Page 332 of 441
Note
s on inter changing wheels &
WARNING Risk of injury thro ugh dif fer‐
ent wheel sizes
Inter changing the front and rear wheels if the
wheels or tyres ha vediffere nt dimensions
may se verely impair the driving characteris‐
tics.
The disk brakes or wheel suspension compo‐
nents may also be damaged. #
Rotate front and rear wheels on lyifthe
wheels and tyres are of the same
dimensions. Inter
changing the front and rear wheels if the
wheels or tyres ha vediffere nt dimensions can
re nder thege neral operating pe rmit in valid.
The wear pat tern s on the front and rear wheels
dif fer:
R Front wheels wear more on the shoulder of
th e tyre
R Rear wheels wear more in the cent reofthe
tyre Do not drive wi
thtyres that ha vetoo little tread
dep th. This significantly reduces traction on wet
ro ads (aquaplaning).
On vehicles with the same front and rear wheel
size, you can inter change the wheels every
5,000 to10,000 km, depending on thewe ar.
Ensure the direction of rotation is maintained for
th e wheels.
Obser vethe instructions and saf ety no tes on
"Changing a wheel" when doing so
(/ page 330). Note
s onstoring wheels When
storing wheels, obser vethefo llowing
no tes:
R Afterre moving wheels, store them in a cool,
dry and preferably dark place.
R Protect the tyres from conta ct withoil,
grease or fuel. Overview of
the ty re-change tool kit Apart from some countr
y-specific variants, vehi‐
cles are not equipped with a tyre-change tool kit.
Fo r more information on which tyre-changing
to ols are required and appr oved for per form ing a
wheel change on your vehicle, consult a qualified
specialist workshop.
Re quired tyre-change tool kits may include, for
ex ample:
R Jack
R Chock
R Wheel wrench
R Cent ring pin
% The jack weighs appr oximately 1.2 kg.
The maximum load capacity of the jack can
be found on thest icke r af fixe dto the jac k.
The jack is maintenance-free. If there is a
malfunction, please conta ct aqualified spe‐
cialist workshop. Wheels and tyres
329
Page 347 of 441
Note
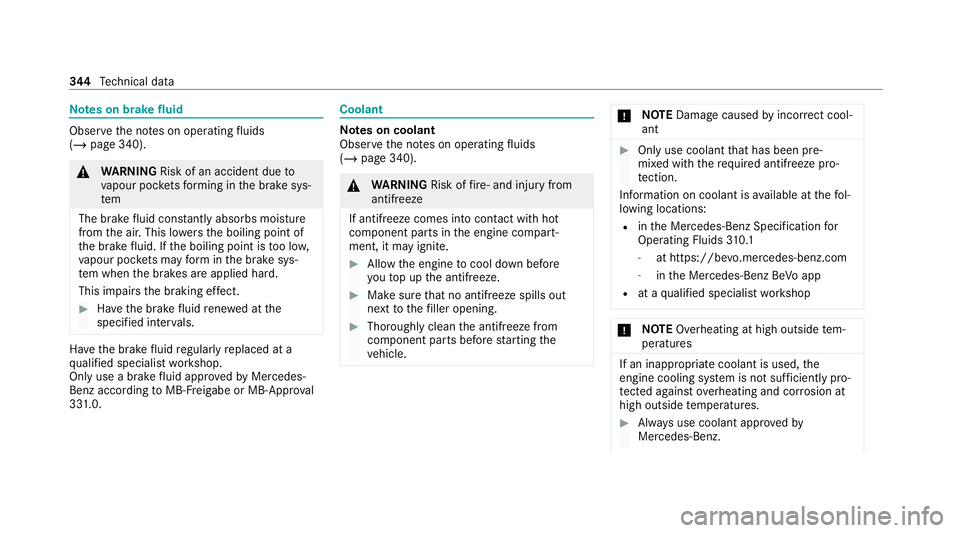
s on brake fluid Obser
vethe no tes on operating fluids
(/ page 340). &
WARNING Risk of an accident due to
va pour poc kets form ing in the brake sys‐
tem
The brake fluid cons tantly absorbs moi sture
from the air. This lo wersthe boiling point of
th e brake fluid. If the boiling point is too lo w,
va pour poc kets may form inthe brake sys‐
te m when the brakes are applied hard.
This impairs the braking ef fect. #
Have the brake fluid rene we d at the
specified inter vals. Ha
ve the brake fluid regularly replaced at a
qu alified specialist workshop.
Only use a brake fluid appr ovedby Mercedes-
Benz according toMB-F reigabe or MB-Appr oval
33 1.0. Coolant
Note
s on coolant
Obser vethe no tes on operating fluids
(/ page 340). &
WARNING Risk offire ‑ and inju ryfrom
antifreeze
If antifreeze comes into contact with hot
component parts in the engine compart‐
ment, it may ignite. #
Allow the engine tocool down before
yo uto p up the antif reeze. #
Make sure that no antifreeze spills out
next tothefiller opening. #
Thoroughly clean the antif reeze from
component parts before starting the
ve hicle. *
NO
TEDama gecaused byincor rect cool‐
ant #
Only use coolant that has been pre‐
mixed with therequ ired antifreeze pro‐
te ction.
Information on coolant is available at thefo l‐
lowing locations:
R inthe Mercedes-Benz Specification for
Operating Fluids 310.1
- at https://be vo.mercedes-benz.com
- inthe Mercedes-Benz BeVo app
R at a qualified specialist workshop *
NO
TEOverheating at high outside tem‐
peratures If an inapp
ropriate coolant is used, the
engine cooling sy stem is not suf ficiently pro‐
te cted against overheating and cor rosion at
high outside temp eratures. #
Alw ays use coolant appr ovedby
Mercedes-Benz. 344
Tech nical da ta
Page 368 of 441
Display messages
Possible causes/consequences and M MSolutions
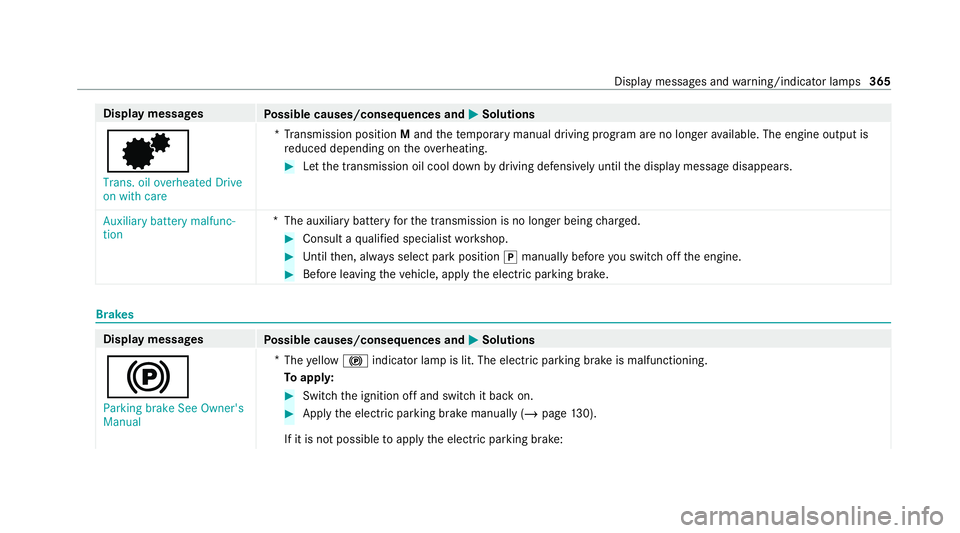
d Trans. oil overheated Drive
on with care *T
ransmission position Mand thete mp orary manual driving program are no longer available. The engine output is
re duced depending on theove rheating. #
Let the transmission oil cool down bydriving defensively until the display message disappears.
Auxiliary battery malfunc-
tion *T
he auxiliary batteryforth e transmission is no longer being charge d. #
Consult a qualified specialist workshop. #
Untilthen, alw ays select park position jmanually before you swit choff the engine. #
Before leaving theve hicle, apply the electric parking brake. Brakes
Display messages
Possible causes/consequences and M MSolutions
! Parking brake See Owner's
Manual *
The yellow ! indicator lamp is lit. The elect ric pa rking brake is malfunctioning.
To appl y: #
Switch the ignition off and switch it back on. #
Apply the electric parking brake manually (/ page130).
If it is not possible toapply the electric parking brake: Display messages and
warning/indicator lamps 365
Page 391 of 441
Instrument display
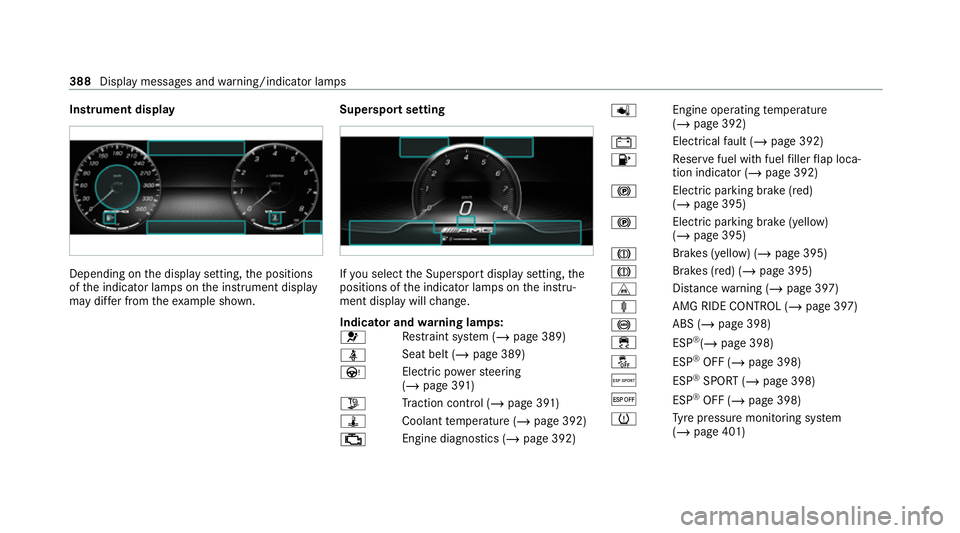
Depending on
the display setting, the positions
of the indicator lamps on the instrument display
may dif fer from theex ample shown. Supersport setting If
yo u select the Supersport display setting, the
positions of the indicator lamps on the instru‐
ment display will change.
Indicator and warning lamps:
6 Re
stra int sy stem (/ page 389)
ü Seat belt (/
page 389)
Ù Electric po werst eering
(/ page 391)
Õ Traction control (/ page 391)
ÿ Coolanttemp erature (/ page 392)
; Engine diagnostics (/
page 392)p
Engine operating temp erature
(/ page 392)
# Elect
rical fault (/ page 392)
8 Re
ser vefuel with fuel filler flap loca‐
tion indicator (/ page 392)
! Elect
ric pa rking brake (red)
(/ page 395)
! Electric parking brake (yellow)
(/
page 395)
J Brakes (yellow) (/
page 395)
J Brakes (red) (/
page 395)
L Distance warning (/ page 397)
ä AMG RIDECONTROL (/ page 397)
! ABS (/
page 398)
÷ ESP®
(/ page 398)
å ESP®
OFF (/ page 398)
Æ ESP®
SPORT (/ page 398)
¤ ESP®
OFF (/ page 398)
h Ty
re pressure monitoring sy stem
(/ page 401) 388
Display messages and warning/indicator lamps
Page 398 of 441
Brakes
Wa
rning/indicator lamp
Possible causes/consequences and M MSolutions
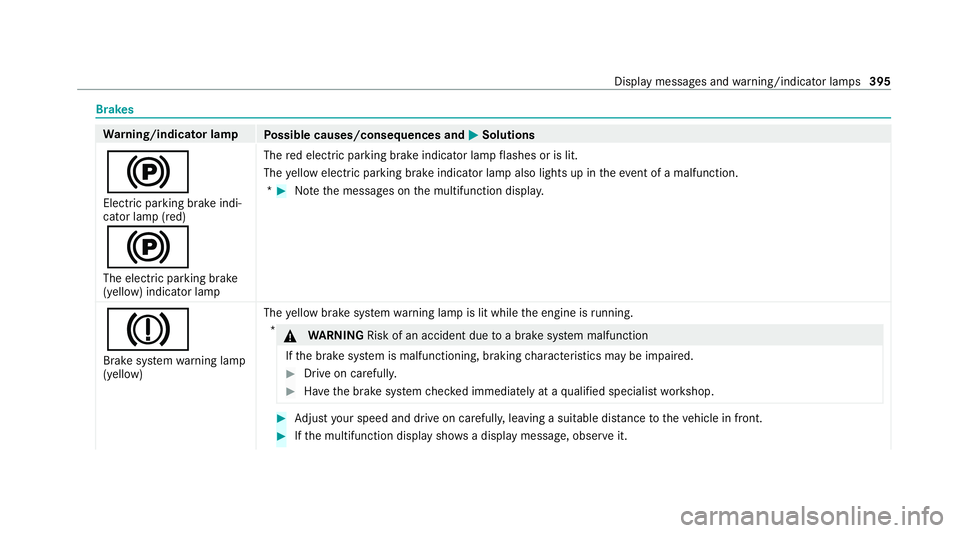
! Elect ric pa rking brake indi‐
cator lamp (red)
!
The elect ric pa rking brake
(yellow) indicator lamp The
red elect ric pa rking brake indicator lamp flashes or is lit.
The yellow elect ric pa rking brake indicator lamp also lights up in theev ent of a malfunction.
* #
Notethe messages on the multifunction displa y.
J
Brake sy stem warning lamp
(yellow) The
yellow brake sy stem warning lamp is lit while the engine is running.
* &
WARNING Risk of an accident due toa brake sy stem malfunction
If th e brake sy stem is malfunctioning, braking characteristics may be impaired. #
Drive on carefull y. #
Have the brake sy stem checked immediately at a qualified specialist workshop. #
Adjust your speed and drive on carefull y,leaving a suitable dis tance totheve hicle in front. #
Ifth e multifunction display sho wsa display message, obse rve it. Display messages and
warning/indicator lamps 395
Page 410 of 441
Selecting a media pl
ayer ..................... 275
Boot lid see Tailgate
Brake Assist Sy stem
see BAS (Brake Assi stSystem)
Brake fluid
No tes .................................................. 344
Brake forc e distribution
EBD (Elect ronic Brake forc e Distribu‐
tion) ..................................................... 13 5
Brake sy stem
ABS ...................................................... 11 4
Brake callipers ..................................... 11 5
Brake cooling ....................................... 11 5
Brake discs .......................................... 11 4
Brake fluid ............................................ 11 4
Brake hose .......................................... .115
Brake line ............................................. 11 5
Brake pads .......................................... .114
No tes ................................................... 11 4
Brakes ABS (Anti-lock Braking Sy stem) ........... 13 2
Ac tive Brake Assi st.............................. 13 5
Ad aptive brake lights ...........................1 38AMG ceramic high-per
form ance
composite brake sy stem ......................1 11
BA S (Brake Assi stSystem) .................. 13 2
Driving tips .......................................... 107
EBD (Electronic Brake forc e Distribu‐
tion) ..................................................... 13 5
HOLD function .................................... .145
Limi ted braking ef fect (salt-treated
ro ads) .................................................. 107
New/replaced brakepads/brake
discs .................................................... 106
Ru nning-in no tes ..................................1 06
Braking assi stance
see BAS (Brake Assi stSystem)
Breakdown Overview of the help functions .............. 14
To w- starting ........................................ .318
To wing away ......................................... 315
Tr ansporting theve hicle ....................... 317
Wheel change ...................................... 330
Breakdown see Flat tyre Bu
rm ester ®
high-end Sur round sound
sy stem ...................................................... 287
Ad justing the balance .......................... 288
Ad justing the sound optimisation ........ 288
Ad justing treble, mid-range and bass
settings ............................................... 288
Au tomatic volume adjustment ............ .288
Calling up the sound menu .................. 287
Information .......................................... 287
Selecting the sound profile .................. 288
Burmes ter®
sur round sound sy stem .....2 86
Ad justing the balance .......................... 287
Ad justing treble, mid-range and bass
settings ............................................... 287
Au tomatic volume adjustment ............ .287
Calling up the sound menu .................. 287
Information .......................................... 286
Switching the sur round sound on/off
............................................................ .287
Buttons Steering wheel .....................................1 64 Index
407